


1.整合打包
1.pom.xml引入依赖
<!-- SpringBoot 打包插件,把 maven-jar-plugin 打成的jar包重新打成可运行jar包 -->
<plugin>
   <groupId>org.springframework.boot</groupId>
   <artifactId>spring-boot-maven-plugin</artifactId>
</plugin>
2.执行mvn命令打包或者工具直接打包
1.maven常用打包命令:
1、mvn clean 将旧的class字节码文件删除。
2、mvn pakage 打包,动态web工程打war包,Java工程打jar 包。
3、mvn install 将项目生成jar包放在仓库中,然后打包。
4、mvn clean install 删除target文件夹 ,然后打包到target。
2.maven工具打包
maven窗口执行

在项目target文件中找到jar包
这样的jar包,包含了依赖包,配置文件在里面,对于项目的部署发布很不友好,如果网络传输慢,需要很长时间发布,更新替换配置文件也需要重新打包,很麻烦。
下面是分层打包,对依赖和配置文件和运行jar包分开,部署起来就非常方便快捷啦👇👇👇


2.分层打包
1.pom.xml 引入依赖
1.在 build中引入
<build>
<finalName>${output.software.name}-${output.software.version}</finalName>
<resources>
<resource>
<directory>${project.basedir}/lib</directory>
<targetPath>BOOT-INF/lib/</targetPath>
<includes>
<include>**/*.jar</include>
</includes>
</resource>
<resource>
<directory>src/main/resources</directory>
<filtering>true</filtering>
</resource>
</resources>
<plugins>
<!--支持yaml读取pom的参数-->
<plugin>
<artifactId>maven-resources-plugin</artifactId>
<configuration>
<encoding>utf-8</encoding>
<useDefaultDelimiters>true</useDefaultDelimiters>
</configuration>
</plugin>
<!-- 打JAR包 -->
<plugin>
<groupId>org.apache.maven.plugins</groupId>
<artifactId>maven-jar-plugin</artifactId>
<configuration>
<!-- 不打包资源文件(配置文件和依赖包分开) -->
<excludes>
<exclude>application*.yml</exclude>
</excludes>
<archive>
<manifest>
<addClasspath>true</addClasspath>
<!-- MANIFEST.MF 中 Class-Path 加入前缀 -->
<classpathPrefix>${output.software.libs}/</classpathPrefix>
<!-- jar包不包含唯一版本标识 -->
<useUniqueVersions>false</useUniqueVersions>
<!--指定入口类 -->
<mainClass>${output.software.mainclass}</mainClass>
</manifest>
<manifestEntries>
<!--MANIFEST.MF 中 Class-Path 加入资源文件目录 -->
<Class-Path>./${output.software.config}/</Class-Path>
</manifestEntries>
</archive>
<outputDirectory>${project.build.directory}/${output.software.name}</outputDirectory>
</configuration>
</plugin>
<!-- 这个插件是用来复制项目依赖的jar包 -->
<plugin>
<groupId>org.apache.maven.plugins</groupId>
<artifactId>maven-dependency-plugin</artifactId>
<executions>
<execution>
<!-- 自定义 -->
<id>copy-dependencies</id>
<phase>package</phase>
<goals>
<!-- 复制依赖的jar包 -->
<goal>copy-dependencies</goal>
</goals>
<configuration>
<!-- 将依赖的jar包复制到该路径下 -->
<outputDirectory>
${project.build.directory}/${output.software.name}/${output.software.libs}
</outputDirectory>
</configuration>
</execution>
</executions>
</plugin>
<!-- 这个插件是用来复制项目的静态资源-->
<plugin>
<artifactId>maven-resources-plugin</artifactId>
<executions>
<execution>
<!-- 自定义 -->
<id>copy-resources</id>
<phase>package</phase>
<goals>
<!-- 复制静态资源 -->
<goal>copy-resources</goal>
</goals>
<configuration>
<resources>
<resource>
<!-- 指定静态资源的路径 -->
<directory>target/classes</directory>
<!-- 指定需要复制的文件 -->
<includes>
<include>application.properties</include>
<include>application.yml</include>
<include>application-${spring.auto.active}.yml</include>
</includes>
</resource>
</resources>
<!-- 指定复制到该目录下 -->
<outputDirectory>
${project.build.directory}/${output.software.name}/${output.software.config}
</outputDirectory>
</configuration>
</execution>
</executions>
</plugin>
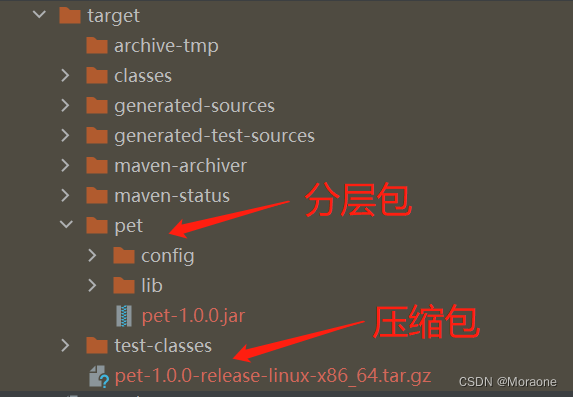
<!-- 以上配置后你的文件打包后的文件目录如下
-lib
-config
-项目名.jar
-->
<!-- 这个插件使用来将分离出来的静态资源和依赖的jar包(就是上面说到的文件目录),
压缩成一个zip文件。个人感觉这个蛮方便的 -->
<plugin>
<groupId>org.apache.maven.plugins</groupId>
<artifactId>maven-assembly-plugin</artifactId>
<configuration>
<!-- 这个插件需要指定一个配置文件 【重点:这里的assembly.xml 就是讲到分层打包】 -->
<descriptors>
<descriptor>src/assembly/assembly.xml</descriptor>
</descriptors>
</configuration>
<executions>
<execution>
<!-- 自定义 -->
<id>make-assembly</id>
<phase>package</phase>
<goals>
<!-- 只执行一次 -->
<goal>single</goal>
</goals>
</execution>
</executions>
</plugin>
</plugins>
</build>2.properties需要引入配置参数
<properties>
        <!-- 打包输出软件名称 -->
        <output.software.name>pet</output.software.name>
        <!-- 打包输出依赖包路径 -->
        <output.software.libs>lib</output.software.libs>
        <!-- 打包输出配置文件路径 -->
        <output.software.config>config</output.software.config>
        <!-- 打包输出软件版本号 -->
        <output.software.version>1.0.0</output.software.version>
        <!-- 启动类完成名称 -->
        <output.software.mainclass>cn.ly.PetHomeApp</output.software.mainclass>
        <!-- 激活配置 -->
        <spring.auto.active>dev</spring.auto.active>
        <!-- os.platform 配置保持为空,不填写任何内容 -->
        <os.platform></os.platform>
        <platform>linux-x86_64</platform>
        <platform.format>tar.gz</platform.format>
    </properties>
参数说明:
1.output.software.name 打包输出软件名称
2.output.software.libs jar包目录名称
3.output.software.config 配置文件目录名称
4.output.software.version 打包软件版本号
5.output.software.mainclass 启动类路径
6.spring.auto.active 多环境下配置的激活配置这里启用的dev(没有就不管,用到了参考下面配置)
7.platform 配置的输出软件后缀(可以不用配置)
8.platform.format 打包格式,这里配置的 tar.gz
上面第6点使用多环境 在application.yml中需要配置
spring:
  profiles:
active: ${spring.auto.active}如果报错,加入配置,支持yml读取pom参数。这里已经引入
<!--支持yaml读取pom的参数-->
<plugin>
<artifactId>maven-resources-plugin</artifactId>
<configuration>
<encoding>utf-8</encoding>
<useDefaultDelimiters>true</useDefaultDelimiters>
</configuration>
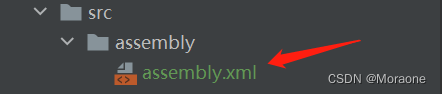
</plugin>3.需要在src/assembly中新建配置文件 assembly.xml 这个文件是把打出来的包进行压缩处理
1.文件目录
2.这是assembly.xml文件
<assembly xmlns="http://maven.apache.org/plugins/maven-assembly-plugin/assembly/1.1.0"
		  xmlns:xsi="http://www.w3.org/2001/XMLSchema-instance"
		  xsi:schemaLocation="http://maven.apache.org/plugins/maven-assembly-plugin/assembly/1.1.0 http://maven.apache.org/xsd/assembly-1.1.0.xsd">
	<id>release-${platform}</id>
	<formats>
		<format>${platform.format}</format>
	</formats>
	<includeBaseDirectory>true</includeBaseDirectory>
	<files>
		<file>
			<source>./target/${output.software.name}/${output.software.name}-${output.software.version}.jar</source>
			<outputDirectory></outputDirectory>
			<fileMode>755</fileMode>
		</file>
	</files>

	<fileSets>
		<fileSet>
			<directory>./target/${output.software.name}/${output.software.config}</directory>
			<outputDirectory>${output.software.config}</outputDirectory>
		</fileSet>

		<fileSet>
			<directory>./target/${output.software.name}/${output.software.libs}</directory>
			<outputDirectory>${output.software.libs}</outputDirectory>
		</fileSet>
	</fileSets>

</assembly>
4.然后直接打包
这是打包之后的结果
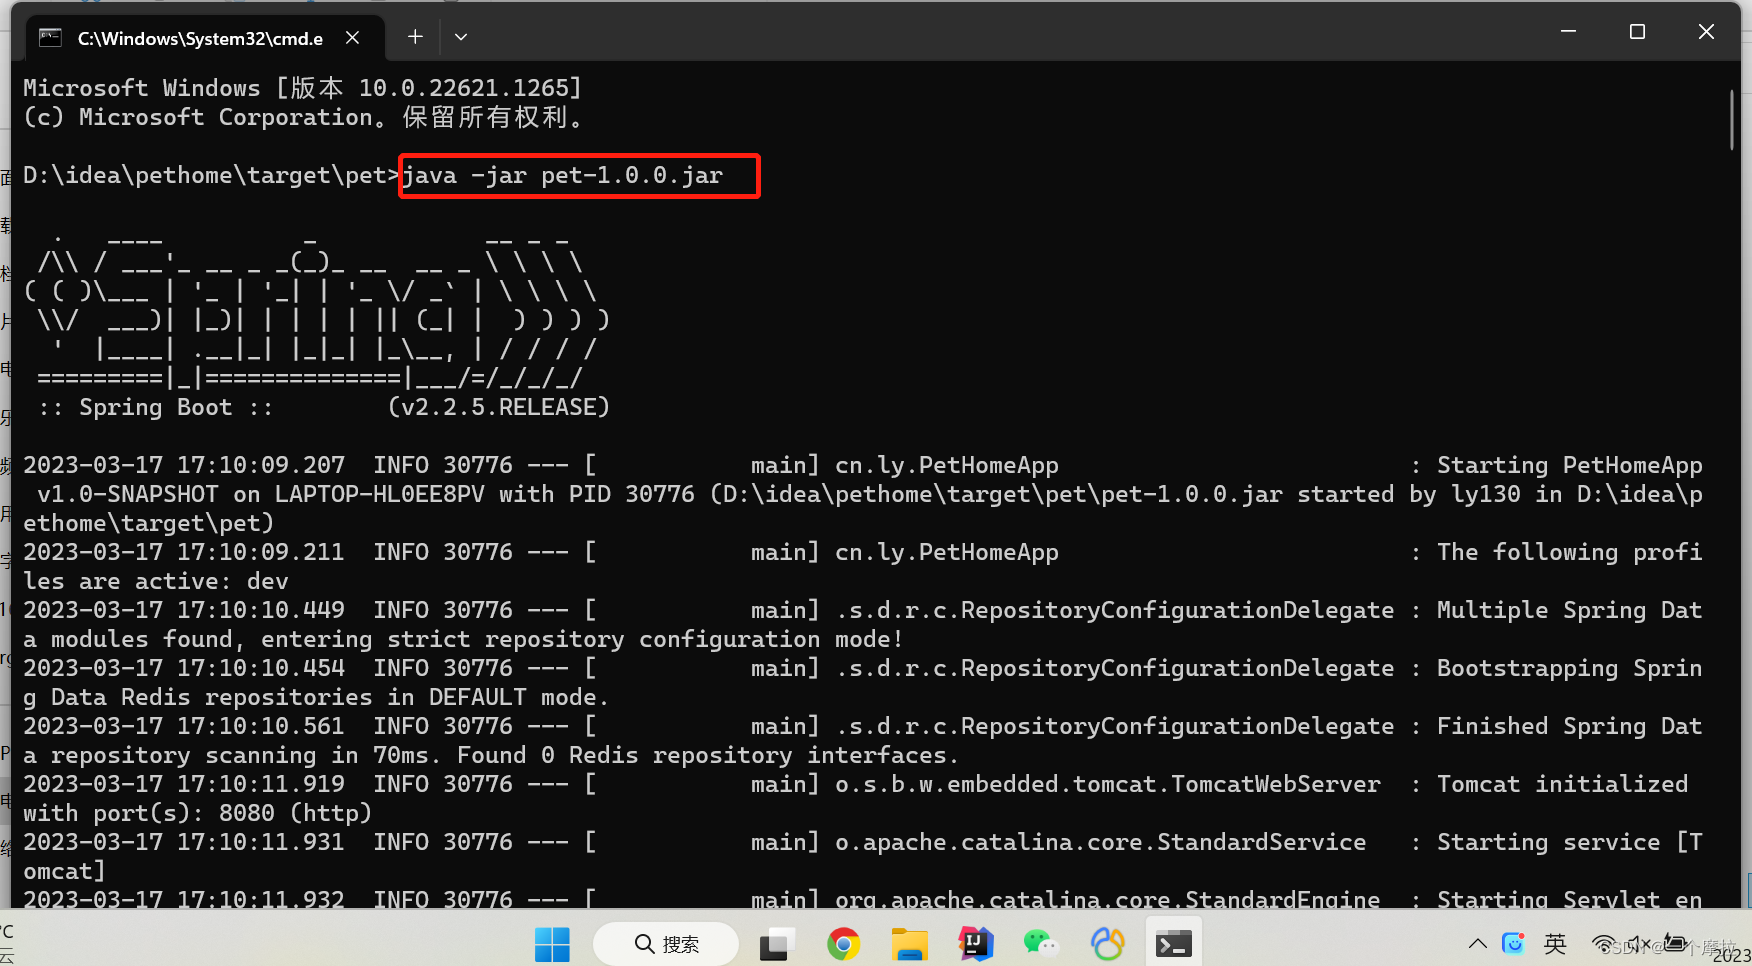
5.直接进入jar包目录,就可以执行jar包了
3.运行jar包
进入jar包目录,进入控制台,输入命令 java -jar 包名


 9301
9301

 被折叠的 条评论
为什么被折叠?
被折叠的 条评论
为什么被折叠?
 到【灌水乐园】发言


