


1.构造器注入
https://blog.csdn.net/QYH7777/article/details/105626779
2.set方式注入
在我们的pojo类中需要get和set方法
public class Student {

    private String name;
    private Address address;
    private String[] books;
    private List<String> hobbys;
    private Map<String,String> card;
    private Set<String> games;
    private String wife;
    private Properties info;

    public String getName() {
        return name;
    }

    public void setName(String name) {
        this.name = name;
    }

    public Address getAddress() {
        return address;
    }

    public void setAddress(Address address) {
        this.address = address;
    }

    public String[] getBooks() {
        return books;
    }

    public void setBooks(String[] books) {
        this.books = books;
    }

    public List<String> getHobbys() {
        return hobbys;
    }

    public void setHobbys(List<String> hobbys) {
        this.hobbys = hobbys;
    }

    public Map<String, String> getCard() {
        return card;
    }

    public void setCard(Map<String, String> card) {
        this.card = card;
    }

    public Set<String> getGames() {
        return games;
    }

    public void setGames(Set<String> games) {
        this.games = games;
    }

    public String getWife() {
        return wife;
    }

    public void setWife(String wife) {
        this.wife = wife;
    }

    public Properties getInfo() {
        return info;
    }

    public void setInfo(Properties info) {
        this.info = info;
    }

    @Override
    public String toString() {
        return "Student{" +
                "name='" + name + '\'' +
                ", address=" + address.toString() +
                ", books=" + Arrays.toString(books) +
                ", hobbys=" + hobbys +
                ", card=" + card +
                ", games=" + games +
                ", wife='" + wife + '\'' +
                ", info=" + info +
                '}';
    }
}
public class Address {
private String address;
public String getAddress() {
return address;
}
public void setAddress(String address) {
this.address = address;
}
@Override
public String toString() {
return "Address{" +
"address='" + address + '\'' +
'}';
}
}xml配置文件如下
<bean id="student" class="com.qyh.pojo.Student">
        <!--第一种:普通值注入,value-->
        <property name="name" value="qyh"/>

        <!--第二种:Bean注入,ref-->
        <property name="address" ref="address"/>

        <!--数组-->
        <property name="books">
            <array>
                <value>水浒传</value>
                <value>三国演义</value>
                <value>西游记</value>
                <value>红楼梦</value>
            </array>
        </property>

        <!--list-->
        <property name="hobbys">
            <list>
                <value>听歌</value>
                <value>敲代码</value>
                <value>看B站</value>
                <value>玩知乎</value>
                <value>谈恋爱</value>
            </list>
        </property>

        <!--map-->
        <property name="card">
            <map>
                <entry key="身份证" value="111222333366665555"/>
                <entry key="银行卡" value="6200000000000000000000"/>
            </map>
        </property>

        <!--Set-->
        <property name="games">
            <set>
                <value>LOL</value>
                <value>CF</value>
                <value>QQ飞车</value>
            </set>
        </property>

        <!--null-->
        <property name="wife">
            <null/>
        </property>

        <!--Properties-->
        <property name="info">
            <props>
                <prop key="学号">20170215</prop>
                <prop key="性别">男</prop>
                <prop key="姓名">张三</prop>
            </props>
        </property>

</bean>
测试代码
 @Test
    public void run1(){
        ApplicationContext context = new ClassPathXmlApplicationContext("applicationContext.xml");
        Student student = (Student) context.getBean("student");
        System.out.println(student.toString());
    }
测试结果

3.其它方式
首先在xml中引入p命名和c命名

xmlns:p="http://www.springframework.org/schema/p"
xmlns:c="http://www.springframework.org/schema/c"
pojo实体类
public class User {

    private String name;
    private int age;

    public User() {
    }

    public User(String name, int age) {
        this.name = name;
        this.age = age;
    }

    public String getName() {
        return name;
    }

    public void setName(String name) {
        this.name = name;
    }

    public int getAge() {
        return age;
    }

    public void setAge(int age) {
        this.age = age;
    }

    @Override
    public String toString() {
        return "User{" +
                "name='" + name + '\'' +
                ", age=" + age +
                '}';
    }
}
p标签
<!--p命名空间注入,可以直接注入属性值:property-->
<bean id="user" class="com.qyh.pojo.User" p:age="18" p:name="李四"/>
c标签
<!--c命名空间注入,通过构造器注入:construct-args-->
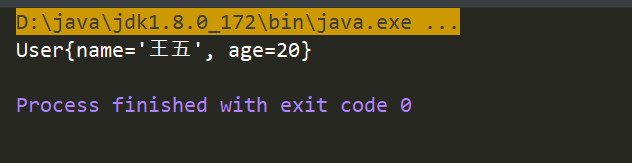
<bean id="user2" class="com.qyh.pojo.User" c:name="王五" c:age="20"/>测试
 @Test
    public void run2(){
        ApplicationContext context = new ClassPathXmlApplicationContext("userbeans.xml");
//        User user = context.getBean("user", User.class);
        User user = context.getBean("user2", User.class);

        System.out.println(user.toString());

    }
测试结果

当我们在一个xml中同时写这两个标签的时候会出现报错。因为c标签是基于含参构造实现的,p标签是基于无参构造实现的。所以在pojo中我们需要实现含参和无参构造。


 950
950


 被折叠的 条评论
为什么被折叠?
被折叠的 条评论
为什么被折叠?
 到【灌水乐园】发言


