


作为一个纯前端,经常要等到后端出接口才能进行调试,那样进度就会很慢,然后最近发现了mockis这个好东西,可以制作虚拟接口进行调试。
一、安装依赖
- 在创建项目时,要选择安装typescript,可以更好的使用elementPlus
- 安装element Plus
快速开始 | Element Plusa Vue 3 based component library for designers and developers![]() https://element-plus.gitee.io/zh-CN/guide/quickstart.html 3、安装axios和mockjs
https://element-plus.gitee.io/zh-CN/guide/quickstart.html 3、安装axios和mockjs
npm install mockjs -D              #只在开发环境使用
npm i axios -D
二、封装axios请求
//http->http.ts
import axios from 'axios'
//axios.create 创建一个axios实例  我们给这个实例编写配置,后续所有通过实例发送的请求,都受当前配置约束
const http = axios.create({
    baseURL: '',//域名
    timeout: 1000,
    // headers: {'X-Custom-Header': 'foobar'}
});

// 添加请求拦截器
http.interceptors.request.use(function (config) {
    // 在发送请求之前做些什么
    // config.headers.token='123123123'
    return config;
}, function (error) {
    // 对请求错误做些什么
    return Promise.reject(error);
});

// 添加响应拦截器
http.interceptors.response.use(function (response) {
    // 对响应数据做点什么
    let data=response.data;
    console.log(response)
    return data;
}, function (error) {
    console.log('error:'+error)
    // 对响应错误做点什么
    return Promise.reject(error);
});

export default http
二、配置mockjs
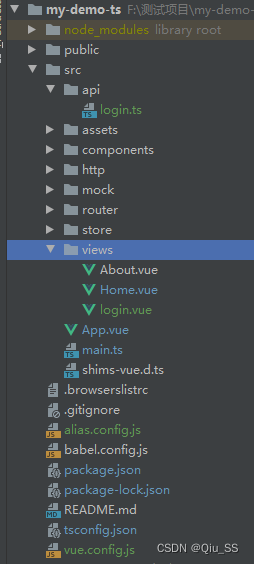
1、项目目录

2、模拟数据
//login-mock.ts
const login_info={
    'status':'200',
    'message':'success',
    'data':[{
        'username':'play',
        'password':'abcd@1234',
        'userList':{
            'token':'youke_token',
            'name':'游客',
            'type':'person'
        }
    },{
        'username':'admin',
        'password':'gdut@20902',
        'userList':{
            'token':'admin_token',
            'name':'管理员',
            'type':'t_person'
        }
    },{
        'username':'editor',
        'password':'gdut@20902',
        'userList':{
            'token':'editor_token',
            'name':'管理员',
            'type':'t_person'
        }
    }]
}

export default login_info
3、模拟接口
//user.ts
import { defineComponent } from "vue";
const loginInfo = require('../json/login-mock')
//console.log(loginInfo)
export default defineComponent({
    //模拟用户登录
    login:config =>{
        let data = JSON.parse(config.body);
        let userList = {}
        var bel = loginInfo.default.data.map(res =>{
            console.log('user.ts'+data)
            //匹配用户
            if (data.name === res.username && data.password === res.password){
                userList = res.userList
                return true
            }else{
                return false
            }
        })
        if(bel.includes(true)){

        }else{
            return{
                code:-1,
                data:{
                    msg:'用户名或密码错误',
                    status:'fail'
                }
            }
        }
        return {
            code:200,
            data:{
                userList:userList
            }
        }
    }
})
4、模拟请求
//index.ts
const Mock = require('mockjs')//引入mockjs,npm已安装
const loginAPI = require('./api/user')
console.log(loginAPI)

//设置全局延时,才能检测到数据变化
Mock.setup({
    // timeout: 400  //延时400ms请求到数据
    timeout: 200 - 400 //延时200-400ms请求到数据
})
Mock.mock(/\/user\/login/,'get',loginAPI.default.login)

export default Mock;


// 注1:如何同时拦截get/post请求,并对get和post请求大小写不敏感呢?那就请使用正则表达式吧
// Mock.mock(url, /post|get/i, loginInfo)
// 注2:Mockjs如何拦截带参数的GET请求
// Mock.mock(RegExp(url + ".*"), /post|get/i, {...});
// // 注3:定义拦截路由配置最简单的方式就是使用POST请求,并且不在URL中添加参数(推荐)
// //导入测试数据
// import loginInfo from '@/mock/json/login-mock.js'

//模拟Ajax请求
// Mock.mock(url, "post", loginInfo)
// Mock.mock(url,/post|get/i,(options)=>{
//     return Mock.mock(loginInfo)
// })
5、调用虚拟接口
//api->login.ts
import http from '../http/http'
export function loginApi(params) {
    return http({
        url:'/user/login',
        method:'get',
        data:params
    })
}
三、element plus表单及数据验证
1、完整项目目录
2、登录界面
//login.vue
<template>
    <div id="my-demo-ts" :style="{height:bgHight}">
//制作漂浮的气泡
        <div>
            <ul class="bg-bubbles">
                <li v-for="i in 10" :key="i"></li>
            </ul>
        </div>
//登录表单
        <div class="demo-login">
            <el-form ref="ruleFormRef"
                    :model="ruleForm"
                    :rules="rules"
                    label-width="80px"
                    class="demo-ruleForm"
                    :size="formSize"
                    status-icon
                    label-position="left"
            >
                <el-row>
                    <el-col :span="24">
                        <h3 class="title">demo登录</h3>
                    </el-col>
                    <el-col :span="24">
                        <el-form-item label="用户名" prop="name">
                            <el-input v-model="ruleForm.name"/>
                        </el-form-item>
                    </el-col>
                    <el-col :span="24">
                        <el-form-item label="密码" prop="password">
                            <el-input v-model="ruleForm.password"/>
                        </el-form-item>
                    </el-col>
                    <el-col :span="24">
                        <el-form-item>
                            <el-button round type="primary" style="width:100%;" @click="submitForm(ruleFormRef)">
                                登录
                            </el-button>
                        </el-form-item>
                    </el-col>
                    <el-col :span="24">
                        <el-form-item>
                            <el-button round style="width:100%;" @click="resetForm(ruleFormRef)">重置</el-button>
                        </el-form-item>
                    </el-col>
                </el-row>
            </el-form>
        </div>

    </div>
</template>
//漂浮的气泡
<style scoped>
.bg-bubbles {
position: absolute;
top: 0;
left: 0;
width: 100%;
height: 100%;
overflow: hidden;
}
.bg-bubbles li {
position: absolute;
bottom: -160px;
width: 40px;
height: 40px;
background-color: rgba(255, 255, 255, 0.36);
list-style: none;
animation: square 15s infinite;
transition-timing-function: linear;
border-radius: 10px;
}
.bg-bubbles li:nth-child(1) {
left: 10%;
}
.bg-bubbles li:nth-child(2) {
left: 20%;
width: 90px;
height: 90px;
animation-delay: 2s;
animation-duration: 7s;
}
.bg-bubbles li:nth-child(3) {
left: 25%;
animation-delay: 4s;
}
.bg-bubbles li:nth-child(4) {
left: 40%;
width: 60px;
height: 60px;
animation-duration: 8s;
background-color: rgba(255, 255, 255, 0.3);
}
.bg-bubbles li:nth-child(5) {
left: 70%;
}
.bg-bubbles li:nth-child(6) {
left: 80%;
width: 120px;
height: 120px;
animation-delay: 3s;
background-color: rgba(255, 255, 255, 0.2);
}
.bg-bubbles li:nth-child(7) {
left: 32%;
width: 160px;
height: 160px;
animation-delay: 2s;
}
.bg-bubbles li:nth-child(8) {
left: 55%;
width: 20px;
height: 20px;
animation-delay: 4s;
animation-duration: 15s;
}
.bg-bubbles li:nth-child(9) {
left: 25%;
width: 10px;
height: 10px;
animation-delay: 2s;
animation-duration: 12s;
background-color: rgba(255, 255, 255, 0.3);
}
.bg-bubbles li:nth-child(10) {
left: 85%;
width: 160px;
height: 160px;
animation-delay: 5s;
}
@keyframes square {
0% {
opacity: 0.5;
transform: translateY(0px) rotate(45deg);
}
25% {
opacity: 0.75;
transform: translateY(-400px) rotate(90deg);
}
50% {
opacity: 1;
transform: translateY(-600px) rotate(135deg);
}
100% {
opacity: 0;
transform: translateY(-1000px) rotate(180deg);
}
}
</style>3、表单验证及使用虚拟接口
<script lang="ts">
//此处要声明lang=“ts”不然引入FormInstance, FormRules会报错
 import {defineComponent, ref, reactive} from 'vue';
//表单验证
 import type {FormInstance, FormRules} from 'element-plus'
//接口
 import {loginApi} from "../api/login";

  export default defineComponent({
        name: 'login',
        components: {},
        setup() {
            const bgHight = window.innerHeight + 'px'
//用于控制该表单内组件的尺寸
            const formSize = ref('default')
            const ruleFormRef = ref<FormInstance>()
            const ruleForm = reactive({
                name: '',
                password: ''
            })
//验证规则
            const rules = reactive<FormRules>({
                name: [
                    {required: true, message: '请输入账号', trigger: 'blur'},
                ],
                password: [
                    {required: true, message: '请输入密码', trigger: 'blur'},
                ]
            })
//表单验证+调用虚拟接口
            const submitForm = async (formEl: FormInstance | undefined) => {
                if (!formEl) return
                await formEl.validate((valid, fields) => {
                    if (valid) {
                        // console.log(ruleForm)
                        loginApi(ruleForm).then(res => {
                            console.log(res)
                        })
                    } else {
                        console.log('error submit!', fields)
                    }
                })
            }
//重置

            const resetForm = (formEl: FormInstance | undefined) => {
                if (!formEl) return
                formEl.resetFields()
            }

            return {
                bgHight,
                formSize,
                ruleFormRef,
                ruleForm,
                rules,
                submitForm,
                resetForm
            }
        },
    });


</script>
效果如下:


 222
222


 被折叠的 条评论
为什么被折叠?
被折叠的 条评论
为什么被折叠?
 到【灌水乐园】发言


