


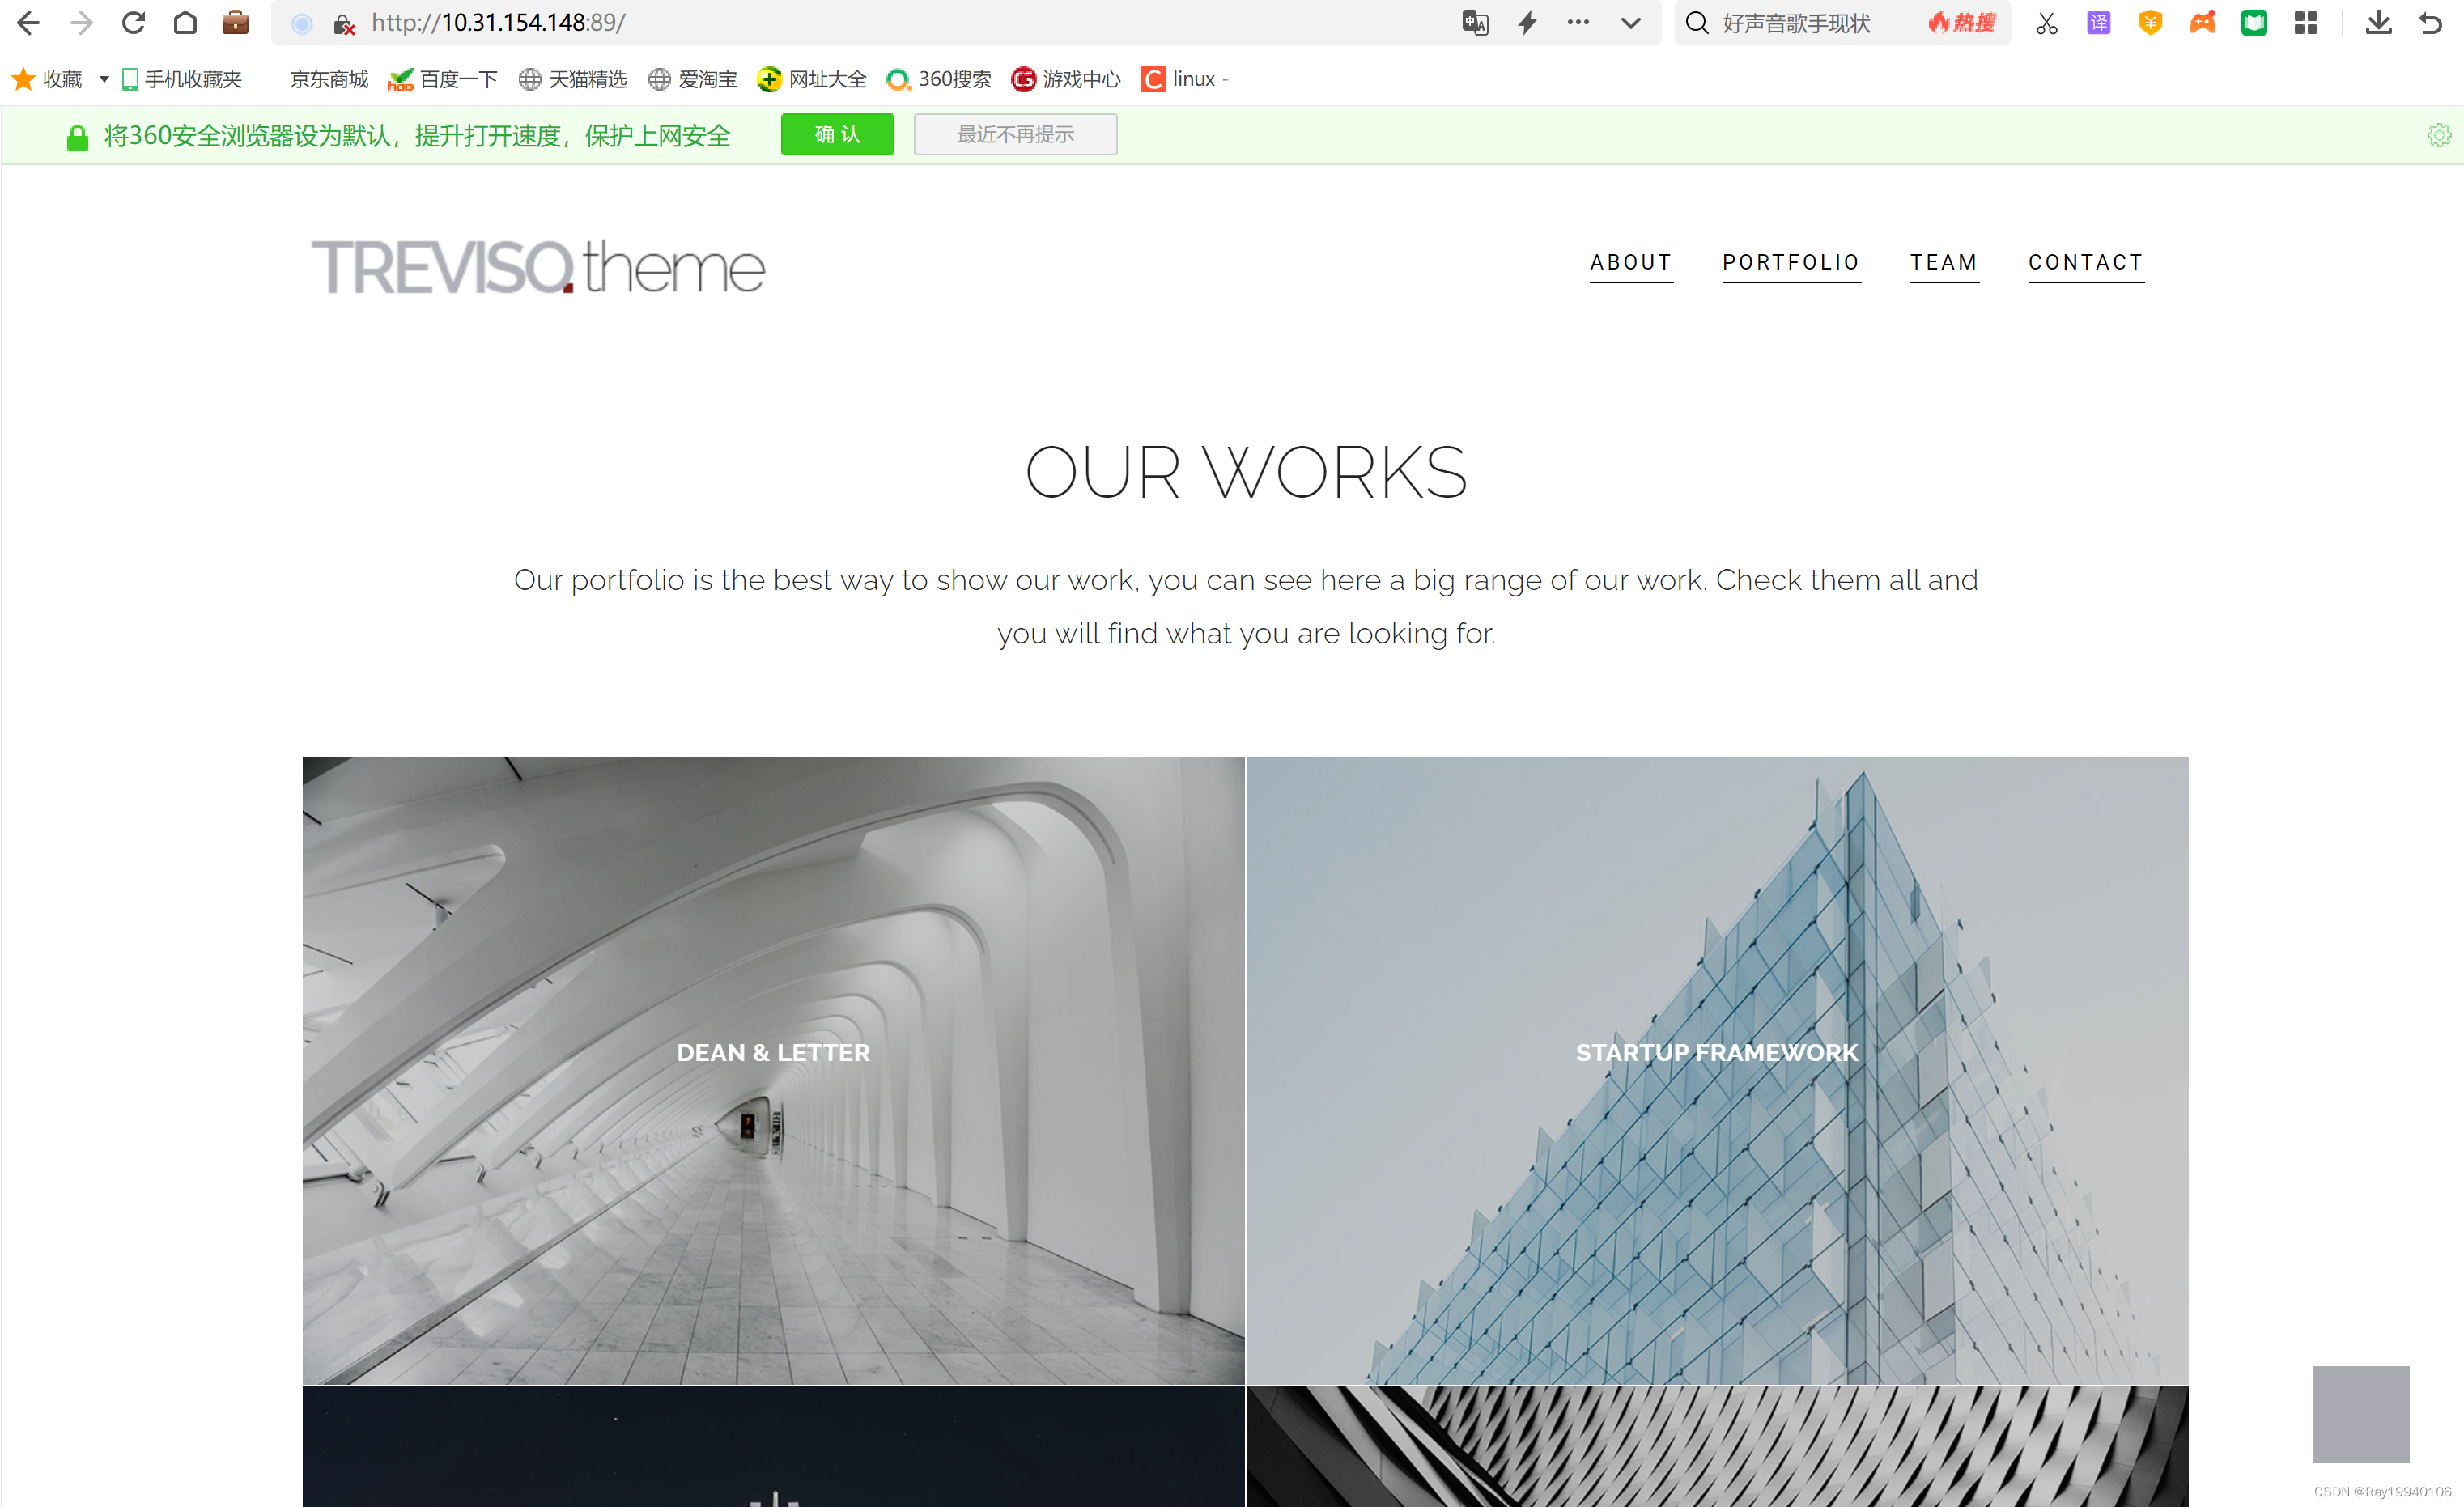
一、nginx增加端口访问
(一)yum 安装:
环境整理,关闭防火墙:
systemctl stop firewalld
systemctl status firewalld
1、安装rpm包
rpm -Uvh http://nginx.org/packages/centos/7/noarch/RPMS/nginx-release-centos-7-0.el7.ngx.noarch.rpm2、安装nginx
yum install -y nginx
3、启动Nginx
systemctl start nginx.service
systemctl status nginx
4.上传前端包到/opt/下,并解压查询路径/opt/zsy20201119-13/zsy20201119-13
cd /opt/
rz -E
unzip zsy20201119-13.zip
cd zsy20201119-13
cd zsy20201119-13/
pwd
5、安装后在配置文件在/etc/nginx/conf.d下
vim /etc/nginx/conf.d/s1.conf,

vim /etc/nginx/conf.d/s3.conf
server {
    listen                    ;#端口号
    server_name  localhost;

     location / {
        root                                                 ;  # 此处存放前端页面
        index  index.html index.htm;
    }

}
6、重启nginx
setenforce 0
systemctl stop firewalld
systemctl restart nginx
6、登录ip:87,ip89

二、博客搭建
(一)安装PHP服务
yum -y install wget

yum -y install curl

yum -y install gcc make zlib-devel pcre pcre-devel openssl-devel

yum -y  install gcc*

 yum install autoconf

yum -y install lsof  vim
关闭防火墙
setenforce 0

systemctl stop firewalld
1、导入源
yum install epel-release
rpm -Uvh https://dl.fedoraproject.org/pub/epel/epel-release-latest-7.noarch.rpm
rpm -Uvh https://mirror.webtatic.com/yum/el7/webtatic-release.rpm

yum update

yum install -y http://rpms.remirepo.net/enterprise/remi-release-7.rpm
2、安装yum-utils
yum install yum-utils3、开始安装
 yum -y install php74 php74-php-devel

yum install php74-php-gd  php74-php-pdo php74-php-mbstring php74-php-cli php74-php-fpm php74-php-mysqlnd -y
4、修改php-fpm配置
vim /etc/opt/remi/php74/php-fpm.d/www.conf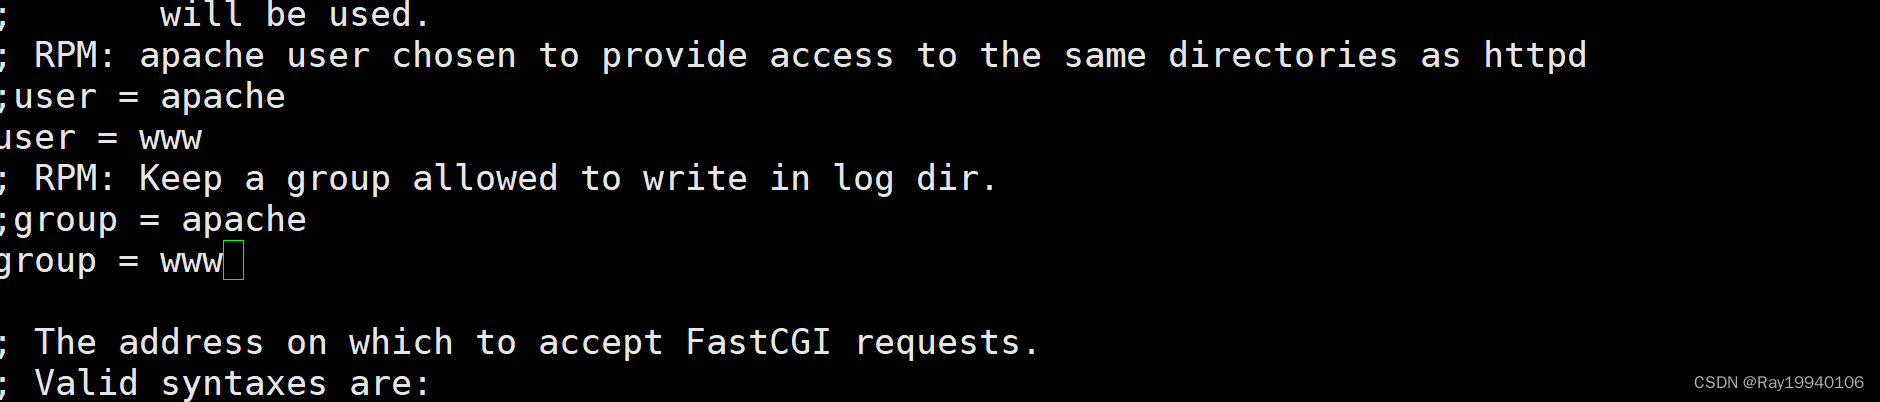
5、启动php-fpm
创建 www的用户
useradd www启动php-fpm 访问
systemctl restart php74-php-fpm
检查是否启动:
方式一:lsof -i:9000

方式二:systemctl restart php74-php-fpm
查看php 版本
php74 -v(二)安装nginx
1.安装rpm 包
rpm -Uvh http://nginx.org/packages/centos/7/noarch/RPMS/nginx-release-centos-7-0.el7.ngx.noarch.rpm2.安装nginx
yum install -y nginx3.启动Nginx
#修改配置
vim /etc/nginx/nginx.conf
user nginx; 改成 user www; 保存并退出
修改服务配置后要重启服务
systemctl restart nginx.service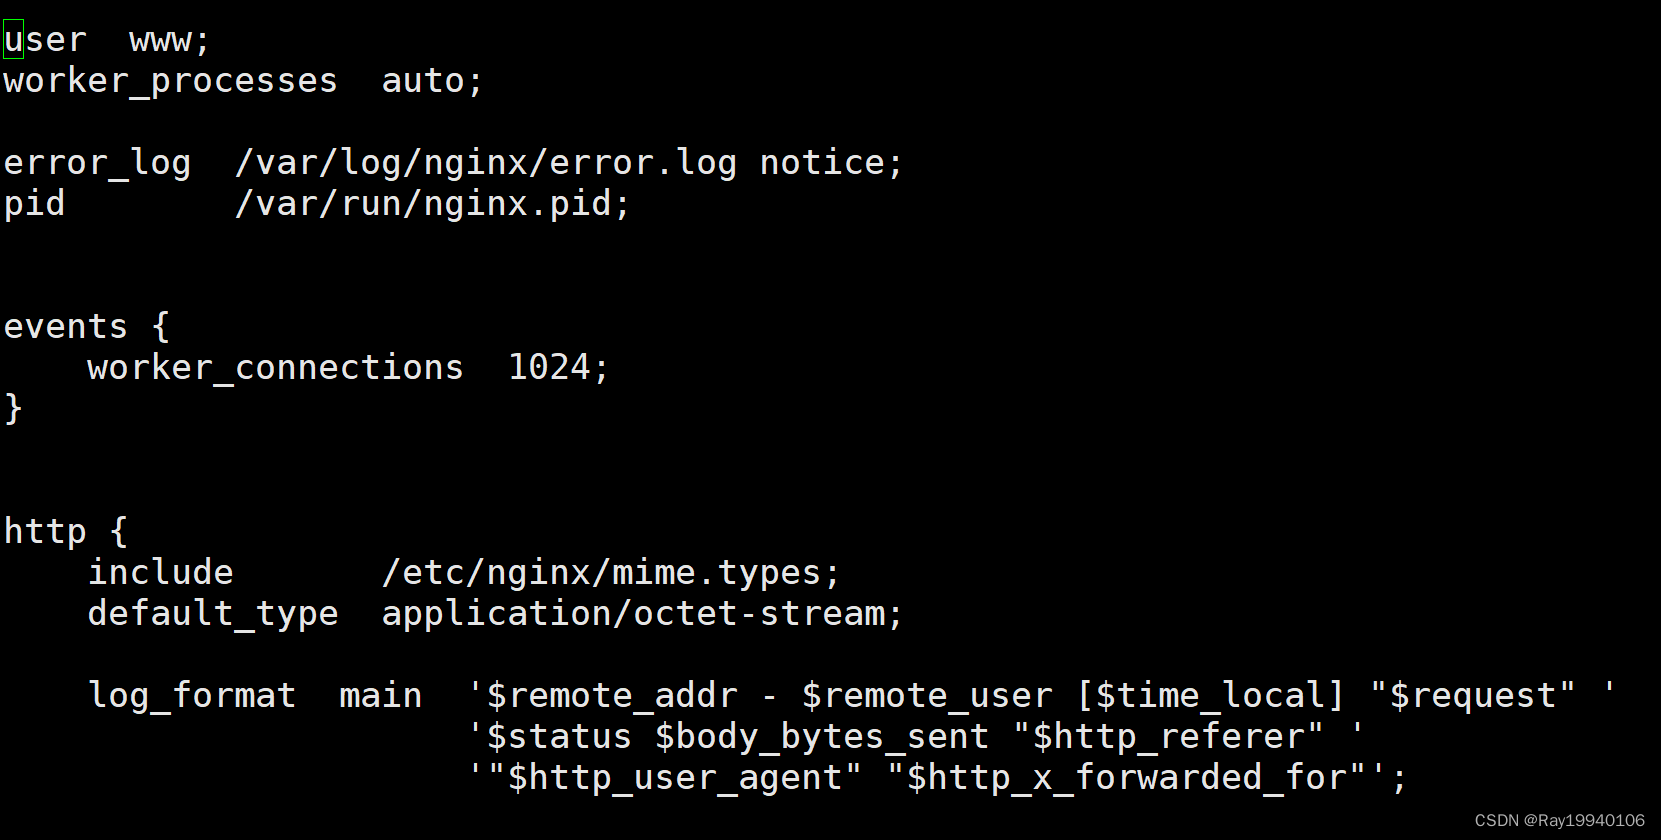
4.测试php-fpm 连接
创建/opt/www 并vim /opt/www/test_php.php
<?php
   phpinfo();
?>
授权:
chown -R www.www /opt/www
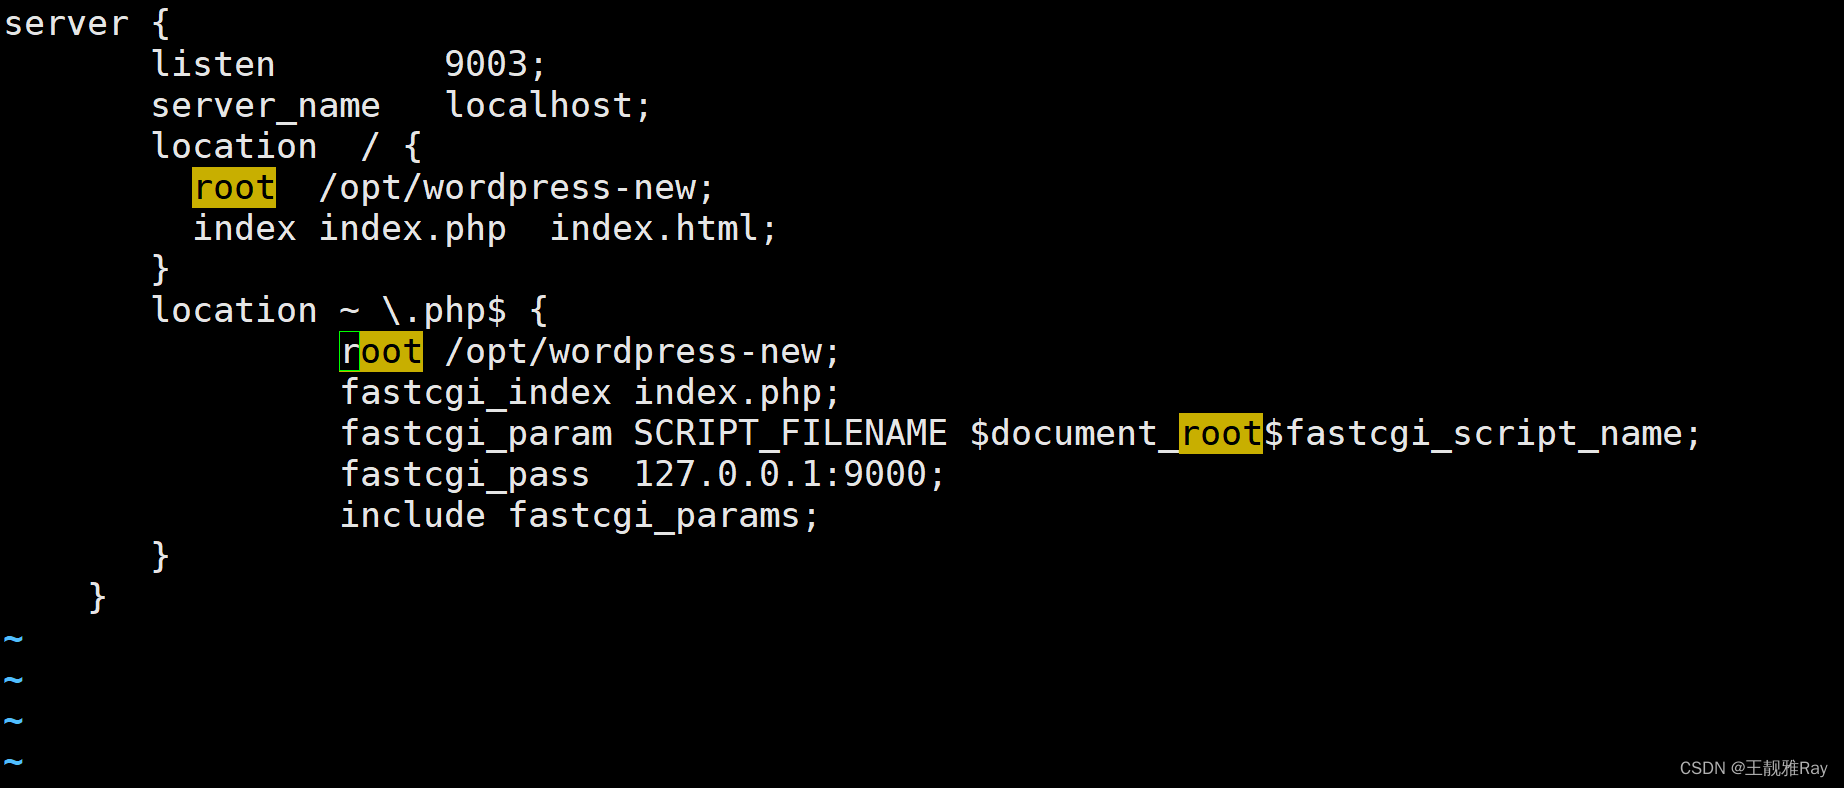
 vim /etc/nginx/conf.d/s2.conf

server {
       listen        91;
       server_name   localhost;
       location  / {
         root  /opt/wordpress;
         index index.php  index.html;
       }
       location ~ \.php$ {
                root /opt/wordpress;
                fastcgi_index index.php;
                fastcgi_param SCRIPT_FILENAME $document_root$fastcgi_script_name;
                fastcgi_pass  127.0.0.1:9000;
                include fastcgi_params;
       }
    }
(三)安装mysql
官方[yum源]方式安装
wget https://dev.mysql.com/get/mysql80-community-release-el7-3.noarch.rpm如果需要升级包可以用下面的命令
rpm -Uvh mysql80-community-release-el7-3.noarch.rpm2、查看所有版本
yum repolist all | grep mysql这里5.7版本是不可用的 8.0的能用 所以需要先禁用8.0的然后开启5.7版本的
yum-config-manager --disable mysql80-community

yum -y install yum-utils

rpm --import https://repo.mysql.com/RPM-GPG-KEY-mysql-2022
启用5.7版本
yum-config-manager --enable mysql57-community3、安装mysql
yum install -y mysql-community-server验证MySQL
mysql --version4、启动mysql
systemctl start mysqld.service
systemctl status mysqld
登录MySQL
grep 'temporary password' /var/log/mysqld.log

 mysql -uroot -p'临时密码’
重置密码
set global validate_password_length=0;

set global  validate_password_policy=0;

ALTER USER 'root'@'localhost' IDENTIFIED BY '密码';
(五)开启远程连接
进入mysql库执行命令
use mysql
select host ,user from user;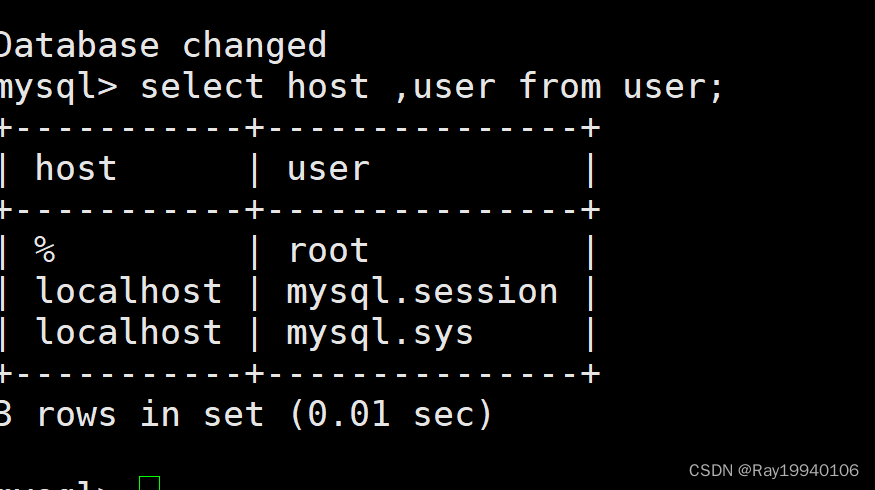
修改权限
把root用户的host改为%
update user set host = "%" where user = "root";刷新权限
flush privileges;在navicat premium新建连接MYSQL
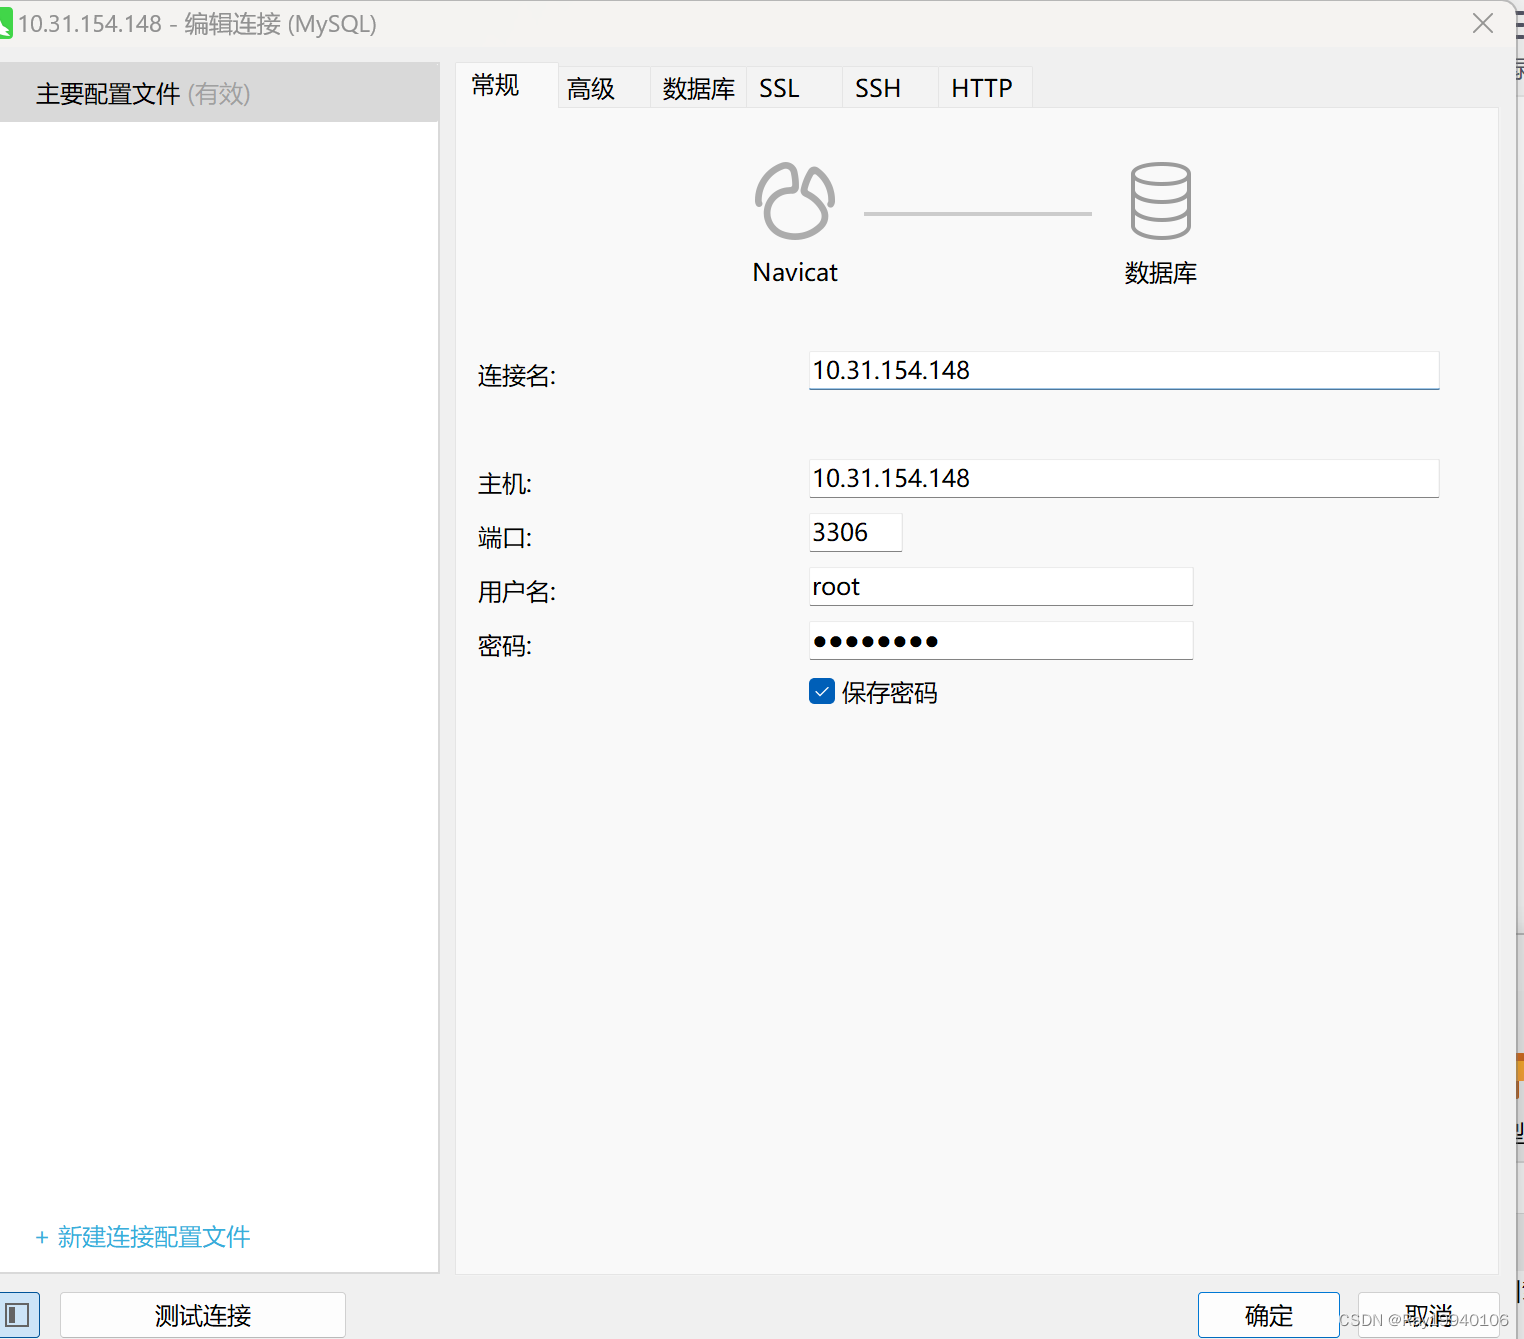
四、下载博客
1、下载
wget https://cn.wordpress.org/wordpress-5.6.2-zh_CN.tar.gz
2、解压:
tar -xf wordpress-5.6.2-zh_CN.tar.gz3、移动到/opt/下
mv wordpress/ /opt/4、切换到博客的目录下
cd /opt/wordpress/
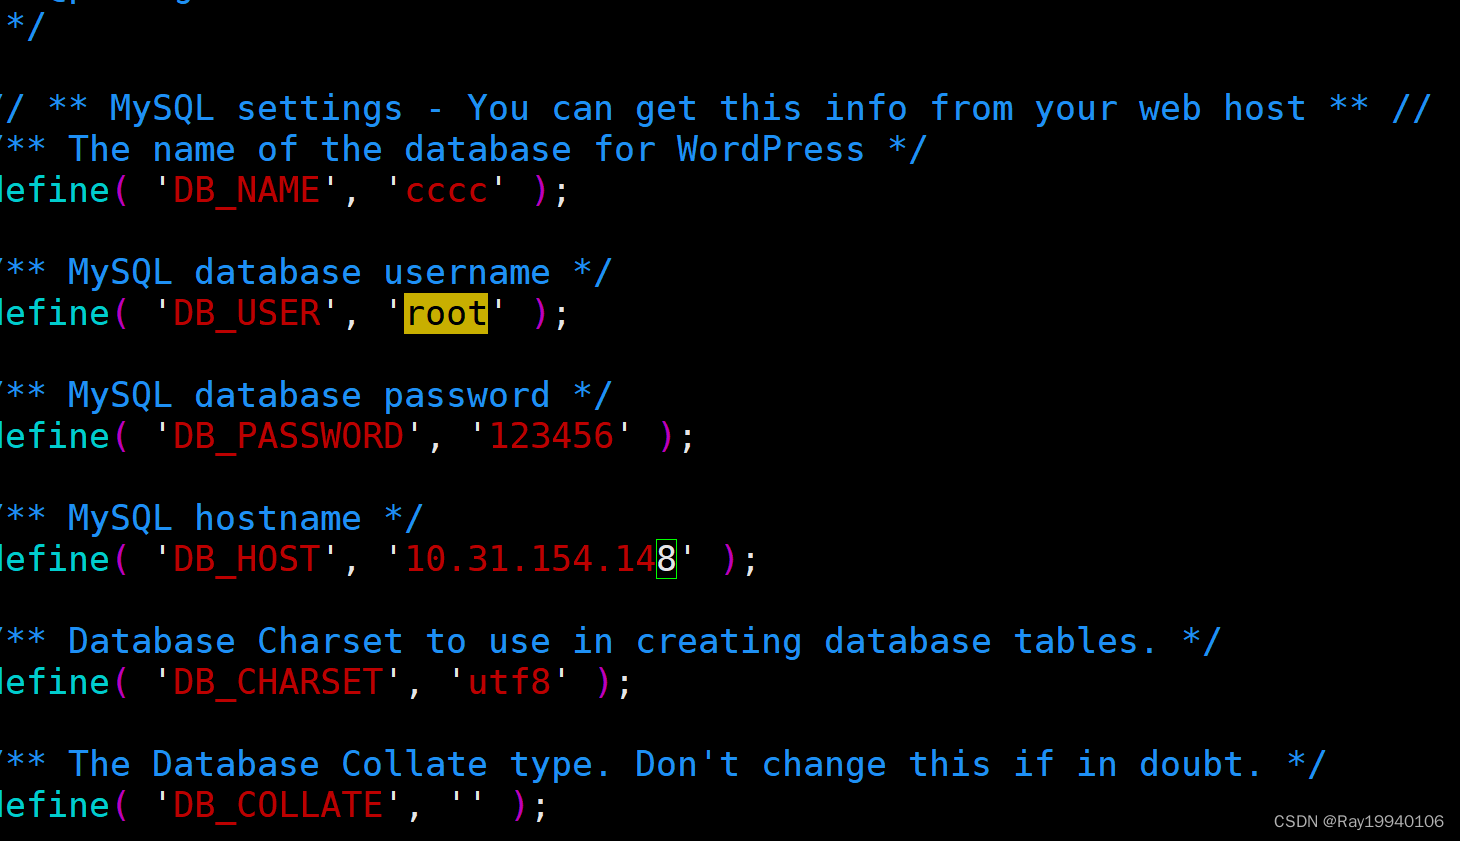
5、复制 wp-config-sample.php 为wp-config.php
cp wp-config-sample.php wp-config.phpvim wp-config.php修改文件
6、设置wordpress的权限
chown -R www.www /opt/wordpress/
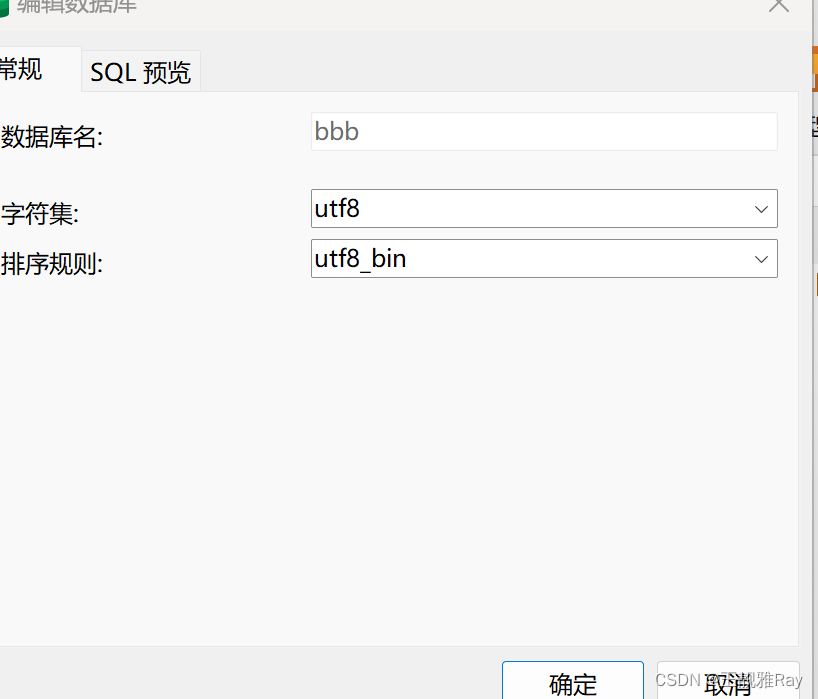
7、用navicat
点击数据库,右键----> 新建数据库---->

8、更改配置:
vim /etc/nginx/conf.d/s2.conf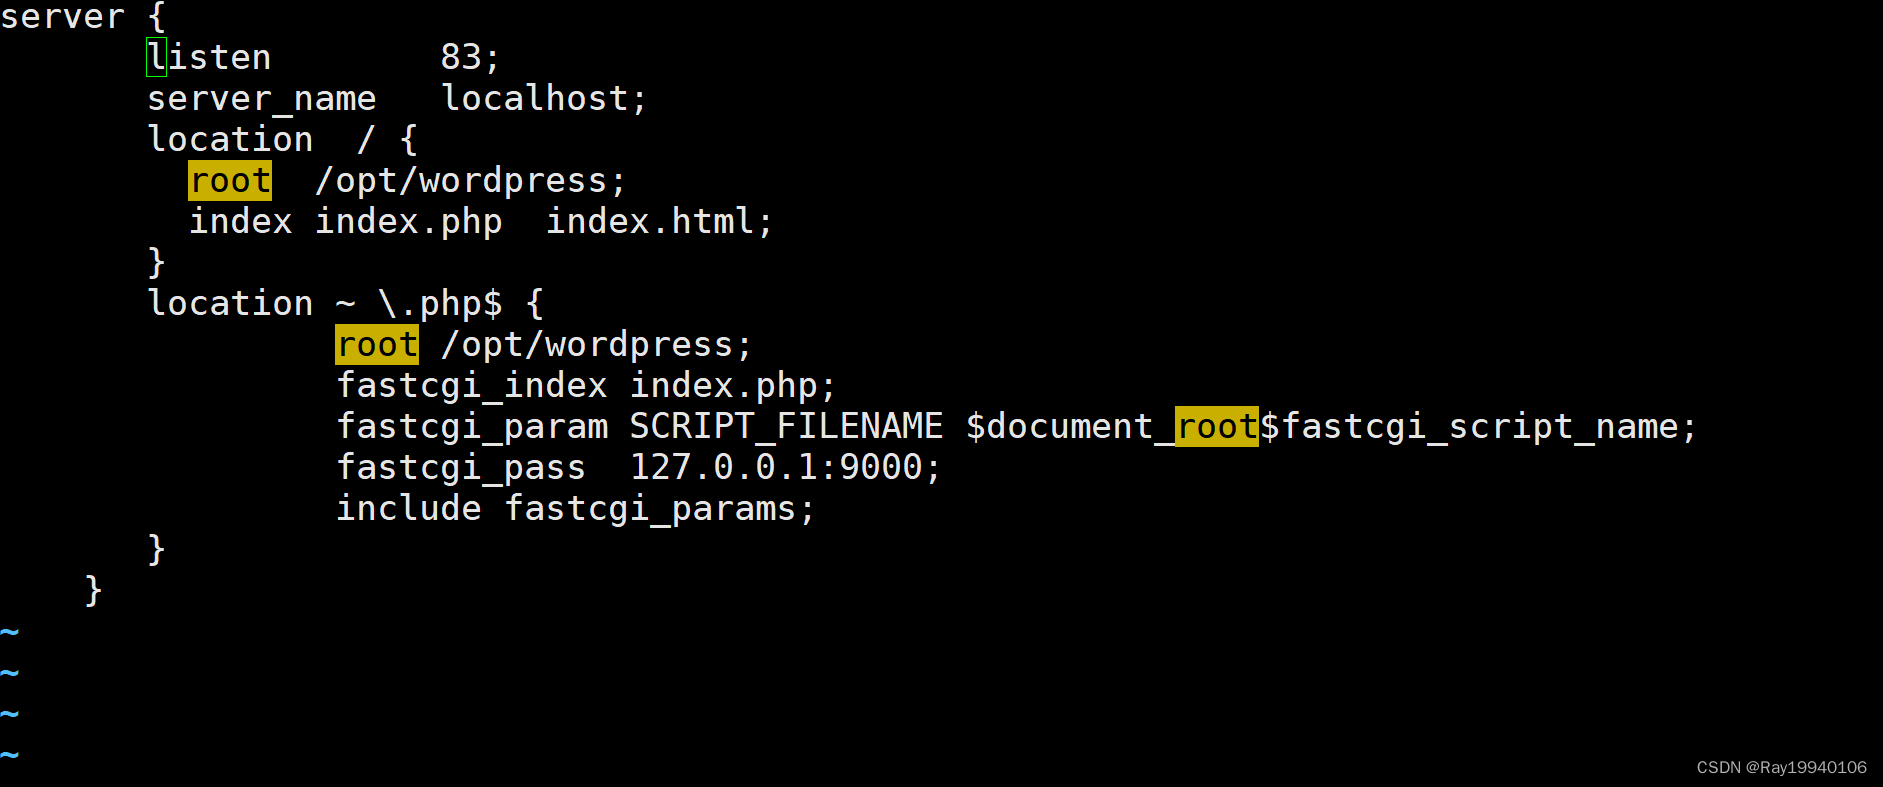
9、 重启nignx
setenforce 0
systemctl stop firewalld
systemctl restart nginx
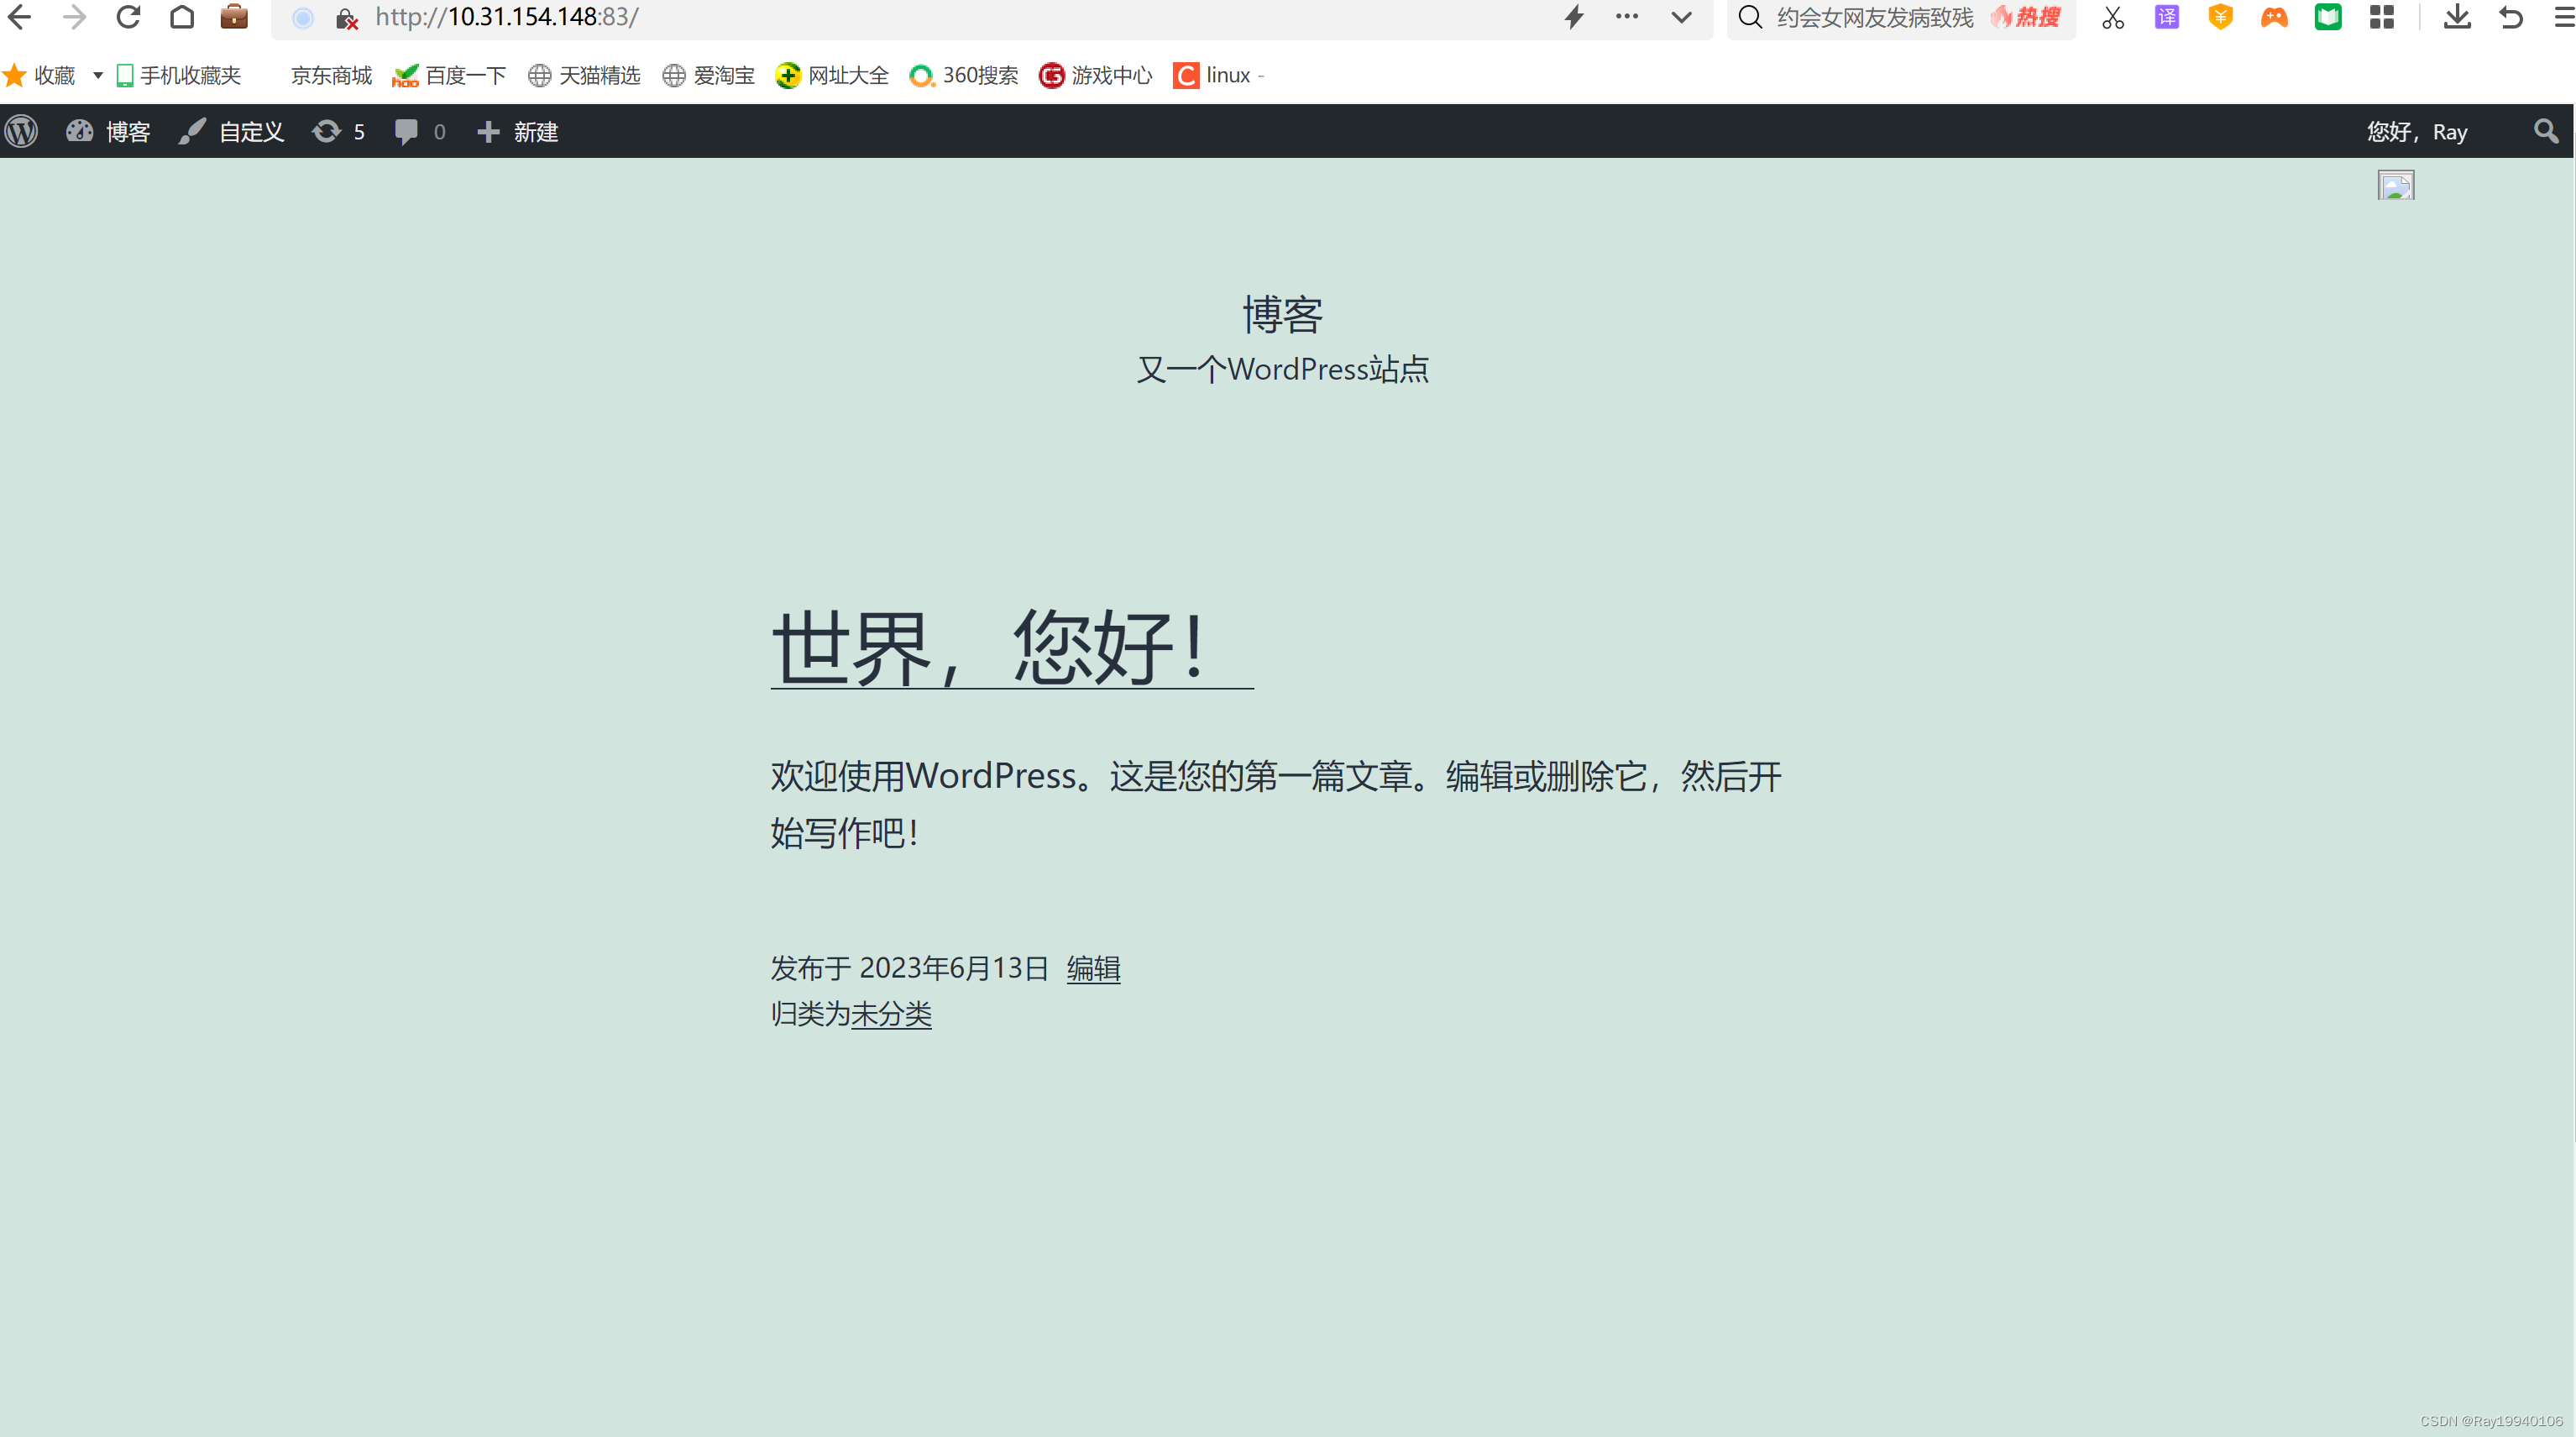
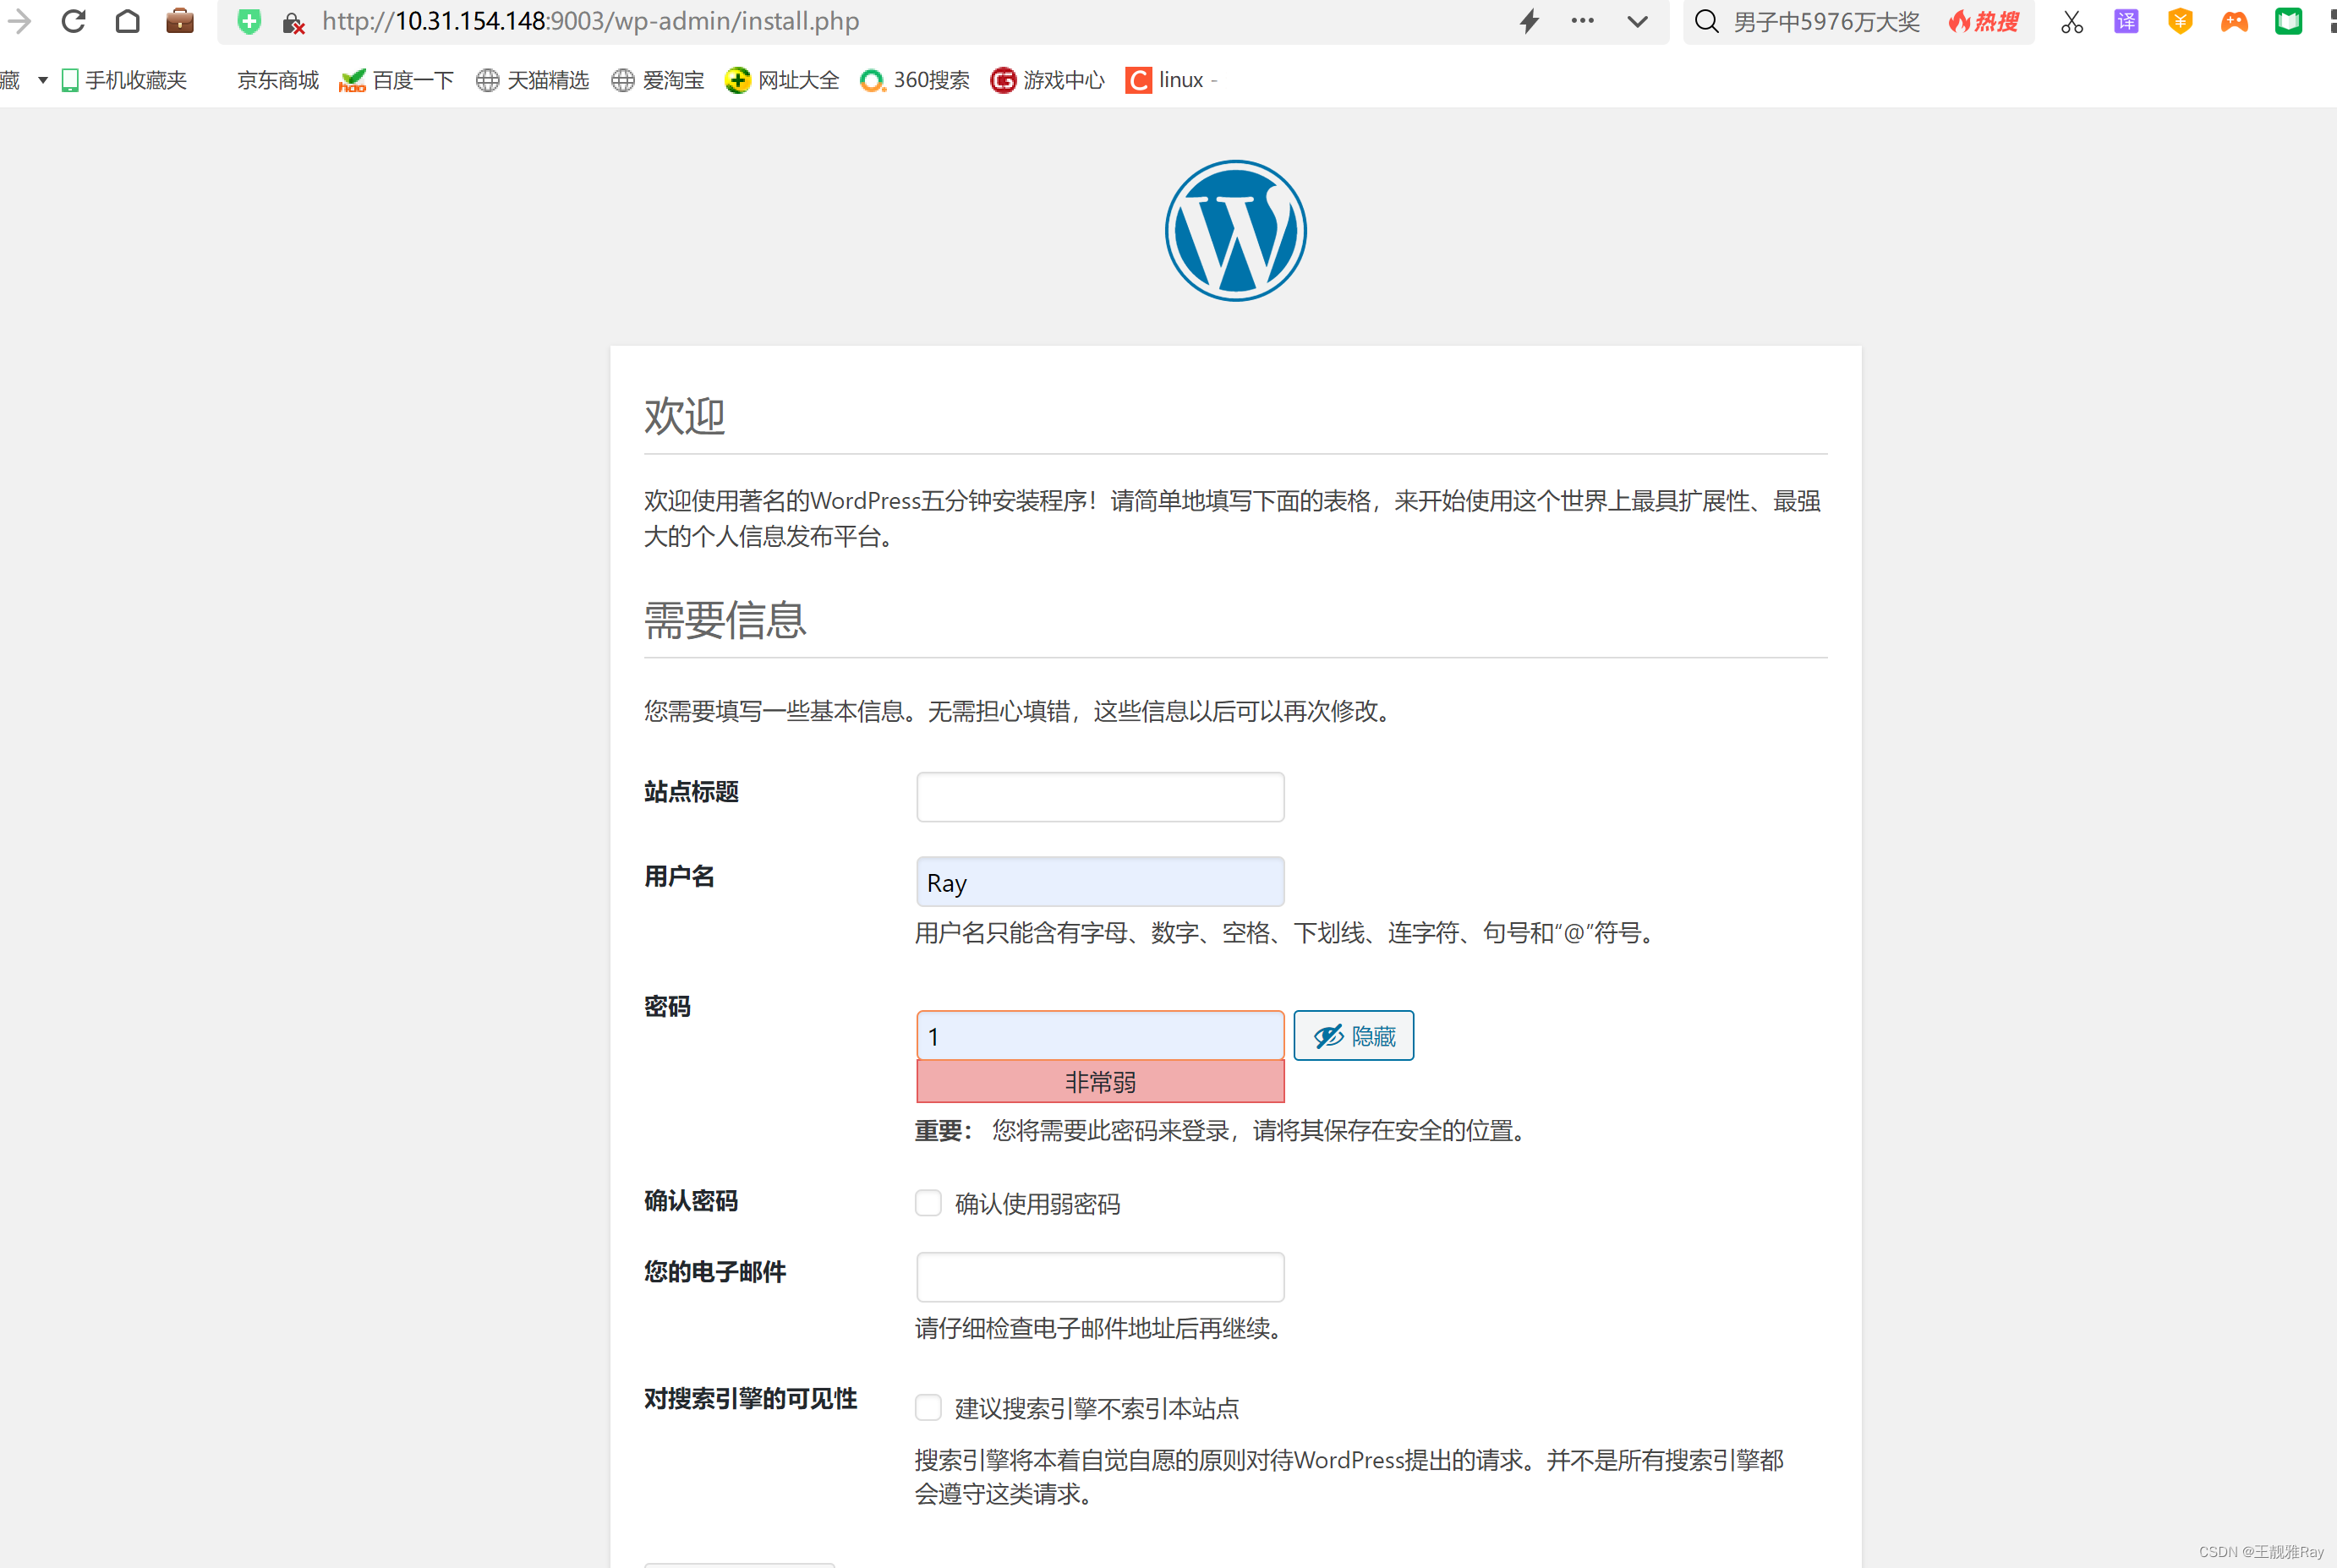
10、 登录ip:端口号
更改端口无法登录博客
方法:
1、重新下载 wordpress-5.6.2-zh_CN.tar.gz
tar -xf wordpress-5.6.2-zh_CN.tar.gz2、移动WordPress
mv wordpress /opt/wordpress-new3、切换到wordpress-new下 拷贝文件wp-config-sample.php 成wp-config.php
cp wp-config-sample.php wp-config.php
4、修改文件
vim wp-config.php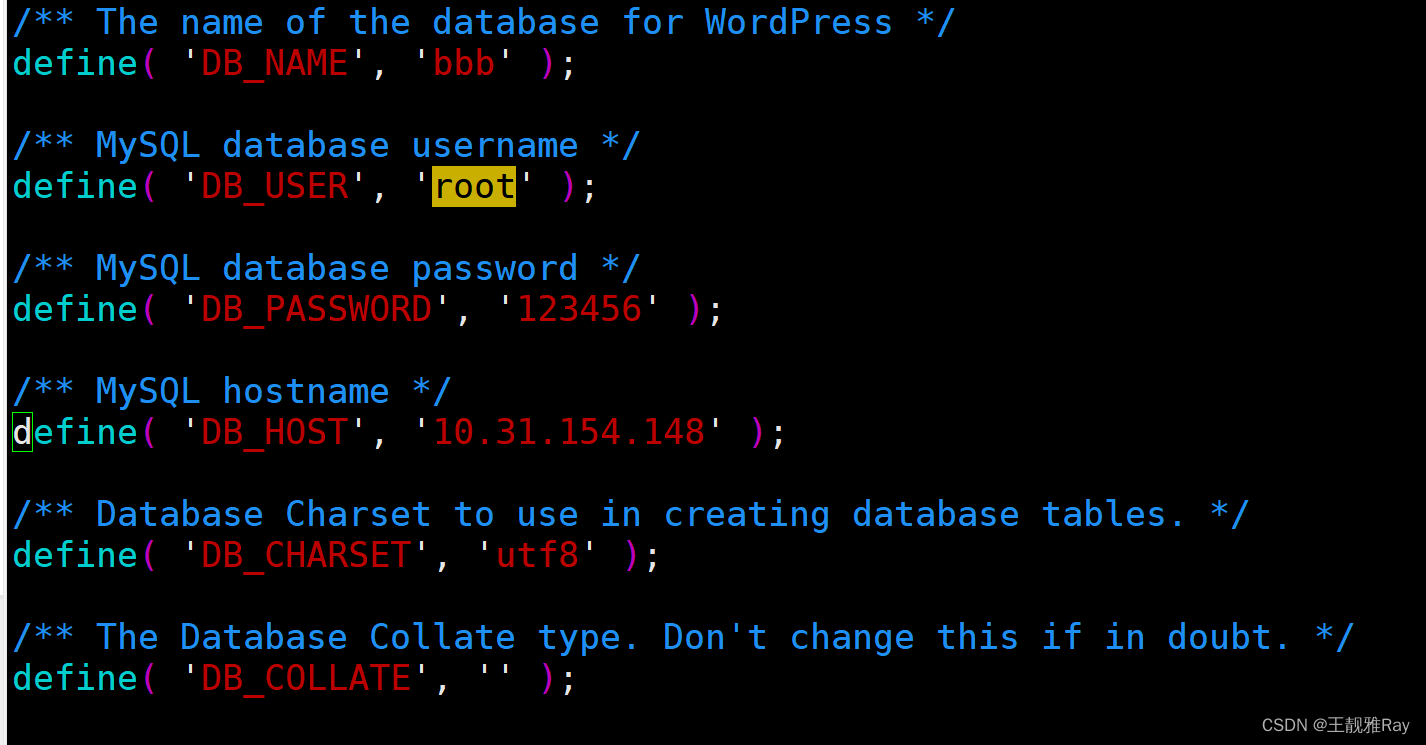
5、更改权限
chown -R www.www /opt/wordpress-new6、切换目录 /etc/nginx/conf.d,拷贝文件s2.conf 成s4.conf
cd /etc/nginx/conf.d
cp s2.conf  s4.conf
7.修改s4.conf
8、新建数据库
9、关闭防火墙,安全,重启php,nginx,登录ip:端口


 260
260


 被折叠的 条评论
为什么被折叠?
被折叠的 条评论
为什么被折叠?
 到【灌水乐园】发言


