


 本文介绍了如何在Eclipse环境中,通过Maven创建一个基于Spring和CXF的RESTful Web Service项目。首先,创建新的Maven Project,然后配置Group Id、Artifact Id和Package。接着,构建项目的目录结构,并在pom.xml中添加Spring和CXF的依赖。在web.xml中配置CXF Servlet和Spring的ContextLoaderListener。最后,编写Java代码,配置applicationContext.xml,完成RESTful服务的搭建并进行测试。
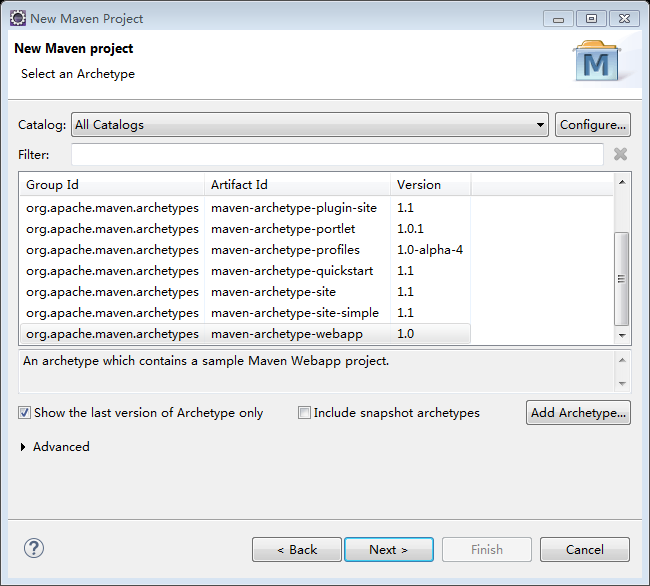
在Eclipse中新建Maven Project
1.New Maven Project
选择maven-archetype-webapp
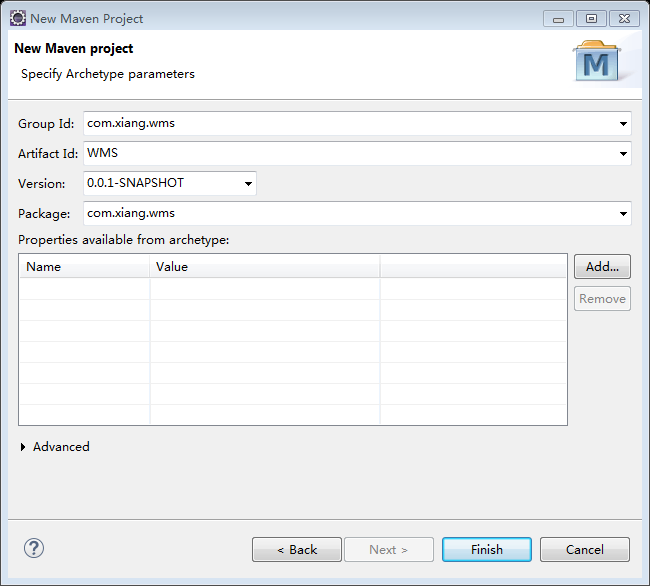
2.设置Group Id、Artifact Id、Package
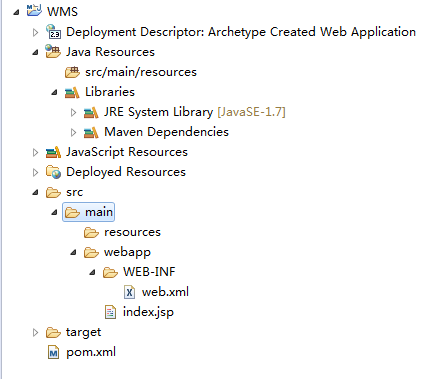
3.默认的项目结构
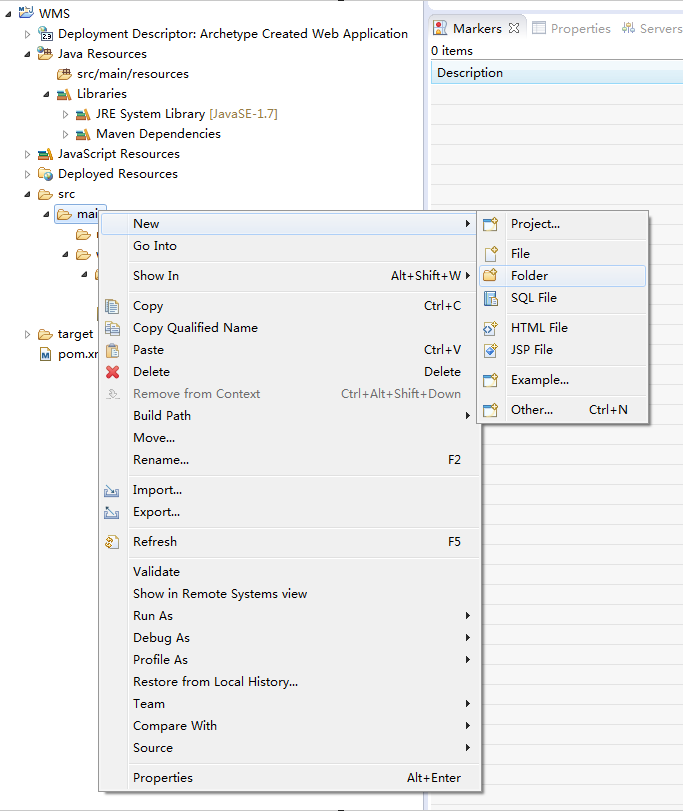
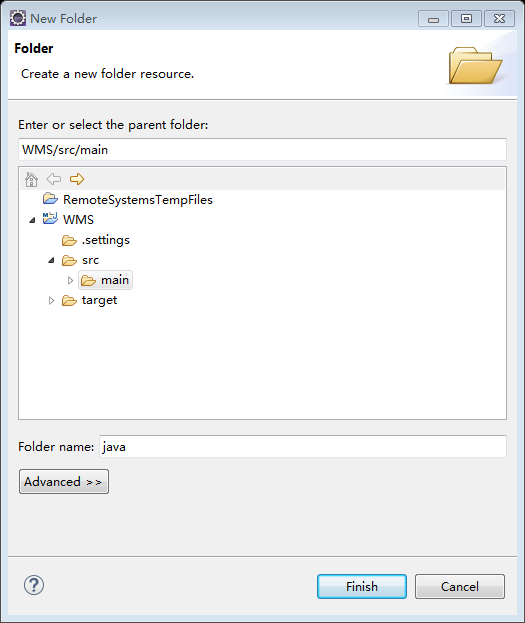
4.新建java 源码目录
右键点击main –> New –> Folder
5.完整项目结构
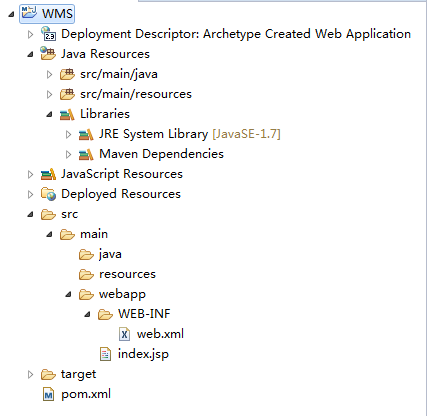
项目搭建完毕
6.pom.xml中添加Spring和CXF依赖
<!-- Spring -->
<dependency>
    <groupId>org.springframework</groupId>
    <artifactId>spring-context</artifactId>
    <version>3.2.3.RELEASE</version>
</dependency>
<dependency>
    <groupId>org.springframework</groupId>
    <artifactId>spring-web</artifactId>
    <version>3.2.3.RELEASE</version>
</dependency>
<!-- CXF -->
<dependency>
    <groupId>org.apache.cxf</groupId>
    <artifactId>cxf-rt-frontend-jaxrs</artifactId>
    <version>3.0.4</version>
</dependency>
7.web.xml中配置CXF Servlet和Spring ContextLoaderListener
web.xml
<!-- Spring -->
<context-param>
    <param-name>contextConfigLocation</param-name>
    <param-value>/WEB-INF/applicationContext.xml</param-value>
</context-param>
<listener>
    <listener-class>org.springframework.web.context.ContextLoaderListener</listener-class>
</listener>

<!-- CXF -->
<servlet>
    <servlet-name>CXFServlet</servlet-name>
    <servlet-class>org.apache.cxf.transport.servlet.CXFServlet</servlet-class>
    <load-on-startup>1</load-on-startup>
</servlet>
<servlet-mapping>
    <servlet-name>CXFServlet</servlet-name>
    <url-pattern>/rest/*</url-pattern>
</servlet-mapping>
8.编写java代码
import javax.ws.rs.GET;
import javax.ws.rs.Path;
import javax.ws.rs.PathParam;
import javax.ws.rs.Produces;
import org.springframework.stereotype.Service;

@Service
@Path("/")
public class RestfulService {

    @GET
    @Path("/prime/{number}")
    @Produces("text/plain")
    public boolean isPrime(@PathParam("number") int number){
        return true;
    }
}
9.配置applicationContext.xml
注意加入:xmlns和xsi:schemaLocation中加入jaxrs
<?xml version="1.0" encoding="UTF-8"?>
<beans xmlns="http://www.springframework.org/schema/beans"
    xmlns:xsi="http://www.w3.org/2001/XMLSchema-instance"
    xmlns:p="http://www.springframework.org/schema/p"
    xmlns:jaxrs="http://cxf.apache.org/jaxrs"
    xmlns:context="http://www.springframework.org/schema/context"
    xsi:schemaLocation="http://www.springframework.org/schema/beans
http://www.springframework.org/schema/beans/spring-beans-3.2.xsd
        http://cxf.apache.org/jaxrs
http://cxf.apache.org/schemas/jaxrs.xsd
        http://www.springframework.org/schema/context
http://www.springframework.org/schema/context/spring-context-3.2.xsd">

    <!-- CXF必须 -->
    <import resource="classpath:META-INF/cxf/cxf.xml" />
    <import resource="classpath:META-INF/cxf/cxf-servlet.xml" />

    <!-- 扫描Spring自动注解 -->
    <context:component-scan base-package="com.xiang.wms"></context:component-scan>

    <!-- RESTful -->
    <jaxrs:server id="restfulServiceContainer" address="/">
        <!-- 关联REST Web Service Bean -->
        <jaxrs:serviceBeans>
            <ref bean="restfulService" />
        </jaxrs:serviceBeans>
    </jaxrs:server>
</beans>
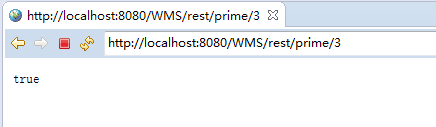
10.测试


 813
813

 被折叠的 条评论
为什么被折叠?
被折叠的 条评论
为什么被折叠?
 到【灌水乐园】发言


