


文章目录
前言
因公司要做一个营销类的pc官网,需要支持seo,所以考虑nuxt服务端渲染。尤大都强力推荐的服务端渲染框架,因目前nuxt3还是测试版本,本次开发决定使用的是nuxt2,后面会继续学习nuxt3
从头搭建一个服务端渲染的应用是相当复杂的。幸运的是,我们有一个优秀的社区项目 Nuxt.js 让这一切变得非常简单。Nuxt 是一个基于 Vue 生态的更高层的框架,为开发服务端渲染的 Vue 应用提供了极其便利的开发体验。更酷的是,你甚至可以用它来做为静态站生成器。推荐尝试。
一、创建一个nuxt项目
咱们跟着nuxt官网使用npm init nuxt-app <project-name>安装
npm init nuxt-app pc_web_new
会有以下提示咱们一路根据自己的需求安装选好之后回车
create-nuxt-app v4.0.0
✨  Generating Nuxt.js project in pc_web_new
? Project name: pc_web_new
? Programming language: JavaScript
? Package manager: Npm
? UI framework: Element
? Nuxt.js modules: (Press <space> to select, <a> to toggle all, <i> to invert selection)
? Linting tools: (Press <space> to select, <a> to toggle all, <i> to invert selection)
? Testing framework: None
? Rendering mode: Universal (SSR / SSG)
? Deployment target: Static (Static/Jamstack hosting)
? Development tools: (Press <space> to select, <a> to toggle all, <i> to invert selection)
? What is your GitHub username? ruanjunwei
? Version control system: Git
启动项目时会自动安装两个文件.nuxt, node_modules文件
To get started:

        cd pc_web_new
        npm run dev
根据以上命令成功启动项目
二、目录解读

三、新建页面,路由跳转
咱们在pages下新建两个vue文件,随便输入一些内容,让我们能看到变化,这是时候nuxt已经帮我们自动注册了路由了,可以在.nuxt/router.js中看到 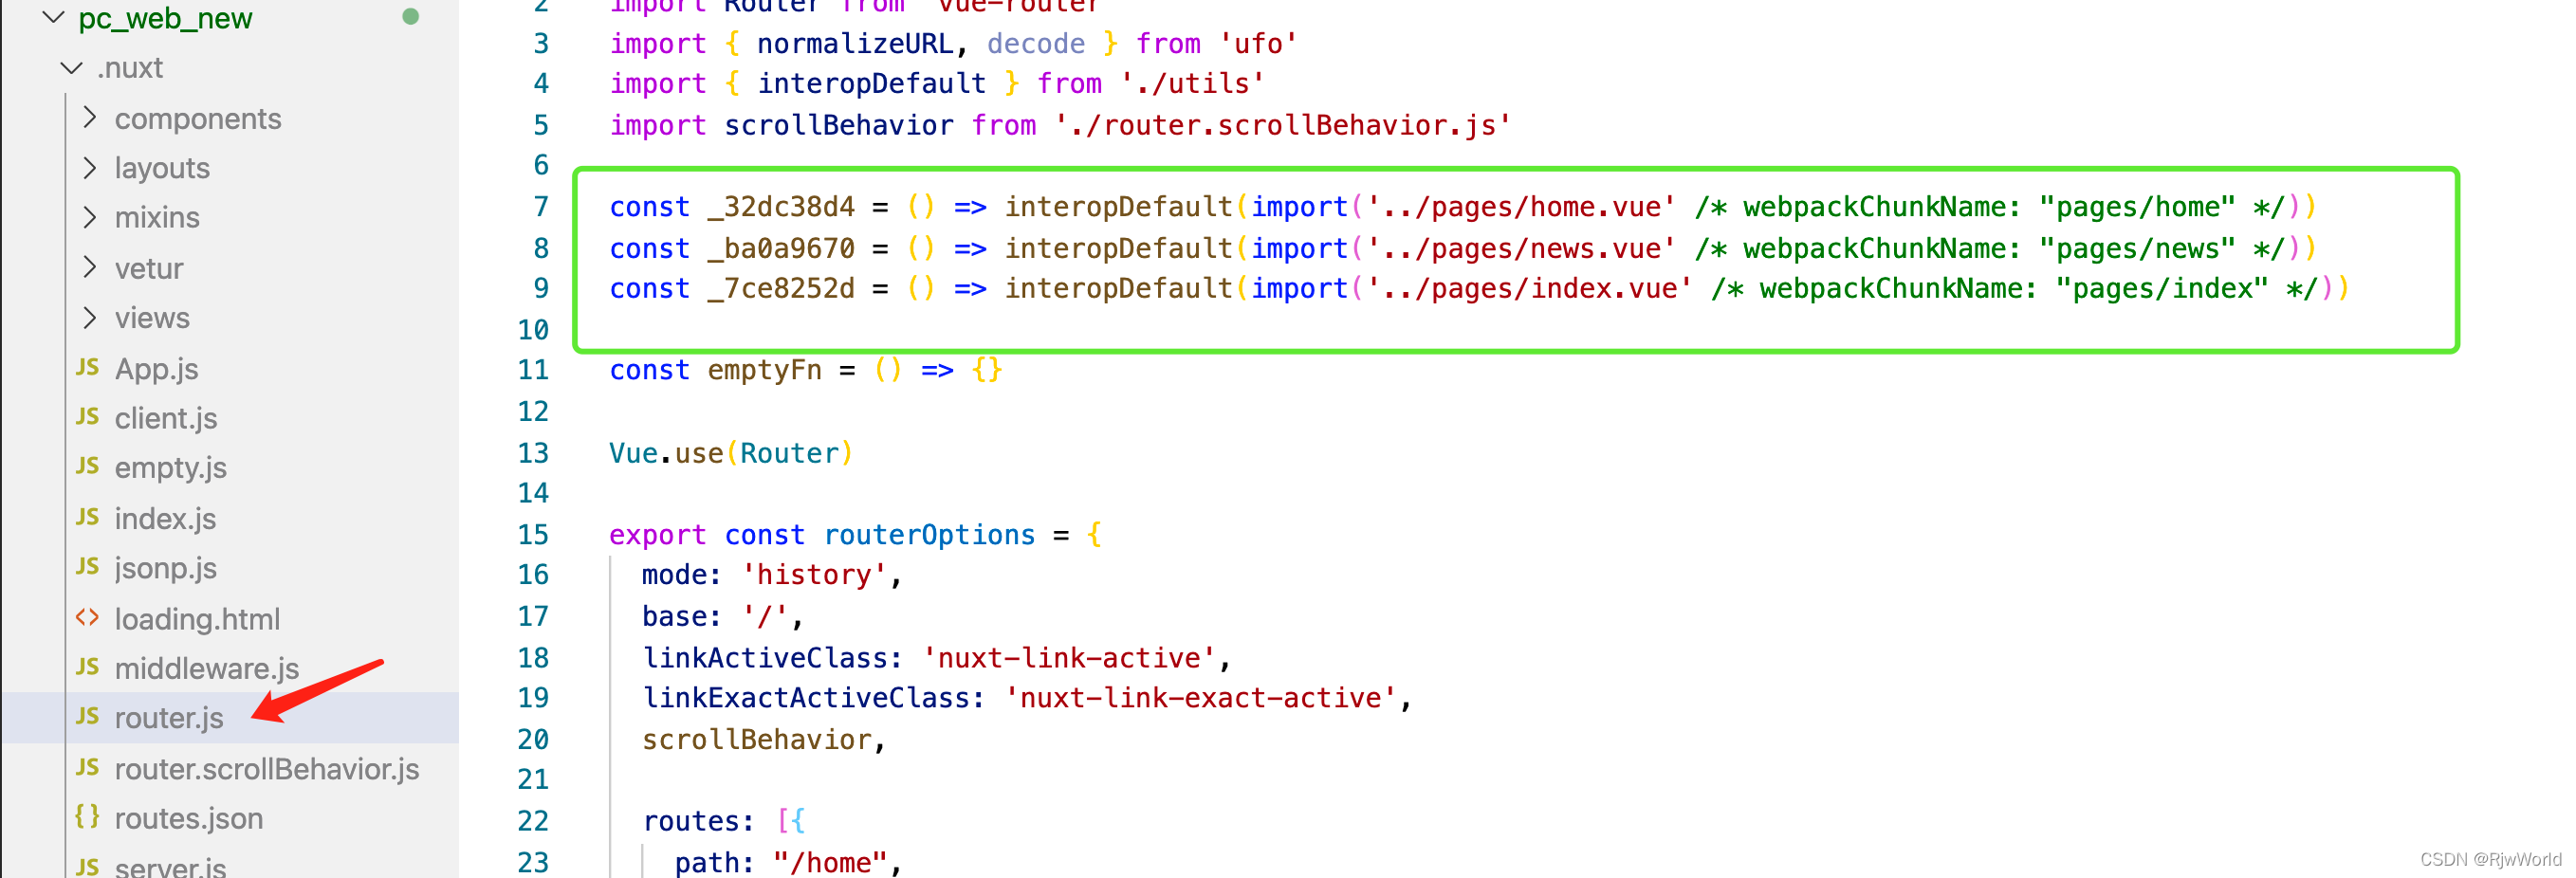 咱们的项目有一个主入口pages/index.vue 该页面就是咱们路由的 "/"首页
我们到这个页面中去试试路由跳转,按照nuxt文档中的方法实现
<template>
  <div>
    <NuxtLink to="/">index</NuxtLink>
    <NuxtLink to="/home">home</NuxtLink>
    <span @click="gotoNews">news</span>
  </div>

</template>

<script>
export default {
  name: 'IndexPage',
  methods: {
    gotoNews() {
      this.$router.push('/news')
    }
  },
}
</script>
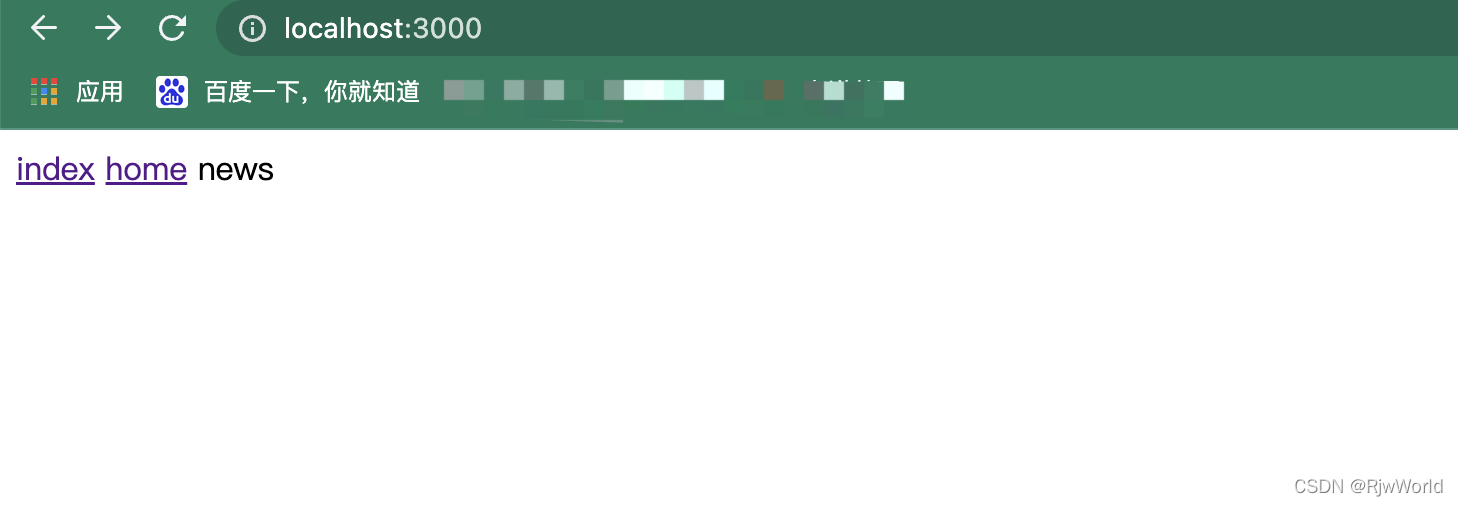
可以看到目前是已经实现了路由的跳转
四、组件的使用
在项目中咱们经常使用到组件,把常用的模块抽成一个组件在各个页面去使用,有vue基础的朋友应该知道咱们的组件在vue中需要先创建组件文件,然后引入,注册之后才能使用。但是在nuxt中,只要在components中的文件会自动的视为一个组件,可以直接在所有页面调用。
我们直接在component中创建一个 NewsItem.vue文件,然后随便输入一个内容让我们能看到变化
components/NewsItem.vue
<template>
  <div> 我是一个组件 </div>
</template>
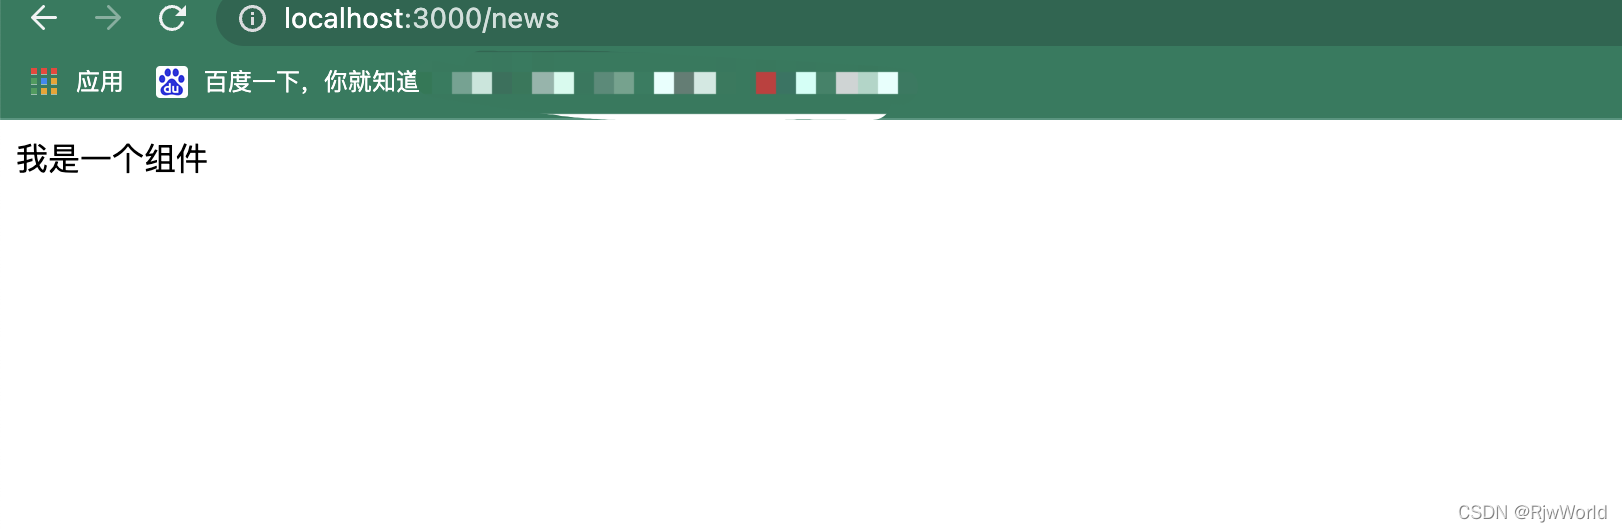
然后直接在pages/news.vue中使用该组件,然后看看效果
pages/news.vue
<template>
  <div>
    <NewsItem/>
  </div>
</template>
如果组件目录时嵌套的怎么办呢,官方已经给我们想好了,组件名称基于其自己的路径目录和文件名。例如:
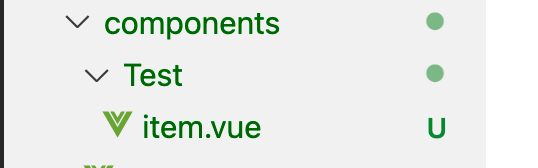
此时的组件名称应是<TestItem/>
注意,不能使用index命名,官方没说为什么,但是我使用index.vue命名组件就报错了
五、插件的使用
在开发中会用到很多插件,帮助我们更快的完成开发,我举几个例子如:elementUI, swiper, sass
- nuxt中使用element
在我们安装项目的时候npm init nuxt-app pc_web_new,已经安装了element,如果没安装的可以使用npm i element-ui -S安装。
如果是默认选择了element,在我们项目plugins文件夹中已经有了element-ui.js的文件
import Vue from 'vue'
import Element from 'element-ui'
import locale from 'element-ui/lib/locale/lang/en'

Vue.use(Element, { locale })
然后在nuxt.config.js中
export default {
	//
	css: [
	    'element-ui/lib/theme-chalk/index.css'
    ],
    plugins: [
   	 '@/plugins/element-ui'
  	]
}
默认引入全部的,如果我们要使用按需引入使用以下引入
import Vue from "vue";
import {
  Button,
  Loading,
  MessageBox,
  Carousel,
  CarouselItem,
  Row,
  Col,
  Input,
  Notification,
  Form,
  FormItem,
  Dialog
} from 'element-ui'
Vue.use(Button).use(Carousel).use(CarouselItem).use(Row).use(Col).use(Input).use(Form).use(FormItem).use(Dialog)
Vue.prototype.$loading = Loading.service
Vue.prototype.$msgbox = MessageBox
Vue.prototype.$notify = Notification
引入之后咱们随便在一个页面引入一个element的组件
<template>
  <div>
    <NewsItem/>
    <LazyTestItem/>
    <el-button type="primary">主要按钮</el-button>
  </div>
</template>

- nuxt中使用scss预处理,配置全局scss文件
npm i node-sass sass-loader scss-loader --save-dev
因为默认安装最新的版本,可能会出现报错的情况如下
npm ERR! code ERESOLVE
npm ERR! ERESOLVE unable to resolve dependency tree
npm ERR!
npm ERR! While resolving: pc_web_new@1.0.0
npm ERR! Found: webpack@4.46.0
npm ERR! node_modules/webpack
npm ERR!   webpack@"^4.46.0" from the root project
npm ERR!
npm ERR! Could not resolve dependency:
npm ERR! peer webpack@"^5.0.0" from sass-loader@12.6.0
npm ERR! node_modules/sass-loader
npm ERR!   dev sass-loader@"*" from the root project
npm ERR!
npm ERR! Fix the upstream dependency conflict, or retry
npm ERR! this command with --force, or --legacy-peer-deps
npm ERR! to accept an incorrect (and potentially broken) dependency resolution.
npm ERR!
npm ERR! See /Users/liqiushi/.npm/eresolve-report.txt for a full report.

npm ERR! A complete log of this run can be found in:
npm ERR!     /Users/liqiushi/.npm/_logs/2022-03-18T02_56_04_895Z-debug-0.log
这个时候我们应该指定版本去安装
npm i sass@1.49.9 --save
npm i sass-loader@10.2.1 --save
随便写点scss看看是否生效
<template>
  <div>
    <NewsItem/>
    <LazyTestItem/>
    <el-button type="primary">主要按钮</el-button>
    <div class="test">scss是否生效</div>
  </div>
</template>

<style scoped lang="scss">
$red: rgb(255, 102, 0);
.test{
  color: $red;
}
</style>
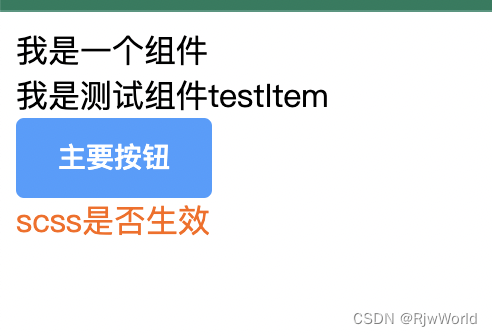
可以看到,scss已经生效。我们很多时候需要全局使用scss文件,这个时候怎么办呢,如下
npm i @nuxtjs/style-resources --save
然后在assets文件夹中新建几个scss文件
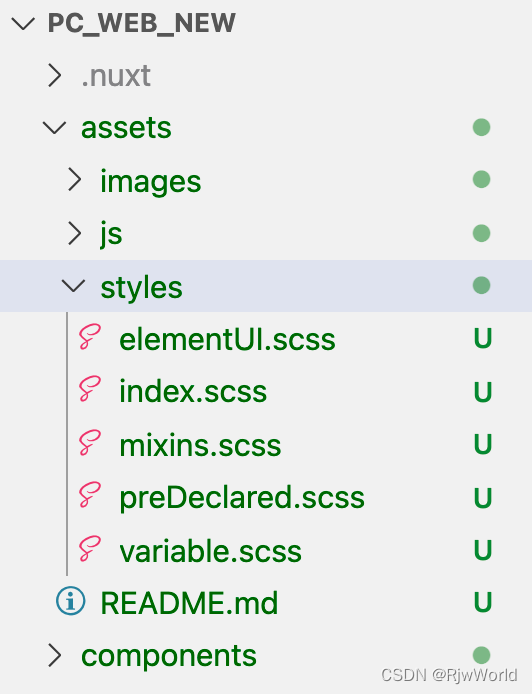
通常我们会有一个主入口文件index.scss,然后在该文件里引入其他文件
@import 'variable.scss';
@import 'mixins.scss';
@import 'preDeclared.scss';
@import 'elementUI.scss';
然后在nuxt.config.js中
 modules: [
    '@nuxtjs/style-resources'
  ],
  styleResources: {
    scss: ['./assets/styles/index.scss']
  },
就可以直接使用了
- nuxt中使用swiper
npm i swiper@5.4.5 --save
npm i vue-awesome-swiper@4.1.1 --save
在plugins文件中新建Swiper.js
import Vue from 'vue';
import VueAwesomeSwiper from 'vue-awesome-swiper';

Vue.use(VueAwesomeSwiper);
然后在nuxt.config.js中
 css: [
    'element-ui/lib/theme-chalk/index.css',
    'swiper/css/swiper.css'
  ],
   plugins: [
    '@/plugins/element-ui',
    { src: "@/plugins/Swiper", ssr: false }
  ],
然后就可以使用了

六、异步数据和代理,nuxt中使用axios和proxy代理
npm i @nuxtjs/proxy --save
npm i @nuxtjs/proxy --save
nuxt.config.js中
modules: [
  '@nuxtjs/style-resources',
  '@nuxtjs/axios',
  '@nuxtjs/proxy'
],
axios: {
  proxy: true
},
proxy: {
  '/apiIntroduce': {
    target: 'http://172.16.xx.99:33099',
    pathRewrite: {
      '^/apiIntroduce': ''
    }
  }
},
使用:
commitFun() {
  this.$axios.post('/apiIntroduce/inforcollect/contact-infos/gather', this.applyForm).then(res => {
     console.log(res, 'ssss');
   }).catch(err => {
     console.log(err);
   })
 }
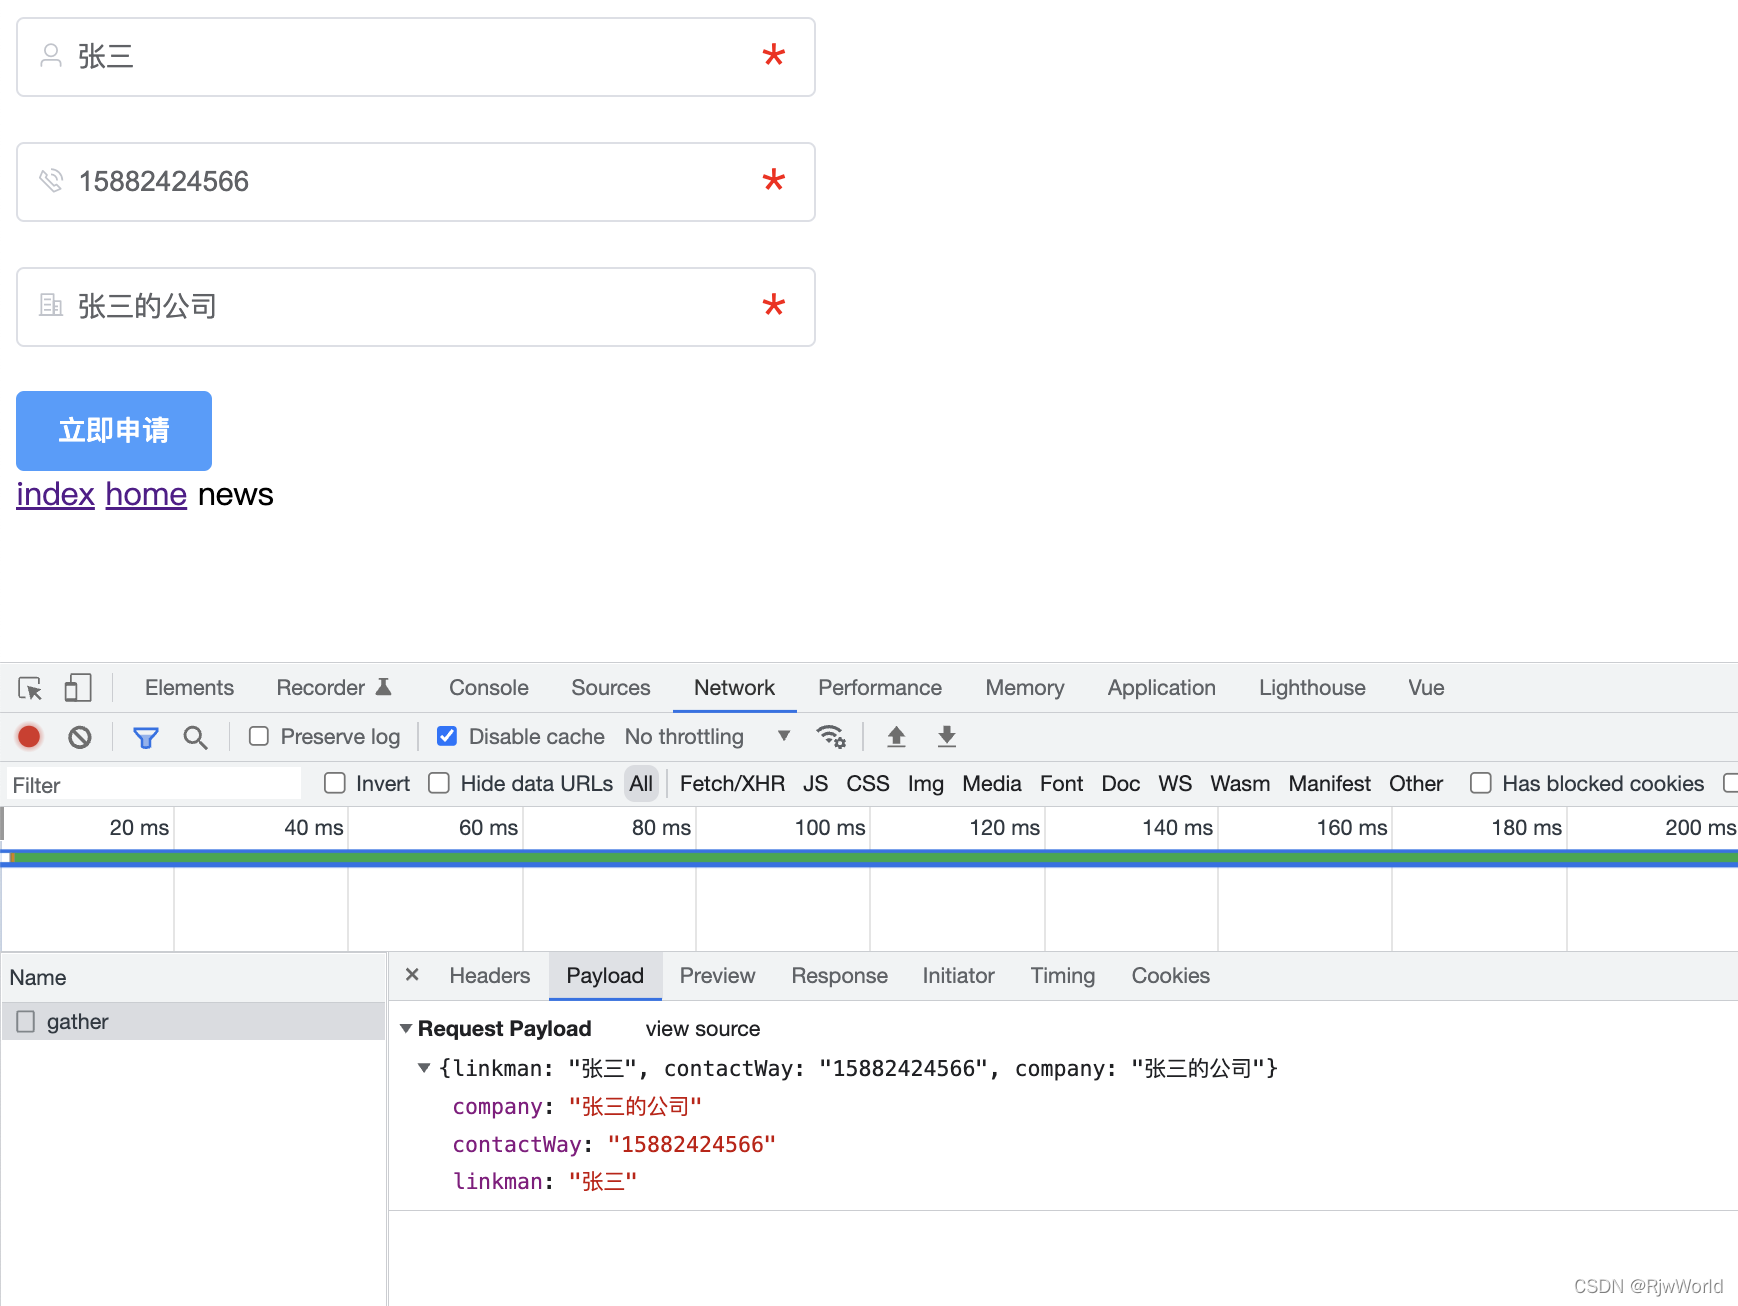
可以看到接口已经请求成功!
这是常规的请求接口的方式,nuxt是服务端渲染应用框架,可以在服务端请求数据,然后在页面中展示
Nuxt.js 扩展了 Vue.js,增加了一个叫 asyncData 的方法,使得我们可以在设置组件的数据之前能异步获取或处理数据。
asyncData方法会在组件(限于页面组件)每次加载之前被调用。它可以在服务端或路由更新之前被调用。在这个方法被调用的时候,第一个参数被设定为当前页面的上下文对象,你可以利用 asyncData方法来获取数据,Nuxt.js 会将 asyncData 返回的数据融合组件 data 方法返回的数据一并返回给当前组件。
export default {
  async asyncData({ params }) {
    const { data } = await axios.get(`https://my-api/posts/${params.id}`)
    return { title: data.title }
  }
}
请求到数据之后可以直接使用
<template>
  <h1>{{ title }}</h1>
</template>
注意:由于asyncData方法是在组件 初始化 前被调用的,
所以在方法内是没有办法通过 this 来引用组件的实例对象。
七、nuxt Seo优化
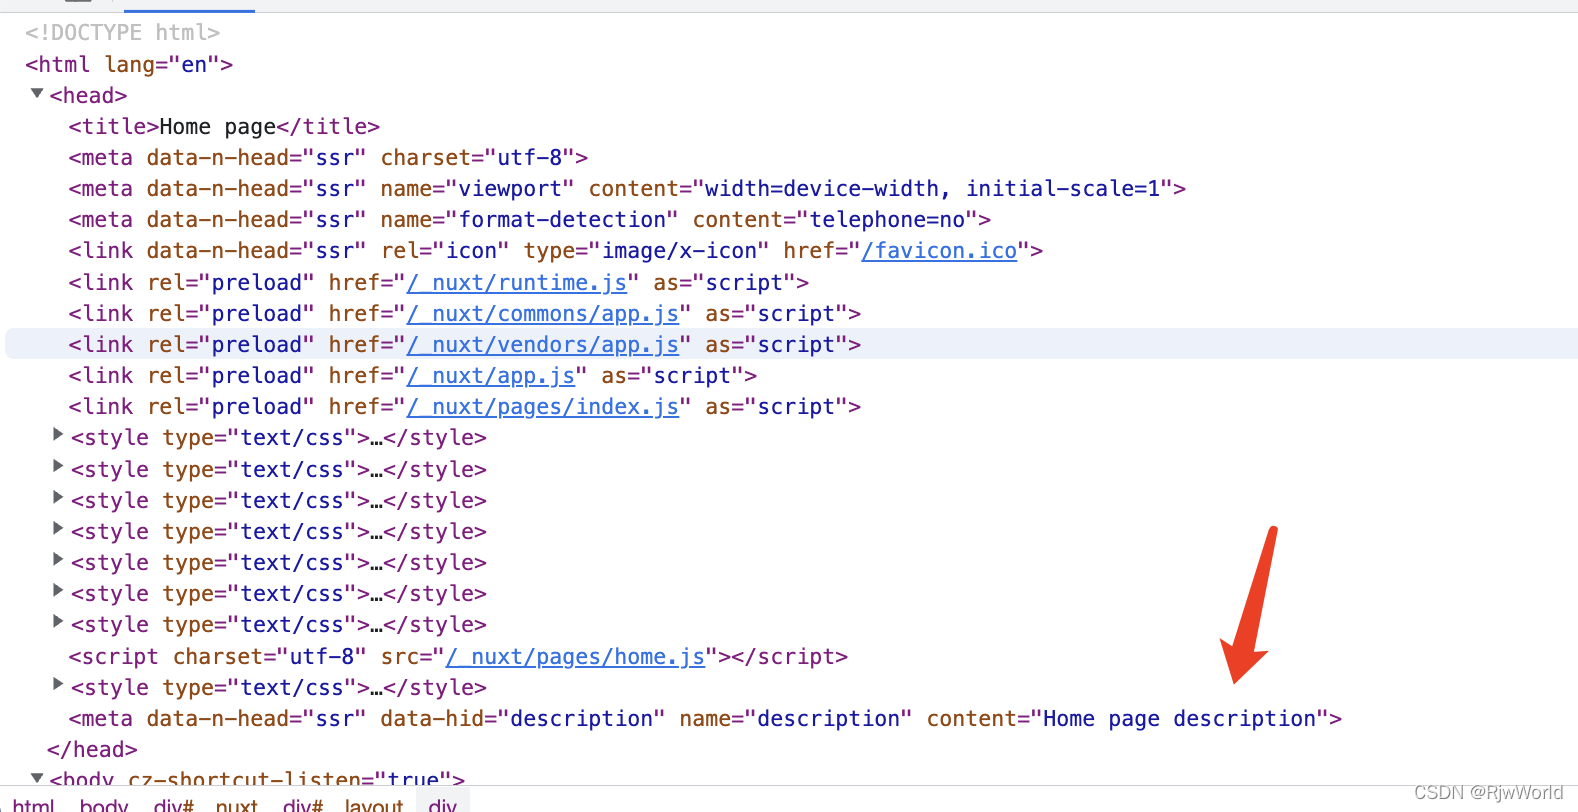
我们使用nuxt的最主要的目的还是seo优化,我们在nuxt.config.js中可以看到已经有了默认的head
head: {
    title: 'pc_web_new',
    htmlAttrs: {
      lang: 'en'
    },
    meta: [
      { charset: 'utf-8' },
      { name: 'viewport', content: 'width=device-width, initial-scale=1' },
      { hid: 'description', name: 'description', content: '' },
      { name: 'format-detection', content: 'telephone=no' }
    ],
    link: [
      { rel: 'icon', type: 'image/x-icon', href: '/favicon.ico' }
    ]
  },
这是整体的,如果我们单个页面想做seo优化怎么办
在我们pages文件下就是我们所有的页面,在单个页面中可以再写一份
<script>
export default {
  head: {
    title: 'Home page',
    meta: [
      { hid: 'description', name: 'description', content: 'Home page description' }
    ]
  },
  data() {
    return {
      bodySwiperOption: {
        // direction: 'vertical',
        slidesPerView: 3,
        spaceBetween: 0,
        mousewheel: true
      }
    }
  }
}
</script>
八、nuxt的部署
nuxt提供了ssr部署和静态部署两种方式
- nuxt静态部署
nuxt.config.js中
export default {
  target: 'static',
  .........
}
执行npm run generate会在项目中生成dist文件
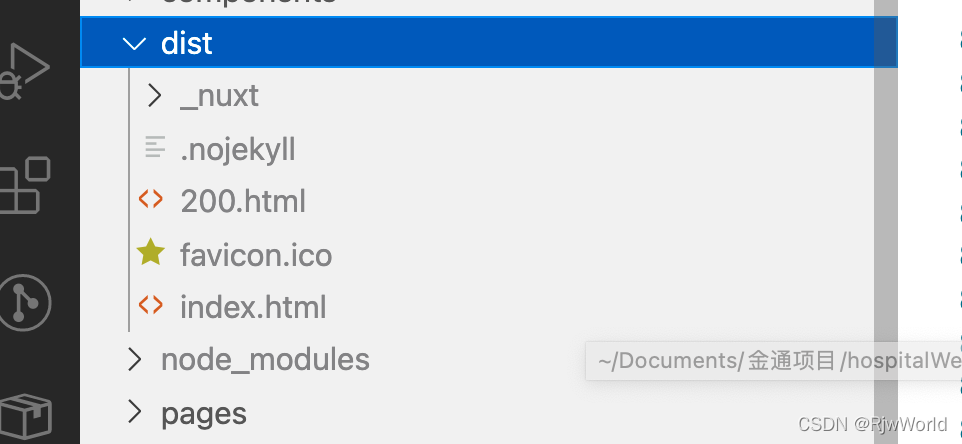
然后咱们连接服务器将文件放在随意的位置,我这里给dist文件重新改了个名字hostpitalWebsite,这个无所谓可以忽略这个改动

然后我们找到服务器中nginx配置的地方 nginx.conf文件
增加一个server
server {
	listen       3000;
	server_name  localhost;
	location / {
	  root   /home/front-web/hospitalWebsite/;
	  index  index.html index.htm;
	}
	location /apiIntroduce/ {
		 proxy_pass http://172.16.xx.99:33099/;
	}
}
改好了之后重启nginx
/usr/local/nginx/sbin/nginx -c /usr/local/nginx/conf/nginx.conf
/usr/local/nginx/sbin/nginx -s reload
然后打开我们nginx上配置的ip
已经可以看到了
- nuxt ssr部署
nuxt.config.js中
export default {
 target: 'server',
 server: {
   host: '0.0.0.0',
   port: 3001
 },
 .........
}
执行npm run build
然后打包之后将.nuxt、nuxt.config.js、package.json、static文件压缩放到服务器然后解压
在目标文件中
npm install 安装依赖
然后 npm run start
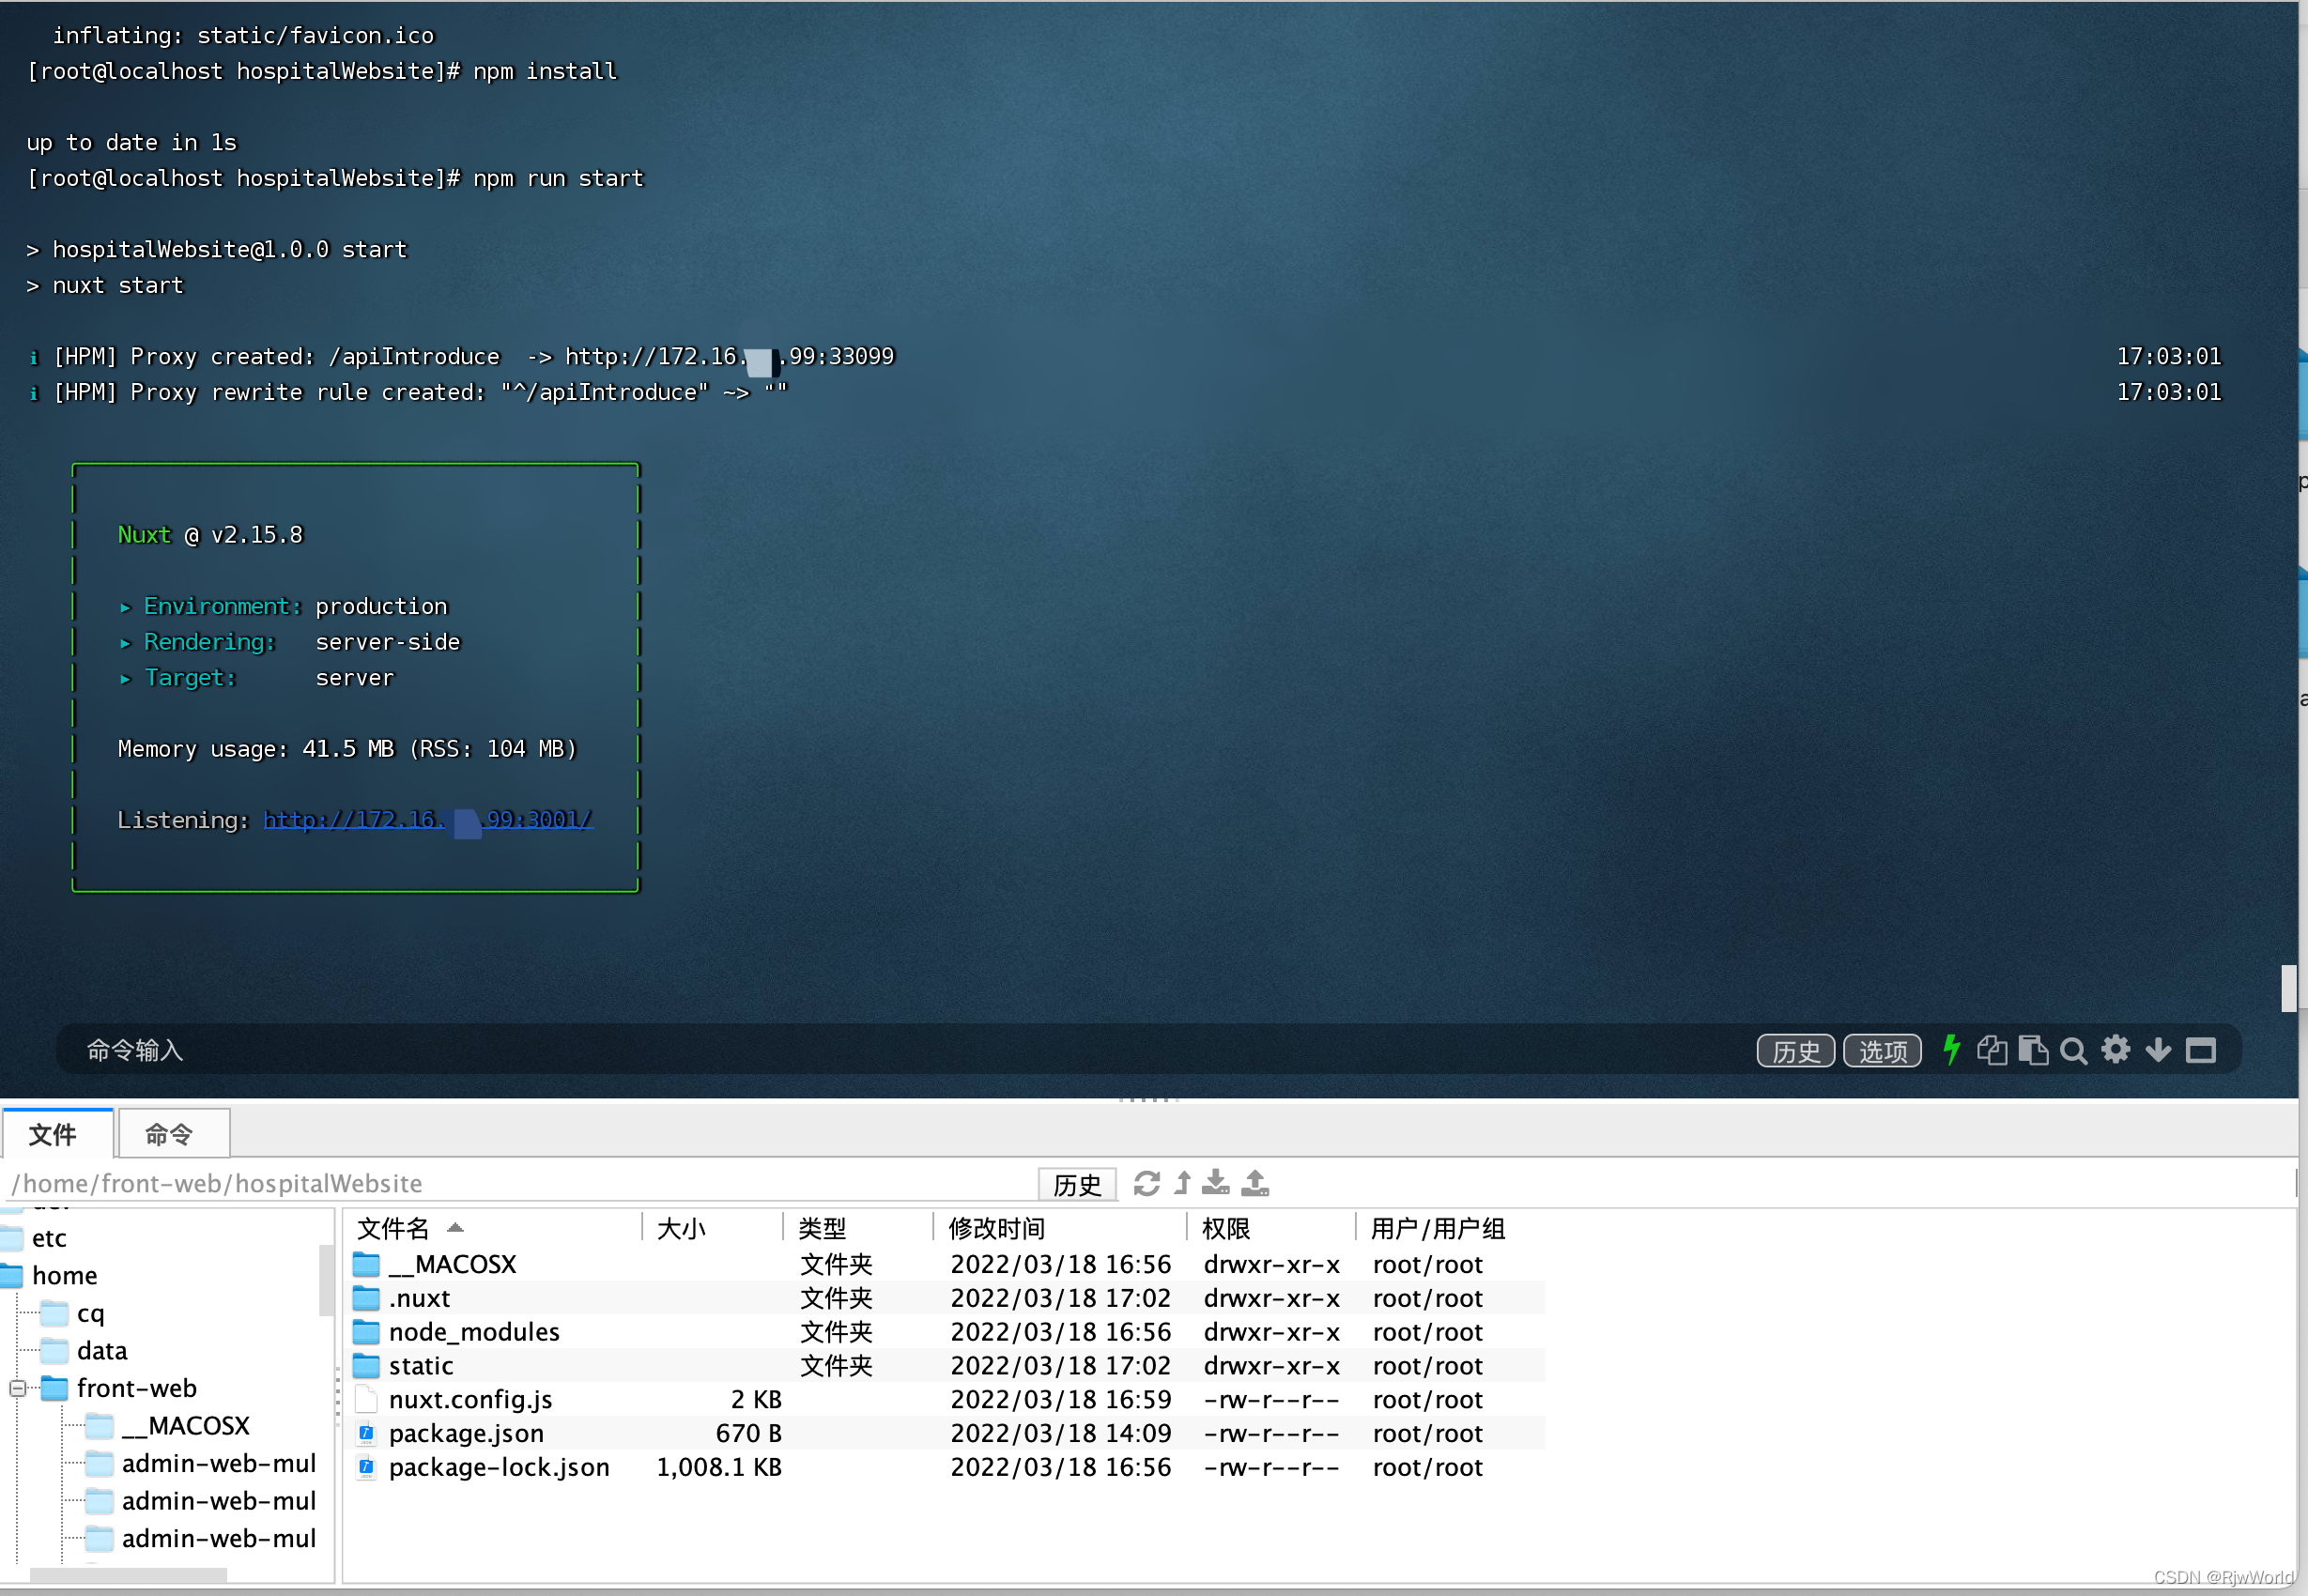

可以看到ssr部署也可以访问了
------至此 结束--------


 3358
3358


 被折叠的 条评论
为什么被折叠?
被折叠的 条评论
为什么被折叠?
 到【灌水乐园】发言


