


目录
IOC容器
Spring容器是Spring框架的核心。
IOC 容器具有依赖注入功能的容器,它可以创建对象,IOC 容器负责实例化、定位、配置应用程序中的对象及建立这些对象间的依赖。
Spring 提供了以下两种不同类型的容器
- Spring BeanFactory 容器
- Spring ApplicationContext 容器
ApplicationContext 容器包括 BeanFactory 容器的所有功能,所以通常不建议使用BeanFactory。BeanFactory 仍然可以用于轻量级的应用程序,如移动设备或基于 applet 的应用程序,其中它的数据量和速度是显著。
Spring 的 BeanFactory 容器
这是一个最简单的容器,它主要的功能是为依赖注入 (DI) 提供支持,这个容器接口在 org.springframework.beans.factory.BeanFactory中被定义。
实例:这种方式已不推荐使用,知悉即可
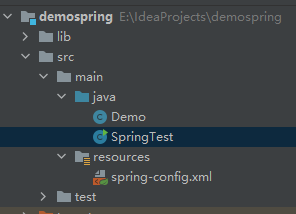
public class SpringTest {
    public static void main(String[] args){
        XmlBeanFactory xmlBeanFactory = new XmlBeanFactory(new ClassPathResource("spring-config.xml"));
        Demo demo = (Demo) xmlBeanFactory.getBean("demo");
        demo.getMessage();
    }
}
public class Demo {
private String message;
public void setMessage(String message){
this.message = message;
}
public void getMessage(){
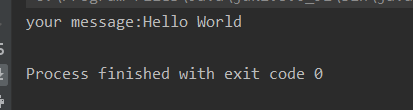
System.out.println("your message:"+message);
}
}
<?xml version="1.0" encoding="UTF-8"?>
<beans xmlns="http://www.springframework.org/schema/beans"
       xmlns:xsi="http://www.w3.org/2001/XMLSchema-instance"
       xsi:schemaLocation="http://www.springframework.org/schema/beans http://www.springframework.org/schema/beans/spring-beans.xsd">

    <bean id="demo" class="Demo">
        <property name="message" value="Hello World"></property>
    </bean>
</beans>
运行:
Spring ApplicationContext 容器
- ApplicationContext 包含 BeanFactory 所有的功能
- Application Context 是 BeanFactory 的子接口,也被称为 Spring 上下文。
- 这个容器在 org.springframework.context.ApplicationContext interface 接口中定义。
最常被使用的 ApplicationContext 接口实现:
- FileSystemXmlApplicationContext:该容器从 XML 文件中加载已被定义的 bean。在这里,你需要提供给构造器 XML 文件的完整路径。
- ClassPathXmlApplicationContext:该容器从 XML 文件中加载已被定义的 bean。在这里,你不需要提供 XML 文件的完整路径,只需正确配置 CLASSPATH 环境变量即可,因为,容器会从 CLASSPATH 中搜索 bean 配置文件。
- WebXmlApplicationContext:该容器会在一个 web 应用程序的范围内加载在 XML 文件中已被定义的 bean。
实例
FileSystemXmlApplicationContext
public class Demo {

    private String message;
    public void setMessage(String message){
        this.message = message;
    }

    public void getMessage(){
        System.out.println("your message:"+message);
    }
}
public class SpringTest {
    public static void main(String[] args){
        ApplicationContext context = new FileSystemXmlApplicationContext
            ("C:/Users/ZARA/workspace/HelloSpring/src/Beans.xml");
        Demo demo = (Demo) xmlBeanFactory.getBean("demo");
        demo.getMessage();
    }
}
<?xml version="1.0" encoding="UTF-8"?>
<beans xmlns="http://www.springframework.org/schema/beans"
       xmlns:xsi="http://www.w3.org/2001/XMLSchema-instance"
       xsi:schemaLocation="http://www.springframework.org/schema/beans http://www.springframework.org/schema/beans/spring-beans.xsd">

    <bean id="demo" class="Demo">
        <property name="message" value="Hello World"></property>
    </bean>
</beans>
ClassPathXmlApplicationContext
public class SpringTest {
    public static void main(String[] args){
        ApplicationContext applicationContext = new ClassPathXmlApplicationContext("spring-config.xml");
        Demo demo = (Demo) applicationContext.getBean("demo");
        demo.getMessage();
    }
}
Spring Bean
定义
bean 是一个被实例化,组装,并通过 Spring IoC 容器所管理的对象
bean 是由用容器提供的配置元数据创建的,例如,在 XML 的表单中的 定义
<bean id="demo" class="Demo">
        <property name="message" value="Hello World"></property>
    </bean>
Bean 与 Spring 容器的关系

Spring 配置元数据
Spring IoC 容器完全由实际编写的配置元数据的格式解耦。有下面三个重要的方法把配置元数据提供给 Spring 容器:(在(五)基于注解的配置中详解)
- 基于 XML 的配置文件
<bean id="demo" class="Demo">
        <property name="message" value="Hello World"></property>
    </bean>
- 基于注解的配置:需要先开启自动装配
<?xml version="1.0" encoding="UTF-8"?>

<beans xmlns="http://www.springframework.org/schema/beans"
    xmlns:xsi="http://www.w3.org/2001/XMLSchema-instance"
    xmlns:context="http://www.springframework.org/schema/context"
    xsi:schemaLocation="http://www.springframework.org/schema/beans
    http://www.springframework.org/schema/beans/spring-beans-3.0.xsd
    http://www.springframework.org/schema/context
    http://www.springframework.org/schema/context/spring-context-3.0.xsd">
   <!-- 开启自动装配 -->
   <context:annotation-config/>
   <!-- bean definitions go here -->

</beans>
主要的注解有:@Required(已不推荐使用) @Autowired @Qualifier
- 基于 Java 的配置
@Configuration 和 @Bean 注解
作用域
Spring 框架支持以下五个作用域,分别为 singleton、prototype、request、session 和 global session
注意,如果你使用 web-aware ApplicationContext 时,其中三个是可用的。
singleton 作用域:
singleton 是默认的作用域,也就是说,当定义 Bean 时,如果没有指定作用域配置项,则 Bean 的作用域被默认为 singleton。
例:
package com.tutorialspoint;
public class HelloWorld {
   private String message;
   public void setMessage(String message){
      this.message  = message;
   }
   public void getMessage(){
      System.out.println("Your Message : " + message);
   }
}
package com.tutorialspoint;
import org.springframework.context.ApplicationContext;
import org.springframework.context.support.ClassPathXmlApplicationContext;
public class MainApp {
   public static void main(String[] args) {
      ApplicationContext context = new ClassPathXmlApplicationContext("Beans.xml");
      HelloWorld objA = (HelloWorld) context.getBean("helloWorld");
      objA.setMessage("I'm object A");
      objA.getMessage();
      HelloWorld objB = (HelloWorld) context.getBean("helloWorld");
      objB.getMessage();
   }
}
Beans.xml
<?xml version="1.0" encoding="UTF-8"?>

<beans xmlns="http://www.springframework.org/schema/beans"
    xmlns:xsi="http://www.w3.org/2001/XMLSchema-instance"
    xsi:schemaLocation="http://www.springframework.org/schema/beans
    http://www.springframework.org/schema/beans/spring-beans-3.0.xsd">

   <bean id="helloWorld" class="com.tutorialspoint.HelloWorld"
      scope="singleton">
   </bean>

</beans>
运行输出
Your Message : I'm object A
Your Message : I'm object A
prototype 作用域
当一个 bean 的作用域为 Prototype,表示一个 bean 定义对应多个对象实例。Prototype 作用域的 bean 会导致在每次对该 bean 请求(将其注入到另一个 bean 中,或者以程序的方式调用容器的 getBean() 方法)时都会创建一个新的 bean 实例。
例:
<?xml version="1.0" encoding="UTF-8"?>

<beans xmlns="http://www.springframework.org/schema/beans"
    xmlns:xsi="http://www.w3.org/2001/XMLSchema-instance"
    xsi:schemaLocation="http://www.springframework.org/schema/beans
    http://www.springframework.org/schema/beans/spring-beans-3.0.xsd">

   <bean id="helloWorld" class="com.tutorialspoint.HelloWorld"
      scope="prototype">
   </bean>

</beans>
运行输出:
Your Message : I'm object A
Your Message : null
生命周期
理解 Spring bean 的生命周期很容易。当一个 bean 被实例化时,它可能需要执行一些初始化使它转换成可用状态。同样,当 bean 不再需要,并且从容器中移除时,可能需要做一些清除工作。
Bean的生命周期可以表达为:Bean的定义——Bean的初始化——Bean的使用——Bean的销毁
初始化回调
<bean id="exampleBean"
         class="examples.ExampleBean" init-method="init"/>
销毁回调
<bean id="exampleBean"
         class="examples.ExampleBean" destroy-method="destroy"/>
后置处理器
Bean 后置处理器允许在调用初始化方法前后对 Bean 进行额外的处理。
主要通过BeanPostProcessor 接口定义回调方法,例:
package com.tutorialspoint;
public class HelloWorld {
   private String message;
   public void setMessage(String message){
      this.message  = message;
   }
   public void getMessage(){
      System.out.println("Your Message : " + message);
   }
   public void init(){
      System.out.println("Bean is going through init.");
   }
   public void destroy(){
      System.out.println("Bean will destroy now.");
   }
}
实现 BeanPostProcessor
package com.tutorialspoint;
import org.springframework.beans.factory.config.BeanPostProcessor;
import org.springframework.beans.BeansException;
public class InitHelloWorld implements BeanPostProcessor {
   public Object postProcessBeforeInitialization(Object bean, String beanName) throws BeansException {
      System.out.println("BeforeInitialization : " + beanName);
      return bean;  // you can return any other object as well
   }
   public Object postProcessAfterInitialization(Object bean, String beanName) throws BeansException {
      System.out.println("AfterInitialization : " + beanName);
      return bean;  // you can return any other object as well
   }
}
下面是 MainApp.java 文件的内容。在这里,你需要注册一个在 AbstractApplicationContext 类中声明的关闭 hook 的 registerShutdownHook() 方法。它将确保正常关闭,并且调用相关的 destroy 方法。
package com.tutorialspoint;
import org.springframework.context.support.AbstractApplicationContext;
import org.springframework.context.support.ClassPathXmlApplicationContext;
public class MainApp {
   public static void main(String[] args) {
      AbstractApplicationContext context = new ClassPathXmlApplicationContext("Beans.xml");
      HelloWorld obj = (HelloWorld) context.getBean("helloWorld");
      obj.getMessage();
      context.registerShutdownHook();
   }
}
下面是 init 和 destroy 方法需要的配置文件 Beans.xml 文件:
<?xml version="1.0" encoding="UTF-8"?>
<beans xmlns="http://www.springframework.org/schema/beans"
xmlns:xsi="http://www.w3.org/2001/XMLSchema-instance"
xsi:schemaLocation="http://www.springframework.org/schema/beans
http://www.springframework.org/schema/beans/spring-beans-3.0.xsd">
<bean id="helloWorld" class="com.tutorialspoint.HelloWorld"
init-method="init" destroy-method="destroy">
<property name="message" value="Hello World!"/>
</bean>
<bean class="com.tutorialspoint.InitHelloWorld" />
</beans>
输出:
BeforeInitialization : helloWorld
Bean is going through init.
AfterInitialization : helloWorld
Your Message : Hello World!
Bean will destroy now.
定义继承
子 bean 的定义继承父定义的配置数据。子定义可以根据需要重写一些值,或者添加其他值
使用 parent 属性把 “helloIndia” bean 定义为 “helloWorld” bean 的孩子
<?xml version="1.0" encoding="UTF-8"?>

<beans xmlns="http://www.springframework.org/schema/beans"
    xmlns:xsi="http://www.w3.org/2001/XMLSchema-instance"
    xsi:schemaLocation="http://www.springframework.org/schema/beans
    http://www.springframework.org/schema/beans/spring-beans-3.0.xsd">

   <bean id="helloWorld" class="com.tutorialspoint.HelloWorld">
      <property name="message1" value="Hello World!"/>
      <property name="message2" value="Hello Second World!"/>
   </bean>

   <bean id="helloIndia" class="com.tutorialspoint.HelloIndia" parent="helloWorld">
      <property name="message1" value="Hello India!"/>
      <property name="message3" value="Namaste India!"/>
   </bean>

</beans>
例
package com.tutorialspoint;
public class HelloWorld {
   private String message1;
   private String message2;
   public void setMessage1(String message){
      this.message1  = message;
   }
   public void setMessage2(String message){
      this.message2  = message;
   }
   public void getMessage1(){
      System.out.println("World Message1 : " + message1);
   }
   public void getMessage2(){
      System.out.println("World Message2 : " + message2);
   }
}
package com.tutorialspoint;

public class HelloIndia {
   private String message1;
   private String message2;
   private String message3;

   public void setMessage1(String message){
      this.message1  = message;
   }

   public void setMessage2(String message){
      this.message2  = message;
   }

   public void setMessage3(String message){
      this.message3  = message;
   }

   public void getMessage1(){
      System.out.println("India Message1 : " + message1);
   }

   public void getMessage2(){
      System.out.println("India Message2 : " + message2);
   }

   public void getMessage3(){
      System.out.println("India Message3 : " + message3);
   }
package com.tutorialspoint;

import org.springframework.context.ApplicationContext;
import org.springframework.context.support.ClassPathXmlApplicationContext;

public class MainApp {
   public static void main(String[] args) {
      ApplicationContext context = new ClassPathXmlApplicationContext("Beans.xml");

      HelloWorld objA = (HelloWorld) context.getBean("helloWorld");

      objA.getMessage1();
      objA.getMessage2();

      HelloIndia objB = (HelloIndia) context.getBean("helloIndia");
      objB.getMessage1();
      objB.getMessage2();
      objB.getMessage3();
   }
}
运行
World Message1 : Hello World!
World Message2 : Hello Second World!
India Message1 : Hello India!
India Message2 : Hello Second World!
India Message3 : Namaste India!
在这里你可以观察到,我们创建 “helloIndia” bean 的同时并没有传递 message2,但是由于 Bean 定义的继承,所以它传递了 message2。


 463
463


 被折叠的 条评论
为什么被折叠?
被折叠的 条评论
为什么被折叠?
 到【灌水乐园】发言


