


springboot中的shiro简单使用
1.首先pom文件中的依赖
    <dependencies>
        <dependency>
            <groupId>org.springframework.boot</groupId>
            <artifactId>spring-boot-starter-web</artifactId>
        </dependency>
<!--thymeleaf-->
        <dependency>
            <groupId>org.springframework.boot</groupId>
            <artifactId>spring-boot-starter-thymeleaf</artifactId>
            <version>2.4.4</version>
        </dependency>
<!--        shiro整合springboot-->
        <dependency>
            <groupId>org.apache.shiro</groupId>
            <artifactId>shiro-spring</artifactId>
            <version>1.7.1</version>
        </dependency>

        <dependency>
            <groupId>org.projectlombok</groupId>
            <artifactId>lombok</artifactId>
        </dependency>


        <dependency>
            <groupId>org.mybatis.spring.boot</groupId>
            <artifactId>mybatis-spring-boot-starter</artifactId>
            <version>2.1.4</version>
        </dependency>

        <dependency>
            <groupId>mysql</groupId>
            <artifactId>mysql-connector-java</artifactId>
        </dependency>

        <dependency>
            <groupId>com.alibaba</groupId>
            <artifactId>druid</artifactId>
            <version>1.2.5</version>
        </dependency>

        <dependency>
            <groupId>org.springframework.boot</groupId>
            <artifactId>spring-boot-starter-test</artifactId>
            <scope>test</scope>
            <exclusions>
                <exclusion>
                    <groupId>org.junit.vintage</groupId>
                    <artifactId>junit-vintage-engine</artifactId>
                </exclusion>
            </exclusions>
        </dependency>

    </dependencies>
2.application.properties文件
# 应用名称
spring.application.name=shiro
# 应用服务 WEB 访问端口
server.port=8080

spring.datasource.driver-class-name=com.mysql.cj.jdbc.Driver
spring.datasource.url=jdbc:mysql://127.0.0.1:3306/test?serverTimezone=CTT&useUnicode=true&characterEncoding=utf-8&allowMultiQueries=true
spring.datasource.username=root
spring.datasource.password=123456
spring.datasource.type=com.alibaba.druid.pool.DruidDataSource
spring.thymeleaf.cache=false
#整合mybatis
mybatis.type-aliases-package=com.cgx.shiro.pojo
mybatis.mapper-locations=classpath:mapper/*.xml

spring.datasource.initialSize=5
spring.datasource.maxActive=20
spring.datasource.minIdle=5
spring.datasource.maxWait=60000
spring.datasource.timeBetweenEvictionRunsMillis=60000
spring.datasource.minEvictableIdleTimeMillis=300000
spring.datasource.validationQuery=SELECT 1 FROM DUAL
spring.datasource.testWhileIdle=true
spring.datasource.testOnBorrow=false
spring.datasource.testOnReturn=false
spring.datasource.poolPreparedStatements=true

spring.datasource.filters=stat,wall,log4j
spring.datasource.maxPoolPreparedStatementPerConnectionSize=20
spring.datasource.useGlobalDataSourceStat=true
spring.datasource.connectionProperties=druid.stat.mergeSql=true;druid.stat.slowSqlMillis=500
3.前端文件

add.html
<!DOCTYPE html>
<html lang="en">
<head>
    <meta charset="UTF-8">
    <title>add</title>
</head>
<body>
<h1>add</h1>
</body>
</html>
login.html
<!DOCTYPE html>
<html lang="en" xmlns:th="http://www.thymeleaf.org" >
<head>
    <meta charset="UTF-8">
    <title>登录</title>
    <link rel="stylesheet" th:href="@{/css/layui.css}"/>
    <link rel="stylesheet" th:href="@{/login/login.css}" />
</head>
<body>
<h1>登录</h1>
<hr>
<p th:text="${msg}" style="color: red"></p>
<p th:text="${msg}" style="color: red"></p>
<form th:action="@{/login}">
    <p>username <input type="text" name="username"></p>
    <p>password <input type="text" name="password"></p>
    <button type="submit">登录</button>
</form>
</body>
</html>
<!DOCTYPE html>
<html lang="en">
<head>
    <meta charset="UTF-8">
    <title>update</title>
</head>
<body>
<h1>update</h1>
</body>
</html>
<!DOCTYPE html>
<html lang="en" xmlns:th="http://www.thymeleaf.org" >
<head>
    <meta charset="UTF-8">
    <title>首页</title>
    <meta name="renderer" content="webkit">
    <meta http-equiv="X-UA-Compatible" content="IE=edge,chrome=1">
    <meta name="viewport" content="width=device-width, initial-scale=1, maximum-scale=1">
    <link rel="stylesheet" href="//res.layui.com/layui/dist/css/layui.css"  media="all">
</head>
<body>
        <h1>首页</h1>
        <p th:text="${msg}"></p>
<hr>
<a th:href="@{/user/add}">add</a> | <a th:href="@{/user/update}">update</a>
</body>
</html>
准备工作就绪
4.shiro的配置
项目结构如下

在config中对shiro进行配置,新建ShiroUserRealm和ShiroConfig
ShiroUserRealm如下,重写两个方法,分别是授权和验证
public class ShireUserRealm extends AuthorizingRealm {
    @Autowired
    UserService userService;
    //授权
    @Override
    protected AuthorizationInfo doGetAuthorizationInfo(PrincipalCollection principalCollection) {
        System.out.println("执行了授权");
        return null;
    }
    //认证
    @Override
    protected AuthenticationInfo doGetAuthenticationInfo(AuthenticationToken authenticationToken) throws AuthenticationException {
        System.out.println("执行了认证");
        UsernamePasswordToken Token = (UsernamePasswordToken) authenticationToken;
        User user = userService.queryNameById(Token.getUsername());
        if(user==null){//没有这个人
            return null;
        }
        return new SimpleAuthenticationInfo("",user.getPwd(),"");
    }
}
ShiroConfig如下
@Configuration
public class ShiroConfig {
    //第三步getshiroFilterFactoryBean
    @Bean
    public ShiroFilterFactoryBean getshiroFilterFactoryBean(@Qualifier("SecurityManager") DefaultWebSecurityManager defaultWebSecurityManager){
        ShiroFilterFactoryBean Bean = new ShiroFilterFactoryBean();
        //设置安全管理器
        Bean.setSecurityManager(defaultWebSecurityManager);
        //添加shiro内置的拦截器
        Map<String,String> filter = new LinkedHashMap<>();
        /**
         * 添加shiro内置过滤器
         *
         * anno 无需认证就可以用
         * authc 必须认证了才可以用
         * user 必须有记住我才可以使用
         * perms 拥有某个资源的权限
         * role 拥有某个角色权限才可以访问
         */
        filter.put("/user/add","authc");
        filter.put("/user/update","authc");
        Bean.setFilterChainDefinitionMap(filter);
        Bean.setLoginUrl("/togologin");
        return Bean;
    }
    //第二步getdefaultWebSecurityManager
    @Bean(name = "SecurityManager")
    public DefaultWebSecurityManager getdefaultWebSecurityManager(@Qualifier("shireUserRealm") ShireUserRealm shireUserRealm){
        DefaultWebSecurityManager SecurityManager = new DefaultWebSecurityManager();
        //关联Userealm
        SecurityManager.setRealm(shireUserRealm());
        return SecurityManager;
    }
    //第一步,创建自己的UserRealm
    @Bean
    public ShireUserRealm shireUserRealm(){
        return new ShireUserRealm();
    }
}
5.访问数据库
数据库如下

新建pojo包,包下新建User类
@Data
@AllArgsConstructor
@NoArgsConstructor
public class User {
	//和user表中的数据对应
    private int id;
    private String name;
    private String pwd;
}
新建mapper包,包下新建USerMapper接口
@Repository
@Mapper
public interface UserMapper {
    public User queryNameById(String name);
}
然后在resource路径下新建mapper文件夹,文件夹下新建UserMapper.xml文件
<?xml version="1.0" encoding="UTF-8" ?>
<!DOCTYPE mapper
        PUBLIC "-//mybatis.org//DTD Mapper 3.0//EN"
        "http://mybatis.org/dtd/mybatis-3-mapper.dtd">
<mapper namespace="!!!!注意这里是自己的mapper包路径">
    <select id="queryNameById" parameterType="String" resultType="User">
        select * from test.user where name = #{name}
    </select>
</mapper>
新建Service类,新建UserService接口和UserService类去实现接口
UserService接口
public interface UserService {
    public User queryNameById(String name);
}
UserService类
@Service
public class UserService implements com.cgx.shiro.UserService.UserService {

    @Autowired
    UserMapper userMapper;
    @Override
    public User queryNameById(String name) {
        return userMapper.queryNameById(name);
    }
}
之后再test中进行测试
@SpringBootTest
class ShiroApplicationTests {

    @Autowired
    UserService userService;
    @Test
    void contextLoads() {
        System.out.println(userService.queryNameById("admin"));
    }

}
测试结果如下

测试成功,
6.添加映射
@Controller
public class controller {
    //首页映射
    @RequestMapping({"/","index"})
    public String tologin(Model model){
        model.addAttribute("msg","hello,this first shiro");
        return "index";
    }
    //add界面映射
    @RequestMapping("/user/add")
    public String add(){
        return "user/add";
    }
    //update界面映射
    @RequestMapping("/user/update")
    public String update(){
        return "user/update";
    }
    //登录界面映射
    @RequestMapping("/togologin")
    public String togologin(){
        return "user/login";
    }
    @RequestMapping("/login")
    public String login(String username, String password, Model model, HttpSession session){
        //获取用户数据
        Subject subject = SecurityUtils.getSubject();
        //封装用户数据
        UsernamePasswordToken usernamePasswordToken = new UsernamePasswordToken(username,password);
        try{
            subject.login(usernamePasswordToken);
            return "index";
        }catch (UnknownAccountException e){
            model.addAttribute("msg","用户名错误");
            return "user/login";
        }catch (IncorrectCredentialsException e){
            model.addAttribute("msg","密码错误");
            return "user/login";
        }
    }
}
项目代码到此为止
7.测试
访问到首页之后如果点击add或者update的话,会进行登录验证

但是第一次可能回报错,刷新即可(具体原因不知道,望大佬指正),
当账号和密码不正确的时候会报相应的错误信息

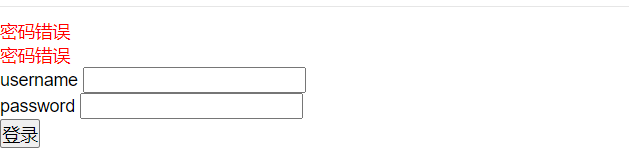
密码正确即可进行查看


 8315
8315


 被折叠的 条评论
为什么被折叠?
被折叠的 条评论
为什么被折叠?
 到【灌水乐园】发言


