


nginx虚拟主机
虚拟主机有三种:基于域名的虚拟主机,基于IP地址的虚拟主机,基于端口的虚拟主机
做虚拟主机的目的是:在同一台服务器上,访问不同的域名、IP地址或端口,能够访问到不同的页面。
实验环境:
nginx-1.16.1
192.168.91.131 nginx
实验步骤如下:
基础环境:
1、关闭selinux和防火墙
2、安装nginx环境(可源码编译,可yum安装,在本实验我们选择yum安装)
[root@localhost ~]# yum install yum-utils
[root@localhost ~]# vim /etc/yum.repos.d/nginx.repo   #配置nginx的yum源
[nginx-stable]
name=nginx stable repo
baseurl=http://nginx.org/packages/centos/$releasever/$basearch/
gpgcheck=1
enabled=1
gpgkey=https://nginx.org/keys/nginx_signing.key
module_hotfixes=true

[nginx-mainline]
name=nginx mainline repo
baseurl=http://nginx.org/packages/mainline/centos/$releasever/$basearch/
gpgcheck=1
enabled=0
gpgkey=https://nginx.org/keys/nginx_signing.key
module_hotfixes=true

[root@localhost ~]# yum -y install nginx
[root@localhost ~]# systemctl start nginx
[root@localhost ~]# systemctl enable nginx
3、测试基础环境

实验一:基于域名的虚拟主机
1、修改配置文件
[root@localhost ~]# cd/etc/nginx/conf.d/
[root@localhost ~]# mv default.conf default.conf.bak #备份原文件
[root@localhost ~]# vim default.conf
server {
    listen       80;
    server_name  www.nginx1.com;
    location / {
        root   /web1/;
        index  index.html index.htm;
    }
}
server {
    listen       80;
    server_name  www.nginx2.com;
    location / {
        root   /web2/;
        index  index.html index.htm;
    }
}
2、创建目录写入测试页面
[root@localhost conf.d]# mkdir /web{1..2}
[root@localhost conf.d]# vim /web1/index.html
<html>
  <h1>i am nginx1</h1>
  <h2>www.nginx1.com</h2>
</html>

[root@localhost conf.d]# vim /web1/index.html
<html>
  <h1>i am nginx2</h1>
  <h2>www.nginx2.com</h2>
</html>

[root@localhost conf.d]# nginx -s reload
3、测试
(1)方法一:直接使用curl查看
[root@localhost ~]# curl www.nginx1.com
<html>
  <h1>i am nginx1</h1>
  <h2>www.nginx1.com</h2>
</html>
~
[root@localhost ~]# curl www.nginx2.com
<html>
  <h1>i am nginx2</h1>
  <h2>www.nginx2.com</h2>
</html>
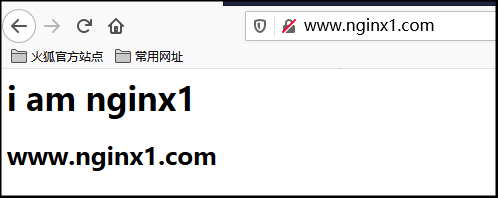
(2)在浏览器查看
需要在C:\Windows\System32\drivers\etc\hosts 文件中添加两行
192.168.91.131    www.nginx1.com
192.168.91.131    www.nginx2.com
访问不同域名得到不同的页面。

实验二:基于IP地址的虚拟主机
在实验一的基础上做,修改配置文件
[root@localhost ~]# ifconfig ens33:1 192.168.91.231/24
[root@localhost ~]# ifconfig
ens33: flags=4163<UP,BROADCAST,RUNNING,MULTICAST>  mtu 1500
        inet 192.168.91.131  netmask 255.255.255.0  broadcast 192.168.91.255

ens33:1: flags=4163<UP,BROADCAST,RUNNING,MULTICAST>  mtu 1500
        inet 192.168.91.231  netmask 255.255.255.0  broadcast 192.168.91.255
[root@localhost ~]# vim /web1/index.html
server {
    listen       80;
    server_name  192.168.91.131;

    location / {
        root   /web1/;
        index  index.html index.htm;
    }
}
server {
    listen       80;
    server_name  192.168.91.231;

    location / {
        root   /web2/;
        index  index.html index.htm;
    }
}
[root@localhost ~]# nginx -s reload
测试


补充:
删除绑定的子网ip
[root@localhost ~]# ifconfig ens33:1 192.168.91.131/24 down
重启一下nginx
[root@localhost ~]# systemctl restart nginx
实验三:基于端口的虚拟主机
在实验三的基础上做,修改配置文件
[root@localhost ~]# vim /web1/index.html
server {
    listen       80;
    server_name  localhost;

    location / {
        root   /web1/;
        index  index.html index.htm;
    }
}
server {
    listen       81;
    server_name  localhost;

    location / {
        root   /web2/;
        index  index.html index.htm;
    }
}
[root@localhost ~]# nginx -s reload
测试


至此三种类型的虚拟主机配置完成。


 1万+
1万+


 被折叠的 条评论
为什么被折叠?
被折叠的 条评论
为什么被折叠?
 到【灌水乐园】发言


