


Nginx安装
(环境:Ubuntu 14.04)
安装法一
1. nginx依赖安装
- gzip模块 zlib库
下载地址:http://www.zlib.net/ 文件:zlib-1.2.8.tar.gz
$tar -xzvf zlib-1.2.8.tar.gz
$cd zlib-1.2.8
$./configure
$make
$sudo make install- rewrire模块 pcre库
下载地址: http://www.pcre.org/ 文件:pcre-8.38.tar.gz(推荐,10.10版本make不通过)
$tar -xzvf pcre-8.38.tar.gz
$cd pcre-8.38
$./configure
$make
$sudo make install- ssl模块 openssl库
下载地址: http://distfiles.macports.org/openssl/ 文件:openssl-1.0.1g.tar.gz(不推荐1.0.1c版本,各种问题)
$tar -xzvf openssl-1.0.1g.tar.gz
$cd openssl-1.0.1g
$./config
$make
$sudo make install
error:
POD document had syntax errors at /usr/bin/pod2man line 69. make
tips:
rm /usr/bin/pod2man2. nginx安装
$tar -zxvf nginx-1.8.0.tar.gz
$cd nginx.1.8.0
$groupadd -r nginx
$useradd -r -g nginx -s /bin/false -M nginx
$sudo ./configure --sbin-path=/usr/local/nginx/nginx --conf-path=/usr/local/nginx/nginx.conf --pid-path=/usr/local/nginx/nginx.pid --with-http_ssl_module --with-pcre=../pcre-8.38 --with-zlib=../zlib-1.2.8 --with-openssl=../openssl-1.0.1g --with-http_stub_status_module --user=nginx --group=nginx
$sudo make
$sudo make install
tips:
./configure参数中 –with-pcre=指向解压的源码目录
error:
make[2]: Entering directory `/usr/local/src/pcre2-10.10`
make[2]: *** No rule to make target `libpcre.la`. Stop.
make[2]: Leaving directory `/usr/local/src/pcre2-10.10`
make[1]: *** [../pcre2-10.10/.libs/libpcre.a] Error 2
make[1]: Leaving directory `/usr/local/src/nginx-1.8.0’
make: *** [build] Error 2
tips:
pcre2-10.10的问题,换个版本就解决了。具体为什么出问题我也不知道。
3. 安装成功
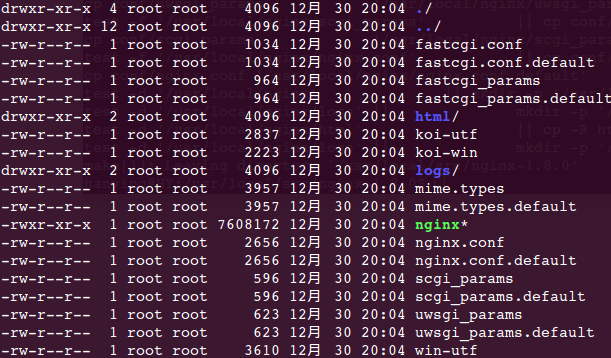
自动创建/usr/local/nginx
4. 手动启动
//不指定配置文件
sudo /usr/local/nginx/nginx
//指定配置文件
/usr/local/nginx/nginx -c /usr/local/nginx/nginx.conf
5. 停止服务
$sudo kill `cat /usr/local/nginx/nginx.pid`安装法二
$sudo apt-get install nginx- 配置文件 /etc/nginx/nginx.conf
- 程序文件目录 /usr/sbin/nginx
- 错误日志 /var/log/nginx/error.log
- 启动脚本 /etc/init.d/nginx
安装法三【官网】
$sudo -s
#nginx=stable
#add-apt-repository ppa:nginx/$nginx
#apt-get update
#apt-get install nginx
安装成功后 nginx已启动

手动开启服务
方式一
$/etc/init.d/nginx start开启失败时,检查/etc/init.d/nginx启动脚本
原脚本:
#! /bin/sh

### BEGIN INIT INFO
# Provides:          nginx
# Required-Start:    $all
# Required-Stop:     $all
# Default-Start:     2 3 4 5
# Default-Stop:      0 1 6
# Short-Description: starts the nginx web server
# Description:       starts nginx using start-stop-daemon
### END INIT INFO

PATH=/opt/nginx/sbin:/sbin:/bin:/usr/sbin:/usr/bin
DAEMON=/opt/nginx/sbin/nginx
NAME=nginx
DESC=nginx

test -x $DAEMON || exit 0

# Include nginx defaults if available
if [ -f /etc/default/nginx ] ; then
        . /etc/default/nginx
fi

set -e

case "$1" in
  start)
        echo -n "Starting $DESC: "
        start-stop-daemon --start --quiet --pidfile /opt/nginx/logs/$NAME.pid \
                --exec $DAEMON -- $DAEMON_OPTS
        echo "$NAME."
        ;;
  stop)
        echo -n "Stopping $DESC: "
        start-stop-daemon --stop --quiet --pidfile /opt/nginx/logs/$NAME.pid \
                --exec $DAEMON
        echo "$NAME."
        ;;
  restart|force-reload)
        echo -n "Restarting $DESC: "
        start-stop-daemon --stop --quiet --pidfile \
                /opt/nginx/logs/$NAME.pid --exec $DAEMON
        sleep 1
        start-stop-daemon --start --quiet --pidfile \
                /opt/nginx/logs/$NAME.pid --exec $DAEMON -- $DAEMON_OPTS
        echo "$NAME."
        ;;
  reload)
          echo -n "Reloading $DESC configuration: "
          start-stop-daemon --stop --signal HUP --quiet --pidfile     /opt/nginx/logs/$NAME.pid \
              --exec $DAEMON
          echo "$NAME."
          ;;
      *)
            N=/etc/init.d/$NAME
            echo "Usage: $N {start|stop|restart|reload|force-reload}" >&2
            exit 1
            ;;
    esac

    exit 0
方式二
/usr/sbin/nginx -c /etc/nginx/nginx.conf成功开启
查看nginx进程
ps aux|grep nginx
访问http://localhost:80/index.html查看欢迎界面
停止服务
/etc/init.d/nginx -s stop也可以直接kill掉nginx主进程
重启服务
/etc/init.d/nginx -s reload


 614
614

 被折叠的 条评论
为什么被折叠?
被折叠的 条评论
为什么被折叠?
 到【灌水乐园】发言


