


对象属性
- 自身属性高于原型属性
 function Product(name){
            this.name=name;
        }
        Product.prototype.name='音响';
        var p1=new Product('相机');//自身属性高于原型属性
        console.log(p1.name);//相机
        delete p1.name;
        console.log(p1.name);//音响
        p1.name='手机';
        console.log(p1.name);//手机
结果:

- 输出属性的值
  var obj={
            username:'king',
            age:12,
            addr:'北京',
            email:'38277'
        }

        for(var i in obj){
            console.log(obj[i]);//

        }
结果:

- 输出属性名
function Product(name,color) {
this.name=name;
this.color=color;
this.someMethod=function () {
return 'this is a test';
}
}
Product.prototype.price=1234;
Product.prototype.memory=32;
var p1=new Product('p苹果','白色');
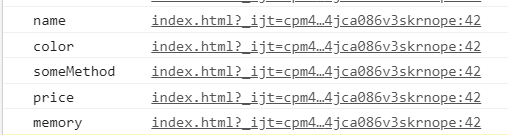
for(var p in p1){
console.log(p);//输出它的属性
}
结果:
- 也可以只输出自身属性
function Product(name,color) {
            this.name=name;
            this.color=color;
            this.someMethod=function () {
                return 'this is a test';
            }
        }
        Product.prototype.price=1234;
        Product.prototype.memory=32;
        var p1=new Product('p苹果','白色');
   for(var p in p1){
          if(p1.hasOwnProperty(p)){
              console.log(p);//只输出自身属性
          }
        }

- 检测一个对象是否是另一个对象的原型
    var monkey={
            hair:true,
            feeds:'香蕉',
            breathes:'air'
        };
        function Human(name) {
            this.name=name;
        }
        Human.prototype=monkey;
        var person1=new Human('king');
        console.log(person1.name);
        console.log(monkey.isPrototypeOf(person1));
结果:

        var monkey={
            hair:true,
            feeds:'香蕉',
            breathes:'air'
        };
        function Human(name) {
            this.name=name;
        }
        Human.prototype=monkey;


        var person2=new Human('queen');
        person2.feeds='火锅';
        person2.learn='js课程';
        console.log(person2.learn);
        console.log(person2.feeds);
        console.log(person2.name);
        console.log(person2.breathes);
        person2.constructor='this is a test';
        console.log(person2.__proto__);//指向monkey原型
        console.log(person2.constructor);
        monkey.test='hellw';
        console.log(person2.test);
结果:

需要注意的是:
        console.log(typeof person2.__proto__);
        console.log(typeof person2.prototype);

实例:
 <script>

      function foo(a,b) {
          return a*b;
      }
      console.log(foo.length);
      console.log(foo.constructor);
      console.log(foo.prototype);//初始值为空对象
      foo.prototype={};

      function Product(name,color) {
          this.name=name;
          this.color=color;
          this.whatAreYou=function(){
              return 'this is a'+this.color+' '+this.name;
          };
      }
      // Product.prototype.price=200;
      // Product.prototype.rating=3;
      // Product.prototype.getInfo=function () {
      //     return "等级:"+this.rating+"价钱:"+this.price;
      // }
        Product.prototype={
            price:999,

            memory:64,
            getInfo:function () {
                return "内存:"+this.memory+"价钱"+this.price;
            }
        };
      var p1=new Product('iphone','玫瑰');
      console.log(p1.name);
      console.log(p1.color);
      console.log(p1.whatAreYou());
      console.log(p1.price);
      console.log(p1.memory);
      console.log(p1.getInfo());
      Product.prototype.get=function (what) {
          return this[what];
      }
      console.log(p1.get('price'));
      console.log(p1.get('name'));//p1可访问新创建的get
    </script>

再加上下面的代码
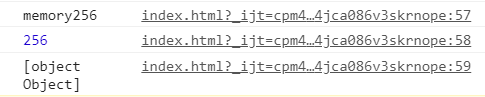
        Product.prototype.getInfo=function () {
            return 'memory'+Product.prototype.memory;
        }
        var p2=new Product('mac',"土豪");
        Product.prototype.price=14888;
        Product.prototype.memory=256;
        console.log(p2.getInfo());
        console.log(p2.memory);
        console.log(p2.toString());
结果:
扩展内建对象
        //检测方法是否存在,不存在则扩展
        if(!Array.prototype.inArray){
            Array.prototype.inArray=function (needle) {
                for(var i=0,len=this.length;i<len;i++){
                    if(this[i]==needle){
                        return true;
                    }
                }
                return false;
            }
        }
        var arr=['a','b','c','d'];
        console.log(arr.inArray('b'));
        console.log(arr.inArray('C'));
结果:

代码:
function Person() {
this.mouth=true;
}
var p1=new Person();
var p2=new Person();
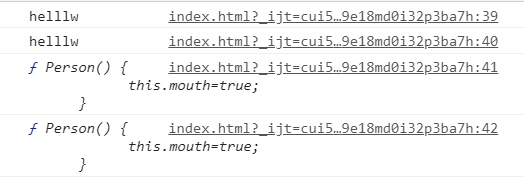
Person.prototype.say=function () {
return 'helllw';
}
console.log(p1.say());
console.log(p2.say());
console.log(p2.constructor);
console.log(p1.constructor.prototype.constructor);//原型构造器
console.log(p1.constructor.prototype.mouth);
访问新增对象
 <script>
        function Person() {
            this.mouth=true;
        }
        var p1=new Person();
        var p2=new Person();
        Person.prototype.say=function () {
            return 'helllw';
        }
        Person.prototype={
            hair:true,
            face:true
        };
        console.log(typeof p1.hair);//原有属性不能直接访问新增对象
        console.log(p1.say());
        console.log(typeof p1.__proto__.say);
        console.log(typeof p1.__proto__.hair);
        var p3=new Person();
        console.log(typeof p3.__proto__.say);
        console.log(typeof p3.__proto__.hair);
        console.log(typeof p3.__proto__.face);//新建的p3就可以访问
        console.log(p3.constructor);//Object
        console.log(p1.constructor);//Person
		console.log(typeof p3.constructor.prototype.hair);//原型指向Object 没有hair
        console.log(typeof p1.constructor.prototype.hair);//p1则有hair


    </script>

可以通过重置construct解决
        Person.prototype={
            'hair':true,
            face: true
        };
        Person.prototype.constructor=Person;//重置
        var p4=new Person();
        console.log(p4.constructor);//此时指向person了
        console.log(typeof p4.constructor.prototype.hair);
结果:

原型链
    <script>
        function Shape() {
            this.name='shape';
            this.toString=function () {
                return this.name;
            }
        }
        function TwoDshape() {
            this.name='2D shape';

        }
        function Triangle(side,height) {
            this.name='triangle';
            this.side=side;
            this.height=height;
            this.getArea=function () {
                return this.side*this.height/2;
            }
        }
        TwoDshape.prototype=new Shape(); //Shape负责TwoDshape的重建
        Triangle.prototype=new TwoDshape();

        //重置constructor属性
        TwoDshape.prototype.constructor=TwoDshape;
        Triangle.prototype.constructor=Triangle;

        var myTriangle=new Triangle(5,10);
        console.log(myTriangle.getArea());
        console.log(myTriangle.toString());//继承了shape
        console.log(myTriangle.constructor);
        console.log(myTriangle instanceof Triangle);//是否实例化
        console.log(myTriangle instanceof TwoDshape);
        console.log(myTriangle instanceof Shape);//都完成了继承效果 形成了原型链
        console.log(Shape.prototype.isPrototypeOf(myTriangle));
        console.log(TwoDshape.prototype.isPrototypeOf(myTriangle));
        console.log(Object.prototype.isPrototypeOf(myTriangle));
        console.log(String.prototype.isPrototypeOf(myTriangle));//false


    </script>
结果:

也可以调用它
   var td=new TwoDshape();//调用TwoDshape
        console.log(td.constructor);
        console.log(td.toString());

        var s=new Shape();
        console.log(s.constructor);
        console.log(s.toString());
结果:


 728
728


 被折叠的 条评论
为什么被折叠?
被折叠的 条评论
为什么被折叠?
 到【灌水乐园】发言


