


一.概述
和Android实现从底部弹出的Dialog(一)一样,我们先上效果图:
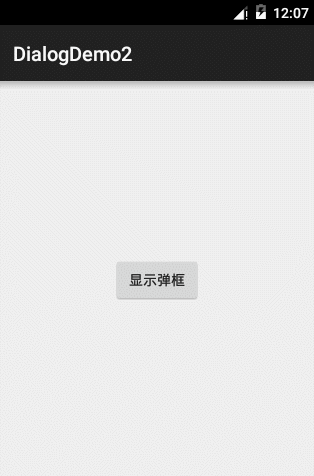
点击中间的弹出对话框按钮,从底部弹出Dialog,我们可以选择拍照,选择相片,以及取消按钮
二.代码实现
主页面布局:
<RelativeLayout
    xmlns:android="http://schemas.android.com/apk/res/android"
    xmlns:tools="http://schemas.android.com/tools" android:layout_width="match_parent"
    android:layout_height="match_parent" android:fitsSystemWindows="true"
    tools:context="com.example.dialogdemo.MainActivity">
        <Button
            android:layout_width="wrap_content"
            android:layout_height="wrap_content"
            android:layout_centerInParent="true"
            android:onClick="show"
            android:text="显示弹框"
            />
</RelativeLayout>
很简单,一个按钮响应点击事件
对话框布局:
<LinearLayout xmlns:android="http://schemas.android.com/apk/res/android"
    android:layout_width="match_parent"
    android:orientation="vertical"
    android:layout_height="match_parent">
    <Button
        android:id="@+id/takePhoto"
        android:layout_width="match_parent"
        android:layout_height="45dp"
        android:background="@drawable/actionsheet_top_selector"
        android:gravity="center"
        android:text="拍照"
        android:textColor="#0000ff"
        android:textSize="18sp"
        android:textStyle="bold" />
    <Button
        android:id="@+id/choosePhoto"
        android:layout_width="match_parent"
        android:layout_height="45dp"
        android:background="@drawable/actionsheet_bottom_selector"
        android:gravity="center"
        android:text="从相册选择"
        android:textColor="#0000ff"
        android:textSize="18sp"
        android:textStyle="bold" />

    <Button
        android:id="@+id/btn_cancel"
        android:layout_width="match_parent"
        android:layout_height="45dp"
        android:layout_marginTop="8dp"
        android:background="@drawable/actionsheet_single_selector"
        android:gravity="center"
        android:text="取消"
        android:textColor="#0000ff"
        android:textSize="18sp"
        android:textStyle="bold" />

</LinearLayout>
和第一篇文章的不同之处在于TextView换成了Button,而且加入了状态选择器作为背景,同时底部也加入了取消按钮
然后是java代码实现:
public class MainActivity extends ActionBarActivity implements OnClickListener{

    private View inflate;
    private Button choosePhoto;
    private Button takePhoto;
    private Button cancel;
    private Dialog dialog;
    @Override
    protected void onCreate(Bundle savedInstanceState) {
        super.onCreate(savedInstanceState);
        setContentView(R.layout.activity_main);
    }
    public void show(View view){
        dialog = new Dialog(this,R.style.ActionSheetDialogStyle);
        inflate = LayoutInflater.from(this).inflate(R.layout.dialog_layout, null);
        choosePhoto = (Button) inflate.findViewById(R.id.choosePhoto);
        takePhoto = (Button) inflate.findViewById(R.id.takePhoto);
       cancel = (Button) inflate.findViewById(R.id.btn_cancel);
        choosePhoto.setOnClickListener(this);
        takePhoto.setOnClickListener(this);
        cancel.setOnClickListener(this);
        dialog.setContentView(inflate);
        Window dialogWindow = dialog.getWindow();
        dialogWindow.setGravity( Gravity.BOTTOM);
        WindowManager.LayoutParams lp = dialogWindow.getAttributes();
        lp.y = 20;
        dialogWindow.setAttributes(lp);
        dialog.show();
    }

    @Override
    public void onClick(View view) {
        switch (view.getId()){
            case R.id.takePhoto:
                Toast.makeText(this,"点击了拍照",Toast.LENGTH_SHORT).show();
                break;
            case R.id.choosePhoto:
                Toast.makeText(this,"点击了选择照片",Toast.LENGTH_SHORT).show();
                break;
            case R.id.btn_cancel:
                dialog.dismiss();
        }
    }
}


 832
832

 被折叠的 条评论
为什么被折叠?
被折叠的 条评论
为什么被折叠?
 到【灌水乐园】发言


