


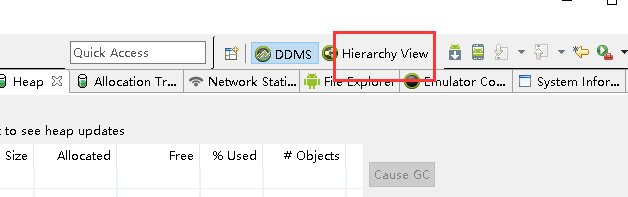
今天给大家介绍一下一种优化Android布局的方法,我们这里需要用到一个工具,HierarchyViewer,这是Android自带的一个布局结构查看器,位于sdk的tools文件夹下,当然,我们要使用这个工具,直接在开发工具里面使用就可以了。
我们先把代码写出来,然后看看布局结构是啥样,先上效果图
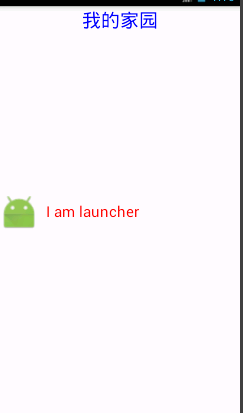
最顶部是一个TextView,下面是一个自定义的LinearLayout
主界面布局:
<FrameLayout xmlns:android="http://schemas.android.com/apk/res/android"
    xmlns:tools="http://schemas.android.com/tools"
    android:layout_width="fill_parent"
    android:layout_height="fill_parent">
    <TextView
        android:layout_width="fill_parent"
        android:layout_height="wrap_content"
        android:textSize="25sp"
        android:textColor="#FF0000FF"
        android:gravity="center_horizontal"
        android:text="我的家园"/>
    <com.example.lxn.app1.MyItemView
        android:id="@+id/myitem_view"
        android:layout_width="fill_parent"
        android:layout_height="wrap_content"
        android:layout_gravity="center" />
</FrameLayout>
自定义View
public class MyItemView extends LinearLayout {
    private Context context;

    public MyItemView(Context context, AttributeSet attrs) {
        super(context, attrs);
        this.context = context;
        initView();
    }
    public void initView(){
    //注意:如果要使用merge标签,这里的root参数不能为空,attachToRoot必须为true
        View view = LayoutInflater.from(context).inflate(R.layout.item_layout,this,true);
       ImageView imageView = (ImageView) view.findViewById(R.id.view_item_img);
        TextView textView = (TextView) view.findViewById(R.id.view_item_txt);
        imageView.setImageResource(R.mipmap.ic_launcher);
        textView.setText("I am launcher");
    }
}
view的布局文件
<LinearLayout xmlns:android="http://schemas.android.com/apk/res/android"
    xmlns:tools="http://schemas.android.com/tools"
    android:layout_width="fill_parent"
    android:layout_height="fill_parent"
    android:orientation="horizontal" >
    <ImageView
        android:id="@+id/view_item_img"
        android:layout_width="50dp"
        android:layout_height="50dp"
        android:scaleType="fitXY"/>
    <TextView
        android:id="@+id/view_item_txt"
        android:layout_width="fill_parent"
        android:layout_height="50dp"
        android:gravity="center_vertical"
        android:layout_marginLeft="10dp"
        android:textSize="20sp"
        android:textColor="#FFFF0000"/>
</LinearLayout>
然后我们使用HierarchyViewer这个工具看看布局的层次,
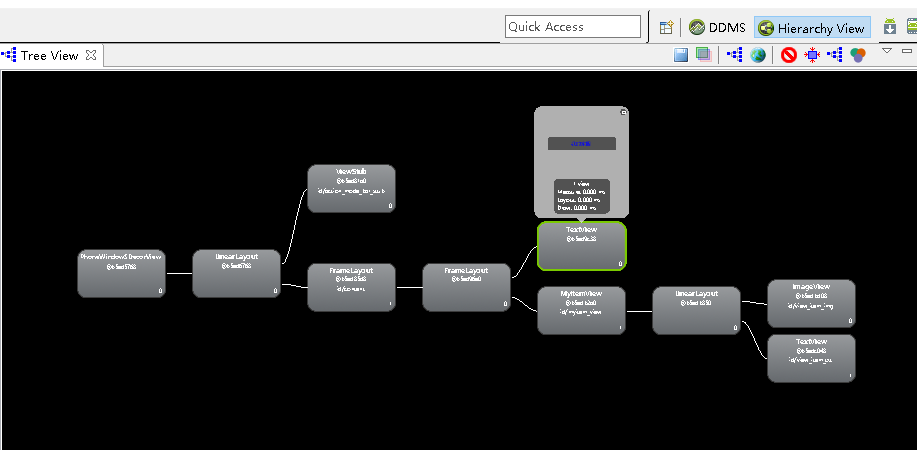
我们看到,一个很简单的界面就有七层的结构,我们看到第四层的FrameLayout和第六层的LinearLayout明显是冗余的,下面我们看看如何优化,我们使用merage标签,修改布局如下
MyItemView布局
<merge xmlns:android="http://schemas.android.com/apk/res/android"
    android:layout_width="fill_parent"
    android:layout_height="fill_parent"
    android:orientation="horizontal" >
    <ImageView
        android:id="@+id/view_item_img"
        android:layout_width="50dp"
        android:layout_height="50dp"
        android:scaleType="fitXY"/>
    <TextView
        android:id="@+id/view_item_txt"
        android:layout_width="fill_parent"
        android:layout_height="50dp"
        android:gravity="center_vertical"
        android:layout_marginLeft="10dp"
        android:textSize="20sp"
        android:textColor="#FFFF0000"/>
</merge>
主页面布局:
<merge xmlns:android="http://schemas.android.com/apk/res/android"
    android:layout_width="fill_parent"
    android:layout_height="fill_parent">
    <TextView
        android:layout_width="fill_parent"
        android:layout_height="wrap_content"
        android:textSize="25sp"
        android:textColor="#FF0000FF"
        android:gravity="center_horizontal"
        android:text="我的家园"/>
    <com.example.test.MyItemView
        android:id="@+id/myitem_view"
        android:layout_width="fill_parent"
        android:layout_height="wrap_content"
        android:layout_gravity="center" />
</merge>
然后我们把程序运行起来,再看布局层次结构
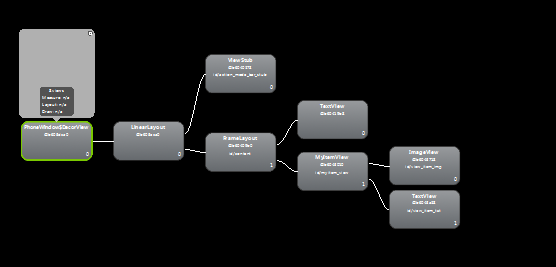
此时已经少了两层,加载速度也明显加快,特别是如果布局比较复杂,子View较多的情况下,合理使用merge能大大提高程序的速度和流畅性
当点击某一个View的时候,可以看见这个View的绘制情况,不过第一次点击的时候,显示的时间都是NA,我们需要点击右上角的Profile Node重新计算
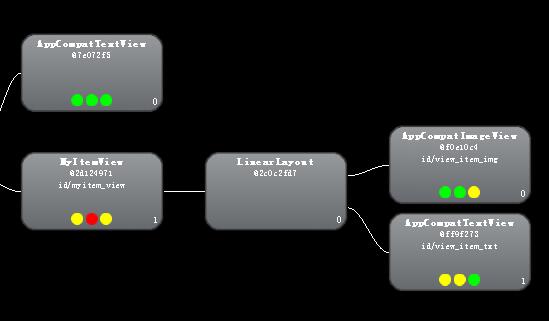
绿,黄,红分别代表好中差三种不同的绘制效率。
但是使用merge标签还是有一些限制的,具体有以下几点:
(1)merge只能用在布局XML文件的根元素
(2)使用merge来inflate一个布局时,必须指定一个ViewGroup作为其父元素,并且要设置inflate的attachToRoot参数为true。(参照inflate(int, ViewGroup, boolean))
(3)不能在ViewStub中使用merge标签。最直观的一个原因就是ViewStub的inflate方法中根本没有attachToRoot的设置


 595
595

 被折叠的 条评论
为什么被折叠?
被折叠的 条评论
为什么被折叠?
 到【灌水乐园】发言


