在工作中一般创建的工程都是maven工程,用spring boot进行项目开发,maven插件就是自动集成的
<plugin> <groupId>org.springframework.boot</groupId> <artifactId>spring-boot-maven-plugin</artifactId> </plugin>
当我们开发完成之后进行测试部署或者正式上线后,要进行迭代的时候发现需要上传的包比较大,包含了很多没有改动的资源(依赖包lib、resources),如果可以把这些包和工程jar包(只有class文件)进行分离,那么每次进行迭代的时候只需要上传修改的文件或者工程jar包,就会节省很多时间。
下面就针对实际应用中的实践做一个配的简单说明:
maven打包的方式有很多下面就先讲解我用的一种
使用maven-assembly-plugin插件进行资源分离。
官方文档
http://maven.apache.org/plugins/maven-assembly-plugin/
第一步:修改pom.xml文件
<!--多环境支持-->
    <profiles>
        <profile>
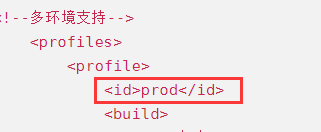
            <id>prod</id>
            <build>
                <!--包名-->
                <finalName>authoritymanagement</finalName>
                <resources>
                    <resource>
                        <directory>src/main/java</directory>
                        <filtering>false</filtering>
                        <excludes>
                            <exclude>**/*.java</exclude>
                        </excludes>
                    </resource>
                </resources>
                <plugins>

                    <!--maven-jar-plugin 负责将应用程序打包成可执行的jar文件-->
                    <!-- 打包成jar文件,并指定lib文件夹以及resources资源文件夹 -->
                    <plugin>
                        <groupId>org.apache.maven.plugins</groupId>
                        <artifactId>maven-jar-plugin</artifactId>
                        <version>2.4</version>
                        <configuration>
                            <archive>
                                <manifest>
                                    <mainClass>com.ganinfo.MainApplication</mainClass>
                                    <classpathPrefix>lib/</classpathPrefix>
                                    <addClasspath>true</addClasspath>
                                </manifest>
                                <manifestEntries>
                                    <Class-Path>resources/</Class-Path>
                                </manifestEntries>
                            </archive>
                        </configuration>
                    </plugin>

                    <!--配置编码-->
                    <plugin>
                        <artifactId>maven-compiler-plugin</artifactId>
                        <configuration>
                            <source>1.8</source>
                            <target>1.8</target>
                            <encoding>UTF-8</encoding>
                        </configuration>
                    </plugin>

                    <!--打包跳过测试类-->
                    <plugin>
                        <groupId>org.apache.maven.plugins</groupId>
                        <artifactId>maven-surefire-plugin</artifactId>
                        <configuration>
                            <testFailureIgnore>true</testFailureIgnore>
                            <skip>true</skip>
                        </configuration>
                    </plugin>

                    <!--maven-assembly-plugin,负责将整个项目按照自定义的目录结构打成最终的压缩包,方便实际部署 -->
                    <plugin>
                        <!--使用插件-->
                        <artifactId>maven-assembly-plugin</artifactId>
                        <configuration>
                            <!--自定义的configuration配置后,将会生成一个demo-demo.jar 文件在目录 output 下,其中前一个demo
                            来自finalName,后一个demo来自assembly descriptor中的id,其中的内容和默认的打包出来的jar类似,
                            如果只想有finalName,则增加配置:<appendAssemblyId/>-->
                            <appendAssemblyId>false</appendAssemblyId>
                            <!--输出路径-->
                            <outputDirectory>${project.build.directory}/dist/</outputDirectory>
                            <!--描述文件位置-->
                            <descriptors>
                                <descriptor>assembly.xml</descriptor>
                            </descriptors>
                        </configuration>
                        <!--配置执行器-->
                        <executions>
                            <execution>
                                <id>make-assembly</id>
                                <!--绑定到package生命周期阶段上-->
                                <phase>package</phase>
                                <goals>
                                    <!--只运行一次-->
                                    <goal>single</goal>
                                </goals>
                            </execution>
                        </executions>
                    </plugin>
                </plugins>
            </build>
        </profile>
        <profile>
            <id>dev</id>
            <build>
                <finalName>生成的包名</finalName>
                <plugins>
                    <plugin>
                        <groupId>org.springframework.boot</groupId>
                        <artifactId>spring-boot-maven-plugin</artifactId>
                        <executions>
                            <execution>
                                <goals>
                                    <goal>build-info</goal>
                                </goals>
                            </execution>
                        </executions>
                    </plugin>
                </plugins>
            </build>
        </profile>
    </profiles>
添加文件 assembly.xml
<assembly xmlns="http://maven.apache.org/plugins/maven-assembly-plugin/assembly/1.1.2"
          xmlns:xsi="http://www.w3.org/2001/XMLSchema-instance"
          xsi:schemaLocation="http://maven.apache.org/plugins/maven-assembly-plugin/assembly/1.1.2 http://maven.apache.org/xsd/assembly-1.1.2.xsd">

    <!--标识符,添加到生成文件名称的后缀符。如果指定 id 的话,目标文件则是 ${artifactId}-${id}.tar.gz-->
    <id>distribution</id>
    <formats>
        <!--指定打包类型: zip、tar、tar.gz(or tgz)、tar.bz2 (or tbz2)、tar.snappy 、tar.xz (or txz)、jar、dir、war-->
        <format>dir</format>
    </formats>

    <!--是否包含根目录-->
    <!--指定是否包含打包层目录(比如finalName是output,当值为true,所有文件被放在output目录下,否则直接放在包的根目录下)-->
    <includeBaseDirectory>false</includeBaseDirectory>
    <!--根目录名称-->
    <!--<baseDirectory>${project.build.finalName}</baseDirectory>-->

    <fileSets><!--指定要包含的文件集,可以定义多个fileSet;-->
        <fileSet>
            <!--指定要包含的目录-->
            <directory>src/main/resources/</directory>
            <!--指定当前要包含的目录的目的地-->
            <outputDirectory>/resources</outputDirectory>
        </fileSet>
        <fileSet>
            <directory>bin/</directory>
            <outputDirectory>/</outputDirectory>
        </fileSet>
        <fileSet>
            <directory>sh/</directory>
            <outputDirectory></outputDirectory>
        </fileSet>
    </fileSets>

    <!--用来定制工程依赖 jar 包的打包方式-->
    <dependencySets>
        <dependencySet>
            <!--设置相对于程序集根目录根目录的输出目录-->
            <outputDirectory>/lib</outputDirectory>
            <!--默认级别-->
            <scope>runtime</scope>
            <excludes>
                <exclude>${project.groupId}:${project.artifactId}</exclude>
            </excludes>
        </dependencySet>
        <dependencySet>
            <outputDirectory>/</outputDirectory>
            <includes>
                <include>${project.groupId}:${project.artifactId}</include>
            </includes>
        </dependencySet>
    </dependencySets>
</assembly>
在该工程目录下执行命令mvn clean package -Pprod 其中 prod 指的是pom.xml文件中配置的环境

执行完打包命令之后生成目录

引荐几篇文章关于配置maven的
讲解 maven-assembly-plugin
https://blog.csdn.net/chendeyou5/article/details/79448952
讲解 maven assembly实现不同环境的打包
https://blog.csdn.net/qiaoge134/article/details/62223029
讲解 多环境打包
https://blog.csdn.net/zhouyan8603/article/details/78668297
讲解 maven插件
https://segmentfault.com/a/1190000016237395
如果是maven配置的是私服的可能会出现下载不到资源的问题,
首先确认maven配置的是私服地址
1、
<mirror>
    <id>nexus-aliyun</id>
    <mirrorOf>*</mirrorOf>//表示优先请求一下的地址
    <name>Nexus aliyun</name>
    <url>私服地址</url>
</mirror>
2、在pom.xml中添加引用私服地址配置
<project>
<repositories>
    <repository>
        <id>central</id>
        <name>central</name>
        <!-- 配置仓库的地址 -->
        <url>http://localhost:8081/nexus/content/groups/</url>
    </repository>
</repositories>
</project>
继续更新中。。。。


 325
325


 被折叠的 条评论
为什么被折叠?


