


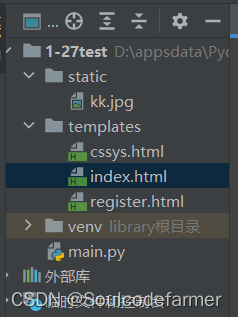
学习到一班才想起来做笔记吧,这个时候已经写了这么多了,都是些简单h5和css,文件内容和目录结构如下,内容都已经注释。
接下来的学习每一步都会详细注释,
20231/31
一、快速开发网站
python 安装 Flask web 框架
pip install flask
1.文件目录格式
1.1 main内容
render_template 返回html代码
request 接受返回内容
from flask import Flask, render_template, request

app = Flask(__name__)


@app.route("/index")
def index():
    return render_template("index.html")


@app.route("/css")
def get_news():
    return render_template("cssys.html")


@app.route("/register", methods=["GET", "POST"])
def register():
    if request.method == "GET":
        return render_template("register.html")
    else:
        user = request.form.get("user")
        pwd = request.form.get("pwd")
        print(user)
        print(pwd)
        return "12"


if __name__ == '__main__':
    app.run()
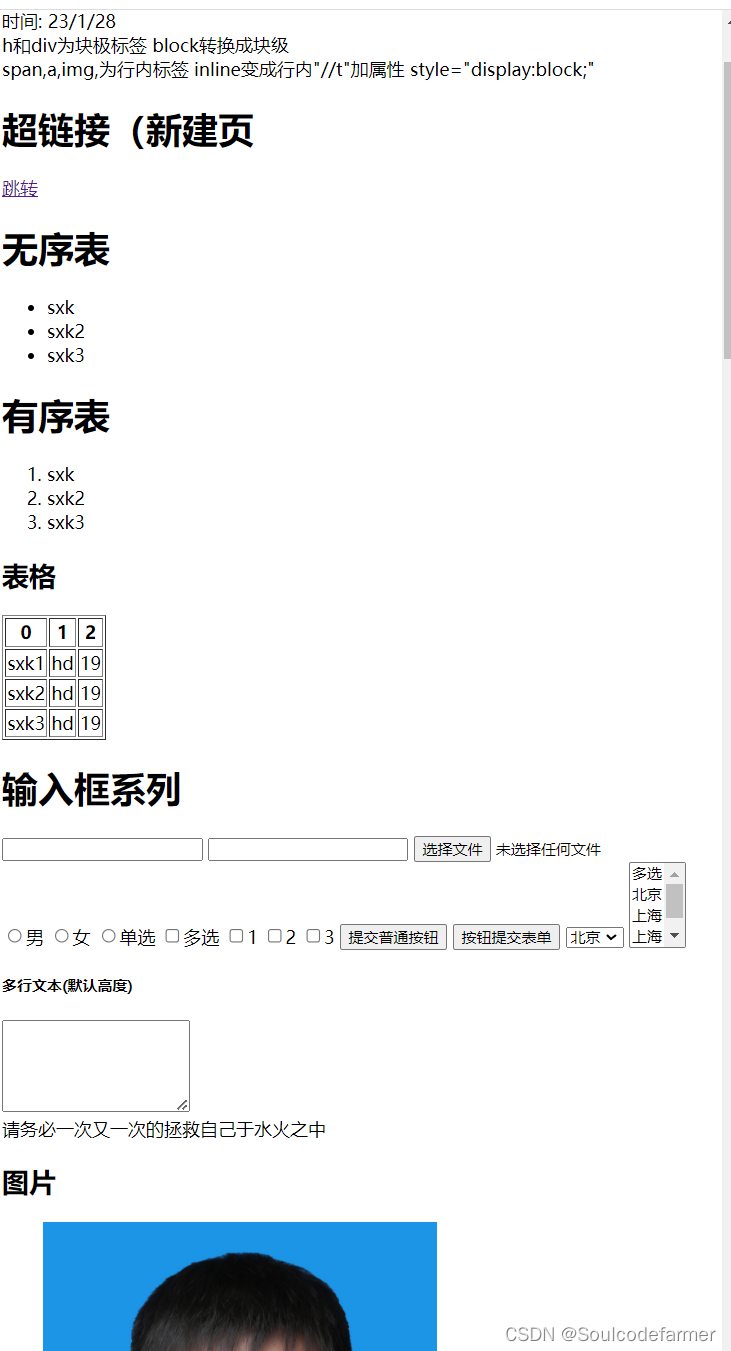
1.2 index.html内容
<!DOCTYPE html>
<html lang="en">
<head>
    <meta charset="UTF-8">
    <title>Title</title>
</head>
<body>
<h2 >行内块级标签</h2>
<div >
    <span >时间:</span>
    <span>23/1/28</span>
</div>
<div> h和div为块极标签  block转换成块级</div>
<div>span,a,img,为行内标签  inline变成行内"//t"加属性 style="display:block;"</div>
<h1>超链接(新建页</h1>
<a href="/get/news" target="_blank"> 跳转</a>
<h1>无序表</h1>
<ul>
    <li> sxk</li>
    <li> sxk2</li>
    <li> sxk3</li>
</ul>
<h1>有序表</h1>
<ol>
    <li> sxk</li>
    <li> sxk2</li>
    <li> sxk3</li>
</ol>
<h2>表格</h2>
<table border="1">
    <thead>
        <tr>    <th>0</th>  <th>1</th>  <th>2</th>  </tr>
    </thead>
    <tbody>
        <tr>    <td>sxk1</td>    <td>hd</td> <td>19</td> </tr>
        <tr>    <td>sxk2</td>    <td>hd</td> <td>19</td> </tr>
        <tr>    <td>sxk3</td>    <td>hd</td> <td>19</td> </tr>
    </tbody>
</table>
<!--用户输入-->
<h1>输入框系列</h1>
    <input type="text">
    <input type="password">
    <input type="file">
    <input type="radio" name="n1">男
    <input type="radio" name="n1">女
    <input type="radio" name="n1">单选

    <input type="checkbox" name="n1">多选
    <input type="checkbox" name="n1">1
    <input type="checkbox" name="n1">2
    <input type="checkbox" name="n1">3

    <input type="button" value="提交普通按钮">
    <input type="submit" value="按钮提交表单">
    <select >
        <option>北京</option>
        <option>上海</option>
        <option>深圳</option>
    </select>
    <select multiple>
        <option>多选</option>
        <option>北京</option>
        <option>上海</option>
        <option>上海</option>
        <option>深圳</option>
    </select>

    <h5>多行文本(默认高度)</h5>
    <textarea rows="5" ></textarea>
    <div>请务必一次又一次的拯救自己于水火之中</div>
    <h2>图片</h2>图片
    <img style="height: 500px;width:350px"  src="/static/kk.jpg">
</body>
</html>
- div: 占一整行(块级标签)
- span: 用多少占多少(行内标签/内联标签)(设置高度边距无效–>display:inline_block)
- 两个 span 标签不在同一行,页面显示时会在同一行,中间以一个空格分隔
- 两个 span 标签在同一行,页面显示时会在同一行,中间没有空格,连着
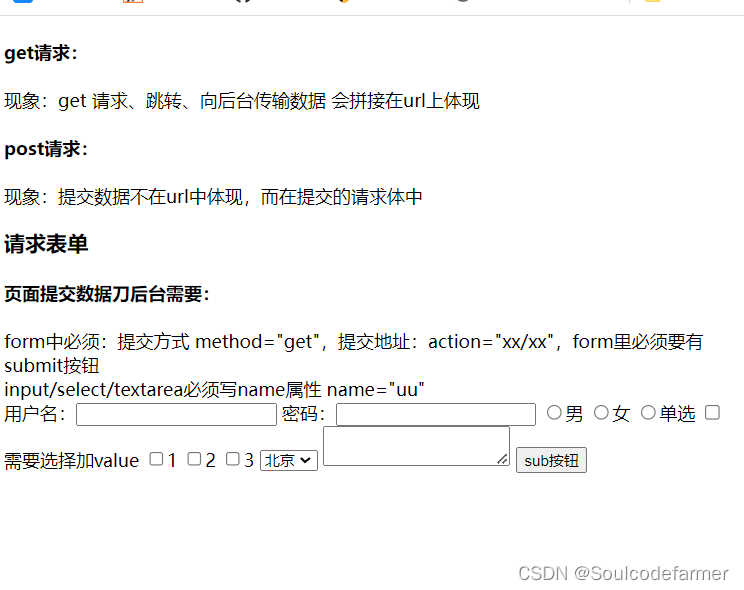
1.2 regist.html内容
<!DOCTYPE html>
<html lang="en">
<head>
    <meta charset="UTF-8">
    <title>用户注册案例</title>

</head>

<body>
    <h4>get请求:</h4>
    <div>现象:get 请求、跳转、向后台传输数据 会拼接在url上体现</div>
    <h4>post请求:</h4>
    <div>现象:提交数据不在url中体现,而在提交的请求体中</div>
    <h3>请求表单</h3>


    <h4> 页面提交数据刀后台需要:</h4>
    <div>form中必须:提交方式 method="get",提交地址:action="xx/xx",form里必须要有submit按钮</div>
    <div> input/select/textarea必须写name属性 name="uu"</div>

    <form method="post" action="/register">

        用户名:<input type="text" name="user">
        密码:<input type="password" name="pwd">

        <input type="radio" name="sex" value="a">男
        <input type="radio" name="sex" value="v">女
        <input type="radio" name="sex"value="o">单选

        <input type="checkbox" name="hop" value="0">需要选择加value
        <input type="checkbox" name="hop" value="1">1
        <input type="checkbox" name="hop" value="2">2
        <input type="checkbox" name="hop" value="3">3

        <select name="city">
            <option value="bj">北京</option>
            <option value="shh">上海</option>
            <option value="sz">深圳</option>
        </select>
        <textarea name="more"></textarea>
        <input type="submit" value="sub按钮">
    </form>
</body>
</html>
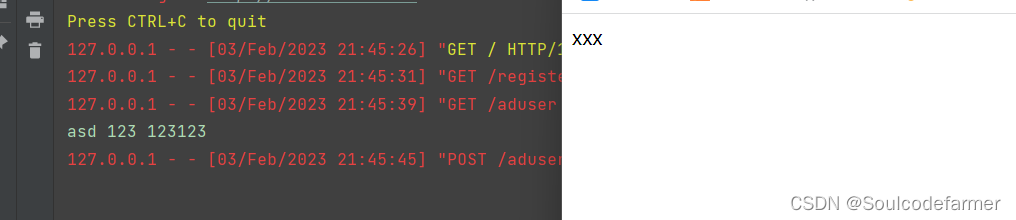
1.2.1 表单提交(flask后台交互方式!!!)
表单可以提交的前提条件:
- 提交方式: method=“get”
- 提交地址: action=“/xxx/xxx/xxx”
- 在form标签里面必须有一个submit标签
- 每个标签有name属性
<!DOCTYPE html>
<html lang="en">
<head>
    <meta charset="UTF-8">
    <title>Title</title>
</head>
<body>
<h1> 添加用户</h1>
<form method="post" action="/aduser">

<input type="text" name="user" placeholder="用户名">
<input type="text" name="pwd" placeholder="密码">
<input type="text" name="mobile" placeholder="手机号">
<input type="submit" value="提交">

</form>
</body>
</html>
from flask import Flask, render_template, request

app = Flask(__name__)


@app.route("/aduser", methods=["POST", "GET"])
def aduser():
    if request.method == "GET":
        return render_template("xaduser.html")
    else:
        un =request.form.get("user")
        pwd =request.form.get("pwd")
        mb =request.form.get("mobile")
        print(un, pwd, mb)
        return "xxx"

if __name__ == '__main__':
    app.run()
1.3cssys.html内容
<!DOCTYPE html>
<html lang="en">
<head>
    <meta charset="UTF-8">
    <title>Title</title>
        <style type="text/css" >
        /*css选择器  */
        .c1{
            display: inline-block;//* 既具有块级也具有行内特征 */
            color:red;
            height: 100px;
            width:200px;
            border: 1px solid gold;
        }
        /*<div class="c1"></div> 类选择器*/

        #c2{
        }
        /*<div id="c2"></div>标签选择器*/

        /*<li></li>标签选择器*/

        input[type="abc"]{
        }
        /*<input type="abc">属性选择器*/

        .yy a{
        }
        /*<div class="yy"}>*/
        /*<a>  后代选择器,yy类下所有a标签*/
        /*</div>*/
    </style>
</head>
<body>
    <div class="c1">sxk</div>
    <div class="c1">sxk</div>
    <div class="c1">sxk</div>
    <div class="c1">sxk</div>
</body>
</html>
css样式
在标签上
<img src="..." stype="height: 100px">
在 head 标签的 style 上
<head>
    <meta charset="UTF-8">
    <title>Document</title>

    <style>
        .c1 {
            color: red;
        }
    </style>

</head>
<body>
    <h1 class="c1">用户注册</h1>
    ...
写到文件中
- common.css
.c1 {
	color: red;
}
- 调用
    <link rel="stylesheet" href="common.css" />

</head>
<body>
    <h1 class="c1">用户注册</h1>
    ...
1.3.1ID选择器
#c1 {
	color: red;
}

<div id='c1'></div>
类选择器
.c1 {
	color: red;
}

<div class='c1'></div>
1.3.2 标签选择器
div{
	color: red;
}

<div>xxx</div>
1.3.3 属性选择器
下面的例子中,所有的text类型的input都会生效
<head>
    <title>Document</title>
    <link rel="stylesheet" href="/static/commons.css">
    <style>
        input[type="text"]{
        border: 1px solid red;
    }
    </style>
</head>
<style>
    .v1[xx="456"]{
        color: gold;	<!-- 橙色 -->
    }
</style>
...
<body>
...
    <div class="v1" xx="123">a</div>
    <div class="v1" xx="456">b</div>
    <div class="v1" xx="789">c</div>
...
</body>
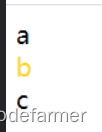
1.3.4 后代选择器
<style>
    .zz h2{
        color:chartreuse;
    }
</style>
</head>

<body>

    <div class="zz" >
        <div>
            <h2>我是div里面的h2</h2>
        </div>
        <h2>我是div外面的h2</h2>
如果只想让第一层的h1生效,可以添加>号
块级与行内标签的转换
<div style="display: inline;">移动</div>
    <span style="display: block;">联通</span>
2. css样式
2.0 块级行内
//* 既具有块级也具有行内特征 */
display: inline-block;
.c1{
display: inline-block;
height: 100px;
width:200px;
border: 1px solid gold;
}
2.1 内边距
padding-top | padding-left | padding-right | padding-botton
内部边距:内容和border直接的距离,可能会增加div块的大小
四个上下左右的padding可以简写为padding: 20px 20px 20px 20px,顺序为上右下左(顺时针方向)
<!DOCTYPE html>
<html lang="en">
<head>
    <meta charset="UTF-8">
    <title>Document</title>
    <style>
        .outer {
            border: 1px solid red;
            height: 200px;
            width: 200px;

            padding-top: 20px;
            padding-left: 20px;
            padding-right: 20px;
            padding-bottom: 20px;
        }

    </style>
</head>
<body>
    <div class="outer">
        <div>hello</div>
        <div>world</div>

    </div>
</body>
</html>
2.2.外边距
margin
自己块大小不变,改变距离外部的距离
<body>
    <div style="height: 200px; background-color: aquamarine;"></div>
    <div style="height: 200px; background-color:blueviolet; margin-top: 20px;"></div>
</body>
一般
body{
	margin:0;
}
区域居中(自己有宽度,margin 0 auto)
.container{
	width:1000px;
	margin:0 auto;
	margin-left:auto;margin-right:auto;
}
文本水平居中
<div style="width:200px" text-align:center;">sxk</div>
文本竖直竖直居中
.c{
	hight:100px;
	line-hight: 100px;
}
父亲没有高度和宽度,会被孩子撑起来
2.3 浮动
如果在块级标签中,加入了float属性,那么这个块级标签奖不会再占用一整行,而是自己有多大就占用多大
如果你让标签浮动起来之后,就会脱离文档流
例如下面的例子中,我们给div的父标签赋予了一个蓝色的背景,但是你不会看到蓝色背景。因为他被浮动的div字标签挡住了。
<body>
    <div style="background-color: blue;">
        <div class="item"></div>
        <div class="item"></div>
        <div class="item"></div>
    </div>
</body>
决办法: 在同级子标签的最下面添加 style=“clear: both;”
<body>
    <div style="background-color: blue;">
        <div class="item"></div>
        <div class="item"></div>
        <div class="item"></div>
        <div style="clear: both;"></div>
    </div>
</body>
2.4 hover(伪类)
hover
字体碰到鼠标变成绿色
边框碰到鼠标变成绿色
鼠标放我这里触发显示二维码
<!DOCTYPE html>
<html lang="en">
<head>
    <meta charset="UTF-8">
    <title>Document</title>
    <style>
        .c1 {
            color:brown;
        }
        .c1:hover {
            color: green;
            font-size: 20px;
        }

        .c2 {
            width: 300px;
            height: 300px;
            border: 3px solid red;
        }
        .c2:hover {
            border: 3px solid green;
        }

        .download {
            display: none;
        }

        .app:hover .download {
            display: block;
        }

    </style>
</head>
<body>
    <div class="c1">字体碰到鼠标变成绿色</div>
    <div class="c2">边框碰到鼠标变成绿色</div>
    <div class="app">
        <div>鼠标放我这里触发显示二维码</div>
        <div class="download">
            <img src="https://cdn.cnbj1.fds.api.mi-img.com/mi-mall/78c30d4f259ed43ab20e810a522a6249.png" alt="">
        </div>
    </div>
</body>
</html>
2.5 a标签去下划线
a{
		display:incline-block;
		text-decaration:none;
}
2.6 after(伪类)
清除浮动
效果与给所有有float的加style="clear: both;"相同
<!DOCTYPE html>
<html lang="en">
<head>
    <meta charset="UTF-8">
    <title>Document</title>
    <style>
        .clearfic:after{
            content: " ";
            display: table;
            clear: both;
        }
        .item{
            float: left;
        }

    </style>
</head>
<body>
    <div class="clearfic">
        <div class="item"></div>
        <div class="item"></div>
        <div class="item"></div>
        <div class="item"></div>
    </div>
</body>
</html>
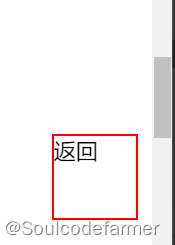
2.7 position :fixed ;
固定窗口位置
fixed 固定
relative
absolute
案例:返回窗口
<!DOCTYPE html>
<html lang="en">
<head>
    <meta charset="UTF-8">
    <title>Document</title>
    <style>
        .back{
            width: 60px;
            height: 60px;
            border: 2px solid red;

            position: fixed;
            right: 10px;
            bottom: 50px;
        }
    </style>
</head>
<body>
    <div style="height: 5000px">
    </div>
<div class="back">返回</div>
</body>
</html>
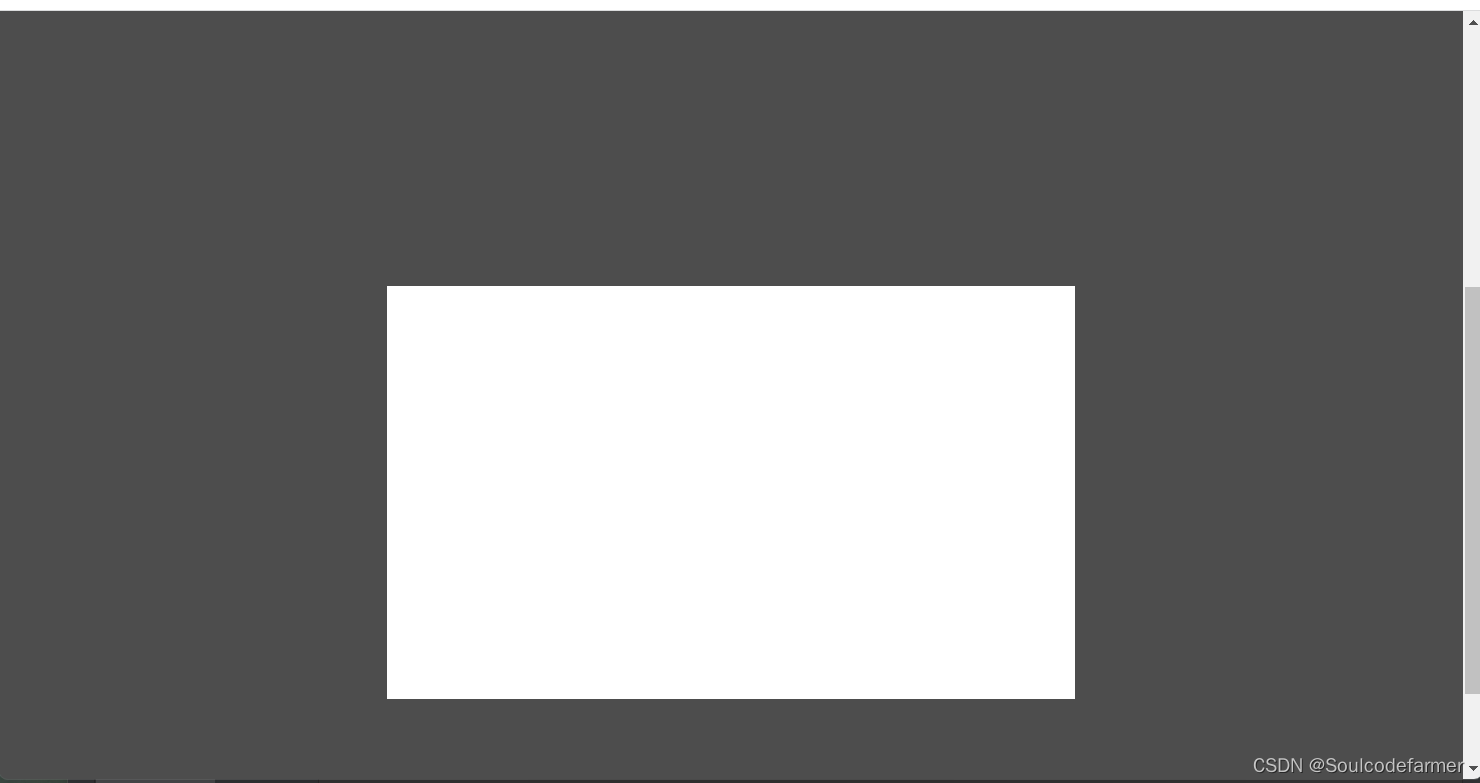
案例:对话框
<!DOCTYPE html>
<html lang="en">
<head>
    <meta charset="UTF-8">
    <title>Document</title>
    <style>

        body {
            margin: 0;
        }

        .dialog {
            position: fixed;
            height: 300px;
            width: 500px;
            background-color: white;

            left: 0;
            right: 0;
            margin: 0 auto;

            top: 200px;

            z-index: 1000;  /* 防止对话框被mask遮住 */
        }

        .mask {
            background-color: black;
            position: fixed;
            left: 0;
            right: 0;
            top: 0;
            bottom: 0;
            opacity: 0.7;

            z-index: 999;   /* 防止对话框被mask遮住 */
        }

    </style>
</head>
<body>
    <div style="height: 1000px;"></div>
    <!-- 如果css中不加 z-index 设置优先级的话 -->
    <!-- 那么下面的 dialog 如果在 mask 的上面,对话框就显示不出来了 -->
    <!-- 设置优先级可以解决此问题 -->
    <div class="dialog"></div>
    <div class="mask"></div>
</body>
</html>
2.8 position :relative/absolute
联用,absolute 的元素相对于relative的元素进行位置调整
...
        .app{
            position: relative;
        }

        .app .download {
            position: absolute;
            display: none;
            height: 100px;
            width: 100px;
        }

        .app:hover .download {
            display: block;
        }

    </style>

</head>
<body>
    <div class="header">
        <div class="container">
            <div class="menu">
  ...
                <a href="https://www.mi.com" class="app">app下载
                    <div class="download">
                        <img src="https://cdn.cnbj1.fds.api.mi-img.com/mi-mall/78c30d4f259ed43ab20e810a522a6249.png" alt="">
                    </div>
                </a>
            </div>
 ...
        </div>
    </div>
...
2.9 边框
border
<!DOCTYPE html>
<html lang="en">
<head>
    <meta charset="UTF-8">
    <title>Document</title>
    <style>
        div{
            height: 200px;
            width: 210px;
            margin: 50px;
        }
        .left {
            float: left;
        }

        .c1 {
            border: 3px dotted red;
        }

        .c2 {
            border: 3px solid red;
            border-left: 3px solid green;
        }

        .c3 {
            background-color: #999;
            border-left: 15px solid transparent;  /* 透明色 */
        }

        .c3:hover {
            border-left: 15px solid yellow;
        }

    </style>
</head>
<body>
    <div class="c1 left">dotted 虚线边框</div>
    <div class="c2 left">border-left: 单独设置边框 -->左边框是绿色,上下右边框是红色</div>
    <div class="c3 left">transparent 透明色,鼠标碰到边框会变色~</div>
    <div style="clear: both;"></div>
</body>
</html>
3 BootStap
别人写好的css样式
导入
<link rel="stylesheet" href="/static/plugins/bootstrap-3.4.1/css/bootstrap.css">
3.1 按钮
<!DOCTYPE html>
<html lang="en">
<head>
    <meta charset="UTF-8">
    <title>Document</title>

    <!-- 开发版本 -->
    <link rel="stylesheet" href="static/plugins/bootstrap-3.4.1/css/bootstrap.css">

    <!-- 生产版本 -->
    <link rel="stylesheet" href="static/plugins/bootstrap-3.4.1/css/bootstrap.min.css">

</head>
<body>
    <input type="button" value="提交">
    <input type="button" value="提交" class="btn btn-primary">
    <input type="button" value="提交" class="btn btn-success">
    <input type="button" value="提交" class="btn btn-danger">
    <input type="button" value="提交" class="btn btn-danger btn-xs">
</body>
</html>

3.2 使用
https://v3.bootcss.com/components/#nav
bootstrap导航栏
网站拷贝
修改
3.3 栅格系统
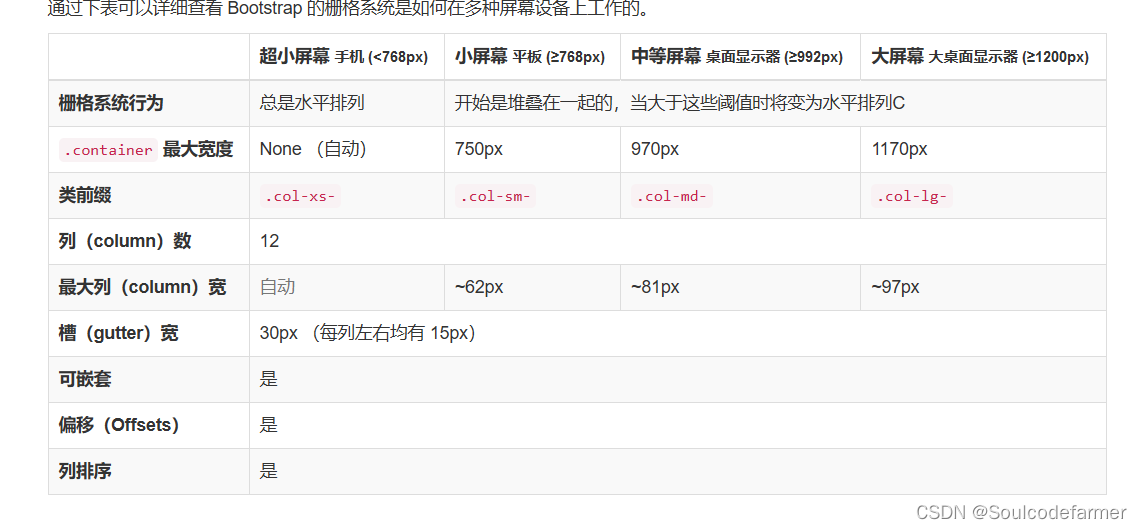
响应式:根据页面的宽度,动态的改变布局
.col-sm- : 750px
.col-md- : 970px (多)
.col-lg- : 1170px
非响应式:.col-xs- (多)
<div class="col-xs-2" style="background-color: brown; height: 20px;"></div>
<div class="col-xs-10" style="background-color: green;height: 20px;"></div>
列偏移
col-sm-offset-
<div class="col-sm-offset-3 col-sm-2" style="background-color: brown; height: 20px;"></div>
<div class="col-sm-7" style="background-color: green;height: 20px;"></div>
3.4 container
<div class="container">
    <div class="col-sm-6">左边</div>
    <div class="col-sm-2">右边</div>
</div>

`<div class="container-fluid">
    <div class="col-sm-6">左边</div>
    <div class="col-sm-2">右边</div>
</div>`

3.5 图标
bootstrap图标https://v3.bootcss.com/components/
fontawesome图标 https://fontawesome.dashgame.com/需要下载放到目录中并且引用
fs 图标引用
<link rel="stylesheet" href="static/plugins/font-awesome-4.7.0/css/font-awesome.css">
直接网页f12找到图标html代码进行复制,粘贴
 效果
效果
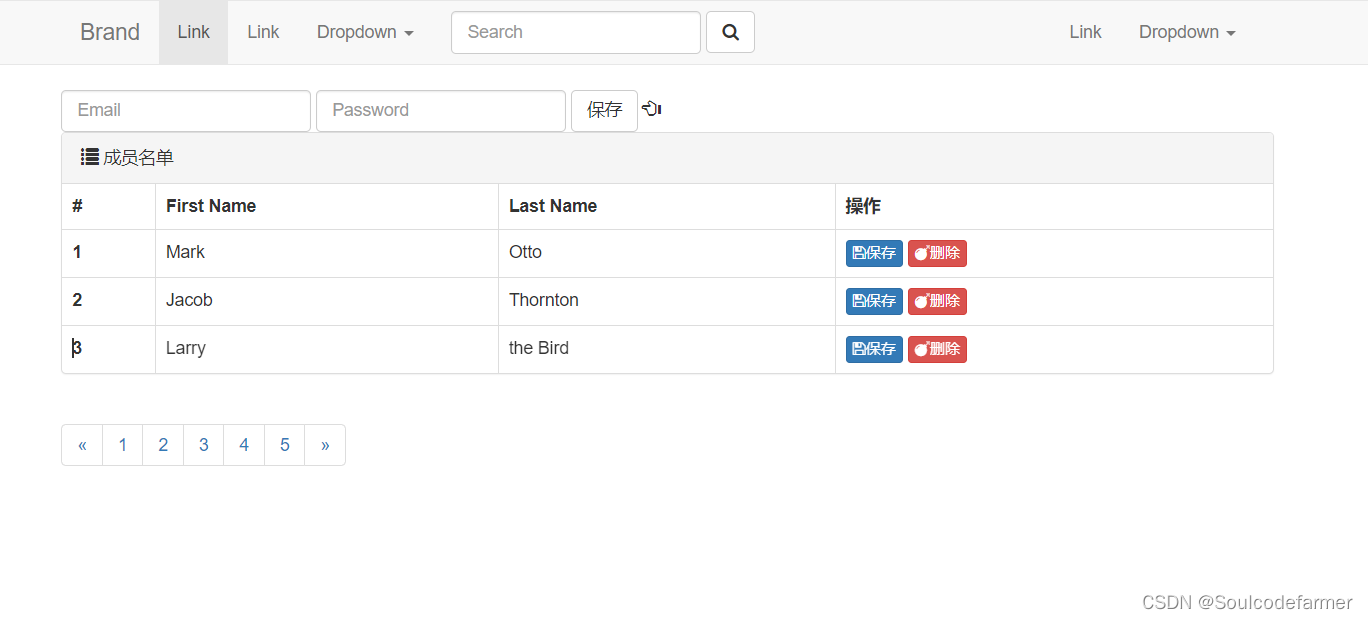
案例:数据管理
<!DOCTYPE html>
<html lang="en">
<head>
    <meta charset="UTF-8">
    <title>Document</title>
    <link rel="stylesheet" href="../static/plugins/bootstrap-3.4.1/css/bootstrap.css">

    <link rel="stylesheet" href="../static/plugins/font-awesome-4.7.0/css/font-awesome.css">
    <style>
        /*div {*/
        /*    border: 2px solid black;*/
        /*}*/
        .body {
            border: 0px;
        }

        .container {
            width: 1000px;

        }

        .navbar {
            border-radius: 0;
        }

        .container .bt {
            margin: 20px 5px;
        }


    </style>
</head>
<body>
<div>
    <nav class="navbar navbar-default">
        <div class="container">
            <div class="container-fluid">
                <!-- Brand and toggle get grouped for better mobile display -->
                <div class="navbar-header">
                    <button type="button" class="navbar-toggle collapsed" data-toggle="collapse"
                            data-target="#bs-example-navbar-collapse-1" aria-expanded="false">
                        <span class="sr-only">Toggle navigation</span>
                        <span class="icon-bar"></span>
                        <span class="icon-bar"></span>
                        <span class="icon-bar"></span>
                    </button>
                    <a class="navbar-brand" href="#">Brand</a>
                </div>

                <!-- Collect the nav links, forms, and other content for toggling -->
                <div class="collapse navbar-collapse" id="bs-example-navbar-collapse-1">
                    <ul class="nav navbar-nav">
                        <li class="active"><a href="#">Link <span class="sr-only">(current)</span></a></li>
                        <li><a href="#">Link</a></li>
                        <li class="dropdown">
                            <a href="#" class="dropdown-toggle" data-toggle="dropdown" role="button"
                               aria-haspopup="true" aria-expanded="false">Dropdown <span class="caret"></span></a>
                            <ul class="dropdown-menu">
                                <li><a href="#">Action</a></li>
                                <li><a href="#">Another action</a></li>
                                <li><a href="#">Something else here</a></li>
                                <li role="separator" class="divider"></li>
                                <li><a href="#">Separated link</a></li>
                                <li role="separator" class="divider"></li>
                                <li><a href="#">One more separated link</a></li>
                            </ul>
                        </li>
                    </ul>
                    <form class="navbar-form navbar-left">
                        <div class="form-group">
                            <input type="text" class="form-control" placeholder="Search">
                        </div>
                        <button type="submit" class="btn btn-default">
                            <i class="fa fa-search" aria-hidden="true"></i>
                        </button>
                    </form>
                    <ul class="nav navbar-nav navbar-right">
                        <li><a href="#">Link</a></li>
                        <li class="dropdown">
                            <a href="#" class="dropdown-toggle" data-toggle="dropdown" role="button"
                               aria-haspopup="true" aria-expanded="false">Dropdown <span class="caret"></span></a>
                            <ul class="dropdown-menu">
                                <li><a href="#">Action</a></li>
                                <li><a href="#">Another action</a></li>
                                <li><a href="#">Something else here</a></li>
                                <li role="separator" class="divider"></li>
                                <li><a href="#">Separated link</a></li>
                            </ul>
                        </li>
                    </ul>
                </div><!-- /.navbar-collapse -->
            </div><!-- /.container-fluid -->
        </div>
    </nav>
</div>

<div class="container">
    <form class="form-inline">
        <div class="form-group">
            <label class="sr-only" for="exampleInputEmail3">表单区域</label>
            <input type="email" class="form-control" id="exampleInputEmail3" placeholder="Email">
        </div>
        <div class="form-group">
            <label class="sr-only" for="exampleInputPassword3">Password</label>
            <input type="password" class="form-control" id="exampleInputPassword3" placeholder="Password">
        </div>

        <button type="submit" class="btn btn-default">保存</button>
        <span class="glyphicon glyphicon-hand-left" aria-hidden="true"></span>
    </form>


    <div class="panel panel-default">
        <div class="panel-heading"><span class="glyphicon glyphicon-list" aria-hidden="true"></span>  成员名单</div>

        <table class="table table-bordered table-hover">
            <thead>
            <tr>
                <th>#</th>
                <th>First Name</th>
                <th>Last Name</th>
                <th>操作</th>
            </tr>
            </thead>
            <tbody>

            <tr>

                <th scope="row">1</th>
                <td>Mark</td>
                <td>Otto</td>
                <td>
                    <a class="btn btn-primary btn-xs"><i class="fa fa-save" aria-hidden="true"></i>保存</a>
                    <a class="btn btn-danger btn-xs"><i class="fa fa-bomb" aria-hidden="true"></i>删除</a>
                </td>
            </tr>
            <tr>
                <th scope="row">2</th>
                <td>Jacob</td>
                <td>Thornton</td>
                <td>
                    <a class="btn btn-primary btn-xs"><i class="fa fa-save" aria-hidden="true"></i>保存</a>
                    <a class="btn btn-danger btn-xs"><i class="fa fa-bomb" aria-hidden="true"></i>删除</a>
                </td>
            </tr>
            <tr>
                <th scope="row">3</th>
                <td>Larry</td>
                <td>the Bird</td>
                <td>
                    <a class="btn btn-primary btn-xs"><i class="fa fa-save" aria-hidden="true"></i>保存</a>
                    <a class="btn btn-danger btn-xs"><i class="fa fa-bomb" aria-hidden="true"></i>删除</a>
                </td>
            </tr>
            </tbody>
        </table>
    </div>
    <nav aria-label="Page navigation">
        <ul class="pagination">
            <li>
                <a href="#" aria-label="Previous">
                    <span aria-hidden="true">«</span>
                </a>
            </li>
            <li><a href="#">1</a></li>
            <li><a href="#">2</a></li>
            <li><a href="#">3</a></li>
            <li><a href="#">4</a></li>
            <li><a href="#">5</a></li>
            <li>
                <a href="#" aria-label="Next">
                    <span aria-hidden="true">»</span>
                </a>
            </li>
        </ul>
    </nav>
</div>


<script src="../static/jquery-3.6.3.min.js"></script>
<script src="../static/plugins/bootstrap-3.4.1/js/bootstrap.js"></script>

</body>
</html>
4 javascrip
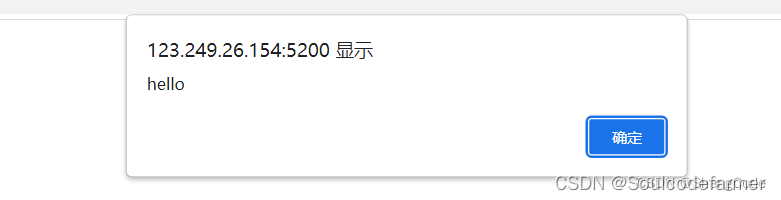
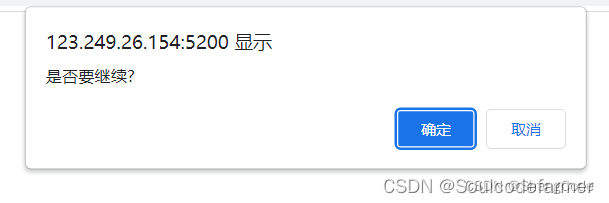
4.1 提示框
alert / confirm
<div class="menus">
        <div onclick="myFunc()">对话框</div>

   </div>
<script type="text/javascript">
    function myFunc() {
        // alert("hello")
        confirm("是否要继续?")
    }
</script>
4.2 字符串
//声明
var name = "helloworld";

var name = "中国联通"
var v1 = name.length;
var v2 = name[0];
var v3 = name.trim();			//去除空白
var v4 = name.substring(0,2)	//切片, 前取后不取
案例:跑马灯
<!DOCTYPE html>
<html lang="en">

<head>
    <meta charset="UTF-8">
    <title>Document</title>
</head>

<body>

    <div id="txt">123456789</div>

    <script type="text/javascript">

        function show() {
            //1.去HTML中找到某个标签并获取他的内容 (DOM)
            var tag = document.getElementById("txt");
            var dataString = tag.innerText;

            //2.动态起来,把文本中的第一个字符放在字符串的最后面
            var firstChar = dataString[0];
            var otherString = dataString.substring(1, dataString.length);
            var newText = otherString + firstChar;

            //3.在HTML标签中更新内容
            tag.innerText = newText;
        }

        //Javascript中的定时器
        //每秒钟执行这个show函数
        setInterval(show, 1000);    //毫秒
    </script>
</body>
</html>
4.3 数组
var v1 = [11,22,33,44];
var v2 = Array([11,22,33,44]);

//操作
var v1 = [11,22,33,44];

v1[1]
v1[0] = "poker"

//追加
v1.push("联通");			//尾部追加 [11,22,33,44,"联通"]
v1.unshift("联通");		//头部追加 ["联通",11,22,33,44]
	//v1.splice(索引,0,元素);
v1.splice(1,0,"中国");	//指定位置追加 [11,"中国",22,33,44]

//.splice(索引,字符数量,字符内容) 为在索引位置将字符数量个元素,替换为指定的字符内容。


//删除
v1.pop();				//尾部删除
v1.shift();				//头部删除
	//v1.splice(索引位置,1);
v1.splice(2,1);			//索引为 2 的元素删除 [11,22,44]


//循环
var v1 = [11,22,33,44];
//循环的是索引
for(var index in v1){
	//data=v1[index]
	...
}


for(var i=0; i<v1.length; i++){
	...
}
案例:动态添加数据
<!DOCTYPE html>
<html lang="en">
<head>
    <meta charset="UTF-8">
    <title>Document</title>
</head>
<body>

    <ul id="city">
        <!-- <li>北京</li>
        <li>天津</li>
        <li>上海</li> -->
    </ul>

    <script type="text/javascript">
        var cityList = ["北京","天津","上海"];
        for(var idx in cityList) {
            var text = cityList[idx];

            //创建 <li></li> 标签
            var tag = document.createElement("li");
            //在 li 标签中写入内容
            tag.innerText = text;

            //添加到 id=city 那个标签的里面 DOM
            var parentTag = document.getElementById("city");
            parentTag.appendChild(tag);
        }
    </script>
</body>
</html>
4.4 对象(字典)
info = {
	"name":"poker",
	"age":18,
}

info = {
	name:"poker",
	age:18
}

info.age;
info.name = "toker"

info["age"]
info["name"] = "toker";

delete info["age"]

//循环
for(var key in info){
	//key值 data=info[key]
	...
}
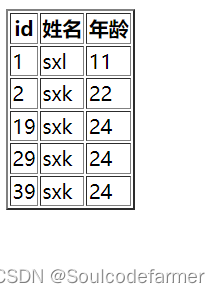
案例: 动态表格
<!DOCTYPE html>
<html lang="en">
<head>
    <meta charset="UTF-8">
    <title>Document</title>
</head>
<body>

<table border="2">
    <thead>
    <tr>
        <th>id</th>
        <th>姓名</th>
        <th>年龄</th>
    </thead>
    <tbody id="tb">
    <tr>
        <td>1</td>
        <td>sxl</td>
        <td>11</td>
    </tr>
    <tr>
        <td>2</td>
        <td>sxk</td>
        <td>22</td>
    </tr>

</table>

<script type="text/javascript">
    var datalist = [
        {id: 19, name: "sxk", age: 24},
        {id: 29, name: "sxk", age: 24},
        {id: 39, name: "sxk", age: 24}
    ];
    for (var idx in datalist) {
        var info = datalist[idx];
        //1.创建 tr 标签
        var tr = document.createElement("tr");

        for (var key in info) {
            //2.创建 td 标签
            var td = document.createElement("td");
            td.innerText = info[key];
            tr.appendChild(td);
        }
            //3. 追加数据
        var bodytag = document.getElementById("tb");
        bodytag.appendChild(tr);
    }
</script>
</body>
</html>
4.5 条件语句
if (条件) {
	...
}else{
	...
}

if (条件) {
	...
else if (条件){
	...
}else{
	...
}
4.6 DOM
DOM 是一个模块,模块可以对HTML页面中的标签进行操作
//根据 ID 获取标签
var tag = doucment.getElementById("xx");

//获取标签中的文本
tag.innerText

//修改标签中的文本
tag.innerText = "hhhhhhh";
事件的绑定
οnclick=“” //单击
οndblclick=" " //双击
点击按钮执行ad()函数
<input type="button" value="ddjtj" onclick="ad()">
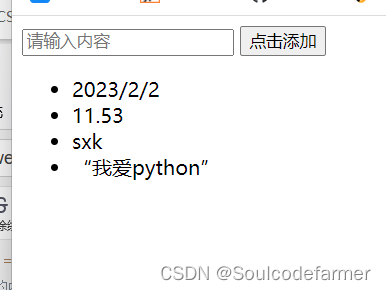
案例:手动输入添加数据
<!DOCTYPE html>
<html lang="en">
<head>
    <meta charset="UTF-8">
    <title>Document</title>
</head>
<body>

<input type="text" placeholder="请输入内容" id="txt">
<input type="button" value="点击添加" onclick="ad()">

<ul id="uu">


</ul>

<script type="text/javascript">
    function ad() {
        // 找到输入框的标签
        var txt=document.getElementById("txt")
        //判断输入是否为空
        if (txt.value.length > 0) {
            //创建li标签
            var newtag = document.createElement("li");
            // 找到输入的内容,并给li
            newtag.innerText = txt.value;
            // 找到列表
            var ll = document.getElementById("uu");
            // 赋值
            ll.appendChild(newtag);
            // 将输入框清空
            txt.value = "";
        }else {
            alert("输入不能为空")
        }
    }

</script>
</body>
</html>

5 jquery
JQuery是一个JavaScript的第三方模块(第三方类库)
下载JQuery: https://jquery.com/download/
jquery-3.6.1.min.js 放在static/js下
文件导入
<body>
...
    <script src="static/js/jquery-3.6.1.min.js"></script>
    <script src="static/plugins/bootstrap-3.4.1/js/bootstrap.min.js"></script>
</body>
5.1 快速上手
$(“#id”)
jquery通过id找到元素
<!DOCTYPE html>
<html lang="en">
<head>
    <meta charset="UTF-8">
    <title>Document</title>
</head>
<body>

    <h1 id="txt">中国联通</h1>

    <script src="static/js/jquery-3.6.1.min.js"></script>
    <script type="text/javascript">
        //使用JQuery修改内容

        $("#txt").text("广西移动");
    </script>

</body>
</html>
5.2寻找标签(直接)
- ID选择器
<h1 id="txt">中国联通</h1>
<h1>中国联通</h1>
<h1>中国联通</h1>
$("#txt")
- 样式选择器
<h1 class="c1">中国联通</h1>
<h1 class="c2">中国联通</h1>
<h1 class="c3">中国联通</h1>
$(".c1")
- 标签选择器
<h1 class="c1">中国联通</h1>
<h1 class="c2">中国联通</h1>
<h1 class="c3">中国联通</h1>
$("h1")
- 层级选择器
<div class="c1">
	<div class="c2">
		<h1>123</h1>
	</div>
</div>
$(".c1 .c2 h1")
- 多选择器
<div class="c1">
	<div class="c2">
		<h1>123</h1>
	</div>
</div>
<div class="c3">
	<div class="c4">
		<h1>123</h1>
		<li>456</li>
	</div>
</div>
$(" .c1, .c2,li")
- 属性选择器
<input type="text" name="n1" />
<input type="text" name="n2" />
<input type="text" name="n3" />
$("input[name='n1']")
5.3 寻找标签(间接)
- 找到上一个兄弟
<div>
	<div>北京</div>
	<div id="c1">上海</div>
	<div>深圳</div>
	<div>广州</div>
</div>
$("#c1").prev()			//上一个
$("#c1")
$("#c1").next()			//下一个
$("#c1").next().next()	//下一个的下一个
$("#c1").siblings()		//所有的兄弟
- 找父子
<div>
	<div>
		<div>北京</div>
		<div id="c1">
			<div>浦东新区</div>
			<div>静安区</div>
			<div>奉贤区</div>
		</div>
		<div>深圳</div>
		<div>广州</div>
	</div>
	<div>
		<div>北京</div>
		<div id="c1">上海</div>
		<div>深圳</div>
		<div>广州</div>
	</div>
</div>
$("#c1").parent()			//父亲
$("#c1").parent().parent()	//父亲的父亲

$("#c1").children()			//所有的儿子
$("#c1").children(".p10")	//所有的儿子中寻找class=p10

$("#c1").find(".p10")		//所有的子孙中寻找class=p10
$("#c1").children("div")	//所有的儿子中寻找标签 div
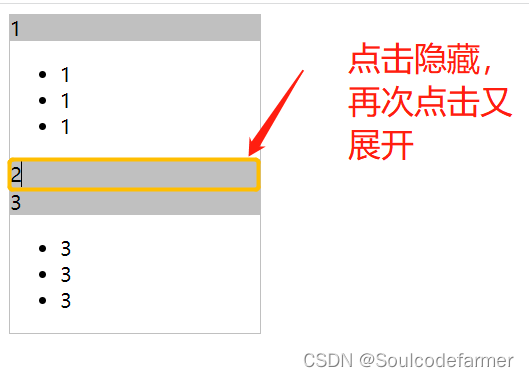
案例: 菜单的切换
js 实现点击标签头隐藏菜单,再次点击展示菜单
<!DOCTYPE html>
<html lang="en">
<head>
    <meta charset="UTF-8">
    <title>Title</title>
    <style type="text/css">
        .menu {
            width: 200px;
            border: 1px solid silver;
        }
        .header {
            background-color: silver;
            cursor: pointer;
        }
        .hide {
            display: none;
        }


    </style>
</head>
<body>
<div class="menu">
    <div class="header" onclick="ck(this)">1</div>
    <ul class="">
        <li>1</li>
        <li>1</li>
        <li>1</li>

    </ul>
</div>
<div class="menu ">
    <div class="header " onclick="ck(this)">2</div>
    <ul class="">
        <li>2</li>
        <li>2</li>
        <li>2</li>
    </ul>
</div>
<div class="menu ">
    <div class="header " onclick="ck(this)">3</div>
    <ul class="">
        <li>3</li>
        <li>3</li>
        <li>3</li>
    </ul>
</div>

<script src="../static/js/jquery-3.6.3.min.js"></script>
<script>

    function ck(self) {
    		//$(self) header的div标签
    		//$(self).next() ul标签

        // 判断点击标签的下一个标签是否有hide标签,被隐藏
        if(c.hasClass('hide')){
            //如果已经被隐藏那么这次点击将去除hide标签
            $(self).next().removeClass("hide");
        }else{
            //如果没有被隐藏,添加hide属性
           $(self).next().addClass("hide");
        }
        // $(self).parents().siblings().next().removeClass("hide");
    }
</script>
</body>
</html>
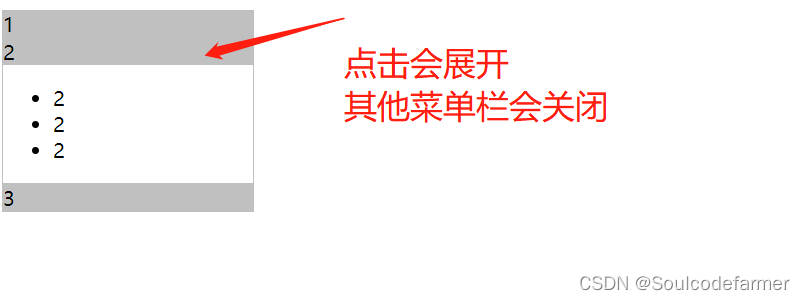
修改只有且仅有一个展开
<!DOCTYPE html>
<html lang="en">
<head>
    <meta charset="UTF-8">
    <title>Title</title>
    <style type="text/css">
        .menu {
            width: 200px;
            border: 1px solid silver;
        }
        .header {
            background-color: silver;
            cursor: pointer;
        }
        .hide {
            display: none;
        }


    </style>
</head>
<body>
<div class="menu">
    <div class="header" onclick="ck(this)">1</div>
    <ul class="hide">
        <li>1</li>
        <li>1</li>
        <li>1</li>

    </ul>
</div>
<div class="menu ">
    <div class="header " onclick="ck(this)">2</div>
    <ul class="hide">
        <li>2</li>
        <li>2</li>
        <li>2</li>
    </ul>
</div>
<div class="menu ">
    <div class="header " onclick="ck(this)">3</div>
    <ul class="hide">
        <li>3</li>
        <li>3</li>
        <li>3</li>
    </ul>
</div>

<script src="../static/js/jquery-3.6.3.min.js"></script>
<script>
    function ck(self) {
        //$(self) 为当前点击的class为header的div
        //$(self).parents() 当前的class为menu的div
        //$(self).parents().siblings()  除了自己的所有menu的div
        //$(self).parents().siblings().children() 除了自己的所有class为header的div和ul
        // $(self).parents().siblings().children().next() 除了自己的ul

        //无论菜单栏什么状态,点击就移除hide属性,进行展开
        $(self).next().removeClass("hide");
        //其他ul隐藏
        $(self).parents().siblings().children().next().addClass("hide");
    }
</script>
</body>
</html>
5.4 对值的操作
对h5中内容的操作
<div id="c1">内容</div>
<input type="text " id="c2"/>
$("#c1").text()				//获取文本内容
$("#c1").text("abc")		//设置文本内容

$("#c2").val()				//获取用户输入的值
$("#c2").val("嘿嘿嘿")		//设置值
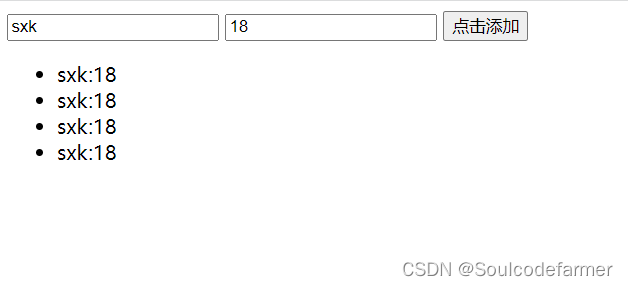
案例:动态创建数据
<!DOCTYPE html>
<html lang="en">
<head>
    <meta charset="UTF-8">
    <title>Document</title>
</head>
<body>

<input type="text" placeholder="请输入用户名" id="yhm">
<input type="text" placeholder="请输入密码" id="mm">
<input type="button" value="点击添加" onclick="ad()">

<ul id="uu">


</ul>

<script src="../static/js/jquery-3.6.3.min.js"></script>
<script>
    function ad() {
        var yhm = $("#yhm").val();
        var mm = $("#mm").val();

        var newli = $("<li>").text(yhm+":"+mm);
        $("#uu").append(newli);
        console.log(newli.toString())
    }

</script>
</body>
</html>
5.5 事件
之前都是dom事件 onclick
<body>

    <ul>
        <li>百度</li>
        <li>谷歌</li>
        <li>搜狗</li>
    </ul>

    <script src="static/js/jquery-3.6.1.min.js"></script>
    <script>
        $("li").click(function(){
            // 点击li标签时,自动执行这和函数
            // $(this) 当前你点击的是哪个标签
        });
    </script>
</body>
在JQuery可以删除指定的标签
$(this) 当前你点击的是哪个标签
<script src="static/js/jquery-3.6.1.min.js"></script>
<script>
    $("li").click(function(){
        // 点击li标签时,自动执行这和函数
        // $(this) 当前你点击的是哪个标签
        $(this).remove();
    });
</script>
当页面框架加载完成之后执行代码
<script>
    $(function () {
        // 当页面框架加载完成之后执行代码
        //...
    })

</script>
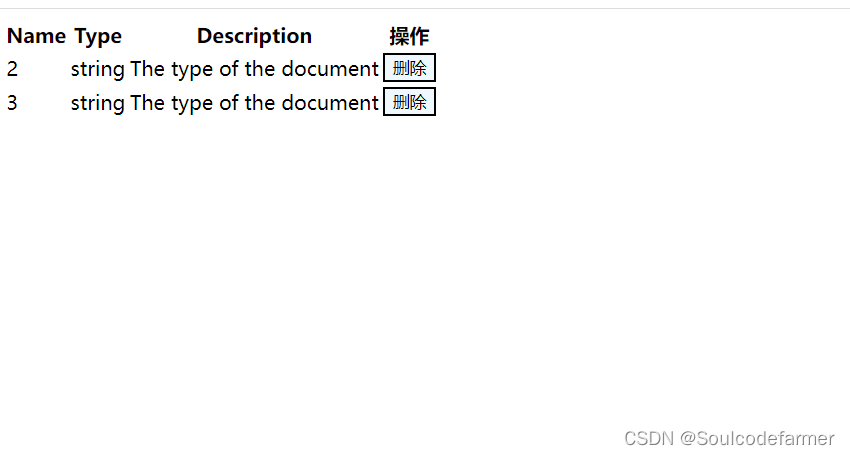
案例:表格删除
<!DOCTYPE html>
<html lang="en">
<head>
    <meta charset="UTF-8">
    <title>Document</title>
    <style>
        .del {
            background-color: aliceblue;
        }

    </style>
</head>
<body>
<table>
    <thead>
    <tr>
        <th>Name</th>
        <th>Type</th>
        <th>Description</th>
        <th>操作</th>
    </tr>
    </thead>

    <tbody>
    <tr>
        <td>0</td>
        <td>string</td>
        <td>The name of the document</td>
        <td><input type="button" value="删除" class="del"></td>
    </tr>
    <tr>
        <td>1</td>
        <td>string</td>
        <td>The type of the document</td>
        <td><input type="button" value="删除" class="del"></td>
    </tr>
    <tr>
        <td>2</td>
        <td>string</td>
        <td>The type of the document</td>
        <td><input type="button" value="删除" class="del"></td>
    </tr>
    <tr>
        <td>3</td>
        <td>string</td>
        <td>The type of the document</td>
        <td><input type="button" value="删除" class="del"></td>
    </tr>
</table>

<script src="../static/js/jquery-3.6.3.min.js"></script>
<script>

    $(function () {
        // 当页面框架加载完成之后执行代码
        //...

        $(".del").click(function () {
            // input.当前td.当前dr.删除
            $(this).parent().parent().remove();
        })
    })

</script>
</body>
</html>
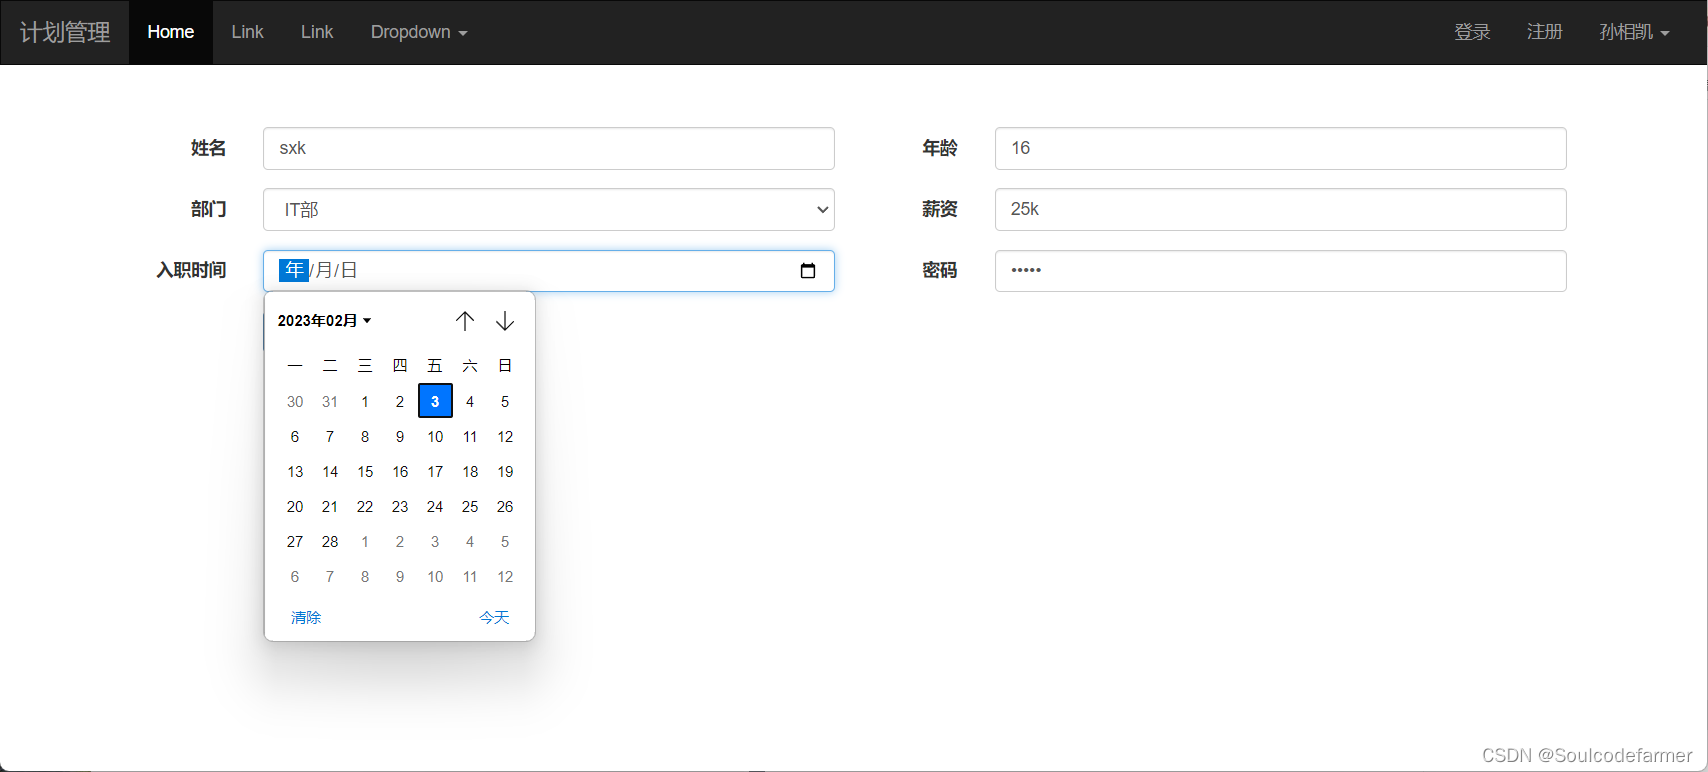
6 前端整活
案例:提交信息
<!DOCTYPE html>
<html lang="en">
<head>
    <meta charset="UTF-8">
    <title>Document</title>
    <link rel="stylesheet" href="../static/plugins/bootstrap-3.4.1/css/bootstrap.css">
    <link rel="stylesheet" href="../static/plugins/font-awesome-4.7.0/css/font-awesome.min.css">
    <style>
        .navbar {
            border-radius: 0;
        }

    </style>
    <style>
    </style>
</head>
<body>

<nav class="navbar navbar-inverse">
    <div class="container-fluid">
        <!-- Brand and toggle get grouped for better mobile display -->
        <div class="navbar-header">
            <button type="button" class="navbar-toggle collapsed" data-toggle="collapse"
                    data-target="#bs-example-navbar-collapse-9" aria-expanded="false">
                <span class="sr-only">Toggle navigation</span>
                <span class="icon-bar"></span>
                <span class="icon-bar"></span>
                <span class="icon-bar"></span>
            </button>
            <a class="navbar-brand" href="#">计划管理</a>
        </div>

        <!-- Collect the nav links, forms, and other content for toggling -->
        <div class="collapse navbar-collapse" id="bs-example-navbar-collapse-9">
            <ul class="nav navbar-nav">
                <li class="active"><a href="#">Home</a></li>
                <li><a href="#">Link</a></li>
                <li><a href="#">Link</a></li>
                <li class="dropdown">
                    <a href="#" class="dropdown-toggle" data-toggle="dropdown" role="button" aria-haspopup="true"
                       aria-expanded="false">Dropdown <span class="caret"></span></a>
                    <ul class="dropdown-menu">
                        <li><a href="#">Action</a></li>
                        <li><a href="#">Another action</a></li>
                        <li><a href="#">Something else here</a></li>
                        <li role="separator" class="divider"></li>
                        <li><a href="#">Separated link</a></li>
                        <li role="separator" class="divider"></li>
                        <li><a href="#">One more separated link</a></li>
                    </ul>
                </li>
            </ul>
            <ul class="nav navbar-nav navbar-right">
                <li><a href="#">登录</a></li>
                <li><a href="#">注册</a></li>
                <li class="dropdown">
                    <a href="#" class="dropdown-toggle" data-toggle="dropdown" role="button" aria-haspopup="true"
                       aria-expanded="false">孙相凯 <span class="caret"></span></a>
                    <ul class="dropdown-menu">
                        <li><a href="#">个人资料</a></li>
                        <li><a href="#">我的账户</a></li>
                        <li><a href="#">修改设置</a></li>
                        <li role="separator" class="divider"></li>
                        <li><a href="#">注销</a></li>
                    </ul>
                </li>
            </ul>
        </div><!-- /.navbar-collapse -->

    </div><!-- /.container-fluid -->

</nav>


    <div class="container">
        <form class="form-horizontal" style="margin-top: 30px;">
            <!-- 引入栅格系统 -->
            <!-- 姓名和年龄 -->
            <div class="row clearfix">
                <div class="col-xs-6">
                    <div class="form-group">
                        <label class="col-sm-2 control-label">姓名</label>
                        <div class="col-sm-10">
                            <input type="text" class="form-control" placeholder="姓名">
                        </div>
                    </div>
                </div>
                <div class="col-xs-6">
                    <div class="form-group">
                        <label class="col-sm-2 control-label">年龄</label>
                        <div class="col-sm-10">
                            <input type="text" class="form-control" placeholder="年龄">
                        </div>
                    </div>
                </div>
            </div>

            <!-- 部门和薪资 -->
            <div class="row clearfix">
                <div class="col-xs-6">
                    <div class="form-group">
                        <label class="col-sm-2 control-label">部门</label>
                        <div class="col-sm-10">
                            <select class="form-control">
                                <option>IT部</option>
                                <option>运营部</option>
                                <option>销售部</option>
                                <option>售前部</option>
                            </select>
                        </div>
                    </div>
                </div>
                <div class="col-xs-6">
                    <div class="form-group">
                        <label class="col-sm-2 control-label">薪资</label>
                        <div class="col-sm-10">
                            <input type="text" class="form-control" placeholder="薪资">
                        </div>
                    </div>
                </div>
            </div>

            <!-- 入职时间和密码 -->
            <div class="row clearfix">
                <div class="col-xs-6">
                    <div class="form-group">
                        <label class="col-sm-2 control-label">入职时间</label>
                        <div class="col-sm-10">
                            <input type="date" class="form-control" placeholder="入职时间">
                        </div>
                    </div>
                </div>
                <div class="col-xs-6">
                    <div class="form-group">
                        <label for="inputPassword3" class="col-sm-2 control-label">密码</label>
                        <div class="col-sm-10">
                            <input type="password" class="form-control" placeholder="密码">
                        </div>
                    </div>
                </div>
            </div>

            <div class="row clearfix">
                <div class="col-xs-6">
                    <div class="form-group">
                        <div class="col-sm-offset-2 col-sm-10">
                            <button type="submit" class="btn btn-primary">Sign in</button>
                        </div>
                    </div>
                </div>
            </div>
        </form>
    </div>

<script src="../static/js/jquery-3.6.3.min.js"></script>
<script src="../static/js/bootstrap.js"></script>
</body>
</html>


 1309
1309


 被折叠的 条评论
为什么被折叠?
被折叠的 条评论
为什么被折叠?
 到【灌水乐园】发言


