配置git,创建git本地仓库
(git的安装可以参考上一篇博文:https://blog.csdn.net/Star_woniu/article/details/129393610)
打开windows git bash, 首先创建一个新的文件夹
![](https://img-blog.csdnimg.cn/img_convert/afb66cce7471b1d8376c14571b425969.png)
执行git init:
![](https://img-blog.csdnimg.cn/img_convert/f7929ee7eefaaa01c6c7d0b6035d804c.png)
配置git用户:
git config --global user.name "name"
git config --global user.email "eamil@email.com"
![](https://img-blog.csdnimg.cn/img_convert/f3d3a1b03ceead05482f7afefa71bb1b.png)
创建并添加自己需要上传到远程的目录及文件:
mkdir key_helper
git add key_helper
cd key_helper/
git add mouse_recorder.ui my_recorder.py my_window.py Ui_mouse_recorder.py
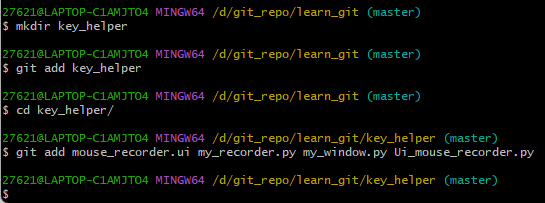
![](https://img-blog.csdnimg.cn/img_convert/d11ee7f13a20e6cb02a7c6c6faa6f6b7.png)
Github创建远程仓库
在github创建远程仓库:
![](https://img-blog.csdnimg.cn/img_convert/6ea94d2d500bc29f0c85e611aa02787b.png)
命名并提交:
![](https://img-blog.csdnimg.cn/img_convert/6345a0329ac97387f49b9a0fc2095205.png)
创建之后就有后续步骤提示了:
![](https://img-blog.csdnimg.cn/img_convert/5912e3e7e62719fccad3fc93dfebac09.png)
一二步我们已经完成了,继续进行代码提交:
尝试提交修改
git commit -m "修改记录",提交修改:
![](https://img-blog.csdnimg.cn/img_convert/1e3453ea15cbf96b90b273f6d02debdf.png)
git remote add:
![](https://img-blog.csdnimg.cn/img_convert/392e9f7813490b1ca15622d9682f6a4e.png)
git push, 发现执行失败,提示“fatal: unable to access 'https://github.com/Sampsin/learning.git/': Could not resolve host: github.com“。用过git的同学就会知道是因为没有配置ssh key
![](https://img-blog.csdnimg.cn/img_convert/108e6b0cb9e195b53156363deff5f66c.png)
配置ssh key
使用如下命令创建:
ssh-keygen -t rsa -C "email@email.com"
ls -al ~/.ssh
cat ~/.ssh/id_rsa.pub
![](https://img-blog.csdnimg.cn/img_convert/cc83aec2b7ca8cfc04068825790c972b.png)
![](https://img-blog.csdnimg.cn/img_convert/c963e7614165d3604683602d4bb6ee72.png)
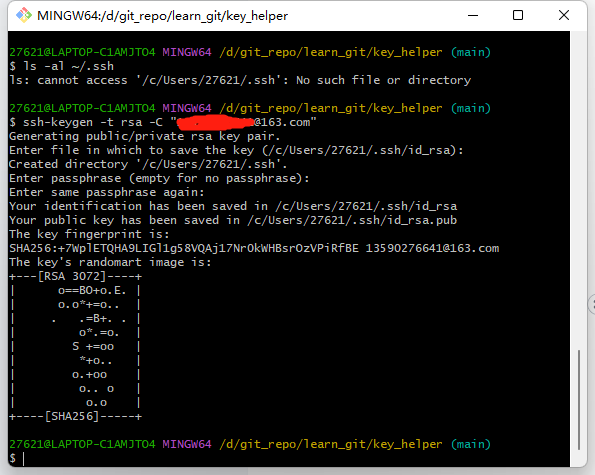
拷贝cat出来的内容到github,GitHub先进入setting->SSH and GPG keys
![](https://img-blog.csdnimg.cn/img_convert/a3929696d03a7600c94635ce9b500409.png)
![](https://img-blog.csdnimg.cn/img_convert/5203ab035a1dfa636a2e6f71f9eab1c6.png)
![](https://img-blog.csdnimg.cn/img_convert/81d23843dcaf950c6856a527a7a39e18.png)
添加完毕。
执行命令检测连通性:
ssh -T git@github.com
![](https://img-blog.csdnimg.cn/img_convert/de69057176899e7364a089689635ac07.png)
重新提交代码
最后我们重新push代码,会弹出github的授权,选择同意:
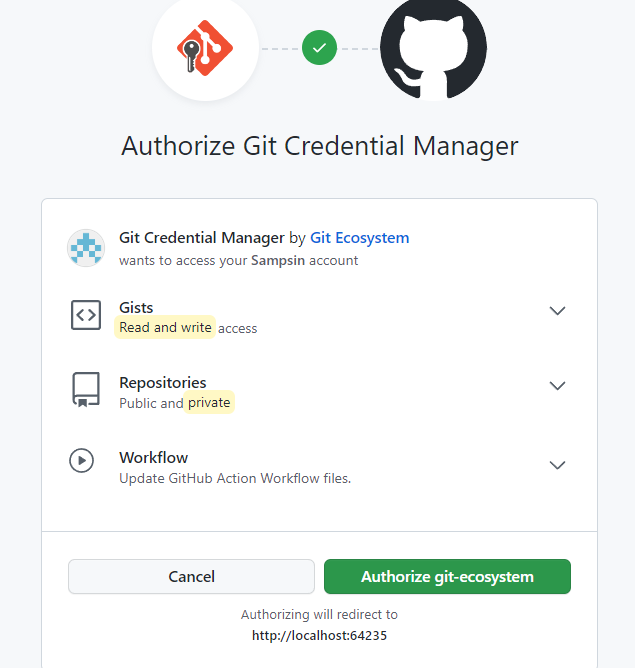
![](https://img-blog.csdnimg.cn/img_convert/5c6fea45474240e05f1b9177dd428456.png)
代码push成功并查看状态:
![](https://img-blog.csdnimg.cn/img_convert/9afc0311737a72c4fb92bb6ceaa3c31f.png)
我们可以新建一个readme并提交:
![](https://img-blog.csdnimg.cn/img_convert/265f8f9fcbe14fd0e0499dbcacd4956c.png)
在github repo这边查看提交的代码:
![](https://img-blog.csdnimg.cn/img_convert/e693ff456dee3575226f7286f0a5ae7a.png)
Perfect!