


 本文是Android学习系列,讲解如何创建并实现一个带有ListView、EditText和Button的对话框。通过分析效果图,逐步解析Step1至Step5的实现过程,包括布局文件、Msg类的定义、MsgAdapter的重写等关键步骤。文章最后提供了源码下载链接。
/**
*@author StormMaybin
*@Date 2016-06-17
*/
写在前面
每一个成功者都有一个开始。勇于开始,才能找到成功的路。
在上一篇自定义View的博客中,列举了大致的自定义View方法步骤,今天这篇博客是关于第一行代码中对话框的实现,先看一下效果图。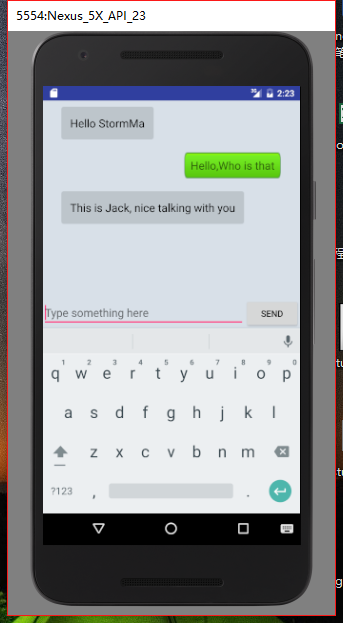
Step1:
先在主布局文件中添加需要的控件:
<?xml version="1.0" encoding="utf-8"?>
<LinearLayout xmlns:android="http://schemas.android.com/apk/res/android"
    xmlns:tools="http://schemas.android.com/tools"
    android:layout_width="match_parent"
    android:layout_height="match_parent"
    android:orientation="vertical"
    android:background="#d8e0e8">
    <ListView
        android:id="@+id/msg_list_view"
        android:layout_width="match_parent"
        android:layout_height="0dp"
        android:layout_weight="1"
        android:divider="#0000">

    </ListView>
    <LinearLayout
        android:layout_width="match_parent"
        android:layout_height="wrap_content"
        >
        <EditText
            android:id="@+id/input_text"
            android:layout_width="0dp"
            android:layout_height="wrap_content"
            android:layout_weight="1"
            android:hint="Type something here"
            android:maxLines="2" />
        <Button
            android:id="@+id/send"
            android:layout_width="wrap_content"
            android:layout_height="wrap_content"
            android:text="Send"/>
    </
最低0.47元/天 解锁文章


 545
545

 被折叠的 条评论
为什么被折叠?
被折叠的 条评论
为什么被折叠?
 到【灌水乐园】发言


