


之前折腾了很久的android的环境,自己也把eros官网的demo安装到手机上跑出来了,可是我想要有自己的页面,一直弄不出来,后台经过android的专人指点,环境搭建好之后,重新写demo,然后跳转,终于成功了,以此博客记录一下
参考:https://juejin.im/post/5a30f3e95188252da0536d2c
我这里是在现有项目基础上,搭建的demo
vs code打开整个项目的文件夹,android打开项目底下的platforms->android->Weex....文件夹,如下图所示

一、对于初学者来说这个目录结构特别重要,我现在接触的正式的app开发使用的就是这个结构

二、在src->js->pages下面新建文件夹 sundemo,然后创建两个页面,分别是我自定义的首页和跳转页面

homePage.vue
<template>
  <div style="align-items: center">
    <image class="loginBackground" src="bmlocal://assets/images/MySelf/beijing.jpg">
    <div class="mainLogin" :style="mainLoginStyle">
      <div style="flex-direction: row ;margin-top: 50px;margin-bottom: 30px">
        <div style="margin-left: 50px">
          <text style="margin-bottom: 10px">请登录</text>
          <text style="margin-bottom: 20px">sun1平台</text>
        </div>
        <image
          class="logo"
          src="bmlocal://assets/images/MySelf/3.jpg"
          style="position: absolute;right: 50px"
        >
      </div>
      <div style="align-items: center">
        <div class="inputDiv">
          <image class="userInput" src="bmlocal://assets/images/MySelf/userInput.png">
          <input v-model="userName" type="text" class="input" :maxlength="20">
        </div>
        <div class="inputDiv">
          <image
            class="userInput"
            style="width: 25px"
            src="bmlocal://assets/images/MySelf/passwordInput.png"
          >
          <input v-model="password" type="password" class="input" :maxlength="16">
        </div>
        <div class="divBottom">
          <text class="lossPass register" @click="toRegister">注册</text>
          <text class="lossPass" @click="goLossPass">忘记密码?</text>
        </div>
      </div>
      <div style="align-items: center">
        <wxc-button
          style="width: 594px ;height: 88px ;margin-top: 30px;background-color: #1bb2af"
          text="立即登录"
          @wxcButtonClicked="showTestPage"
        ></wxc-button>
      </div>
    </div>

    <wxc-loading :show="isShowLoading" loading-text="正在努力跑..." :need-mask="true" type="default"></wxc-loading>
  </div>
</template>

<script>
import { WxcButton, WxcLoading } from "weex-ui";
import loginApi from "../../service/login-service.js";
import { setCache, getCache } from "../../utils/index.js";

export default {
  components: {
    WxcLoading,
    WxcButton
  },
  data() {
    return {
      appExitTime: 0,
      appMaxExitTime: 2000,
      isShowLoading: false,
      userName: "",
      password: ""
    };
  },
  computed: {
    mainLoginStyle() {
      let viewHeight = weex.config.env.deviceHeight;
      let viewWidth = weex.config.env.deviceWidth;
      console.log("viewHeight==", viewHeight, viewWidth);
      let height = (750 * viewHeight) / viewWidth;
      return {
        "margin-top": (height - 592) / 2 + "px"
      };
    }
  },
  created() {
    this.androidFinishApp();
  },
  mounted() {
      this.getTheVersionInfo();
    if (getCache("userName")) {
      this.userName = getCache("userName");
    }
    if (getCache("passWord")) {
      this.password = getCache("passWord");
    }
  },
  methods: {
    androidFinishApp() {
      const globalEvent = weex.requireModule("globalEvent");
      globalEvent.addEventListener("homeBack", options => {
        var timestamp = new Date().valueOf();
        console.log("timestamp = " + timestamp);
        console.log("appExitTime = " + this.appExitTime);
        if (timestamp - this.appExitTime > this.appMaxExitTime) {
          this.$notice.toast({ message: "双击退出应用" });
          this.appExitTime = timestamp;
        } else {
          this.appExitTime = 0;
          this.$router.finish();
        }
      });
    },
    showTestPage() {
      this.$router.open({
             name: 'SunTest'
      })
    }
  }
};
</script>

<style scoped>
.btnLogin {
  margin-top: 200px;
  margin-left: 20px;
  width: 100px;
  height: 100px;
  background-color: aquamarine;
}

.loginBackground {
  width: 750px;
  position: absolute;
  top: 0px;
  bottom: 0px;
  right: 0px;
  left: 0px;
}

.mainLogin {
  margin-top: 300px;
  width: 664px;
  height: 592px;
  background-color: rgba(255, 255, 255, 1);
  border-radius: 6px;
}

.logo {
  width: 126px;
  height: 90px;
}

.input {
  background-color: rgba(248, 248, 248, 1);
  padding-left: 10px;
  border-width: 0px;
  height: 58px;
  font-size: 30px;
  border-radius: 10px;
  width: 500px;
  margin-right: 2px;
}

.inputDiv {
  flex-direction: row;
  align-items: center;
  background-color: rgba(248, 248, 248, 1);
  border-radius: 10px;
  width: 580px;
  height: 64px;
  border-width: 2px;
  border-color: rgba(222, 222, 222, 1);
  margin-bottom: 30px;
}

.userInput {
  width: 32px;
  height: 32px;
  background-color: rgba(248, 248, 248, 1);
  margin-left: 20px;
}

.divBottom {
  display: flex;
  flex-direction: row;
  justify-content: space-between;
  /* justify-content: flex-end; */
  height: 50px;
  width: 664px;
}
.lossPass {
  width: 200px;
  font-size: 20px;
  font-weight: 500;
  color: rgba(151, 151, 151, 1);
  line-height: 28px;
  text-align: right;
  align-self: flex-end;
  padding-right: 40px;
  height: 50px;
  line-height: 50px;
}
.register {
  text-align: left;
  padding-left: 40px;
}
</style>
三、修改 eros.dev.js 中的 exports,添加如下

注意:该文件上面两个是和 eros.native.js 中的 appBoard,mediator 一一对应的,如果这里两边修改没有对应上会导致报错,建议平时不用变动
四、修改app的首页为我自定义的首页,即修改 eros.native.js 中的 page.homePage 路径

五、Ctrl + c断开 eros dev服务,因为要告诉脚手架配置文件的变动。
六、eros pack android 打内置包,因为要告诉 app 配置文件中的变动。
这里想说明一下,一位android同事说的,该命令是为了更新下面三个文件

七、eros dev重启
八、因为我用的是真机测试,在android studio中进行如下操作,点击三角号,选中我的设备,然后点击ok

九、手机安装好之后的首页如下

到这里首页demo完成了
然后实现点击“立即登录”按钮跳转到另一个页面
十、在sundemo文件夹添加SunTest.vue文件
SunTest.vue
<template>
    <div style="margin-top: 50px;">
        <text class="title">Hi!</text>
        <text class="title">Enjoy it!</text>
    </div>
</template>
<script>
    export default {
    }
</script>
<style>
.title{
    font-size: 60;
}
</style>
十一、修改 eros.dev.js 告诉脚手架添加页面了

十二、注册路由,修改 js/config/pages.js

这里的 url 是填写 dist 目录中打包出来 JS Bundle 的相对路径(现在并没有这个 JS Bundle,需要重启开发服务读取配置才会有),注意因为是 JS Bundle 所以以 .js 为结尾。
十三、添加跳转事件


十四、eros dev重启,点击立刻登录,跳转成功

不是一般的开心啊,进步一点点也值得开心
这里需要注意的是,有时页面不展示或者报错,可以试试这个方法:
app打开之后左边会有个Debugger,点击之后出现三个选项,点击第一个选项“调试页面”,将拦截器开关下面Interceptor前面的对勾去掉,然后勾选hotRefresh,然后返回再点击Debugger,点击刷新,
20191023更新,上面有不带参的页面跳转,再更新一个带参的页面跳转
一、修改homePage.vue文件,进行传参


二、SunTest.vue页面也就是即将要跳转到的页面,接参数

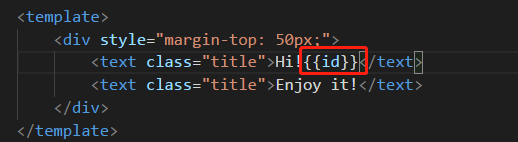
效果如下:

说明一下,一开始想用纯vue的页面带参跳转,试了发现不行,然后在当前app项目中找了带参页面跳转的例子,测试好了,有成就感
当时纠结了mounted和created的区别,参考了https://blog.csdn.net/xdnloveme/article/details/78035065


 8205
8205


 被折叠的 条评论
为什么被折叠?
被折叠的 条评论
为什么被折叠?
 到【灌水乐园】发言


