


使用el-upload 踩过的坑希望能帮助到大家
应用场景:在新增表单的时候 中间穿插 上传文件并且上传文件的街接口需求上传每一条的id很显然是要新增后才能拿到这个id的 下面就详细介绍全过程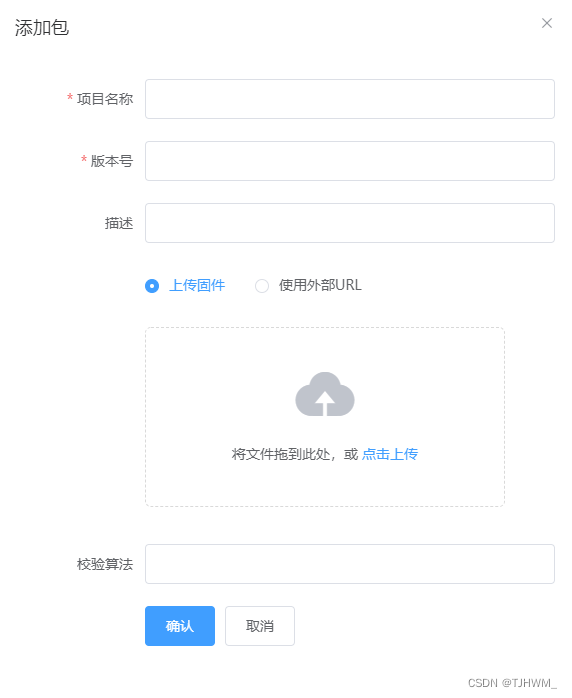
这里的运用的一个场景 点击新增的时候会出发两个接口 第一个是新增的一个接口 第二个是上传附件的一个接口
 <el-form-item>
            <el-upload
              class="upload-demo"
              drag
              action="11"
              :before-upload="beforeUpload"
              :on-exceed="handleExceed"
              multiple
              :on-change="fileChange"
            >
              <i class="el-icon-upload"></i>
              <div class="el-upload__text">
                将文件拖到此处,或
                <em>点击上传</em>
              </div>
            </el-upload>
          </el-form-item>
上面说到我们自己调用接口对吧 就用如果你们的post请求方式没有封装好 不想自己封装那就用我这种方法直接用axios请求
在mian.js中引入一下axios两行代码足够
import axios from 'axios'
Vue.prototype.$axios = axios // 将请求模块挂载到实例模型上
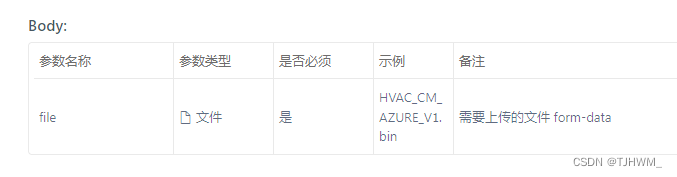
这里后端要求的file文件的名称 和一个路由参数otaID

beforeUpload(file, otaID) {

      let fd = new FormData();
      this.files = file;
      let isLt10M = file.size / 1024 / 1024 < 10;
      if (!isLt10M) {
        this.$message({
          message: "上传文件大小不能超过 10MB!",
          type: "warning"
        });
        return isLt10M;
      }

      fd.append("file", file); //传文件 这里的file名称一定要更后端的要求的名称保持一直才可以
      this.$axios({
        url: "http://localhost:8081/api/ota/" + otaID,
        method: "post",
        data: fd,//data 就是你上面上传传输的一个文件
        processData: false, // 告诉axios不要去处理发送的数据(重要参数)
        contentType: false // 告诉axios不要去设置Content-Type请求头
        //以为他是一个form-data 的请求体所	以不能用常规json去请求 这里就直接给他置为false就ok了
      }).then(res => {
        console.log(res);
      });
    },
    // 文件状态改变时 这里是在所md5转换的时候 需要用到的 没有要求 转换可以忽略
    fileChange(file) {
      let that = this;
      let fileReader = new FileReader();
      let Spark = new SparkMD5.ArrayBuffer();
      fileReader.readAsArrayBuffer(file.raw);
      fileReader.onload = function(e) {
        Spark.append(e.target.result);
        that.ruleForm.checksum_algorithm = Spark.end();
      };
    },
beforeUpload(file, otaID)这里大家可以看到 有两个参数一个file 一个是otaID 所以在新增点击确定的时候 就要把两个参数一并传过来。
下面就是我在提交表单的时候做的操作 调用了beforeUpload(file, otaID) 是在提交完之后调用的 以为这样就可以拿到我们想要的这个otaID了。
 submitForm(formName) {
      this.$refs[formName].validate(async valid => {
        if (valid) {
          let res = await this.$api.postOta(this.ruleForm);
          if (res.status == 201) {
            this.$message({
              message: "新增成功",
              type: "success"
            });
            console.log(res.data.id, "Res");
              this.beforeUpload(this.files, res.data.id);
              //这里有两个参数 要更上面的方法对应 因为下面拿不到这个file 所以我们在beforeUpload
              // 给file  this.files = file;定义一个全局的变量 然后再新增的时候给他一并传过去
              // 如果我们只传一个res.data.id 上面的上传文件肯定那不到这个id的 所以要对应上 即可
            this.getOta();//刷新表单
            this.otaDialogVisible = false;//关闭弹框
          }
        } else {
          return false;
        }
      });
    },
以上就是本人亲自测试之后成功的一个案例 有效案例 希望可以帮到大家!!!


 2万+
2万+


 被折叠的 条评论
为什么被折叠?
被折叠的 条评论
为什么被折叠?
 到【灌水乐园】发言


