


基础配置
配置入口出口
未配置webpack.config.js时,需要在终端输入webpack ./src/main.js ./dist/bundle.js(指定入口出口)来对js文件打包。
配置后,使用webpack即可打包
// 在项目根目录新建webpack.config.js,编辑以下代码
const path = require('path')
module.exports = {
    entry: './src/main.js',
    output: {
        path: path.resolve(__dirname, 'dist'),
        filename: 'bundle.js'
    }
}
配置Loader
配置解析CSS
webpack除了将js文件打包,作为模块化使用之外,还具有其他附带的功能,比如可以将css打包到js文件中,当作模块使用
const path = require('path')
module.exports = {
    entry: './src/main.js',
    output: {
        path: path.resolve(__dirname, 'dist'),
        filename: 'bundle.js'
    },
    module: {
        rules: [
            {
                test: /\.css$/,
                // 使用方向从右往左
                // 先使用css-loader将css文件打包,
                // 再使用style-loader将css写入文档中
                use: ['style-loader', 'css-loader']
            }
        ]
    }
}
// 使用的loader版本如下
    "css-loader": "^2.0.2",
    "style-loader": "^0.23.1",
配置解析less
除了解析css外,还能解析less等
const path = require('path')
module.exports = {
    entry: './src/main.js',
    output: {
        path: path.resolve(__dirname, 'dist'),
        filename: 'bundle.js'
    },
    module: {
        rules: [
            {
                test: /\.less$/,
                use: ['style-loader', 'css-loader', 'less-loader']
            }
        ]
    }
}
// 使用的loader及less版本如下
    "css-loader": "^2.0.2",
    "less": "^3.9.0",
    "less-loader": "^4.1.0",
    "style-loader": "^0.23.1",
配置解析图片
webpack还能解析图片
const path = require('path')
module.exports = {
    entry: './src/main.js',
    output: {
        path: path.resolve(__dirname, 'dist'),
        filename: 'bundle.js',
        // 公共路径,会拼接在所有相对路径的头部
        publicPath: 'dist/'
    },
    module: {
        rules: [
            {
                test: /\.(jpg|png|jpeg|gif)$/,
                use: [
                    {
                        loader: 'url-loader',
                        options: {
                            // 图片大小小于limit时,转换为base64字符串
                            // 图片大小大于limit时,使用file-loader加载,因此还需要下载file-loader(不需要再配置)
                            limit: 8192,
                            // img文件夹下,使用原名字name,hash值取前8位防止重名,再使用原拓展名ext
                            name: 'img/[name].[hash:8].[ext]'
                        }
                    }
                ]
            }

        ]
    }
}
// 使用的loader版本
"url-loader": "^1.1.2",
"file-loader": "^3.0.1"
配置babel,ES6转ES5提升浏览器兼容性
const path = require('path')
module.exports = {
    entry: './src/main.js',
    output: {
        path: path.resolve(__dirname, 'dist'),
        filename: 'bundle.js',
        publicPath: 'dist/'
    },
    module: {
        rules: [
            {
                test: /\.js$/,
                exclude: /(node_modules|bower_components)/,
                use: {
                	// 该loader还需要依赖babel-core, babel-preset文件,需要同时安装(但不需要配置)
                    loader: 'babel-loader',
                    options: {
                        presets: ['es2015']
                    }
                }
            }

        ]
    }
}
// 使用的loader版本
    "babel-core": "^6.26.3",
    "babel-loader": "^7.1.5",
    // es2015即ES6, 帮助es6转为es5
    "babel-preset-es2015": "^6.24.1"
配置vue
- 配置使用runtime-compiler版的vue
module.exports = {
    resolve: {
    	// vue发布时有多个版本,其中就包括runtime-only和runtime-compiler版
    	// 默认使用前者,不包含编译相关的代码
    	// 此处配置,使用vue包含compiler的发布版
        alias: {
            'vue$': 'vue/dist/vue.esm.js'
        }
    }

}
// 使用的vue版本
	"vue": "^2.5.21"
第一步配置完成,就可以在项目中使用vue进行开发了,使用如下
import Vue from 'vue'

new Vue({
    el: '#app',
    template: `
    <div>
        <h1>Vue</h1>
        <h1>{{message}}</h1>
    </div>
    `,
    data: {
        message: "hello"
    }
})
也可以将模版template抽出到另一个文件中方便管理
// app.js
export default {
    template: `
    <div>
        <h1>Vue</h1>
        <h1>{{message}}</h1>
    </div>
    `,
    data() {
        return {
            message: "hello"
        }

    }

}
import Vue from 'vue'

import APP from './vue/app.js'

new Vue({
    el: '#app',
    template: `
        <APP/>
    `,
    components: {
        APP
    }

})
也能够达到模块化的效果,但是我们在项目中常用的是.vue文件,因此还需要配置第二步
2. 配置解析vue
const path = require('path')
module.exports = {
    entry: './src/main.js',
    output: {
        path: path.resolve(__dirname, 'dist'),
        filename: 'bundle.js',
        publicPath: 'dist/'
    },
    module: {
        rules: [
            {
                test: /\.vue$/,
                use: ['vue-loader']
            }
        ]
    },
    resolve: {
        alias: {
            'vue$': 'vue/dist/vue.esm.js'
        }
    }
}
// 使用的loader版本
// loader版本需要与compiler版本相对应
    "vue-loader": "^9.0.0",
    "vue-template-compiler": "^2.5.21",
使用如下
<!-- app.vue -->
<template>
    <div>
        <h1>Vue</h1>
        <h1>{{message}}</h1>
    </div>
</template>
<script>
export default {
    data() {
        return {
            message: "hello"
        }
    }
}
</script>
import Vue from 'vue'

import APP from './vue/app.vue'

new Vue({
    el: '#app',
    template: `
        <APP/>
    `,
    components: {
        APP
    }

})
配置省略扩展名
有时我们引入文件的时候,比如index.js, App.vue等等,我们不想写后缀,如:import 'App',可以这样地配置
module.exports = {
    resolve: {
        extensions: ['.js', '.vue'],
    }
}
使用 Plugin
使用 BannerPlugin
主要作用就是在打包后的文件头部添加一些说明文字
const path = require('path')
const webpack = require('webpack')

module.exports = {
    entry: './src/main.js',
    output: {
        path: path.resolve(__dirname, 'dist'),
        filename: 'bundle.js',
        publicPath: 'dist/'
    },
    plugins: [
    	// webpack自有的Plugin, 不需要安装
        new webpack.BannerPlugin('最终版权归hello所有')
    ]

}

使用 html-webpack-plugin
需求:打包的dist 文件夹只有bundle.js,而使用bundle.js的index.html没在dist文件夹下,不可以直接发布,因此需要在dist文件夹下同时生成index.html
作用:
- 自动生成一个index.html (可以指定模板来生成)
- 将打包的JS文件,自动通过script标签插入到body中
配置:
const path = require('path')
const HtmlWebpackPlugin = require('html-webpack-plugin')

module.exports = {
    entry: './src/main.js',
    output: {
        path: path.resolve(__dirname, 'dist'),
        filename: 'bundle.js',
        // 因为index.html就在dist文件夹下,路径问题不存在了,这句代码也不再需要
        // publicPath: 'dist/'
    },
    plugins: [
    	// 使用默认index.html模版
		// new HtmlWebpackPlugin(),
        // 根据已存在的模版生成
        new HtmlWebpackPlugin({
        	// 使用scr/index.html生成dist/index.html
            template: 'index.html'
        })
    ]

}
相关文件版本:
"html-webpack-plugin": "^3.2.0",
<!-- 默认生成的index.html -->
<!DOCTYPE html>
<html>
  <head>
    <meta charset="UTF-8">
    <title>Webpack App</title>
  </head>
  <body>
    <script type="text/javascript" src="bundle.js"></script>
  </body>
</html>
<!-- 根据已存在的模版生成 -->
<!-- 因为vue通常要挂载到#app下,因此一般用这种方式 -->

<!-- src/index.html -->
<!DOCTYPE html>
<html lang="en">
<head>
    <meta charset="UTF-8">
    <meta name="viewport" content="width=device-width, initial-scale=1.0">
    <title>Document</title>
</head>
<body>
    <div id="app"></div>
</body>
</html>
<!-- dist/index.html -->
<!DOCTYPE html>
<html lang="en">
<head>
    <meta charset="UTF-8">
    <meta name="viewport" content="width=device-width, initial-scale=1.0">
    <title>Document</title>
</head>
<body>
    <div id="app"></div>
<script type="text/javascript" src="bundle.js"></script></body>
</html>
使用 uglifyjs-webpack-plugin
作用: 压缩打包后的js文件
相关文件版本:
配置:
const path = require('path')
const UglifyJsPlugin = require('uglifyjs-webpack-plugin')

module.exports = {
    entry: './src/main.js',
    output: {
        path: path.resolve(__dirname, 'dist'),
        filename: 'bundle.js',
    },
    plugins: [
        new UglifyJsPlugin()
    ]

}

搭建本地服务器 webpack-dev-server
需求:每次改动文件过后需要手动打包再运行网页文件非常繁琐,因此希望改动文件之后能够自动打包(打包结果在内存,不会保存到硬盘),并且将改动体现在网页上
配置:
const path = require('path')

module.exports = {
    entry: './src/main.js',
    output: {
        path: path.resolve(__dirname, 'dist'),
        filename: 'bundle.js',
    },
    devServer: {
        contentBase: './dist',  //   为哪一个文件夹提供本地服务
        inline: true,   // 页面是否实时刷新
        port: 8080		// 监听端口
    }
}
再配置一下脚本命令
  "scripts": {
  	// --open 表示自动打开浏览器
    "dev": "webpack-dev-server --open"
  },
然后通过npm run dev 就可以将本地服务器运行起来
依赖的文件版本:
"webpack-dev-server": "^2.9.1"
webpack 配置分离
需求:在webpack配置里面,有一部分属于基础配置,即在开发和生产环境下都需要的配置,而另外部分的配置可能属于仅在生产环境下需要,或仅在开发环境下需要,一旦配置项变多,很容易混淆,因此希望可以将各种配置分离开,在对应环境使用对应的配置。
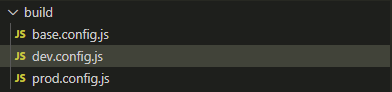
- 在项目文件夹下新建build文件夹,并创建相应文件
/build
 - base.config.js
 - dev.config.js
 - prod.config.js
2. 安装webpack-merge并作以下配置
// dev.config.js
const webpackMerge = require('webpack-merge')
const baseConfig = require('./base.config')

module.exports = webpackMerge(baseConfig, {
    devServer: {
        contentBase: './dist',
        inline: true
    }
})
// prod.config.js
const UglifyJsPlugin = require('uglifyjs-webpack-plugin')
const webpackMerge = require('webpack-merge')
const baseConfig = require('./base.config')

module.exports = webpackMerge(baseConfig, {
    plugins: [
        new UglifyJsPlugin()
    ]
})
// base.config.js
const path = require('path')
const webpack = require('webpack')
const HtmlWebpackPlugin = require('html-webpack-plugin')

module.exports = {
    entry: './src/main.js',
    output: {
    	// 因为配置文件相对于dist文件夹的位置发生了变化,因此这里也需要配置一下
        path: path.resolve(__dirname, '../dist'),
        filename: 'bundle.js',
    },
    module: {
        rules: [
			...
        ]
    },
    resolve: {
			...
    },
    plugins: [
        new webpack.BannerPlugin('最终版权归hello所有'),
        new HtmlWebpackPlugin({
            template: 'index.html'
        }),
        // 这个搬到prod.config.js里面
        // new UglifyJsPlugin()

    ],
    // 这个搬到dev.config.js里面
    /*
    devServer: {
        contentBase: './dist',
        inline: true
    }*/

}
- 配置package.json
  "scripts": {
  	// 生产打包时运行
    "build": "webpack --config ./build/prod.config.js",
    // 开发时运行
    "dev": "webpack-dev-server --open --config ./build/dev.config.js"
  },
依赖文件版本
"webpack-merge": "^4.1.5"


 4455
4455


 被折叠的 条评论
为什么被折叠?
被折叠的 条评论
为什么被折叠?
 到【灌水乐园】发言


