


作者使用MyEclipse 2014版本
本博客所编写程序源码为:
http://download.csdn.net/detail/tmaskboy/9526815
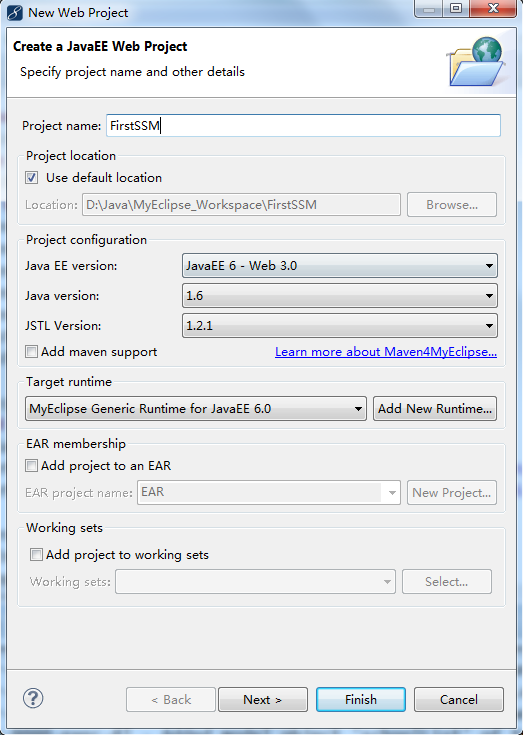
1. 新建Web project
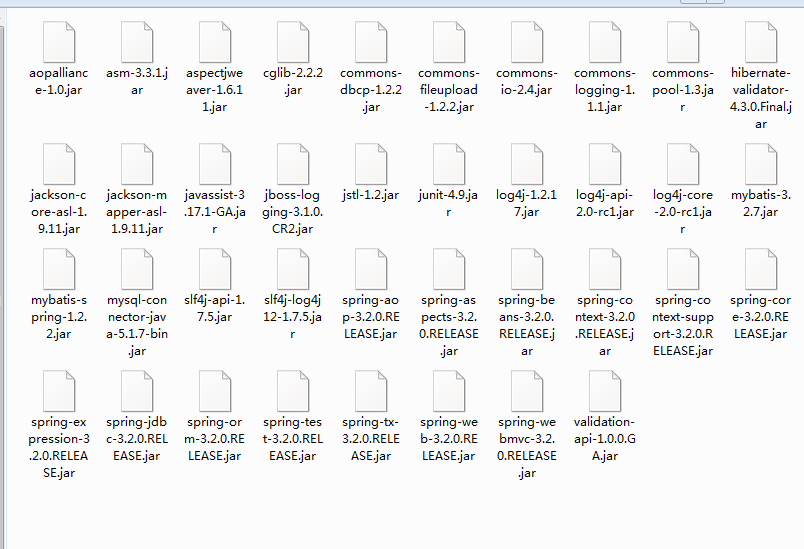
2. 添加ljar文件
3. web.xml文件
<?xml version="1.0" encoding="UTF-8"?>
<web-app xmlns:xsi="http://www.w3.org/2001/XMLSchema-instance" xmlns="http://java.sun.com/xml/ns/javaee" xsi:schemaLocation="http://java.sun.com/xml/ns/javaee http://java.sun.com/xml/ns/javaee/web-app_3_0.xsd" id="WebApp_ID" version="3.0">
<display-name>Major</display-name>
<!-- 加载spring容器 -->
<context-param>
<param-name>contextConfigLocation</param-name>
<param-value>/WEB-INF/classes/spring/applicationContext-*.xml</param-value>
</context-param>
<listener>
<listener-class>org.springframework.web.context.ContextLoaderListener</listener-class>
</listener>
<!-- springmvc前端控制器,rest配置 -->
<servlet>
<servlet-name>springmvc_rest</servlet-name>
<servlet-class>org.springframework.web.servlet.DispatcherServlet</servlet-class>
<!-- contextConfigLocation配置springmvc加载的配置文件(配置处理器映射器、适配器等等) 如果不配置contextConfigLocation,默认加载的是/WEB-INF/servlet名称-serlvet.xml(springmvc-servlet.xml) -->
<init-param>
<param-name>contextConfigLocation</param-name>
<param-value>classpath:spring/springmvc.xml</param-value>
</init-param>
</servlet>
<servlet-mapping>
<servlet-name>springmvc_rest</servlet-name>
<url-pattern>/</url-pattern>
</servlet-mapping>
<!-- post乱码过虑器 -->
<filter>
<filter-name>CharacterEncodingFilter</filter-name>
<filter-class>org.springframework.web.filter.CharacterEncodingFilter</filter-class>
<init-param>
<param-name>encoding</param-name>
<param-value>utf-8</param-value>
</init-param>
</filter>
<filter-mapping>
<filter-name>CharacterEncodingFilter</filter-name>
<url-pattern>/*</url-pattern>
</filter-mapping>
<welcome-file-list>
<welcome-file>index.html</welcome-file>
<welcome-file>index.htm</welcome-file>
<welcome-file>index.jsp</welcome-file>
<welcome-file>default.html</welcome-file>
<welcome-file>default.htm</welcome-file>
<welcome-file>default.jsp</welcome-file>
</welcome-file-list>
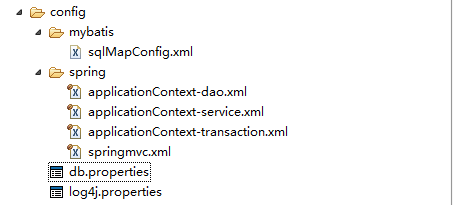
</web-app>添加Source Foled 名称为config,添加如下文件
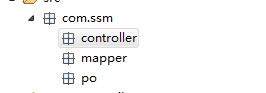
新建package
6.mybatis配置文件下的sqlMapConfig.xml文件
<?xml version="1.0" encoding="UTF-8" ?>
<!DOCTYPE configuration
PUBLIC "-//mybatis.org//DTD Config 3.0//EN"
"http://mybatis.org/dtd/mybatis-3-config.dtd">
<configuration>

    <!-- 全局setting配置,根据需要添加 -->

    <!-- 配置别名 -->
    <typeAliases>
        <!-- 批量扫描别名 -->
        <package name="com.ssm.po"/>
    </typeAliases>

    <!-- 配置mapper
    由于使用spring和mybatis的整合包进行mapper扫描,这里不需要配置了。
    必须遵循:mapper.xml和mapper.java文件同名且在一个目录
     -->

    <!-- <mappers>

    </mappers> -->
</configuration>- spring下的applicationContext-dao.xml
<beans xmlns="http://www.springframework.org/schema/beans"
    xmlns:xsi="http://www.w3.org/2001/XMLSchema-instance" xmlns:mvc="http://www.springframework.org/schema/mvc"
    xmlns:context="http://www.springframework.org/schema/context"
    xmlns:aop="http://www.springframework.org/schema/aop" xmlns:tx="http://www.springframework.org/schema/tx"
    xsi:schemaLocation="http://www.springframework.org/schema/beans
        http://www.springframework.org/schema/beans/spring-beans-3.2.xsd
        http://www.springframework.org/schema/mvc
        http://www.springframework.org/schema/mvc/spring-mvc-3.2.xsd
        http://www.springframework.org/schema/context
        http://www.springframework.org/schema/context/spring-context-3.2.xsd
        http://www.springframework.org/schema/aop
        http://www.springframework.org/schema/aop/spring-aop-3.2.xsd
        http://www.springframework.org/schema/tx
        http://www.springframework.org/schema/tx/spring-tx-3.2.xsd ">

    <!-- 加载db.properties文件中的内容,db.properties文件中key命名要有一定的特殊规则 -->
    <context:property-placeholder location="classpath:db.properties" />
    <!-- 配置数据源 ,dbcp -->

    <bean id="dataSource" class="org.apache.commons.dbcp.BasicDataSource"
        destroy-method="close">
        <property name="driverClassName" value="${jdbc.driver}" />
        <property name="url" value="${jdbc.url}" />
        <property name="username" value="${jdbc.username}" />
        <property name="password" value="${jdbc.password}" />
        <property name="maxActive" value="30" />
        <property name="maxIdle" value="5" />
    </bean>
    <!-- sqlSessionFactory -->
    <bean id="sqlSessionFactory" class="org.mybatis.spring.SqlSessionFactoryBean">
        <!-- 数据库连接池 -->
        <property name="dataSource" ref="dataSource" />
        <!-- 加载mybatis的全局配置文件 -->
        <property name="configLocation" value="classpath:mybatis/sqlMapConfig.xml" />
    </bean>
    <!-- mapper扫描器 -->
    <bean class="org.mybatis.spring.mapper.MapperScannerConfigurer">
        <!-- 扫描包路径,如果需要扫描多个包,中间使用半角逗号隔开 -->
        <property name="basePackage" value="com.ssm.mapper"></property>
        <property name="sqlSessionFactoryBeanName" value="sqlSessionFactory" />
    </bean>
</beans>- spring下的applicationContext-service.xml
<beans xmlns="http://www.springframework.org/schema/beans"
    xmlns:xsi="http://www.w3.org/2001/XMLSchema-instance" xmlns:mvc="http://www.springframework.org/schema/mvc"
    xmlns:context="http://www.springframework.org/schema/context"
    xmlns:aop="http://www.springframework.org/schema/aop" xmlns:tx="http://www.springframework.org/schema/tx"
    xsi:schemaLocation="http://www.springframework.org/schema/beans
        http://www.springframework.org/schema/beans/spring-beans-3.2.xsd
        http://www.springframework.org/schema/mvc
        http://www.springframework.org/schema/mvc/spring-mvc-3.2.xsd
        http://www.springframework.org/schema/context
        http://www.springframework.org/schema/context/spring-context-3.2.xsd
        http://www.springframework.org/schema/aop
        http://www.springframework.org/schema/aop/spring-aop-3.2.xsd
        http://www.springframework.org/schema/tx
        http://www.springframework.org/schema/tx/spring-tx-3.2.xsd ">
<!-- 配置实际的service -->
<!-- <bean id="itemsService" class="com.ssm.service.impl.ItemsServiceImpl"/> -->
</beans>- spring下的applicationContext-transaction.xml
<beans xmlns="http://www.springframework.org/schema/beans"
    xmlns:xsi="http://www.w3.org/2001/XMLSchema-instance" xmlns:mvc="http://www.springframework.org/schema/mvc"
    xmlns:context="http://www.springframework.org/schema/context"
    xmlns:aop="http://www.springframework.org/schema/aop" xmlns:tx="http://www.springframework.org/schema/tx"
    xsi:schemaLocation="http://www.springframework.org/schema/beans
        http://www.springframework.org/schema/beans/spring-beans-3.2.xsd
        http://www.springframework.org/schema/mvc
        http://www.springframework.org/schema/mvc/spring-mvc-3.2.xsd
        http://www.springframework.org/schema/context
        http://www.springframework.org/schema/context/spring-context-3.2.xsd
        http://www.springframework.org/schema/aop
        http://www.springframework.org/schema/aop/spring-aop-3.2.xsd
        http://www.springframework.org/schema/tx
        http://www.springframework.org/schema/tx/spring-tx-3.2.xsd ">

<!-- 事务管理器
    对mybatis操作数据库事务控制,spring使用jdbc的事务控制类
-->
<bean id="transactionManager" class="org.springframework.jdbc.datasource.DataSourceTransactionManager">
    <!-- 数据源
    dataSource在applicationContext-dao.xml中配置了
     -->
    <property name="dataSource" ref="dataSource"/>
</bean>

<!-- 通知 -->
<tx:advice id="txAdvice" transaction-manager="transactionManager">
    <tx:attributes>
        <!-- 传播行为 -->
        <tx:method name="save*" propagation="REQUIRED"/>
        <tx:method name="delete*" propagation="REQUIRED"/>
        <tx:method name="insert*" propagation="REQUIRED"/>
        <tx:method name="update*" propagation="REQUIRED"/>
        <tx:method name="find*" propagation="SUPPORTS" read-only="true"/>
        <tx:method name="get*" propagation="SUPPORTS" read-only="true"/>
        <tx:method name="select*" propagation="SUPPORTS" read-only="true"/>
    </tx:attributes>
</tx:advice>
<!-- 要扫描的serviceImpl包 aop -->
<aop:config>
    <aop:advisor advice-ref="txAdvice" pointcut="execution(* com.ssm.service.impl.*.*(..))"/>
</aop:config>

</beans>- spring下的springmvc.xml
<beans xmlns="http://www.springframework.org/schema/beans"
    xmlns:xsi="http://www.w3.org/2001/XMLSchema-instance" xmlns:mvc="http://www.springframework.org/schema/mvc"
    xmlns:context="http://www.springframework.org/schema/context"
    xmlns:aop="http://www.springframework.org/schema/aop" xmlns:tx="http://www.springframework.org/schema/tx"
    xsi:schemaLocation="http://www.springframework.org/schema/beans
        http://www.springframework.org/schema/beans/spring-beans-3.2.xsd
        http://www.springframework.org/schema/mvc
        http://www.springframework.org/schema/mvc/spring-mvc-3.2.xsd
        http://www.springframework.org/schema/context
        http://www.springframework.org/schema/context/spring-context-3.2.xsd
        http://www.springframework.org/schema/aop
        http://www.springframework.org/schema/aop/spring-aop-3.2.xsd
        http://www.springframework.org/schema/tx
        http://www.springframework.org/schema/tx/spring-tx-3.2.xsd ">

    <!-- 可以扫描controller、service、...
    这里让扫描controller,指定controller的包
     -->
    <context:component-scan base-package="com.ssm.controller"></context:component-scan>

    <!-- 静态资源解析
    包括 :js、css、img、..
     -->
     <mvc:resources location="/js/" mapping="/js/**"/>
     <mvc:resources location="/img/" mapping="/img/**"/>


    <!--注解映射器 -->
    <!-- <bean class="org.springframework.web.servlet.mvc.method.annotation.RequestMappingHandlerMapping"/> -->
    <!--注解适配器 -->
    <!-- <bean class="org.springframework.web.servlet.mvc.method.annotation.RequestMappingHandlerAdapter"/> -->

    <!-- 使用 mvc:annotation-driven代替上边注解映射器和注解适配器配置
    mvc:annotation-driven默认加载很多的参数绑定方法,
    比如json转换解析器就默认加载了,如果使用mvc:annotation-driven不用配置上边的RequestMappingHandlerMapping和RequestMappingHandlerAdapter
    实际开发时使用mvc:annotation-driven
     -->
    <mvc:annotation-driven ></mvc:annotation-driven>

    <!-- 视图解析器
    解析jsp解析,默认使用jstl标签,classpath下的得有jstl的包
     -->
    <bean
        class="org.springframework.web.servlet.view.InternalResourceViewResolver">
        <!-- 配置jsp路径的前缀 -->
        <property name="prefix" value="/WEB-INF/jsp/"/>
        <!-- 配置jsp路径的后缀 -->
        <property name="suffix" value=".jsp"/>
    </bean>

    <!-- 文件上传 -->
    <bean id="multipartResolver"
        class="org.springframework.web.multipart.commons.CommonsMultipartResolver">
        <!-- 设置上传文件的最大尺寸为5MB -->
        <property name="maxUploadSize">
            <value>5242880</value>
        </property>
    </bean>
</beans>- 数据库连接信息db.properties
jdbc.driver=com.mysql.jdbc.Driver
jdbc.url=jdbc:mysql://localhost:3306/mybatis
jdbc.username=root
jdbc.password=mysql
- log4J配置 log4j.properties
# Global logging configuration\uff0c\u5efa\u8bae\u5f00\u53d1\u73af\u5883\u4e2d\u8981\u7528debug
log4j.rootLogger=DEBUG, stdout
# Console output...
log4j.appender.stdout=org.apache.log4j.ConsoleAppender
log4j.appender.stdout.layout=org.apache.log4j.PatternLayout
log4j.appender.stdout.layout.ConversionPattern=%5p [%t] - %m%n
- 编写FirstController
package com.ssm.controller;

import org.springframework.stereotype.Controller;
import org.springframework.web.bind.annotation.RequestMapping;
import org.springframework.web.servlet.ModelAndView;

@Controller
public class FirstController {
@RequestMapping("Index")
public ModelAndView index(){
    ModelAndView mav = new ModelAndView();
    mav.addObject("hello", "Hello world!");
    mav.setViewName("index");
    return mav;
}
}- 在web-inf下新建jsp文件夹,添加index.jsp文件
<%@ page language="java" import="java.util.*" pageEncoding="UTF-8"%>
<%
String path = request.getContextPath();
String basePath = request.getScheme()+"://"+request.getServerName()+":"+request.getServerPort()+path+"/";
%>

<!DOCTYPE HTML PUBLIC "-//W3C//DTD HTML 4.01 Transitional//EN">
<html>
  <head>
    <base href="<%=basePath%>">

    <title>My JSP 'index.jsp' starting page</title>
    <meta http-equiv="pragma" content="no-cache">
    <meta http-equiv="cache-control" content="no-cache">
    <meta http-equiv="expires" content="0">
    <meta http-equiv="keywords" content="keyword1,keyword2,keyword3">
    <meta http-equiv="description" content="This is my page">
    <!--
    <link rel="stylesheet" type="text/css" href="styles.css">
    -->
  </head>

  <body>
   ${hello}<br>
  </body>
</html>
14.发布网站,在浏览器输入 http://localhost:8080/FirstSSM/Index即可
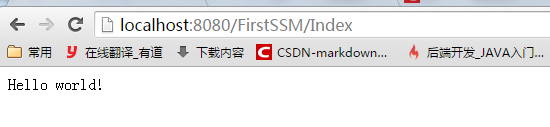
至此,第一个SSM项目已经编写完成!


 422
422

 被折叠的 条评论
为什么被折叠?
被折叠的 条评论
为什么被折叠?
 到【灌水乐园】发言


