


首先,我们创建一个用户并设置密码(我的root是不能用密码登录的)用于登录Cockpit。
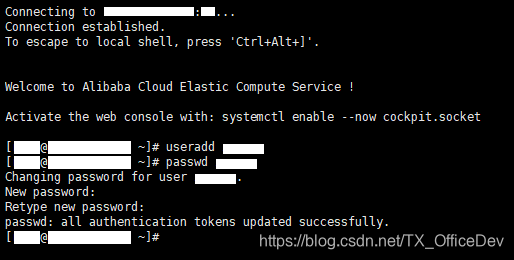
然后,我们给新建的用户分配sudo权限。


安装lrzsz与socat。

安装podman与podman-docker。

新建www文件夹与nginx文件夹。

向nginx文件夹下上传或手动生成一个nginx.conf。代码如下
user root;
worker_processes auto;
error_log /var/log/nginx/error.log;
pid /run/nginx.pid;

include /usr/share/nginx/modules/*.conf;

events {
    worker_connections 1024;
}

http {
    log_format  main  '$remote_addr - $remote_user [$time_local] "$request" '
                      '$status $body_bytes_sent "$http_referer" '
                      '"$http_user_agent" "$http_x_forwarded_for"';

    access_log  /var/log/nginx/access.log  main;

    sendfile            on;
    tcp_nopush          on;
    tcp_nodelay         on;
    keepalive_timeout   300;
    types_hash_max_size 2048;

    include             /etc/nginx/mime.types;
    default_type        application/octet-stream;

    # Load modular configuration files from the /etc/nginx/conf.d directory.
    # See http://nginx.org/en/docs/ngx_core_module.html#include
    # for more information.
    #include /etc/nginx/conf.d/*.conf;
    server {
    	   listen	80;
	   listen	[::]:80;
	   server_name	info-admin.chnmz.com;

	   root		/var/www;

	   location	~/\.well-known/acme-challenge/{
	   		root		/var/www;
			allow		all;
			try_files	$uri =404;
			break;
	   }

	   location / {
	   }
    }
}
启动nginx。
podman run -d -p 80:80 --name nginx -v
/root/nginx/nginx.conf:/etc/nginx/nginx.conf -v /root/www:/var/www nginx
下载acme.sh。
wget -O - https://get.acme.sh | sh

重载一下设定文件,让acme.sh命令生效。
source ~/.bash_profile

生成网站证书:
acme.sh --issue -d [你的网站域名] --webroot /root/www

新建cert文件夹并在此文件夹下安装证书。
mkdir /root/cert
acme.sh --install-cert -d [你的网站域名] \
--key-file /root/cert/[你的网站域名].key \
--fullchain-file /root/cert/fullchain.cer

安装cockpit-dashboard和cockpit-podman(可选)
yum install cockpit-dashboard cockpit-podman -y

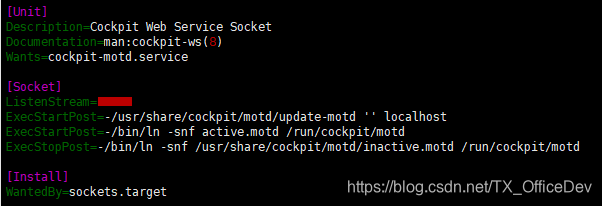
修改/lib/systemd/system/cockpit.socket文件。
vim /lib/systemd/system/cockpit.socket

在红色区域设定你的cockpit端口(原端口为9090,建议修改)。
重新加载守护进程。
systemctl daemon-reload

设定cockpit开机启动。启动cockpit.socket。
systemctl enable cockpit.socket
service cockpit.socket start
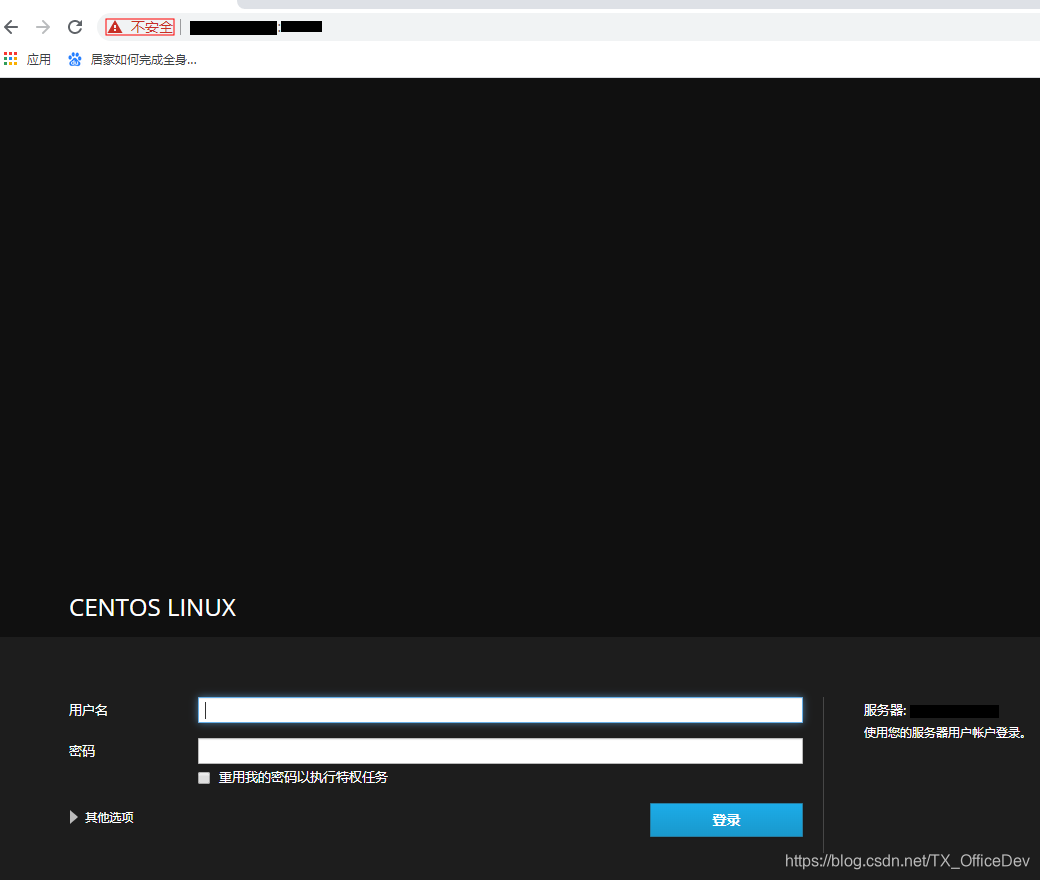
 从浏览器访问https://你的域名:你的cockpit端口
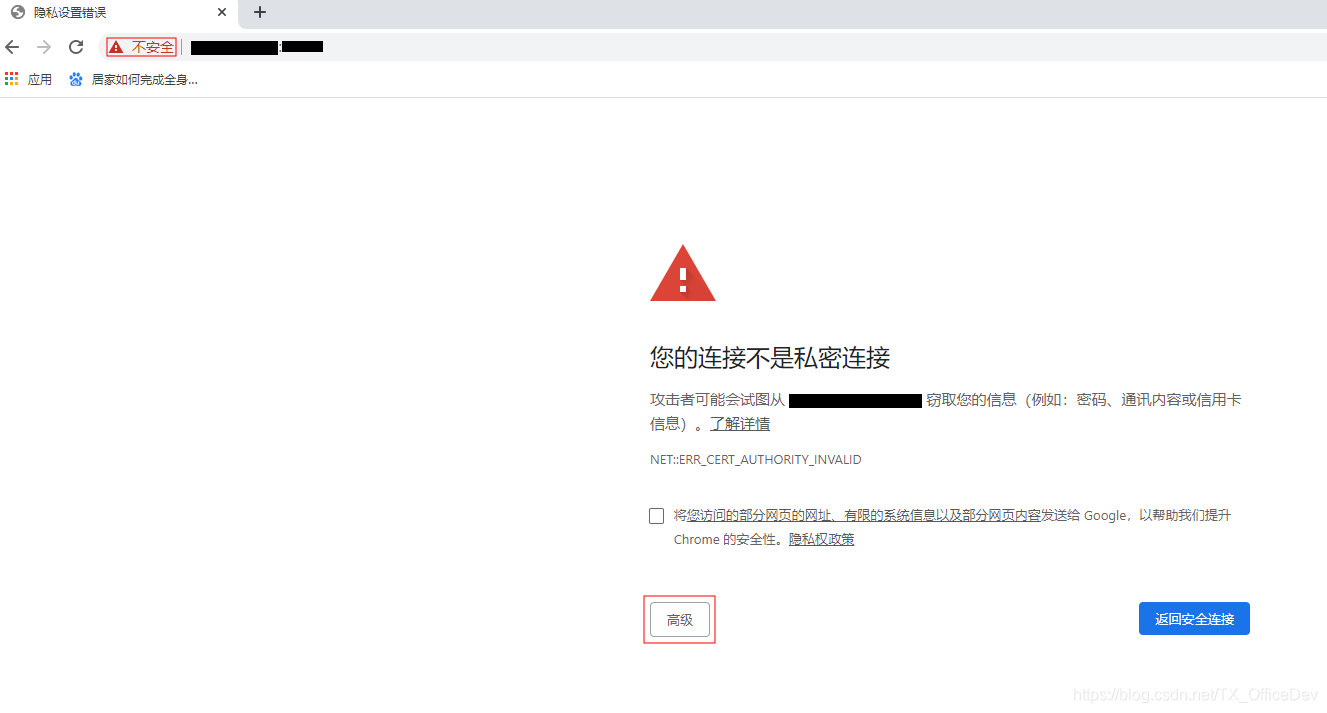 这个时候浏览器会提示你连接不是私密连接。点击“高级“。
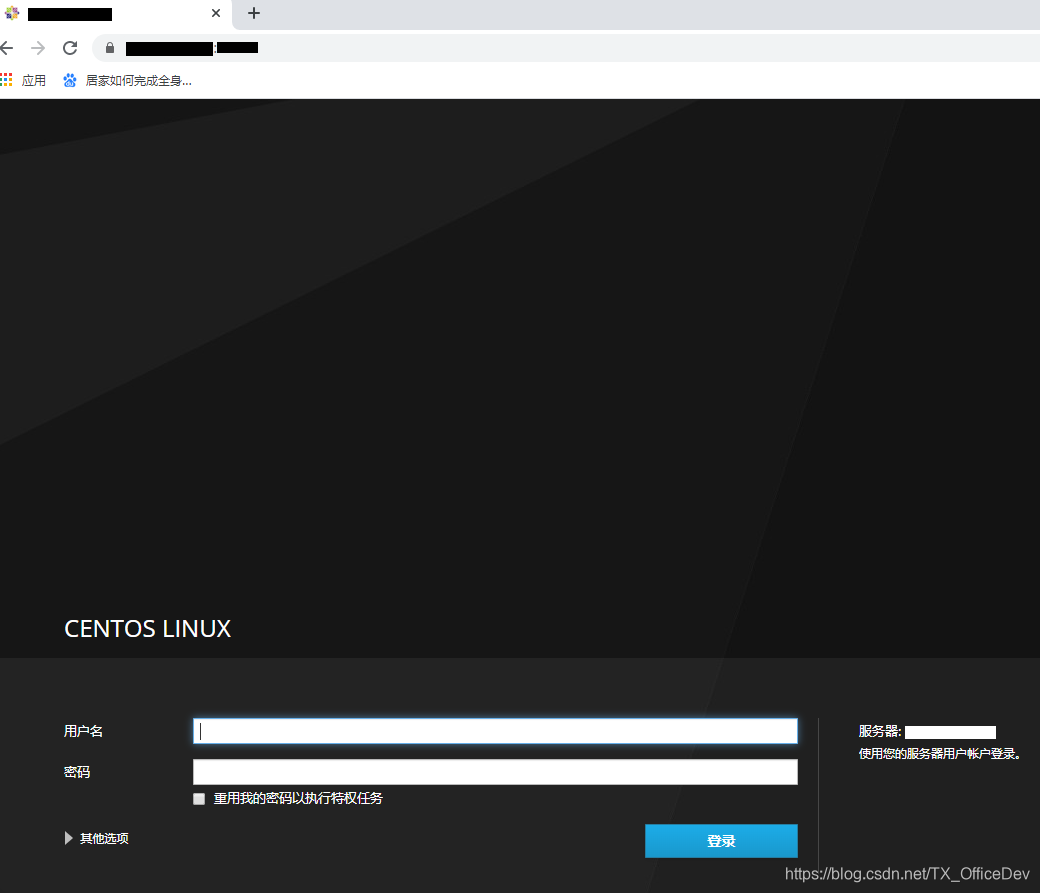
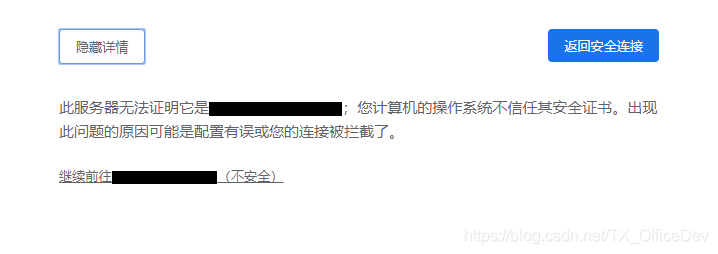 点击继续前往「你的域名」(不安全)
 停止cockpit.socket服务
service cockpit.socket stop

进入/etc/cockpit/ws-certs.d文件夹


将/root/cert/[你的域名].key与fullchain.cer的内容合并到0-self-signed.cert文件。
cat /root/cert/[你的域名].key > 0-self-signed.cert
cat /root/cert/fullchain.cer >> 0-self-signed.cert
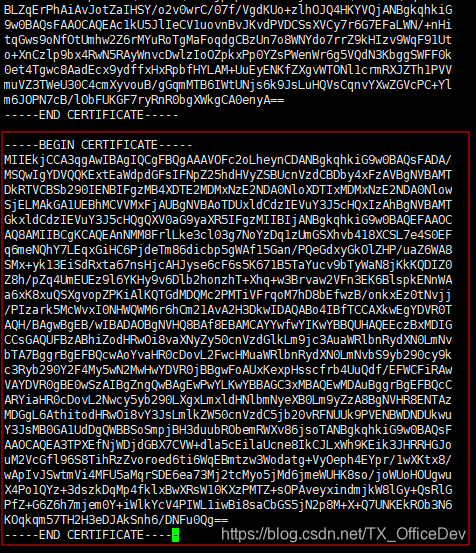
 去除0-self-signed.cert文件未尾的那个证书片段(红框所示)
将/root/cert/fullchain.cer写到0-self-signed.pem中,并只保留上图红框中的部分。


启动cockpit.socket服务

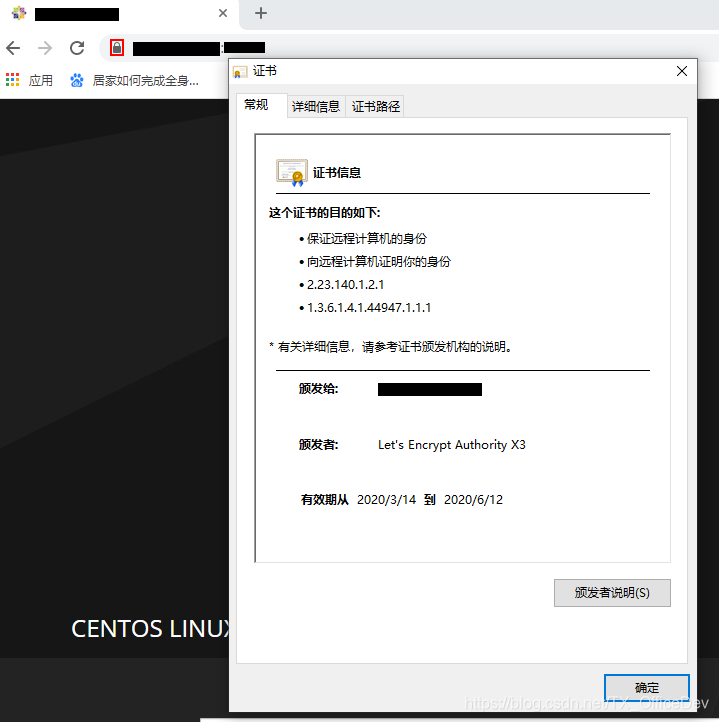
这个时候你的cockpit就是安全连接了。


 6万+
6万+


 被折叠的 条评论
为什么被折叠?
被折叠的 条评论
为什么被折叠?
 到【灌水乐园】发言


