


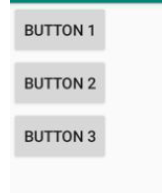
LinearLayout线性布局
控件的排列方式:垂直排列、水平排列
android:orientation 属性:
可选值为 vertical (垂直的)和 horizontal (水平的)

如果不指定 android:orientation 默认值是 horizontal (水平)
如果排列方式是水平,则控件宽度不能设置成match_parent。
android:layout_gravity 属性和 android:gravity 属性不同:
android:gravity:指的是文字在控件中的对齐方式
android:layout_gravity :指的是控件在布局中的对齐方式
当LinearLayout的排列方向是horizontal时,只有垂直方向上的对齐方式才会生效,因为此时水平方向上的长度是不固定的。
同样的道理,当LinearLayout的排列方向是vertical时,只有水平方向上的对齐方式才会生效。
还有一个重要属性:android:layout_weight
允许我们使用比例的方式来控制控件的大小。它在手机屏幕的适配性方面可以起到非常重要的作用。
<LinearLayout xmlns:android="http://schemas.android.com/apk/res/android"
    android:orientation="horizontal"
    android:layout_width="match_parent"
    android:layout_height="match_parent">
    <EditText
        android:id="@+id/input_message"
        android:layout_width="0dp"
        android:layout_height="wrap_content"
        android:layout_weight="1"
        android:hint="Type something"
        />

    <Button
        android:id="@+id/send"
        android:layout_width="0dp"
        android:layout_height="wrap_content"
        android:layout_weight="1"
        android:text="Send"
        />
</LinearLayout>
效果如图:

实现原理很简单,Activity会将所有的android:layout_weight相加起来,然后每个控件所占大小的比例就是用该控件的layout_weight值除以刚才算出的总值。
我们同样可以设置部分其他控件的宽度,来实现更好的效果,对于上述,我们可以修改button 的 width,写成:
    <Button
        android:id="@+id/send"
        android:layout_width="wrap_content"
        android:layout_height="wrap_content"
        android:layout_weight="1"
        android:text="Send"
        />
得到的效果如图:

RelativeLayout相对布局
与线性布局不同,相对布局更加随意,通过相对定位的方式进行布局。
相对父布局定位:
    <Button
        android:layout_width="wrap_content"
        android:layout_height="wrap_content"
        android:text="Button 1"
        android:layout_alignParentTop="true"
        android:layout_alignParentLeft="true" />

    <Button
        android:layout_width="wrap_content"
        android:layout_height="wrap_content"
        android:text="Button 2"
        android:layout_alignParentBottom="true"
        android:layout_alignParentLeft="true" />

    <Button
        android:layout_width="wrap_content"
        android:layout_height="wrap_content"
        android:text="Button 3"
        android:layout_alignParentTop="true"
        android:layout_alignParentRight="true" />

    <Button
        android:layout_width="wrap_content"
        android:layout_height="wrap_content"
        android:text="Button 4"
        android:layout_alignParentBottom="true"
        android:layout_alignParentRight="true" />

    <Button
        android:layout_width="wrap_content"
        android:layout_height="wrap_content"
        android:text="Button 5"
        android:layout_centerInParent="true" />
效果如图:

所用到的属性为:
android:layout_alignParentLeft、android:layout_alignParentTop、android:layout_alignParentRight、android:layout_alignParentBottom、android:layout_centerInParent
还可以相对于控件进行定位:相对于控件进行布局需要对每一个控件设置一个 id
所用到的属性有:layout_above(id)、layout_below(id)、layout_toRightOf(id)、layout_toLeftOf(id)
当运用到某个id时,要按顺序,否则会找不到id!!
还有另一组对齐的属性:android:layout_alignLeft、android:layout_alignRight、android:layout_alignTop、android:layout_alignBottom
分别为与某个控件的左边缘、右边缘、顶边缘、底边缘对齐。
FrameLayout帧布局
定位方式欠缺:这种布局没有丰富的定位方式,所有的控件都会默认摆放在布局的左上角。


 2298
2298


 被折叠的 条评论
为什么被折叠?
被折叠的 条评论
为什么被折叠?
 到【灌水乐园】发言


