


文章目录
我的网站: https://pythoneers.cn
1. 虚拟服务器的构建
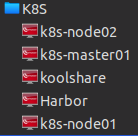
这里需要用到5台虚拟服务器,其中三台是节点服务器。另外两台分别是装有 Harbor 私有仓库的服务器和安装koolshare软路由的服务器:
2. 安装软路由
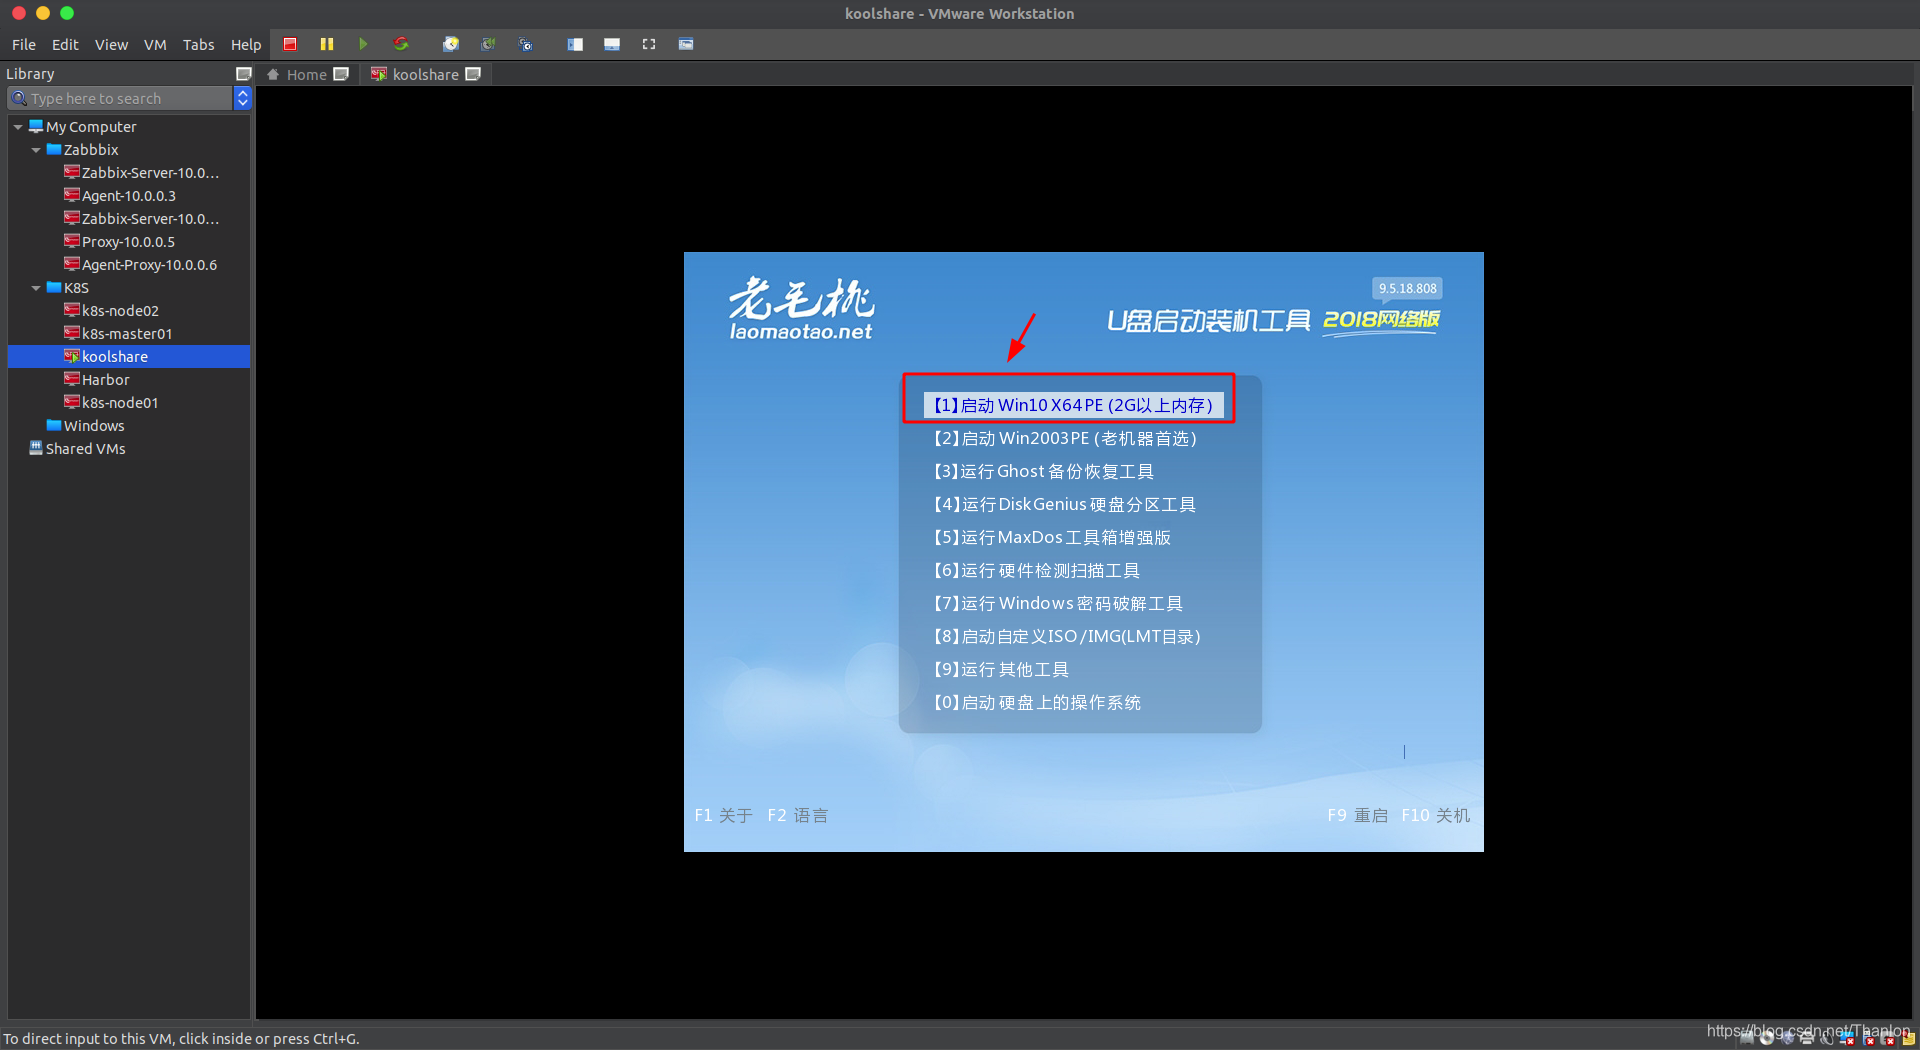
指定使用老毛桃镜像,启动软路由服务器:

启动后选择第一项,启动 Win10 X64 PE:
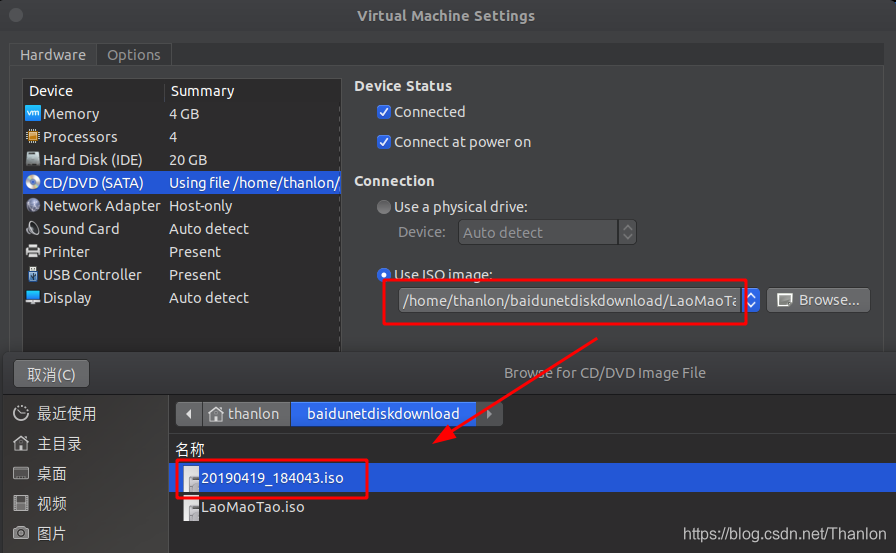
将光盘换成封装了软路由的文件:
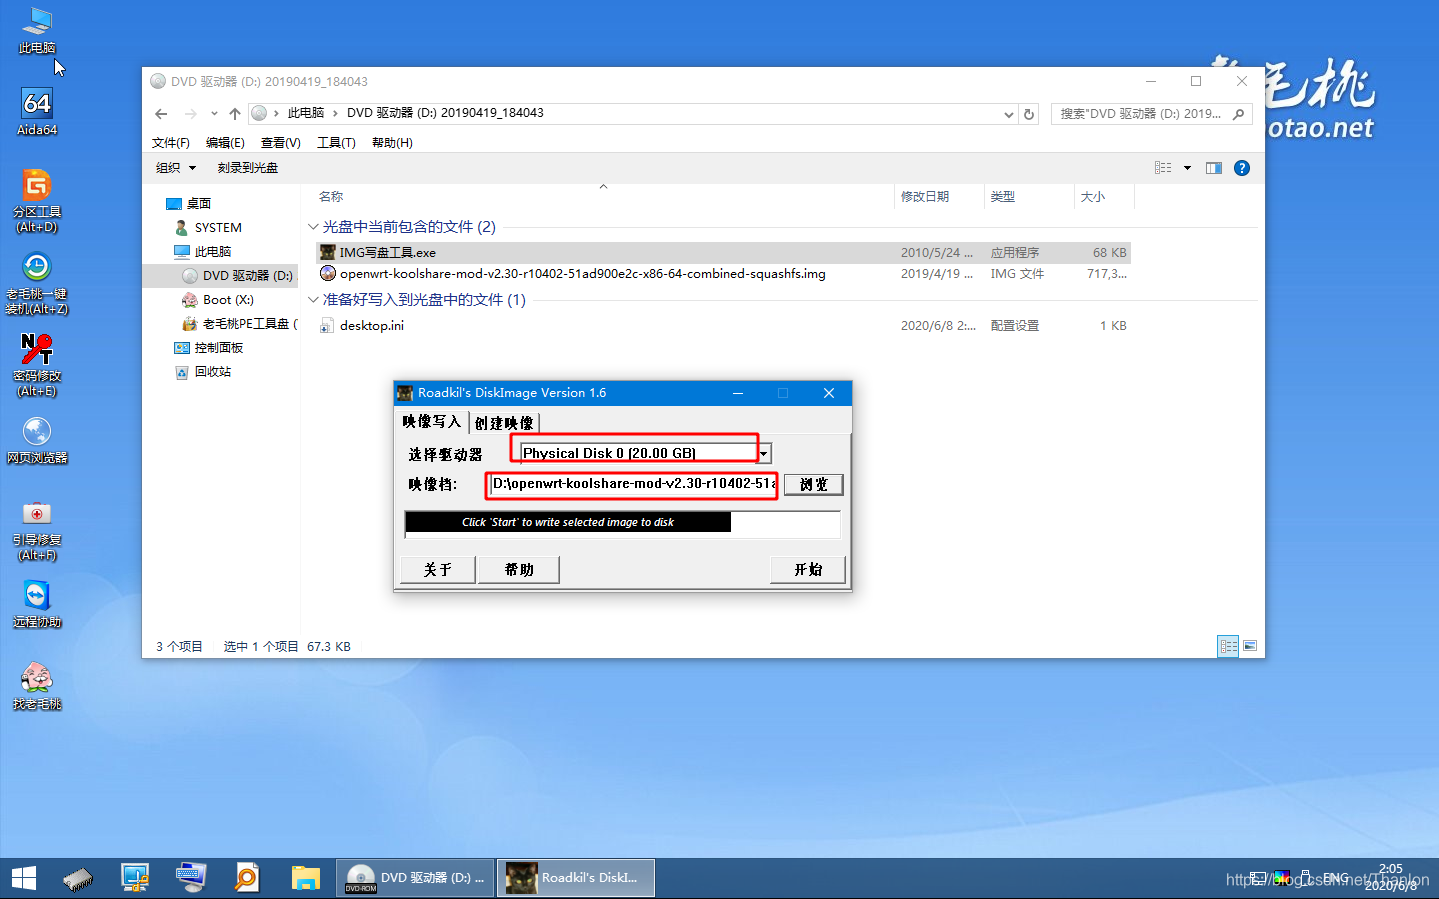
将软路由的img文件写入磁盘中:
取消设备状态下的选项,将镜像文件从光驱中弹出:

关机然后为这台服务器添加一块新的虚拟网卡,将该网卡的网络连接方式设置为NET模式:

服务器一端使用NET网络连接方式可以连接本地主机的网络,共享本地主机的IP地址,通过本机主机上网。服务器的另外一端通过仅主机网络与 K8S 节点相连。koolshare上会运行一个叫 ssr 的插件,使用这个 ssr 插件可以通过本地主机实现 Surfing Scientifically,让 K8S 集群拥有访问Google、连接镜像服务器的能力。这样就可以直接在网络上进行初始化。
编辑虚拟网络,使用本地DHCP服务分发IP地址:

3. 系统初始化
在大型环境下建议通过DNS的方式使各个节点的主机和IP能够相互解析,小型环境下直接修改hosts文件就可以了,因为如果DNS挂掉集群就没有作用了。系统初始化是三台主机都需要做的。
设置master主机和两台node主机的名称,设置完成后重启才能生效:
[root@localhost ~]# hostnamectl set-hostname k8s-master-01
配置master的hosts文件并把配置好的文件传输给两个两台node主机:
[root@k8s-master-01 ~]# vim /etc/hosts
127.0.0.1   localhost localhost.localdomain localhost4 localhost4.localdomain4
::1         localhost localhost.localdomain localhost6 localhost6.localdomain6
10.0.0.2 k8s-master-01
10.0.0.3 k8s-node-01
10.0.0.4 k8s-node-02
[root@k8s-master-01 ~]# scp /etc/hosts root@k8s-node-01:/etc
[root@k8s-master-01 ~]# scp /etc/hosts root@k8s-node-02:/etc
安装依赖包,以master为例:
[root@k8s-master-01 ~]# yum install -y conntrack ntpdate ntp ipvsadm ipset jq iptables curl sysstat libseccomp wgetvimnet-tools git
关闭firewalld防火墙,防火墙设为 Iptables,还要设置空规则并保存。然后关闭firewalld:
[root@k8s-master-01 ~]# yum -y install iptables-services && systemctl start iptables && systemctl  enable iptables && iptables -F && service iptables save
[root@k8s-master-01 ~]# systemctl stop firewalld && systemctl disable firewalld
关闭虚拟内存和SELINUX:
[root@k8s-master-01 ~]# swapoff -a && sed -i '/swap/ s/^\(.*\)$/#\1/g' /etc/fstab
[root@k8s-master-01 ~]# setenforce 0 && sed -i 's/^SELINUX=.*/SELINUX=disabled/' /etc/selinux/config
安装k8s的时候初始化的时候会检测swap分区是否关闭,如果开启了虚拟内存,容器pod就有可能在虚拟内存中运行,大大降低工作效率。会要求服务器强制关闭虚拟内存,虽然可以排除这个报错,但是建议还是要关闭。
调整内核参数,关闭ipv6的协议和开启网桥模式比较重要,是安装k8s必须要选择的。其它几条是优化方案:
[root@k8s-master-01 ~]# cat > kubernetes.conf <<EOF
net.bridge.bridge-nf-call-iptables=1
net.bridge.bridge-nf-call-ip6tables=1
net.ipv4.ip_forward=1
net.ipv4.tcp_tw_recycle=0
vm.swappiness=0 # 禁止使用 swap 空间,只有当系统 OOM 时才允许使用它
vm.overcommit_memory=1 # 不检查物理内存是否够用
vm.panic_on_oom=0 # 开启 OOM
fs.inotify.max_user_instances=8192
fs.inotify.max_user_watches=1048576
fs.file-max=52706963
fs.nr_open=52706963
net.ipv6.conf.all.disable_ipv6=1
net.netfilter.nf_conntrack_max=2310720
EOF
[root@k8s-master-01 ~]# ls
anaconda-ks.cfg  kubernetes.conf
将优化的文件放在/etc/sysctl.d/目录下,保证开机的时候可以被调用。然后手动刷新,立刻生效:
[root@k8s-master-01 ~]# cp kubernetes.conf /etc/sysctl.d/kubernetes.conf
[root@k8s-master-01 ~]# sysctl -p /etc/sysctl.d/kubernetes.conf
sysctl: cannot stat /proc/sys/net/bridge/bridge-nf-call-iptables: 没有那个文件或目录
sysctl: cannot stat /proc/sys/net/bridge/bridge-nf-call-ip6tables: 没有那个文件或目录
net.ipv4.ip_forward = 1
net.ipv4.tcp_tw_recycle = 0
vm.swappiness = 0 # 禁止使用 swap 空间,只有当系统 OOM 时才允许使用它
vm.overcommit_memory = 1 # 不检查物理内存是否够用
vm.panic_on_oom = 0 # 开启 OOM
fs.inotify.max_user_instances = 8192
fs.inotify.max_user_watches = 1048576
fs.file-max = 52706963
fs.nr_open = 52706963
net.ipv6.conf.all.disable_ipv6 = 1
net.netfilter.nf_conntrack_max = 2310720
调整系统的时区,如果安装的时候没有选择Asia/Shanghai主机都需要设置下时区:
[root@k8s-master-01 ~]# timedatectl set-timezone Asia/Shanghai
[root@k8s-master-01 ~]# timedatectl set-local-rtc 0
[root@k8s-master-01 ~]# systemctl restart rsyslog
[root@k8s-master-01 ~]# systemctl restart crond
关闭系统不需要的服务,如邮件服务:
[root@k8s-master-01 ~]# systemctl stop postfix && systemctl disable postfix
设置rsyslog和systemd journald:
# 创建持久化保存日志的目录
[root@k8s-master-01 ~]# mkdir /var/log/journal
# 创建配置文件存放目录
[root@k8s-master-01 ~]# mkdir /etc/systemd/journald.conf.d
# 创建配置文件
[root@k8s-master-01 ~]# cat > /etc/systemd/journald.conf.d/99-prophet.conf <<EOF
[Journal]
# 持久化保存到磁盘
Storage=persistent
# 压缩历史日志
Compress=yes
SyncIntervalSec=5m
RateLimitInterval=30s
RateLimitBurst=1000
# 最大占用空间 10G
SystemMaxUse=10G
# 单日志文件最大 200M
SystemMaxFileSize=200M
# 日志保存时间 2 周
MaxRetentionSec=2week
# 不将日志转发到 syslog
ForwardToSyslog=no
EOF
重启systemd journald:
[root@k8s-master-01 ~]# systemctl restart systemd-journald
在CentsOS7之后引导方式改为了ctud,会有两个日志系统在同时工作。默认是rsyslogd,另外一个是systemd journald。使用systemd journald的方案更好以下,所以需要把systemd journald改为默认。
CentOS 7.x 系统自带的 3.10.x 内核存在一些 Bugs,导致运行的 Docker、Kubernetes 不稳定。所以需要去安装4.44内核版本,可以有效提高Kubernetes的稳定性。
[root@k8s-master-01 ~]# rpm -Uvh http://www.elrepo.org/elrepo-release-7.0-3.el7.elrepo.noarch.rpm
安装完成后检查 /boot/grub2/grub.cfg 中对应内核 menuentry 中是否包含 initrd16 配置,如果没有,再安装一次:
[root@k8s-master-01 ~]# yum --enablerepo=elrepo-kernel install -y kernel-lt
设置开机从新内核启动(默认启动的内核),然后重启后查看是否是新内核启动:
[root@k8s-master-01 ~]# grub2-set-default 'CentOS Linux (4.4.226-1.el7.elrepo.x86_64) 7 (Core)'
[root@k8s-master-01 ~]# reboot
[root@k8s-master-01 ~]# uname -a
Linux k8s-master-01 4.4.226-1.el7.elrepo.x86_64 #1 SMP Tue Jun 2 09:51:15 EDT 2020 x86_64 x86_64 x86_64 GNU/Linux
4. 开启IPVS的前置条件
kube-proxy 主要解决 svc 与 pod 之间的调度关系,IPVS 的调度方式可以极大增加访问效率,所以这种方式是非常必备的方式。开启 IPVS 的前置条件,加载 netfilter 模块,三台主机都需要做下面的操作。
[root@k8s-master-01 ~]# modprobe br_netfilter
创建引导 IPVS 相关依赖(模块)加载的文件:
[root@k8s-master-01 ~]# cat > /etc/sysconfig/modules/ipvs.modules <<EOF
#!/bin/bash
modprobe -- ip_vs
modprobe -- ip_vs_rr
modprobe -- ip_vs_wrr
modprobe -- ip_vs_sh
modprobe -- nf_conntrack_ipv4
EOF
赋予755权限然后执行这个文件:
[root@k8s-master-01 ~]# chmod 755 /etc/sysconfig/modules/ipvs.modules && bash /etc/sysconfig/modules/ipvs.modules
查看模块是否被引导:
[root@k8s-master-01 ~]# lsmod | grep -e ip_vs -e nf_conntrack_ipv4
nf_conntrack_ipv4      20480  0
nf_defrag_ipv4         16384  1 nf_conntrack_ipv4
ip_vs_sh               16384  0
ip_vs_wrr              16384  0
ip_vs_rr               16384  0
ip_vs                 147456  6 ip_vs_rr,ip_vs_sh,ip_vs_wrr
nf_conntrack          114688  2 ip_vs,nf_conntrack_ipv4
libcrc32c              16384  2 xfs,ip_vs
5. 安装Docker
三台主机都需要安装Docker,安装Docker软件的依赖:
[root@k8s-master-01 ~]# yum install -y yum-utils device-mapper-persistent-data lvm2
导入阿里源docker-ce镜像仓库:
[root@k8s-master-01  最低0.47元/天 解锁文章


 1万+
1万+


 被折叠的 条评论
为什么被折叠?
被折叠的 条评论
为什么被折叠?
 到【灌水乐园】发言


