


文章目录
1.ConfigMap
ConfigMap是K8s提供的内置的配置管理的方案
1.1 创建ConfigMap方式
- 从文件夹创建
- 从文件创建
- 从键值对 ⇒ 提供一个键值对的文件,将键值对的文件内容作为ConfigMap的Key和Value
1.2 使用ConfigMap的方式
- 映射为文件 ⇒ 将ConfigMap的Key的value映射为文件
- 映射为环境变量
- 映射为命令行参数
1.3 ConfigMap使用要点建议
- 版本化管理配置文件,以支持快速回滚
- 共享配置使用环境变量注入
ConfigMap的创建脚本代码
// 创建ConfigMap映射
kubectl create configmap geektime-ordering-api-config --from-file=geektime-ordering-api/configs -o yaml --dry-run | kubectl apply -f -
kubectl create configmap geektime-identity-api-config --from-file=geektime-identity-api/configs -o yaml --dry-run | kubectl apply -f -
kubectl create configmap geektime-mobile-apiaggregator-config --from-file=geektime-mobile-apiaggregator/configs -o yaml --dry-run | kubectl apply -f -
kubectl create configmap geektime-config --from-env-file=env.txt -o yaml --dry-run | kubectl apply -f -
kubectl create configmap geektime-mobile-gateway-config --from-file=geektime-mobile-gateway/configs -o yaml --dry-run | kubectl apply -f -
kubectl create configmap geektime-healthcheckshost-config --from-file=geektime-healthcheckshost/configs -o yaml --dry-run | kubectl apply -f -

helm install geektime-ordering-api .\charts\geektime-ordering-api -n default
helm install geektime-identity-api .\charts\geektime-identity-api -n default
helm install geektime-mobile-apiaggregator .\charts\geektime-mobile-apiaggregator -n default
helm install geektime-mobile-gateway .\charts\geektime-mobile-gateway -n default
helm install geektime-healthcheckshost  .\charts\geektime-healthcheckshost -n default

"Any key to exit"  ;
Read-Host | Out-Null ;
Exit
create configmap geektime-ordering-api-config 创建名为geektime-ordering-api-config的ConfigMap
from-file指定一个目录,将该目录下的所有文件的文件名做为Key,文件内容为Value映射到ConfigMapp中
–from-env-file=env.txt -o yaml --dry-run | kubectl apply -f - 通过Key-Value键值对方式创建ConfigMap,比较使用用于定义公共的环境变量
ConfigMap的使用
定义了两种方式使用ConfigMap的方式,一种是将其映射到环境变量中,
env:
    - name: ENV_ABC // 环境变量映射方式
      valueFrom:
        configMapKeyRef:
          name: geektime-config
          key: ENV_ABC
volumeMounts://存储卷映射方式,将文件映射到当前应用目录下
            - mountPath: "/app/appsettings.json"
              name: appsettings
              subPath: appsettings-{{.Chart.AppVersion}}.json //subPath指的是ComfigMap的Key

....

volumes: // 定义存储卷
        - name: appsettings
          configMap:
              name: {{ include "geektime-mobile-gateway.fullname" . }}-config
定义名为ENV_ABC的环境变量,valueFrom定义的是configMapKeyRef,也就是通过之前定义的名为geektime-config的ConfigMap,取它的Key值为ENV_ABC
存储卷定义方式,首先定义一个存储卷volumes,通过过将ConfigMap映射到存储卷,意味着这个名为appsettings的存储卷下面会有ConfigMap中的appsetting配置文件
subPath: appsettings-{{.Chart.AppVersion}}.json 这里使用了Chart.AppVersion变量,是因为建议的做法是镜像的版本和配置的版本以及Helm的版本都应该是一致的,这样在修改Helm版本后就能读到对应的匹配值版本
如果配置的是环境变量时,如果配置发生变更,需要重启应用程序才能获取到新的配置信息
2 分布式配置中心解决方案
2.1 什么时候选择配置中心
- 多项目组并行协作
- 运维开发分工职能明确
- 对风险控制有更高诉求
- 对线上配置热更新有诉求
2.2 Apollo配置中心系统的能力
- 权限与审计
- 版本管理
- 热更新
- 原生支持Java、.Net客户端
- 目前项目仍然很活跃
2.2.1 Apollo创建配置项目
前置条件,需要安装docker环境和docker-compose支持
在当前目录执行start.ps1,启动服务
dashboard:
http://localhost:8070
用户名: apollo
密码: admin
configServer:
http://localhost:8080
start.ps1文件内容
docker-compose up
Apollo页面
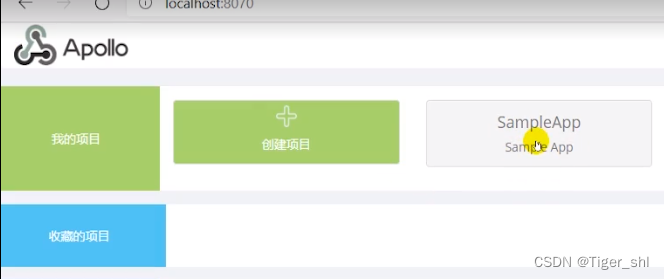
点击"创建项目",创建需要的项目
2.2.2 项目使用
- 项目引用Apollo的包,Com.Ctrip.Framework.Apollo.Configuration
- Program文件添加命名空间,并在CreateHostBuilder中注入
public static IHostBuilder CreateHostBuilder(string[] args) =>
            Host.CreateDefaultBuilder(args)
                .ConfigureAppConfiguration((hostBuilderContext, configurationBuilder) =>
                {
                    LogManager.UseConsoleLogging(Com.Ctrip.Framework.Apollo.Logging.LogLevel.Trace);// 定义日志级别
                    //var c = configurationBuilder.Build().GetSection("Apollo").Get<ApolloOptions>();
                    configurationBuilder.AddApollo(configurationBuilder.Build().GetSection("Apollo")).AddDefault(Com.Ctrip.Framework.Apollo.Enums.ConfigFileFormat.Properties);
                })
                .ConfigureWebHostDefaults(webBuilder =>
                {
                    webBuilder.UseStartup<Startup>();
                });
- 在appsetting.json配置Apollo接点
"Apollo": {
    "AppId": "geektime-mobile-gateway",// 应用程序在配置中心的唯一标识
    "Env": "DEV",
    "MetaServer": "http://172.168.190.76:8080",
    "ConfigServer": [ "http://172.168.190.76:8080" ]
  },
2.2.3 K8s中使用Apollo
- 在配置中添加Apollo配置
"Apollo": {
      "AppId": "geektime-mobile-gateway",
      "Env": "DEV",
      "MetaServer": "http://192.168.67.76:8080",
      "ConfigServer": [ "http://192.168.67.76:8080" ]
    },
- 构建镜像
- 创建ConfigMap
- 访问获取


 5991
5991

 被折叠的 条评论
为什么被折叠?
被折叠的 条评论
为什么被折叠?
 到【灌水乐园】发言


