


前言
在前面我的自动化测试框架系列文章中,有一个知识点没有讲到,现在补上。
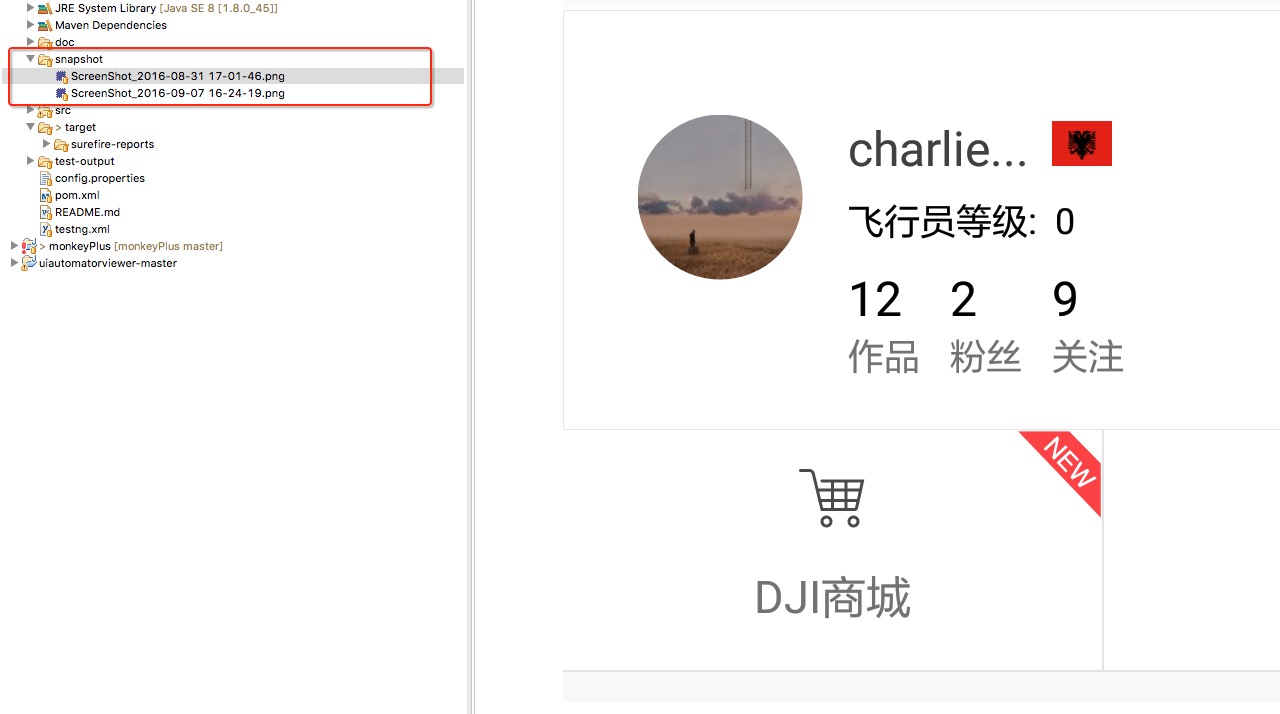
在运行自动测试脚本时,经常会需要增加失败时自动截图的功能,以及失败重跑功能,下面介绍一下通过监听器的方式来实现自动截图和重跑功能。
失败自动截图功能
1. 定义一个截图工具类:ScreenShot
package com.dji.utils;

import java.io.File;
import java.text.SimpleDateFormat;
import java.util.Date;

import org.apache.commons.io.FileUtils;
import org.openqa.selenium.OutputType;

import io.appium.java_client.AppiumDriver;


/**
 * 截图并保存至本地
 *
 * @author Charlie.chen
 */
public class ScreenShot {

    private AppiumDriver<?> driver;
    // 测试失败截屏保存的路径
    private String path;
    public LogUtil log=new LogUtil(this.getClass());

    public ScreenShot(AppiumDriver<?> driver){
        this.driver=driver;
        path=System.getProperty("user.dir")+ "//snapshot//"+ this.getClass().getSimpleName()+"_"+getCurrentTime() + ".png";
    }

    public void getScreenShot() {

        File screen = driver.getScreenshotAs(OutputType.FILE);
        File screenFile = new File(path);
        try {
            FileUtils.copyFile(screen, screenFile);
            log.info("截图保存的路径:" + path);
        } catch (Exception e) {
            log.error("截图失败");
            e.printStackTrace();
        }
    }


    /**
     * 获取当前时间
     */
    public String getCurrentTime(){
        Date date=new Date();
        SimpleDateFormat sdf=new SimpleDateFormat("yyyy-MM-dd HH-mm-ss");
        String currentTime=sdf.format(date);
        return currentTime;
    }

    public String getPath() {
        return path;
    }

    public void setPath(String path) {
        this.path = path;
    }

}
2. 新建一个Java类继承TestListenerAdapter
在TestNG中TestListenerAdapter为监听器类,共有如下主要方法:
- onTestFailure
- onTestSuccess
- onTestSuccess
- onTestStart
- onFinish
要想实现用例运行失败自动截图,只需新建一个类TestNGListener继承TestListenerAdapter,然后重写onTestFailure、onTestSkipped等方法,在这些方法中加入截图操作即可。
package com.dji.utils;

import org.testng.ITestContext;
import org.testng.ITestResult;
import org.testng.TestListenerAdapter;

import io.appium.java_client.AppiumDriver;

/**
 * testNG执行case 失败后 ,testNG Listener会捕获执行失败
 * 如果要实现失败自动截图,需要重写Listener的onTestFailure方法
 *
 * @author Charlie.chen
 */
public class TestNGListener extends TestListenerAdapter {

    private static AppiumDriver<?> driver;

    LogUtil log = new LogUtil(this.getClass());

    public static void setDriver(AppiumDriver<?> driver) {
        TestNGListener.driver = driver;
    }

    @Override
    public void onTestSuccess(ITestResult tr) {
        log.info("Test Success");
        super.onTestSuccess(tr);
    }

    @Override
    public void onTestFailure(ITestResult tr) {
        log.error("Test Failure");
        super.onTestFailure(tr);

        ScreenShot screenShot = new ScreenShot(driver);
        screenShot.getScreenShot();
    }

    @Override
    public void onTestSkipped(ITestResult tr) {
        log.error("Test Skipped");
        super.onTestSkipped(tr);
    }

    @Override
    public void onStart(ITestContext testContext) {
        log.info("Test Start");
        super.onStart(testContext);
    }

    @Override
    public void onFinish(ITestContext testContext) {
        log.info("Test Finish");
        super.onFinish(testContext);
    }

}
3. 在testng.xml文件中配置自己编写的监听器类
    <listeners>
        <listener class-name="com.dji.utils.TestNGListener" />
    </listeners>
完成以上三步即可!!!
失败自动重跑功能
1. 新建TestNGRetry类,实现用例失败自动重跑逻辑
package com.dji.utils;

import org.testng.IRetryAnalyzer;
import org.testng.ITestResult;

/**
 * 用例失败自动重跑逻辑
 * @author Charlie.chen
 *
 */
public class TestNGRetry implements IRetryAnalyzer {
    public LogUtil log = new LogUtil(this.getClass());
    private int retryCount = 0;
    private int maxRetryCount=2;


    public boolean retry(ITestResult result) {
        if (retryCount <= maxRetryCount) {
            String message = "running retry for  '" + result.getName() + "' on class " +
                                       this.getClass().getName() + " Retrying " + retryCount + " times";
            log.info(message);
            retryCount++;
            return true;
        }
        return false;
    }
}
2. 添加用例重跑监听器RetryListener,用例失败自动重跑功能
package com.dji.utils;

import java.lang.reflect.Constructor;
import java.lang.reflect.Method;
import org.testng.IAnnotationTransformer;
import org.testng.IRetryAnalyzer;
import org.testng.annotations.ITestAnnotation;

/**
 * 添加用例重跑监听器,用例失败自动重跑功能
 *
 * @author Charlie.chen
 *
 */

public class RetryListener implements IAnnotationTransformer {
    public void transform(ITestAnnotation annotation, Class testClass, Constructor testConstructor, Method testMethod) {
        IRetryAnalyzer retry = annotation.getRetryAnalyzer();
        if (retry == null) {
            annotation.setRetryAnalyzer(TestNGRetry.class);
        }
    }
}
3. 在testng.xml文件中配置自己编写的监听器
    <listeners>
        <listener class-name="com.dji.utils.TestNGListener" />
        <listener class-name="com.dji.utils.RetryListener"/>
    </listeners>
4. 进一步改进
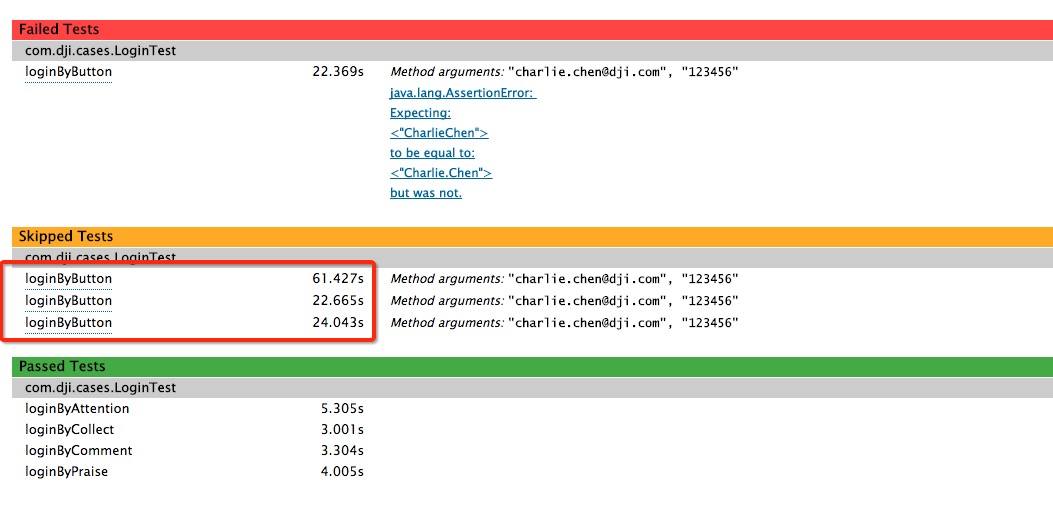
以上三步就搞定用例失败重跑的功能了,但是最后我们查看testng报告时,发现失败的用例在报告里生成了多份,显然这样不好,那怎么解决呢?
我们来更改第一部分自动截图中说到的TestNGListener监听器类,重写onFinish方法
    @Override
    public void onFinish(ITestContext testContext) {
        log.info("Test Finish");

        Iterator<ITestResult> listOfFailedTests = testContext.getFailedTests().getAllResults().iterator();
        while (listOfFailedTests.hasNext()) {
            ITestResult failedTest = listOfFailedTests.next();
            ITestNGMethod method = failedTest.getMethod();
            if (testContext.getFailedTests().getResults(method).size() > 1) {
                listOfFailedTests.remove();
            } else {
                if (testContext.getPassedTests().getResults(method).size() > 0) {
                    listOfFailedTests.remove();
                }
            }
        }

    }


 1069
1069


 被折叠的 条评论
为什么被折叠?
被折叠的 条评论
为什么被折叠?
 到【灌水乐园】发言


