


目录
<<回到导览
Mybatis
1. Mybatis引入
- MyBatis是一款优秀的持久层框架,用于简化JDBC的开发。
官网:MyBatis中文网
1.1. 快速入门
-
创建项目、准备数据库表user(建表语句这里省略)、准备User类(src\main\java\com\jia\pojo\User.java)
// User类 public class User { private Integer id; private String name; private Short age; public Short gender; // ... getter、setter、toString } -
引入Mybatis相关依赖,配置Mybatis(数据库连接信息)

配置数据库连接信息(四要素,src\main\resources\application.properties)
#驱动类名称 spring.datasource.driver-class-name=com.mysql.cj.jdbc.Driver #数据库连接的url spring.datasource.url=jdbc:mysql://localhost:3306/mybatis #连接数据库的用户名 spring.datasource.username=root #连接数据库的密码 spring.datasource.password=123456 -
编写SQL语句(src\main\java\com\jia\mapper\UserMapper.java)
// 运行时,会自动生成该接口的实现类对象(代理对象),并且将该对象交给IOC容器管理 @Mapper public interface UserMapper { // 查询全部用户信息 @Select("select * from user") public List<User> list(); } -
单元测试(src\test\java\com\jia\MybatisDemoApplicationTests.java)
@SpringBootTest
class MybatisDemoApplicationTests {
    @Autowired
    private UserMapper userMapper;

    @Test
    public void testListUser(){
        List<User> userList = userMapper.list();
        userList.forEach(System.out::println);
    }
}
1.2.配置SQl提示
-
选中sql语句,点击鼠标右键 >> 显示上下文操作 >> 语言注入设置 >> 选择mysql


-
在设置成功后表user的字段会报红,这是因为idea没有连接user表所在的数据库(mybatis),识别不了user,我们将idea和数据库建立连接即可


配置成功后,报错消失,并且可以提示user表
1.3. JDBC简介
JDBC:(Java DataBase Connectivity),就是使用Java语言操作关系型数据库的一套API
- 本质:sun公司官方定义的一套操作所有关系型数据库的规范,即接口。
- 各个数据库厂商去实现这套接口,提供数据库驱动jar包
- 我们可以使用这套接口(JDBC)编程,真正执行的代码是驱动jar包中的实现类。


1.4.数据库连接池
- 数据库连接池是个容器,负责分配、管理数据库连接(Connection)
- 它允许应用程序重复使用一个现有的数据库连接,而不是再重新建立一个
- 释放空闲时间超过最大空闲时间的连接,来避免因为没有释放连接而引起的数据库连接遗漏
常见连接池产品:Druid(阿里)、Hikari(Spring boot 默认)
Druid:
-
官网:druid/druid-spring-boot-starter at master · alibaba/druid · GitHub
-
依赖配置:
<!-- mysql连接池 --> <dependency> <groupId>com.alibaba</groupId> <artifactId>druid-spring-boot-starter</artifactId> <version>1.2.8</version> </dependency> -
连接配置 :
spring.datasource.druid.url= # 或spring.datasource.url=
spring.datasource.druid.username= # 或spring.datasource.username=
spring.datasource.druid.password= # 或spring.datasource.password=
spring.datasource.druid.driver-class-name= #或 spring.datasource.driver-class-name=
1.5.lombok

Lombok是一个实用的ava类库,能通过注解的形式自动生成构造器、getter/setter、equals、hashcode、toString 等方法,并可以自动化生成日志变量,简化java开发、提高效率。
| 注解 | 作用 |
|---|---|
| @Getter/@Setter | 为所有的属性提供get/set方法 |
| @ToString | 会给类自动生成易阅读的 toString 方法 |
| @EqualsAndHashCode | 根据类所拥有的非静态字段自动重写 equals 方法和 hashCode方法 |
| @Data | 提供了更综合的生成代码功能(@Getter + @Setter + @ToString + @EqualsAndHashCode) |
| @NOArgsConstructor | 为实体类生成无参的构造器方法 |
| @AllLArgsConstructo | 为实体类生成除了static修饰的字段之外带有各参数的构造器方法。 |
idea已经自动安装好了lombok,直接写lombok的注解,再导入lombok即可
2.Mybatis基操
2.1.准备
-
准备数据库表 emp
-- 部门管理
create table tb_dept(
    id int unsigned primary key auto_increment comment '主键ID',
    name varchar(10) not null unique comment '部门名称',
    create_time datetime not null comment '创建时间',
    update_time datetime not null comment '修改时间'
) comment '部门表';

insert into tb_dept (id, name, create_time, update_time) values(1,'学工部',now(),now()),(2,'教研部',now(),now()),(3,'咨询部',now(),now()), (4,'就业部',now(),now()),(5,'人事部',now(),now());

-- 员工管理
create table tb_emp (
  id int unsigned primary key auto_increment comment 'ID',
  username varchar(20) not null unique comment '用户名',
  password varchar(32) default '123456' comment '密码',
  name varchar(10) not null comment '姓名',
  gender tinyint unsigned not null comment '性别, 说明: 1 男, 2 女',
  image varchar(300) comment '图像',
  job tinyint unsigned comment '职位, 说明: 1 班主任,2 讲师, 3 学工主管, 4 教研主管, 5 咨询师',
  entrydate date comment '入职时间',
  dept_id int unsigned comment '部门ID',
  create_time datetime not null comment '创建时间',
  update_time datetime not null comment '修改时间'
) comment '员工表';

INSERT INTO tb_emp
	(id, username, password, name, gender, image, job, entrydate,dept_id, create_time, update_time) VALUES
	(1,'jinyong','123456','金庸',1,'1.jpg',4,'2000-01-01',2,now(),now()),
	(2,'zhangwuji','123456','张无忌',1,'2.jpg',2,'2015-01-01',2,now(),now()),
	(3,'yangxiao','123456','杨逍',1,'3.jpg',2,'2008-05-01',2,now(),now()),
	(4,'weiyixiao','123456','韦一笑',1,'4.jpg',2,'2007-01-01',2,now(),now()),
	(5,'changyuchun','123456','常遇春',1,'5.jpg',2,'2012-12-05',2,now(),now());
-
创建一个新的springboot工程,选择引入对应的起步依赖(mybatis、mysql、lombok),创建好后项目结构如下

-
application.properties中引入数据库连接信息
spring.datasource.driver-class-name=com.mysql.jdbc.Driver spring.datasource.url=jdbc:mysql://localhost:3306/mybatis spring.datasource.username=root spring.datasource.password=123456 -
创建对应的实体类Emp(实体类属性采用驼峰命名,数据库采用下划线分割)
@Data @NoArgsConstructor @AllArgsConstructor public class Emp { private Integer id; private String username; private String password; private String name; private Short gender; private String image; private Short job; private LocalDate entrydate; private Integer deptId; private LocalDateTime createTime; private LocalDateTime updateTime; } -
准备Mapper接口 EmpMapper
@Mapper
public interface EmpMapper {
}
2.2.删除
-
接口方法
#{}是占位符,实际值是传递的参数id如果mapper接口方法只有一个普通类型的参数,
#{}里面的属性名可以随便写(但是尽量保持一致)@Mapper public interface EmpMapper @Delete("delete from tb_emp where id = #{id}") public void delete(Integer id); } -
测试
@SpringBootTest class EmpApplicationTests { @Autowired public EmpMapper empMapper; @Test public void testDelete() { empMapper.delete(5); } } -
返回值:返回值是该语句执行影响的记录数
@Mapper
public interface EmpMapper {
    @Delete("delete from tb_emp where id = #{id}")
    // 将void改为Integer
    public Integer delete(Integer id);
}
@Test public void testDelete() { int delete = empMapper.delete(5); // 因为刚刚已经将id为5的记录删除,所以影响的记录数为0 System.out.println(delete);; // 0 }
2.2.1预编译SQL
可以在application.properties中,打开mybatis的日志,并指定输出到控制台。
# 指定mybatis输出日志的位置,输出控制台
mybatis.configuration.log-impl=org.apache.ibatis.logging.stdout.StdOutImpl

updates:0就是更新记录数为0
预编译SQL优势:
- 性能更高
- 更安全(防止SQL注入)

2.2.2.SQL注入
SQL注入是通过操作输入的数据来修改事先定义好的SQL语句,以达到执行代码对服务器进行攻击的方法。
启动jar包服务,登录账号,返回500状态码,分析了一下是没有连接上本地数据库,然后我将老师的jar包解析下来,发现我的密码是1234,于是我将密码改了之后运行,出现报错,后来我上午去搜索材发现好像是什么缓存问题,然后我清除缓存去关联pom.xml,重新下载缓存,然后我的电脑就卡死了Q_Q

后来我看弹幕好像可以用压缩软件直接修改jar包内容,然后我就修改了(BOOT-INF\classes\com\itheima\SqlInjectionDemoApplication.class),然后登录,依然报错500,然后我查看控制台,发现预编译SQL正常输出,但是emp表不匹配。。。

-
这里其实是老师资料的一个坑,按照他资料提供的生成语句,生成的表名是tb_emp,和emp表名当然不匹配
哟西,一波三折,终于成功进入系统Q_Q(还有一件事,上面建表语句,为了不使文章显得臃肿,我只生成了5,条语句,上一节还删了一条,用剩下的四个账号才可以登录)

现在我们随机输入账号,密码为
' or '1' = '1(or两边都有空格),登录成功!!!
-
SQL注入原因分析

我们通过控制台的输出可以看出,我刚刚的操作实际上执行了
// 后面的'1' = '1'很成立(如果你可以改写成其他恒成立的式子,效果一样)
select count(*) from emp where username = 'ansssijjasxs' and password = '' or '1' = '1'
但是我们理想中的sql语句应该是这样(密码 =>
' or '1' = '1)select count(*) from emp where username = '账号' and password = '密码'这也导致我们的账号验证被通过SQL认证的方式绕开了
-
SQL注入预防(预编译SQL)
如果使用了预编译SQL,预编译语句为
select count(*) from emp where username = ? and password = ?会将整个字符串作为一个参数传递给password
在实际开发中我们使用
#{}占位符,其实已经会进行SQL的与变量了 -
另外一个占位符
${}这个占位符直接将参数拼接到SQL语句中,存在SQL注入问题(上面的SQL注入成功案例就是用的这个占位符)
@Select({"select count(*) from emp where username = '${username}' and password = '${password}'"})
2.3.新增
如果按照步骤,测试SQL注入,改了tb_emp表的表名,记得改回来。
-
接口方法
@Insert("insert into tb_emp(username, name, gender, image, job, entrydate, dept_id, create_time, update_time)" + "values (#{username}, #{name}, #{gender}, #{image}, #{job}, #{entrydate}, #{deptId}, #{createTime}, #{updateTime})") public void insert(Emp emp); -
测试
@Test
public void testInsert() {
    Emp emp = new Emp();
    emp.setUsername("Tom");
    emp.setName("汤姆");
    emp.setImage("1.jpg");
    emp.setGender((short) 1);
    emp.setJob((short) 1);
    emp.setEntrydate(LocalDate.of(2020, 1, 1));
    emp.setCreateTime(LocalDateTime.now());
    emp.setUpdateTime(LocalDateTime.now());
    emp.setDeptId(1);

    empMapper.insert(emp);
}
新增成功


-
主键返回
应用场景:在数据添加成功后,需要获取插入数据库数据的主键
实现:加入
@Options注解@Mapper public interface EmpMapper { // 会自动将生成的主键值,赋值给emp对象的id属性 @Options(keyProperty = "id", useGeneratedKeys = true) @Insert(...) public void insert(Emp emp); }@Test public void testInsert() { // ... empMapper.insert(emp); System.out.println(emp.getId()); // 8, 获取成功 }
2.4.更新
-
接口方法
@Update("update tb_emp set username = #{username}, name= #{name}, gender= #{gender}, image= #{image}, job= #{job}, entrydate = #{entrydate}, entrydate = #{entrydate}, dept_id = #{deptId}, update_time=#{updateTime} where id = #{id}") public void update(Emp emp); -
测试
@Test
public void testUpdate() {
    Emp emp = new Emp();
    emp.setId(8);
    emp.setUsername("Bob");
    emp.setName("鲍勃");
    emp.setImage("2.jpg");
    emp.setGender((short) 1);
    emp.setJob((short) 1);
    emp.setEntrydate(LocalDate.of(2020, 1, 1));
    emp.setUpdateTime(LocalDateTime.now());
    emp.setDeptId(1);

    empMapper.update(emp);
}
更新成功

2.5.查询
2.5.1.id查询
-
接口方法
@Select("select * from tb_emp where id = #{id}") public Emp selectById(Integer id); -
测试
@Test
public void selectById(){
    Emp emp = empMapper.selectById(1);
    System.out.println(emp);
}
查询成功,但是deptId,createTime,updateTime值为null

-
数据封装
-
实体类属性名和数据库表查询返回的字段名一致,mybatis会自动封装。
-
如果实体类属性名 和 数据库表查询返回的字段名不一致,不能自动封装。

-
-
解决方法
-
方案一:起别名
@Select("select id, username, password, name, gender, image, job, entrydate, dept_id deptId, create_time createTime, update_time updateTime from tb_emp where id = #{id}")
public Emp selectById(Integer id);
查询成功

-
方案二:通过@Results,@Result注解进行手动映射封装
@Results({ @Result(column = "dept_id", property = "deptId"), @Result(column = "create_time", property = "createTime"), @Result(column = "update_Time", property = "updateTime"), }) @Select("select * from tb_emp where id = #{id}") public Emp selectById(Integer id); -
方案三(重点):开启mybatis驼峰命名自动映射开关(application.properties)
mybatis.configuration.map-underscore-to-camel-case=true
-
2.5.2.条件查询
-
接口方法
在字符串中不能直接使用
#{}进行SQL预编译的,我们可以使用${}直接拼接上去@Select("select * from tb_emp "+ "where name like '%${name}%' "+ "and gender = #{gender} "+ "and entrydate between #{begin} and #{end} "+ "order by update_time desc") public List<Emp> list(String name, Short gender, LocalDate begin, LocalDate end); -
测试
@Test
public void testList(){
    List<Emp> empList= empMapper.list("张", (short) 1, LocalDate.of(2010, 1, 1), LocalDate.of(2020, 1, 1));
    System.out.println(empList);
}
查询成功

但是使用
${}性能低、不安全、存在SQL注入问题 -
解决方法
使用concat字符串拼接函数改造
@Select("select * from tb_emp "+
        "where name like concat('%', #{name}, '%') "+
        "and gender = #{gender} "+
        "and entrydate between #{begin} and #{end} "+
        "order by update_time desc")
public List<Emp> list(String name, Short gender, LocalDate begin, LocalDate end);
3.XML
3.1.XML映射文件
使用Mybatis的注解,主要是来完成一些简单的增制改查功能。如果需要实现复杂的SQL功能,建议使用XML来配置映射语句。
映射规范:
-
XML映射文件的名称与Mapper接口名称一致,并且将XML映射文件和Mapper接口放置在相同包下(同包同名)。
创建包和文件时,将
.替换成/(在我在项目中,com/jia/mapper/EmpMapper.xml)
-
XML映射文件的namespace属性为Mapper接口全限定名一致。

获取全类名

-
XML映射文件中sql语句的id与Mapper 接口中的方法名一致,并保持返回类型一致。

-
将上一节的条件查询语句写入XML
<?xml version="1.0" encoding="UTF-8" ?>
<!DOCTYPE mapper
        PUBLIC "-//mybatis.org//DTD Mapper 3.0//EN"
        "http://mybatis.org/dtd/mybatis-3-mapper.dtd">
<mapper namespace="com.jia.mapper.EmpMapper">
    <!--  resultType:单条记录所封装的类型  -->
    <select id="list" resultType="com.jia.pojo.Emp">
        select * from tb_emp
        where name like '%${name}%'
        and gender = #{gender}
        and entrydate between #{begin} and #{end}
        order by update_time desc
    </select>
</mapper>
查询成功

3.2.MyBatisX

安装好MyBatisX后,xml文件和mapper文件的相关代码左侧会有不同颜色的小鸟,点击小鸟会实现相互跳转,还有快速生成xml标签等诸多功能。

4.动态SQL
随着用户的输入或外部条件的变化而变化的SQL语句,称为动态SQL
4.1.if
<select id="list" resultType="com.jia.pojo.Emp">
    select id, username, password, name, gender, image, job,
    entrydate, dept_id, create_time, update_time from tb_emp
    where
    <if test="name != null">
        name like concat('%', #{name}, '%')
    </if>
    <if test="gender != null">
        and gender = #{gender}
    </if>
    <if test="begin != null and end != null">
        and entrydate between #{begin} and #{end}
    </if>
    order by update_time desc
</select>
@Test
public void testList(){
    List<Emp> empList= empMapper.list("张", null, null, null);
    System.out.println(empList);
}
当三个条件都不成立,会多余一个where,在查询时,也可能多余一个and,产生报错,我们可以引入标签来解决这个问题。
<select id="list" resultType="com.jia.pojo.Emp">
    select * from tb_emp
    <where>
        <if test="name != null">
            ...
        </if>
    </where>
    order by update_time desc
</select>
-
案例
完善更新员工的功能,修改为动态更新员工数据信息
用MyBatisX来自动生成标签

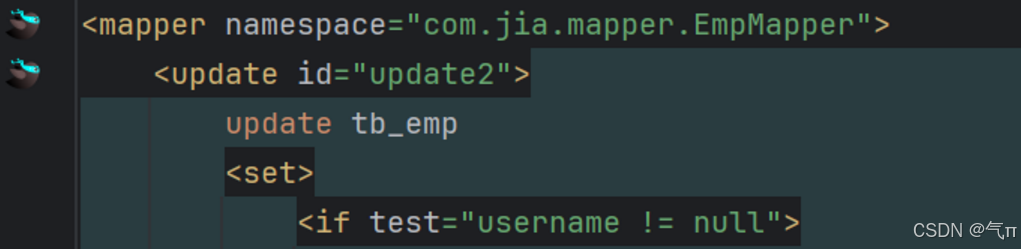
生成的标签
<update id="update2"></update>xml编写完毕
<update id="update2">
    update tb_emp
    set
    <if test="username != null">username = #{username},</if>
    <if test="name != null">name = #{name},</if>
    <if test="gender != null">gender = #{gender},</if>
    <if test="image != null">image = #{image},</if>
    <if test="job != null">job = #{job},</if>
    <if test="entrydate != null">entrydate = #{entrydate},</if>
    <if test="deptId != null">dept_id = #{deptId},</if>
    <if test="updateTime != null">update_time = #{updateTime}</if>
    where id = #{id}
</update>
// 更新员工 @Mapper public interface EmpMapper { public void update2(Emp emp); }更新成功

同上面where一样,如果只执行几条更新(不执行最后一条),则会有多余
,,我们可以通过使用标签来解决这个问题。<update id="update2"> update tb_emp <set> <if test="username != null">username = #{username},</if> // ... </set> where id = #{id} </update>
4.2.foreach
可以通过进行批量操作
| foreach的常见参数 | 说明 |
|---|---|
| collection | 遍历的集合 |
| item | 遍历的元素 |
| separator | 分隔符 |
| open | 遍历开始前拼接的SQL片段 |
| close | 遍历结束后拼接的SQL片段 |
-
xml
<delete id="deleteByIds"> delete from tb_emp where id in <foreach collection="ids" item="id" separator="," open="(" close=")"> #{id} </foreach> </delete> -
批量删除
// 批量删除 @Mapper public interface EmpMapper { public void deleteByIds(List<Integer> ids); } -
测试
@Test
public void testDeleteByIds() {
    List<Integer> ids = Arrays.asList(11,13);
    empMapper.deleteByIds(ids);
}
批量删除成功

4.3.sql&include
在xml文件中,有些语句我们要重复使用(封装的思想),我们可以利用sql和include完成(类似于前端的插槽)
原代码为:
<select id="list1" resultType="com.jia.pojo.Emp">
    select id, username, password, name, gender, image, job, entrydate, dept_id, create_time, update_time from tb_emp
    <!--  ...  -->
</select>

<select id="list2" resultType="com.jia.pojo.Emp">
    select id, username, password, name, gender, image, job,
    entrydate, dept_id, create_time, update_time from tb_emp
    <!--  ...  -->
</select>
利用标签和标签改造后
<sql id = "commonSelect">
    select id, username, password, name, gender, image, job, entrydate, dept_id, create_time, update_time from tb_emp
</sql>

<select id="list1" resultType="com.jia.pojo.Emp">
    <include refid = "commonSelect"/>
    <!--  ...  -->
</select>

<select id="list2" resultType="com.jia.pojo.Emp">
    <include refid = "commonSelect"/>
    <!--  ...  -->
</select>


 被折叠的 条评论
为什么被折叠?
被折叠的 条评论
为什么被折叠?
 到【灌水乐园】发言


