


菜鸟纯手搓5天速成的小型图书管理系统。基于opengauss数据库,前端使用html + vue + elementui,后端使用python + flask,通过psycopg2连接到数据库。
思路:
一、library.sql文件用于初始化数据库。
打开Navicat15,连接上opengauss数据库,找到数据库下对应的用户(如下图):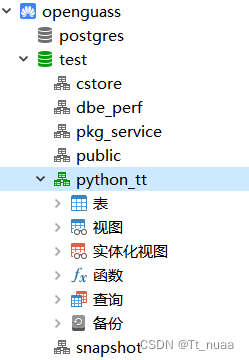
点击查询,新建查询,如下图: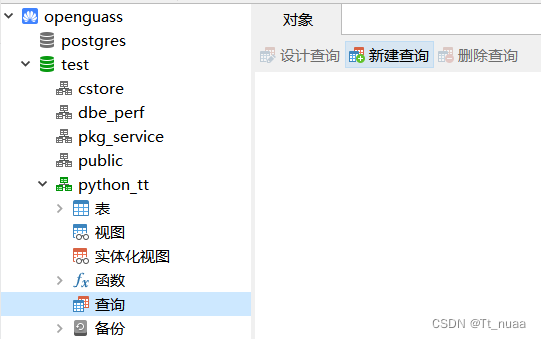
将sql语句粘贴进去,即可完成数据库的初始化,如下图: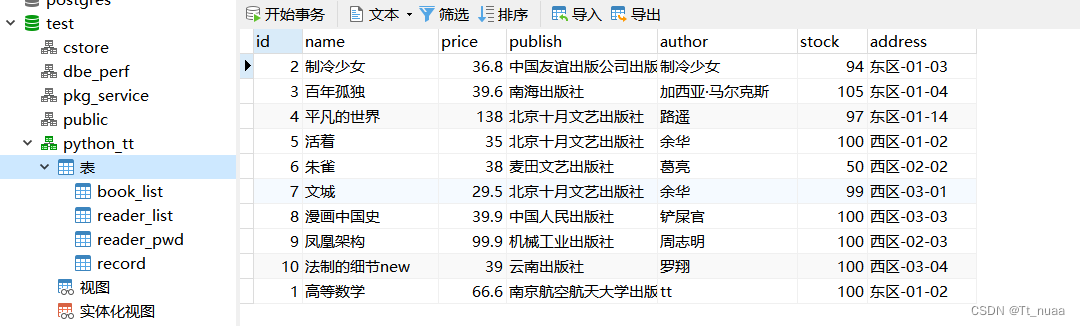
(Navicat主要用来可视化操作,方便快捷一点,没有的话直接命令行也行)
二、后端函数(以登录为例)
# 用户登录
@app.route("/login", methods=["POST"])  #标明接口,包括名称“login”,方式POST
def reader_log_in():                    #定义函数
    data = request.get_json()           #request.get_json()是获取前端传递过来的数据(重点1,后面细说)
    username = data["username"]         #取出其中的username,赋值给username
    password = data["password"]         #取出其中的password,赋值给password
    #sql语句,使用username和password进行查找
    cur.execute(f"SELECT password FROM reader_pwd WHERE username = {username}")
    cur_result = cur.fetchall()         #返回查找用户名的结果
    for row in cur_result:              #遍历查找的结果
        if row[0] != password:          #如果用户不存在,返回false
            return json.dumps({"info": "false"})
        #若存在,再查找权限(不足1,后面细说)
        cur.execute(f"SELECT authority FROM reader_list WHERE student_num = {username}")
        authority_result = cur.fetchall()#返回查找权限的结果
        au = authority_result[0]         #取权限
        return json.dumps({"info": "true","au":au})#将所有需要返回前端的结果打包返回给前端
三、前端页面(以登录为例)
下面是登录页面全部的html代码:
<!DOCTYPE html>
<html>

<head>
    <meta charset="UTF-8" />
    <title>用户登录</title>
    <script src="https://cdn.jsdelivr.net/npm/vue@2.6.14/dist/vue.js"></script>
    <link rel="stylesheet" href="https://unpkg.com/element-ui/lib/theme-chalk/index.css" />
    <script src="https://unpkg.com/element-ui/lib/index.js"></script>
    <script src="https://unpkg.com/axios/dist/axios.min.js"></script>
    <link rel="stylesheet" href="library.css">
    <style>
        .el-message {
            min-width: 180px;
        }
        .el-message--success {
            background-color: #379e00;
            border: 0px;
            border-color: #fefffe;
        }
        .el-message .el-icon-success {
            color: white;
        }
        .el-message--success .el-message__content {
            color: white;
        }
        .el-message--error {
            background-color: #ee5d50;
            border: 0px;
            border-color: #fefffe;
        }
        .el-message .el-icon-error {
            color: white;
        }
        .el-message--error .el-message__content {
            color: white;
        }
    </style>
</head>

<body>
    <div class="body_log" id="app1">
        <div class="author">designed by 162010228 滕腾</div>
        <div class="logbox">
            <div class="box1">南京航空航天大学</div>
            <div class="box1">图书管理系统</div>
            <div class="input1"><div class="box2">用户名:</div><el-input v-model="form.username" placeholder="用户名"></el-input></div>
            <div class="input1"><div class="box2">密码:</div><el-input v-model="form.password" placeholder="密码" show-password></el-input></div>
            <el-button display="flex" style="width: 100px;margin-top: 30px;font-size:20px;font-family:monospace" type="primary"
                @click="login">登录</el-button>
            <el-button display="flex" style="width: 70px;margin-top: 30px;margin-left:280px" font-size="20px" type="info" plain
                onclick="window.location.href='2_register.html'">注册</el-button>
        </div>
    </div>
    <script>
        new Vue({
            el: '#app1',
            data() {
                return {
                    form: {
                        username: '',
                        password: '',
                    },
                    info: '',
                    au: '',
                }
            },
            methods: {
                showsuccessAlert(info1) {
                    this.$message({
                        message: info1,
                        type: 'success',
                        center: true,
                        showClose: true,
                        duration: 800,
                    });
                },
                showerrorAlert(info2) {
                    this.$message({
                        message: info2,
                        type: 'error',
                        center: true,
                        showClose: true,
                        duration: 800,
                    });
                },
                login() {
                    const sendData = {
                        username: this.form.username,
                        password: this.form.password,
                    }
                    console.log("sendData = ", sendData)
                    axios
                        .post('http://127.0.0.1:5000/login', sendData)
                        .then((response) => {
                            this.info = response.data.info;
                            this.au = response.data.au;
                            if (this.info == 'false') {
                                this.showerrorAlert("密码错误");
                            }
                            else {
                                this.showsuccessAlert("登录成功");
                                if (this.au == '1') {
                                    window.location.href = '3_index.html?username=' + this.form.username;
                                }
                                else {
                                    window.location.href = '3_0_index.html?username=' + this.form.username;
                                }
                            }
                        })
                        .catch((error) => {
                            console.error(error)
                        })
                },
            },
        })
    </script>
</body>

</html>
引用的外部css:
#app {
    height: 97vh;
    display: flex;
    flex-direction: column;
    align-items: center;
}

#app1 {
    height: 710px;
    width: 1516px;
    display: flex;
    flex-direction: column;
    align-items: center;
}

#app2 {
    height: 97vh;
    display: flex;
    flex-direction: column;
    align-items: center;
}

#app3 {
    height: 710px;
    display: flex;
    flex-direction: column;
    align-items: center;
}

#app30 {
    height: 97vh;
    display: flex;
    flex-direction: column;
    align-items: center;
}

#app4 {
    height: 97vh;
    display: flex;
    flex-direction: column;
    align-items: center;
}

#app5 {
    height: 97vh;
    display: flex;
    flex-direction: column;
    align-items: center;
}

#app6 {
    height: 97vh;
    display: flex;
    flex-direction: column;
    align-items: center;
}

#app7 {
    height: 97vh;
    display: flex;
    flex-direction: column;
    align-items: center;
}

#app8 {
    height: 97vh;
    display: flex;
    flex-direction: column;
    align-items: center;
}

.body_index {
    background: url("background.jpg") no-repeat;
    background-size: 100% 100%;
}

.body_log {
    background: url("login.jpg") no-repeat;
    background-size: 100% 100%;
    /* Opacity: 0.8; */
}

.body_reader {
    background: url("background.jpg") no-repeat;
    background-size: 100% 100%;
}

.body_book {
    background: url("background.jpg") no-repeat;
    background-size: 100% 100%;
}

.body_record {
    background: url("background.jpg") no-repeat;
    background-size: 100% 100%;
}

.body_center {
    background: url("background.jpg") no-repeat;
    background-size: 100% 100%;
}

.tac {
    display: flex;
    position: absolute;
    left: 9px;
    top: 79px;
}

.el-col-12 {
    width: 200px;
}

.author {
    display: flex;
    width: 100%;
    height: 40px;
    font-size: 20px;
    color: #ffffff;
    justify-content: left;
    margin-left: 50px;
    margin-top: 20px;
}

.logbox {
    background-color: rgb(255, 246, 235, 0.6);
    flex-direction: column;
    width: 400px;
    height: 380px;
    display: flex;
    margin-top: 40px;
    margin-left: 700px;
    padding-top: 50px;
    border-radius: 20px;
    align-items: center;
}

.logbox2 {
    background-color: rgb(255, 246, 235, 0.7);
    flex-direction: column;
    width: 400px;
    height: 500px;
    display: flex;
    margin-top: 40px;
    margin-left: 700px;
    padding-top: 50px;
    border-radius: 20px;
    align-items: center;
}

.box1 {
    display: flex;
    font-family: fantasy;
    font-size: 30px;
}

.box2 {
    display: flex;
    font-family: fantasy;
    font-size: 18px;
    width: 75px;
    height: 40px;
    justify-content: right;
    padding-right: 5px;
    align-items: center;
}

.tip {
    display: flex;
    position: relative;
    bottom: 2px;
    right: 76px;
    height: 0px;
}

.tip2 {
    display: flex;
    position: relative;
    left: 124px;
    height: 0px;
}

.form-container {
    background-color: #DEEDF7;
    position: relative;
    left: 100px;
    width: 1290px;
    display: flex;
    align-items: center;
    /* justify-content: space-evenly; */
    margin-top: 1px;
    padding-top: 10px;
    padding-bottom: 10px;
    padding-left: 40px;
}

.input1 {
    display: flex;
    padding-top: 20px;
    width: 300px;
}

.search {
    display: flex;
    width: 320px;
    margin-right: 20px;
}

.search2 {
    display: flex;
    position: relative;
    left: 400px;
    margin-left: 20px;
    margin-right: 20px;
}

.newinput {
    display: flex;
    width: 300px;
    margin-right: 20px;
}

.select1 {
    display: flex;
    width: 160px;
}

.maintop {
    display: flex;
    width: 100%;
    height: 70px;
    background-color: #004d99;
}

.headpicture {
    width: 370px;
    height: auto;
    background: url("head.png") no-repeat;
    background-size: 100% 100%;
    margin-left: 10px;
    margin-top: 5px;
    margin-bottom: 5px;
}

.headinfo {
    display: flex;
    flex-direction: row;
    width: 800px;
    font-family: fantasy;
    font-size: 30px;
    color: #ffffff;
    align-items: center;
    justify-content: right;
    position: relative;
    left: 200px;
}

.calender {
    display: flex;
    position: relative;
    left: 100px;
    top: 2px;
    Opacity: 0.8;
}

.result-container {
    display: flex;
    justify-content: space-between;
    font-size: 20px;
    color: cadetblue;
    /* height: 400px; */
}

.input2 {
    display: flex;
    width: 400px;
}


.individual {
    display: flex;
    background-color: rgba(0, 0, 0, 0.5);
    margin-top: 30px;
    padding: 40px;
    border-radius: 30px;
    border: 2px solid #8fd3f4;
    box-shadow: 0 0 10px #8fd3ff;
}

.newinfo {
    display: flex;
    justify-content: center;
    margin-top: 20px;
}
其中登录的接口:
login() {
                    const sendData = {//打包需要发送给后端的数据
                        username: this.form.username,
                        password: this.form.password,
                    }
                    console.log("sendData = ", sendData)//数据赋值
                    axios//前后端交互
                        .post('http://127.0.0.1:5000/login', sendData)//调用接口,senddata就表示发送给后端了,这就是重点1的解释
                        .then((response) => {//response就是前端接收到的后端传过来的数据
                            this.info = response.data.info;//取出其中的info和au
                            this.au = response.data.au;
                            if (this.info == 'false') {
                                this.showerrorAlert("密码错误");//如果false,说明用户不存在,报错
                                //这个报错函数我自己写的,好看一点,直接alert也行的
                            }
                            else {
                                this.showsuccessAlert("登录成功");//如果成功,跳转
                                if (this.au == '1') {
                                    //跳转到管理员界面
                                    window.location.href = '3_index.html?username=' + this.form.username;
                                }
                                else {
                                    //跳转到普通用户界面
                                    window.location.href = '3_0_index.html?username=' + this.form.username;
                                }
                            }
                        })
                        .catch((error) => {//错误处理,我不会,无所谓
                            console.error(error)
                        })
                },
不足1:这个地方的权限我不是很懂,我直接水过去了。我是直接写了两个界面,用户一个管理员一个,权限不同登录的页面不同。然后,创建用户时候的权限限制,后续权限的赋予,我真的不会,别喷。各位大牛加油搞,会了回来教我。
四、几个Tips
1.使用Element-ui要联网,引用代码:
script src="https://cdn.jsdelivr.net/npm/vue@2.6.14/dist/vue.js"></script>
    <link rel="stylesheet" href="https://unpkg.com/element-ui/lib/theme-chalk/index.css" />
    <script src="https://unpkg.com/element-ui/lib/index.js"></script>
    <script src="https://unpkg.com/axios/dist/axios.min.js"></script>
2.使用Flask框架的代码(我也是copy的哈):
#代码最前面
app = Flask(__name__)
CORS(app)
app.config["CORS_HEADERS"] = "Content-Type"

#代码最后面
if __name__ == "__main__":
    server = pywsgi.WSGIServer(("127.0.0.1", 5000), app)
    server.serve_forever()
    app.run()
3.前端使用Vue要初始化Vue对象:
先在整个页面中标明vue对象
<div class="body_log" id="app1">//上面有,找一找在哪一行就行对Vue对象app1进行初始化样式(在上面css中也有):
#app1 {
    height: 710px;
    width: 1516px;
    display: flex;
    flex-direction: column;
    align-items: center;
}
在JavaScript中初始化数据,方法等:
<script>
        new Vue({
            el: '#app1',
            data() {
                return {
                    form: {
                        username: '',
                        password: '',
                    },
                    info: '',
                    au: '',
                }
            },
            methods: {
                showsuccessAlert(info1) {},//具体函数看前面
                showerrorAlert(info2) {},
                login() {},
            },
        })
    </script>
4.Element-ui的使用和数据匹配(代码看前面):
现在有一个表单form,里面的数据类型是form.username
<div class="input1"><div class="box2">用户名:</div><el-input v-model="form.username" placeholder="用户名"></el-input></div>整个页面中还有一个数据info:
<el-button display="flex" style="width: 70px;margin-top: 30px;margin-left:280px" font-size="20px" type="info" plain
                onclick="window.location.href='2_register.html'">注册</el-button>
只需要在Vue的初始化中的数据data部分定义就行:
data() {
                return {
                    form: {
                        username: '',
                        password: '',
                    },
                    info: '',
                    au: '',
                }
            },
后面的this.info就是表示这个页面中的info这个数据。
this.info = response.data.info;//取出其中的info和auFinish!干饭!


 5875
5875

 被折叠的 条评论
为什么被折叠?
被折叠的 条评论
为什么被折叠?
 到【灌水乐园】发言


