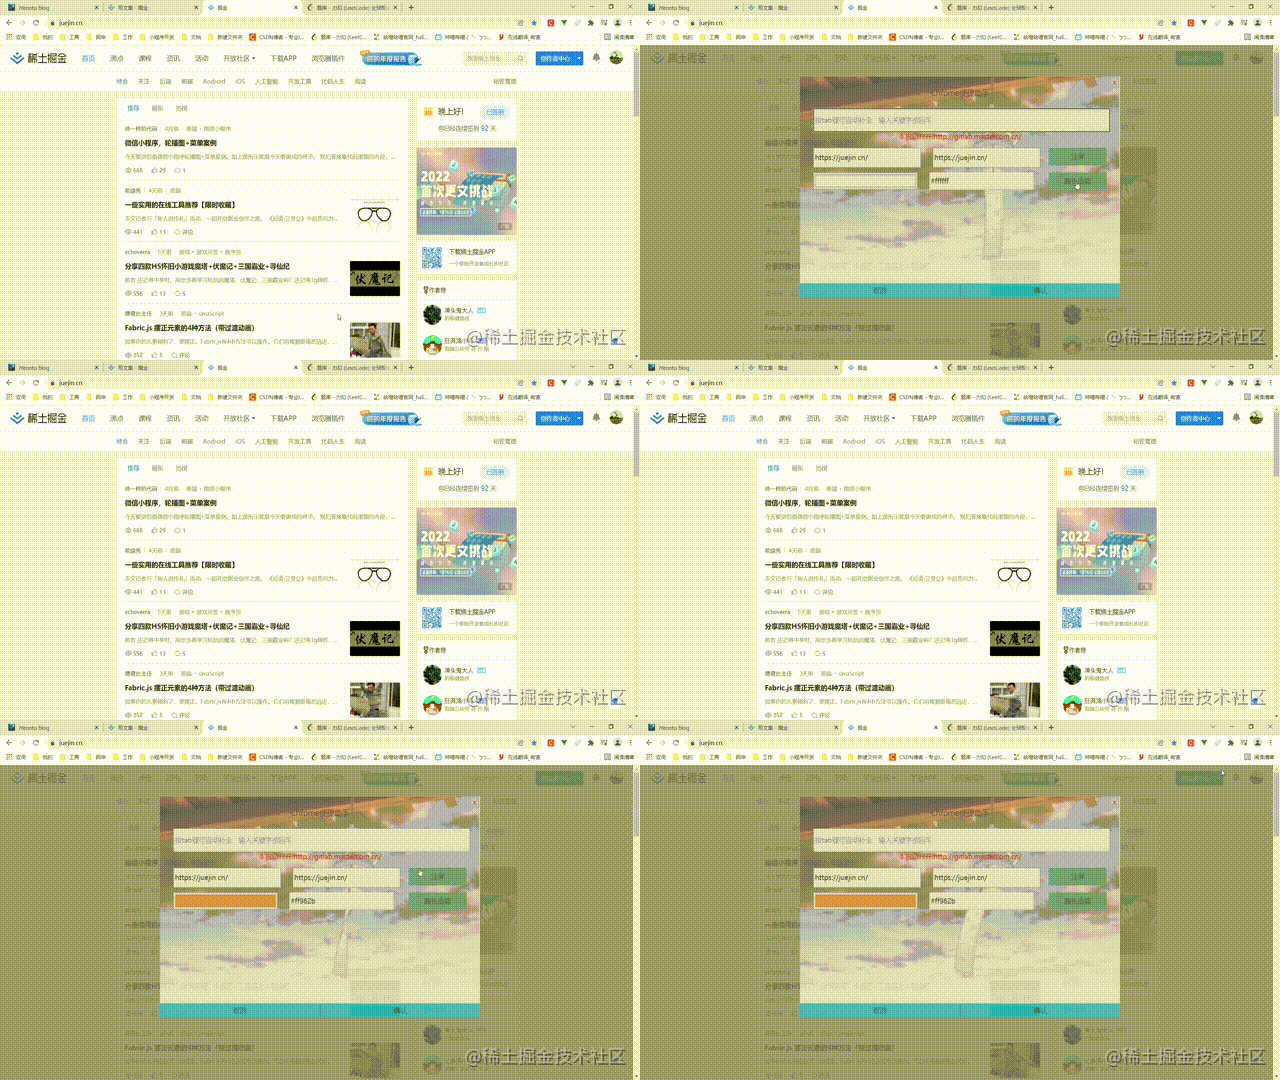
必备工具?
作为一名前端开发,颜色拾取工具是不是你们必备的工具,像之前都是用的软件的吸管工具来进行吸取颜色,完成自己的页面设计,但现在使用简单的JavaScript也能实现颜色拾取功能,你们知道吗?Chrome 95 推出的EyeDropper API 能够帮助我们轻松地在 Web 应用中创建吸管工具。使用EyeDropper API你可以使用取色器提取当前页面上的颜色。当取色器被激活的时候,它就像一个“放大镜”,使得你可以进行像素精度的颜色选择。在取色器下方显示的是当前像素点的颜色值,颜色值显示格式与你在设置中选择的一致。
制作自己的工具
当然,EyeDropper不仅仅可以用在特殊的需求场景上,我们也可以将其封装成一个工具,集成自己平时办公学习的插件,如上图所示,我们可以将其做成一个Chrome浏览器的插件,这样在平时的设计工作时,需要提取颜色的时候,可以随时调出该页面对颜色进行拾取,更加快捷地完成自己的工作。
如何制作
弹窗组件
使用JavaScript封装一个弹窗组件,可以使用快捷键来控制弹窗的显示,实现代码如下:
/*
 * @Author: zheng yong tao
 * @Date: 2021-12-30 00:51:37
 * @LastEditors: zheng yong tao
 * @LastEditTime: 2021-12-30 02:21:36
 * @Description: "弹窗组件类封装"
 */
class Dialog {
    /**
     *
     * @param {String} innerHTML 内嵌页面html
     * @param {Object} config  弹窗属性配置
     * @param {Function} callBack 回调函数
     * @param {Number} mode 内嵌模式 -> 1:页面初始化时就创建dom元素并插入页面 2:窗口打开是创建dom元素,关闭时销毁
     */
    constructor(innerHTML,config = {},callBack,mode = 1){
        this.config = config;
        this.mode = mode;
        this.callBack = callBack
        this.innerHTML = innerHTML;
        this.maskId = 'mask-mt';
        this.dialogInit();
        this.generateMask();
        this.generatePreviewContent(innerHTML);
        if(mode == 1){
            this.append();
        }
    }
    //初始化配置信息
    dialogInit(){
        const dialog = document.getElementsByClassName('dialog');
        let dialogId = 'dialog';
        if(dialog) dialogId += "-" + dialog.length;
        this.dialogId = dialogId;
        this.isHide = true;
    }
    //创建遮罩
    generateMask(){
        let mask = document.createElement('div');
        const maskT = document.getElementsByClassName('mask-mt');
        if(maskT && maskT.length > 0) mask = maskT[0];
        else{
            mask.className = "mask-mt";
            mask.id = this.maskId;
            let maskStyles = {
                position: "fixed",
                height: '100vh',
                width: '100vw',
                backgroundColor: 'grey',
                top: 0,
                opacity:0.8,
                zIndex:2147483646,
                display:'none'
            };
            mask = tagConfingSet(mask,maskStyles);
        }
        this.mask = mask;
    }
    //创建弹窗
    generatePreviewContent(innerHTML){
        let dialog = document.createElement('div');
        dialog.className = "dialog";
        dialog.id = this.dialogId;
        let dialogStyles = {
            position: "fixed",
            height: this.config.height || '70vh',
            width: this.config.width || '50vw',
            backgroundColor: 'white',
            top: this.config.top || "10vh",
            left: this.config.left || "25vw",
            zIndex:2147483647,
            display:"none",
            flexDirection: 'column',
            "background-image": 'url(' + this.config.backgroundImg + ')',
            "background-size": '100%',
            "background-repeat": 'no-repeat',
            opacity:0.7,
        }
        dialog = tagConfingSet(dialog,dialogStyles);
        let icon = `
            <div style="height:16px%;font-size: 16px;">
                <span class="dialogCloseBtn" title="关闭" style="color:red;float: right;width: 16px;height: 16px;
                            background-color: gainsboro;line-height: 16px;
                            text-align: center;border-radius: 50%;margin: 4.8px;
                            cursor: pointer;font-size: 16px;">
                    x
                </span>
            </div>
        `;
        dialog.innerHTML = icon + innerHTML;
        let closebtn = dialog.getElementsByClassName('dialogCloseBtn')[0];
        closebtn.onclick = ()=>{
            this.close();
        };
        this.dialog = dialog;
    }
    //将节点插入页面html
    append(){
        let ghtml = document.getElementsByTagName('html')[0];
        ghtml.appendChild(this.dialog);
        ghtml.appendChild(this.mask);
    }
    open(){
        this.mask.style.display = 'block';
        this.dialog.style.display = 'flex';
        this.isHide = false;
        if(this.mode == 2){
            this.append();
            this.callBack();
        }
    }
    close(){
        this.dialog.style.display = 'none';
        this.mask.style.display = 'none';
        this.isHide = true;
        if(this.mode == 2){
            this.dialog.remove();
        }
    }
}
生成弹窗并完成对应功能
实现颜色提取功能的话其实很简单,就需要几行代码,1、监听按钮的点击;2、创建拾取工具;3、回填拾取的颜色数据。具体代码如下:
panelDom.getElementsByClassName('colorGet')[0].onclick = ()=>{
    const eyeDropper = new EyeDropper();
    panel.close();
    const result = eyeDropper.open().then(res => {
        panel.open();
        panelDom.getElementsByClassName('colorShow')[0].value = res.sRGBHex;
        panelDom.getElementsByClassName('colorText')[0].value = res.sRGBHex;
    }).catch(err=>{
        panel.open();
    });
};
说在后面
EyeDropper这个API出现,其实也可以给我们带来更多的设计和想象空间,也是一个比较实用的API,感兴趣的同学们可以自己动手去体验一下,感受一下这个新出的API的魅力。
相关代码
图片展示的插件代码均已开源,且在我前几篇文章中有对这个插件的其他功能进行了比较详细的介绍,详细代码可以到Gitee上查看,地址为:https://gitee.com/zheng_yongtao/chrome-plug-in.git 感兴趣的也可以体验一下试试,或者有兴趣一起扩展该插件的也可以找我沟通沟通,目前插件的开发还是比较粗糙,仍在学习阶段,也希望有同学可以带领我学习,或者一起学习进步。
感谢大家
感谢大家的观看,希望这篇文章能让你们有所收获。


 介绍如何使用EyeDropper API在Web应用中实现颜色拾取功能,并将其封装为Chrome插件,提高前端开发效率。


 294
294

 被折叠的 条评论
为什么被折叠?


