


作者:来自 Elastic Jonathan Simon
学习如何使用 Elastic Agent Builder 创建一个 agent,然后探索如何通过 A2A 协议,在 Strands Agents SDK 的编排下使用该 agent。
Elasticsearch 与行业领先的 Gen AI 工具和提供商有原生集成。查看我们的网络研讨会,了解如何超越 RAG 基础,或使用 Elastic vector database 构建 prod-ready 应用。
为了为你的使用场景构建最佳的搜索解决方案,现在就开始免费的 cloud 试用,或在你的本地机器上试用 Elastic。
有一个 AI agent 的想法吗?它很可能涉及对数据做一些事情,因为如果一个 agent 要发起有用的操作,它需要做出决策,而它需要正确的数据来做出正确的决策。
Elastic Agent Builder 让构建与数据连接的 AI agent 变得简单。我们将在这篇博客中向你展示如何做到这一点。让我们一起走过使用一个访问存储在 Elastic 中的数据的 MCP 工具来创建一个 agent 所需的所有步骤。然后,我们将使用 Strands Agents SDK 及其 Agent2Agent ( A2A ) 功能来运行该 agent。Strands Agents SDK是一个多 agent 的 AI 开发平台,你可以用它以足够少的代码来构建 agentic 应用,从而确保你获得想要的结果。
让我们构建一个 AI agent 来玩 RPS+ 游戏,这是经典的 Rock Paper Scissors 游戏的一个变体,增加了一点变化;它为游戏玩家提供了几个额外的选择。
更多阅读:
先决条件
以下是按照本博文步骤所需的条件:
- 在本地电脑上运行的文本编辑器
- 本博文示例说明中使用的是 Visual Studio Code
- 在本地电脑上运行的 Python 3.10 或更高版本
创建无服务器项目
我们首先需要一个 Elasticsearch 无服务器项目,其中包括 Elastic Agent Builder。
访问 cloud.elastic.co 并创建一个新的 Elasticsearch 无服务器项目。

创建索引并添加数据
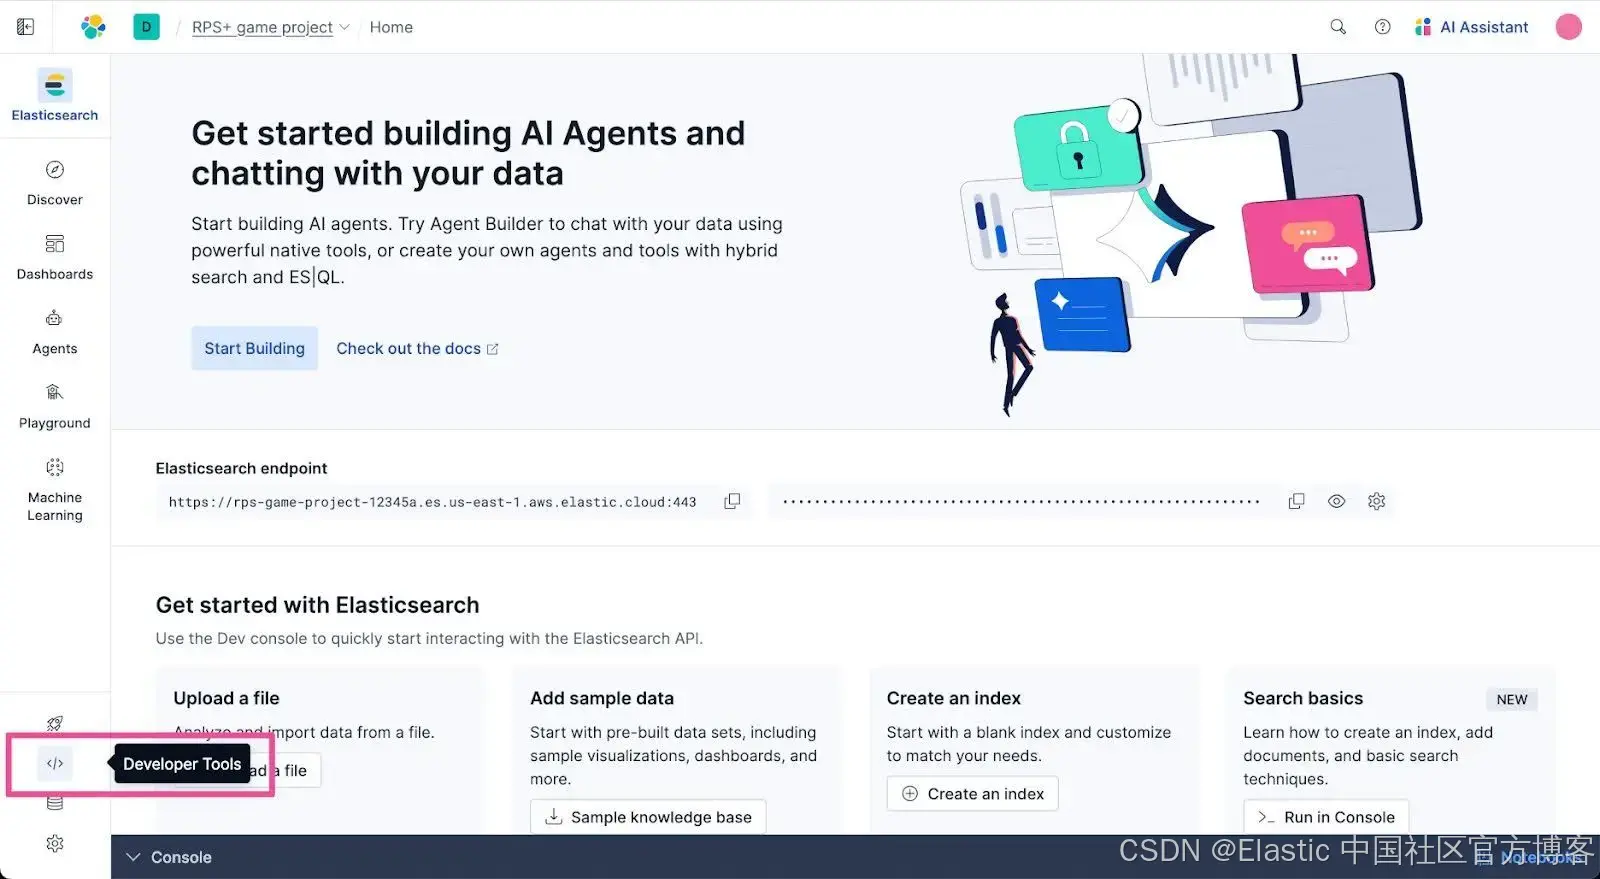
接下来,我们将在 Elasticsearch 项目中添加一些数据。打开 Developer Tools,在这里我们可以运行命令来创建新索引并向其中插入数据。从顶层导航菜单中选择 Developer Tools。
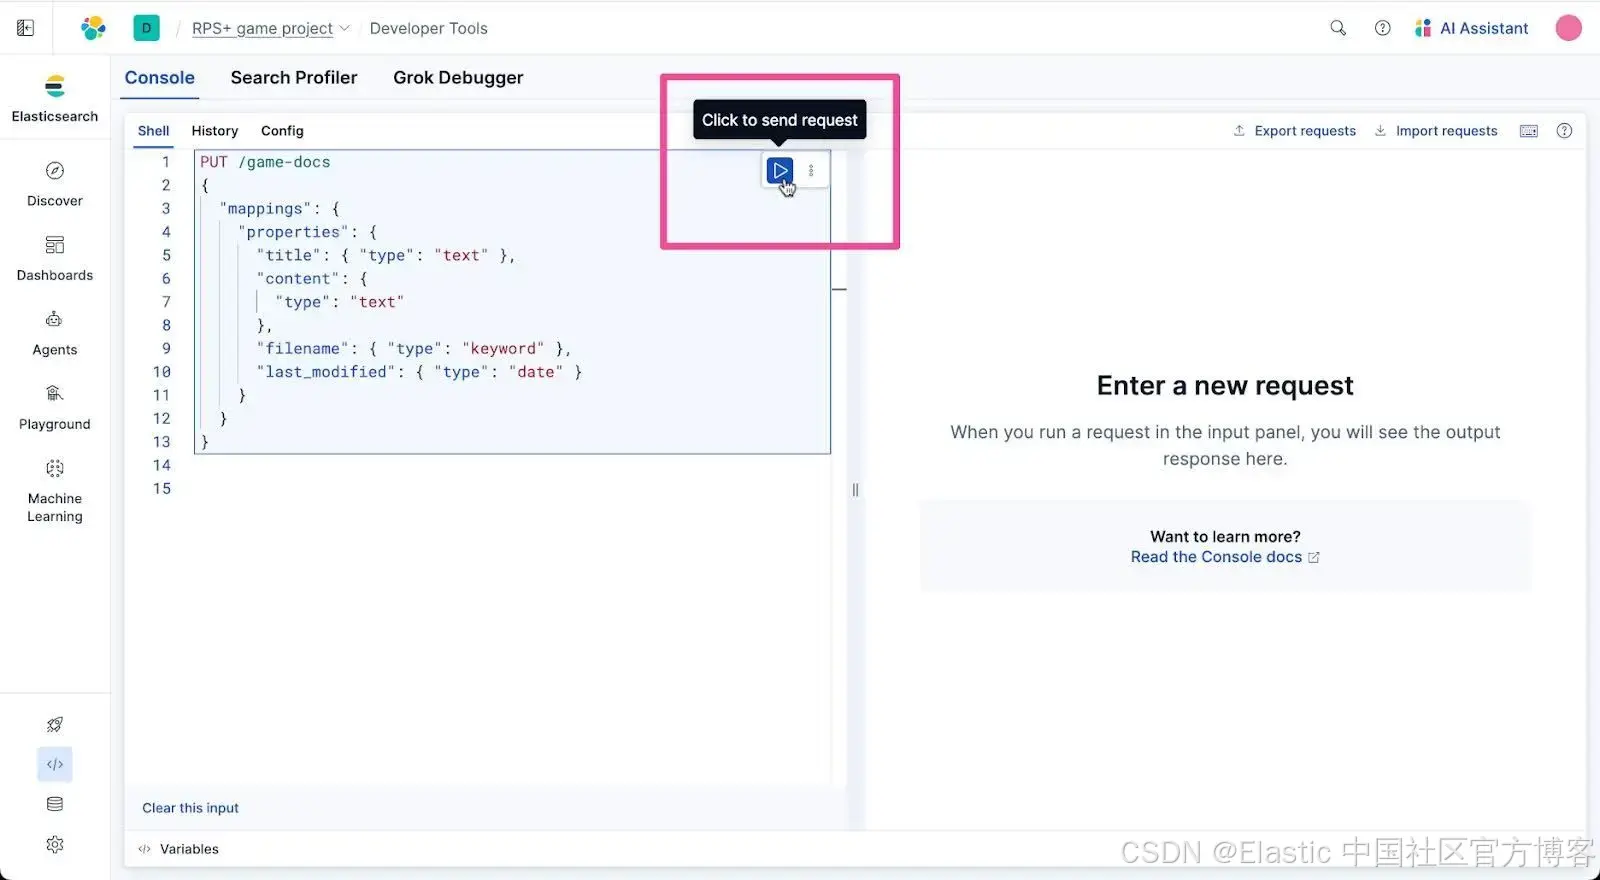
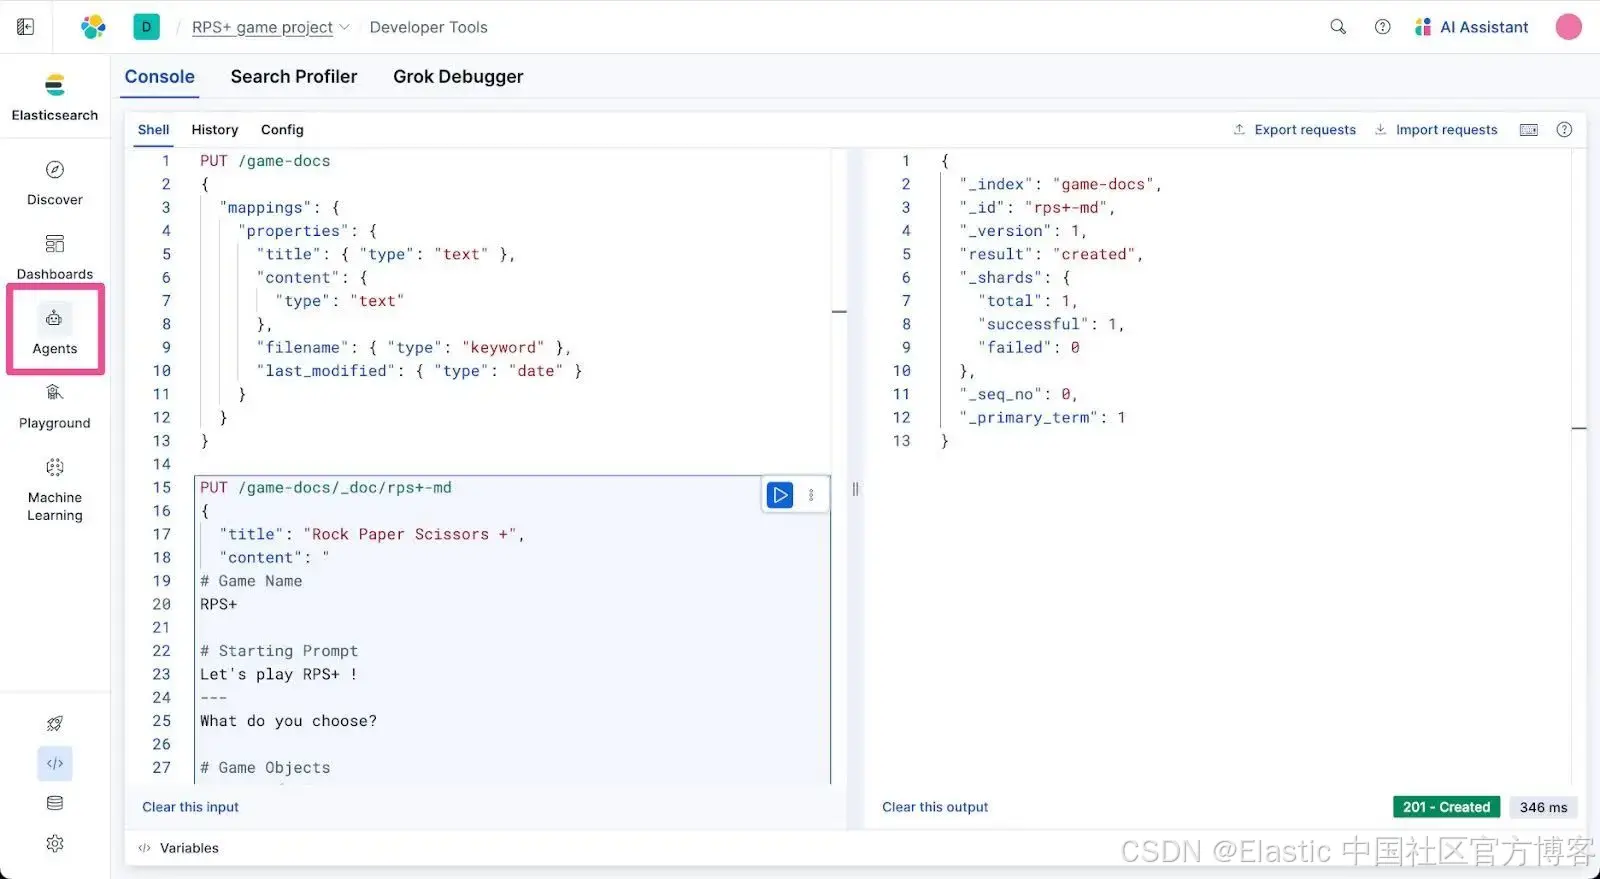
将以下 PUT 命令复制并粘贴到 Developer Tools 控制台的请求输入区域。此语句会创建一个名为 “game-docs” 的 Elasticsearch 索引。
PUT /game-docs
{
  "mappings": {
    "properties": {
      "title": { "type": "text" },
      "content": {
        "type": "text"
      },
      "filename": { "type": "keyword" },
      "last_modified": { "type": "date" }
    }
  }
}
点击 Developer Tools 中语句右侧出现的 Send request 按钮。你应该会在 Developer Tools 的响应区域看到一条通知,确认 game-docs 索引已创建。
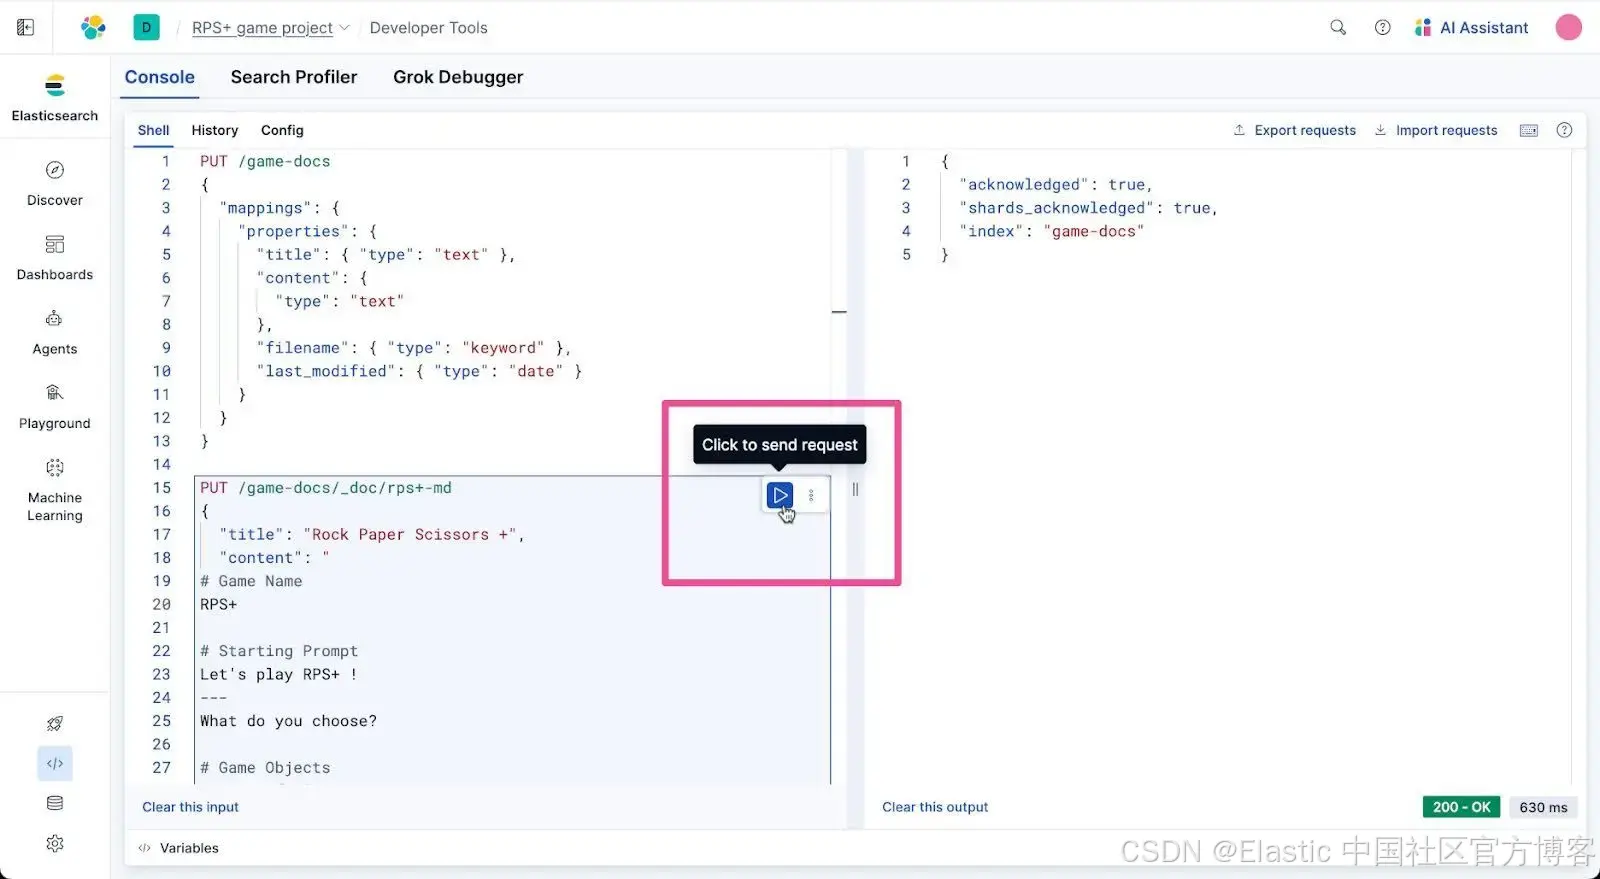
名为 game-docs 的索引是存储我们正在制作的游戏数据的理想位置。让我们在该索引中放入一个名为 rps+-md 的文档,其中包含游戏所需的所有数据。将以下 PUT 命令复制并粘贴到 Developer Tools 控制台。
PUT /game-docs/_doc/rps+-md
{
  "title": "Rock Paper Scissors +",
  "content": "
# Game Name
RPS+

# Starting Prompt
Let's play RPS+ !
---
What do you choose?

# Game Objects
1. Rock 🪨 👊
2. Paper 📜 🖐
3. Scissors ✄ ✌️
4. Light ☼ 👍
5. Dark Energy ☄ 🫱

# Judgement of Victory
* Rock beats Scissors
  * because rocks break scissors
* Paper beats Rock
  * because paper covers rock
* Scissors beat Paper
  * because scissors cut paper
* Rock beats Light
  * because you can build a rock structure to block out light
* Paper beats Light
  * because knowledge stored in files and paper books helps us understand light
* Light beats Dark Energy
  * because light enables humans to lighten up and laugh in the face of dark energy as it causes the eventual heat death of the universe
* Light beats Scissors
  * because light is needed to use scissors safely
* Dark Energy beats Rock
  * because dark energy rocks more than rocks. It rocks rocks and everything else in its expansion of the universe
* Dark Energy beats Paper
  * because humans, with their knowledge stored in files and paper books, can't explain dark energy
* Scissors beat Dark Energy
  * because a human running with scissors is darker than dark energy

# Invalid Input
I was hoping for an worthy opponent
  - but alas it appears that time has past
  - but alas there's little time for your todo list when [todo:fix this] is so vast

# Cancel Game
The future belongs to the bold. Goodbye..
",
  "filename": "RPS+.md",
  "last_modified": "2025-11-25T12:00:00Z"
}
点击语句旁的 Send request 按钮运行它,将 rps+-md 文档添加到 game-docs 索引中。
现在我们应该有一些可以查询的数据了,使用 Agent Builder,这比以往更简单。
从顶层导航菜单中选择 Agents。
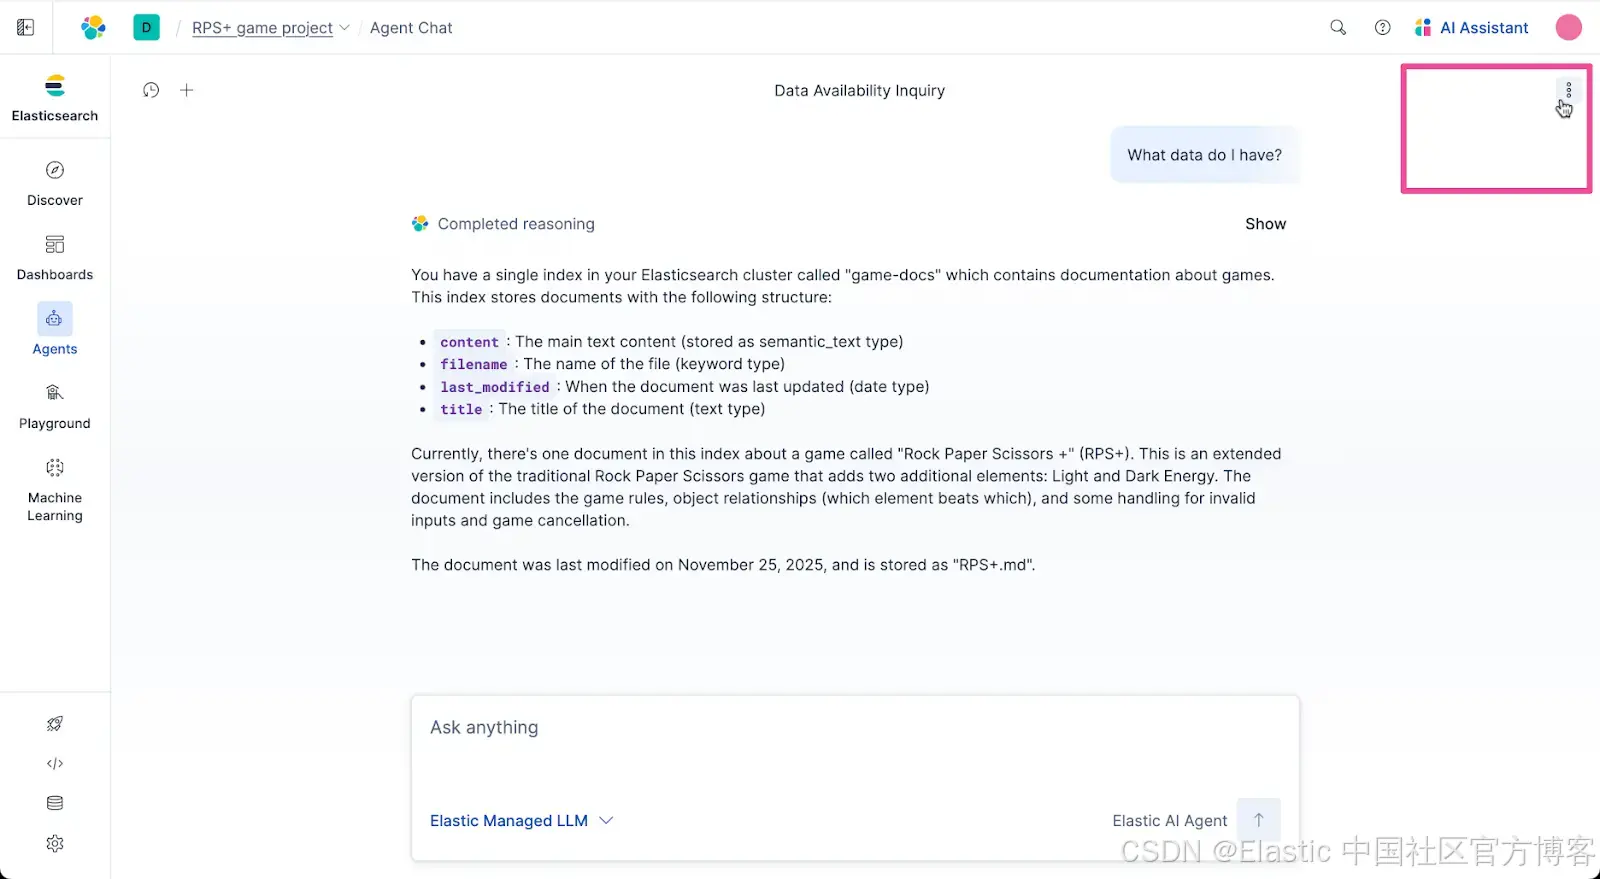
然后你只需问默认的 Elastic AI Agent:“我有什么数据?”
Elastic AI Agent 会评估数据并返回我们拥有的数据的简明说明。
创建工具
好了,我们现在在 Elastic 中已有一些数据,让我们开始使用它。Agent Builder 内置支持创建 MCP 工具,帮助 agent 访问所需数据,从而获得任务的正确上下文。让我们创建一个简单的工具来检索我们的游戏数据。
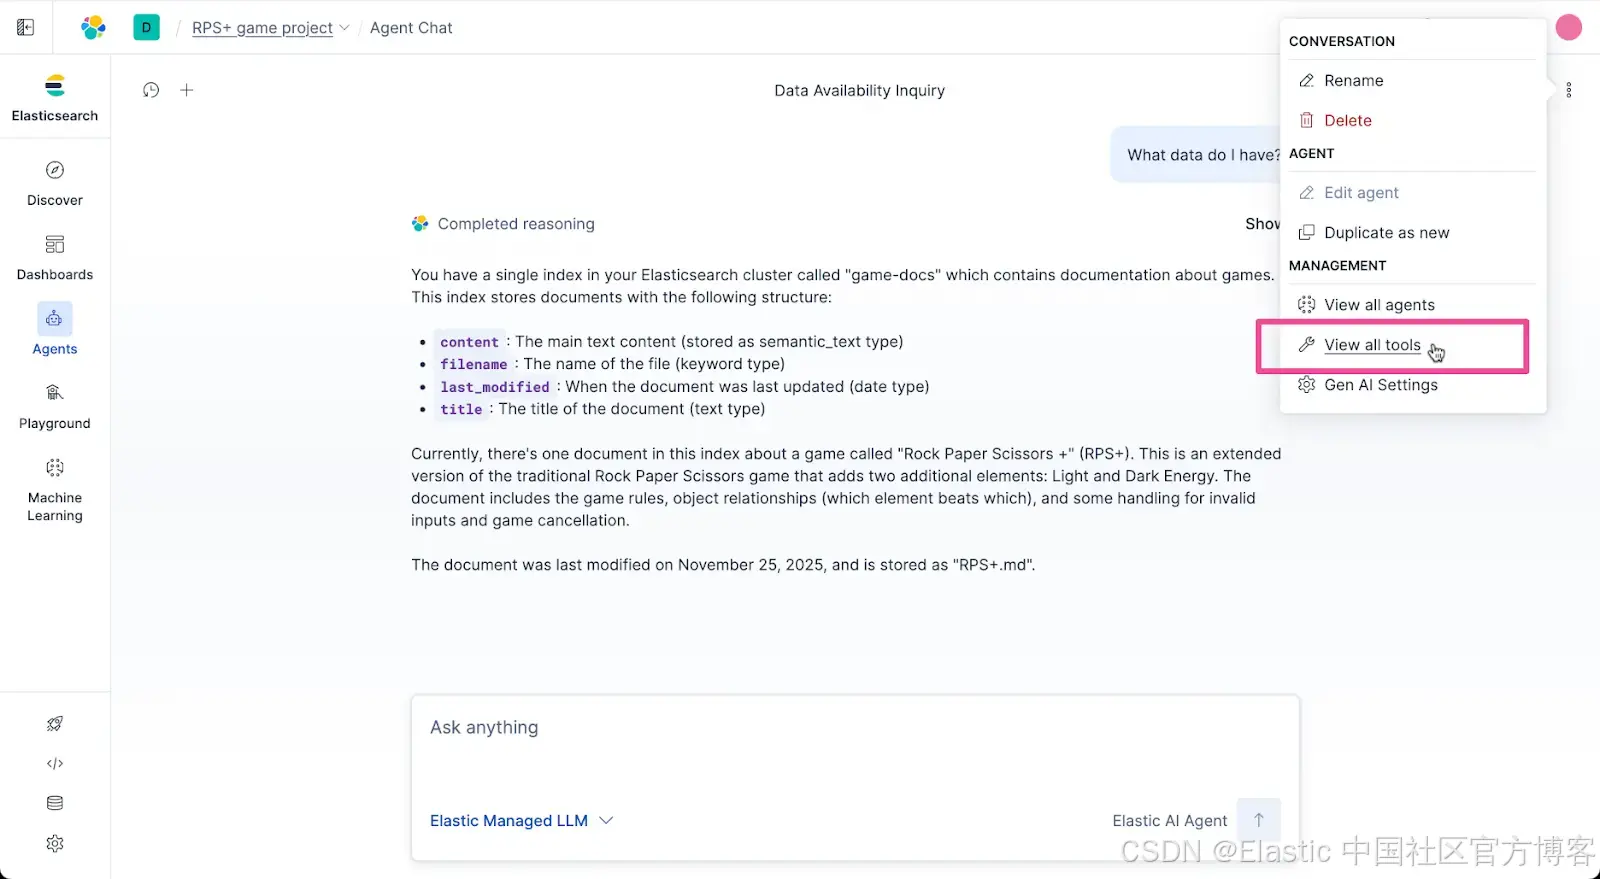
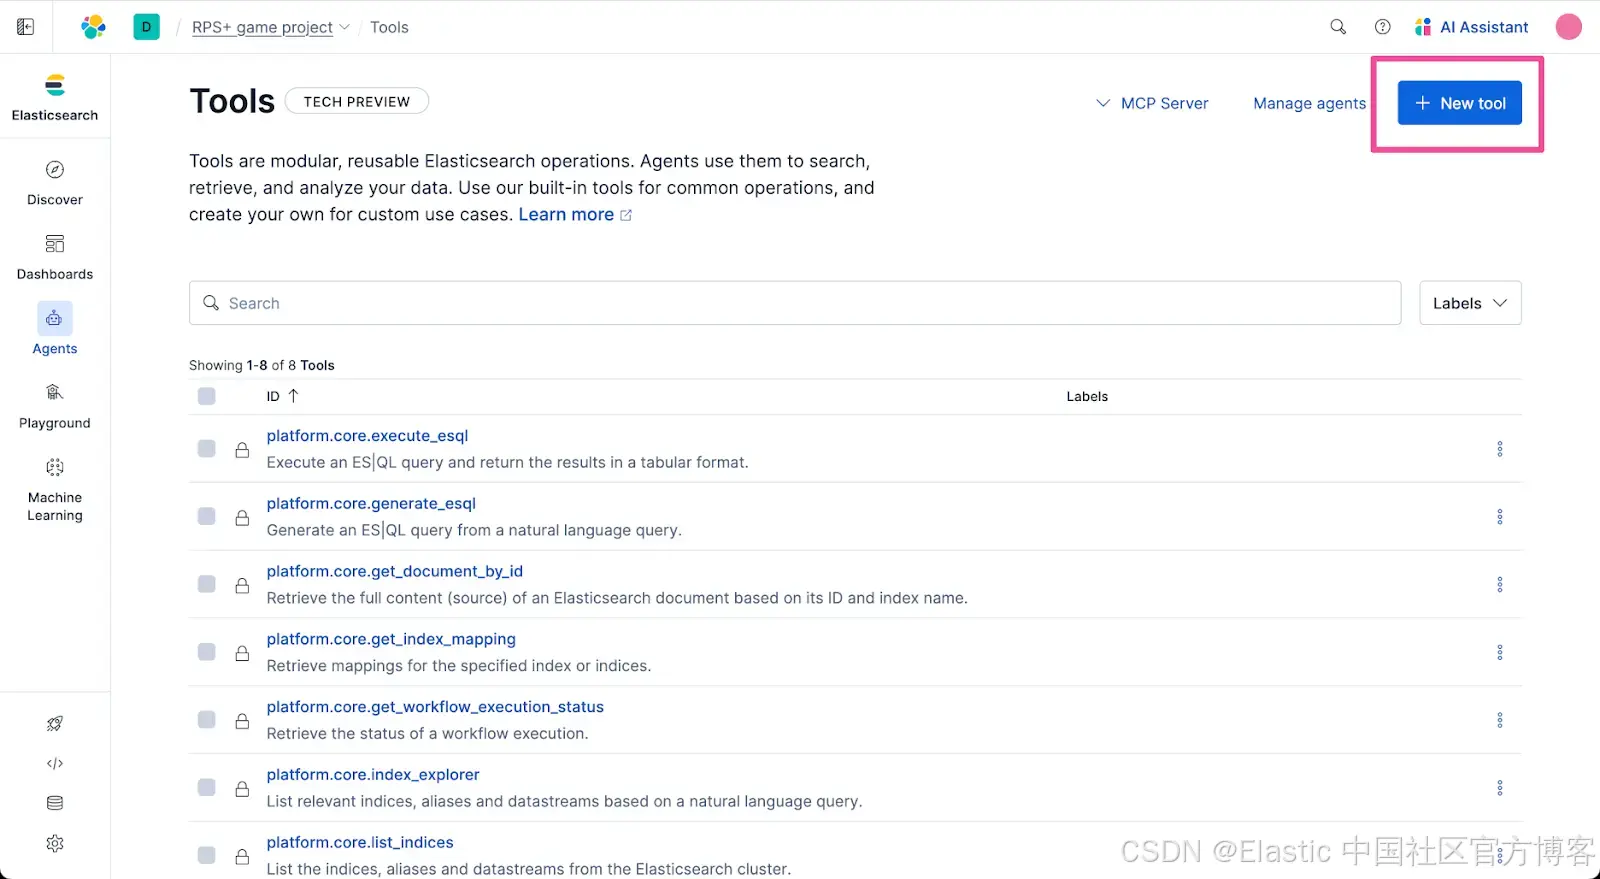
点击 Agent Builder 的 actions 菜单。
从菜单选项中选择 View all tools。
点击 + New Tool。
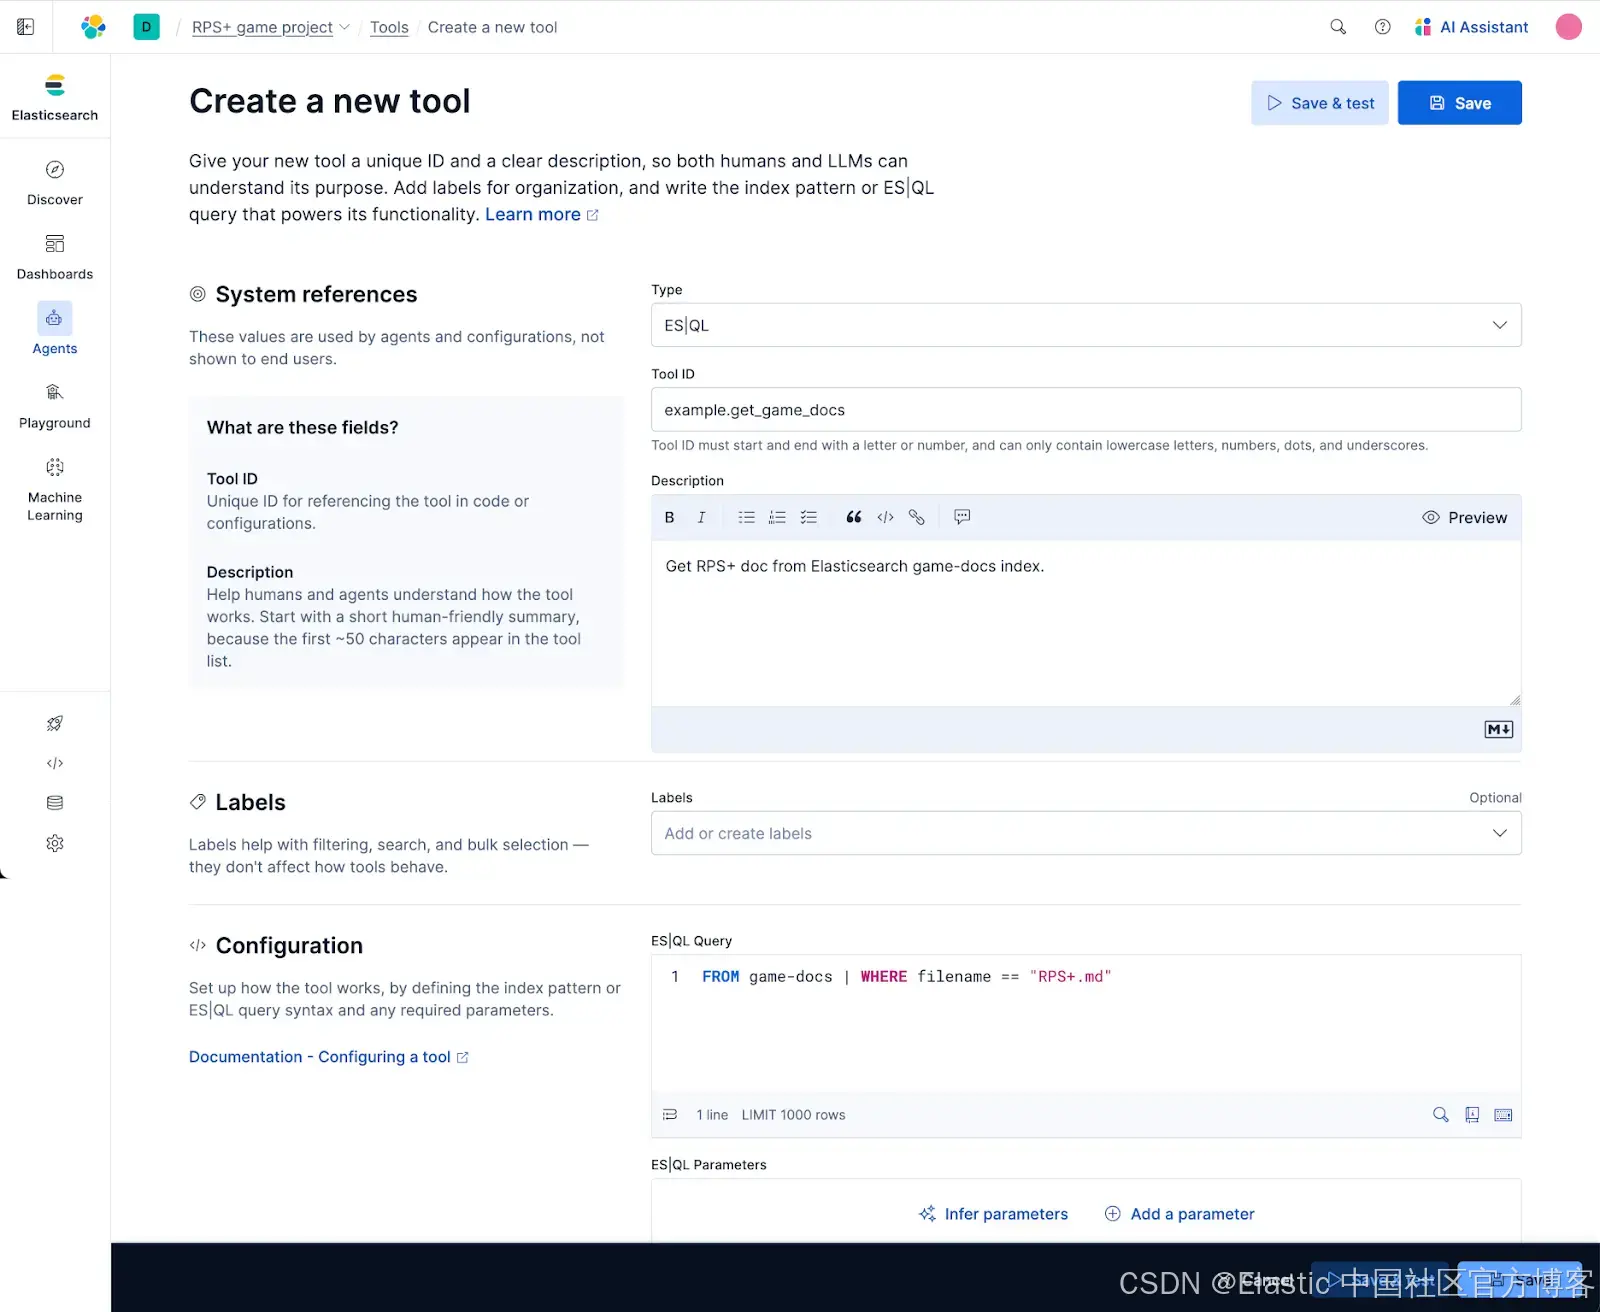
在 Create Tool 表单中,选择 ES|QL 作为工具 type,并输入以下值。
Tool ID:
example.get_game_docsDescription:
Get RPS+ doc from Elasticsearch game-docs index.Configuration:在 ES|QL Query 文本区域中输入以下查询:
FROM game-docs | WHERE filename == "RPS+.md"完整填写的 Create tool 表单应如下所示。点击 Save 创建工具。
我们在工具架上有了一个新工具。工具不应该只是一直挂在架子上,它们应该被充分利用。让我们创建一个可以使用我们新自定义工具的 agent。
创建 Agent 并分配工具
使用 Agent Builder 创建 agent 非常简单。你只需输入 agent 指令和一些细节,就完成了。现在让我们创建一个 agent。
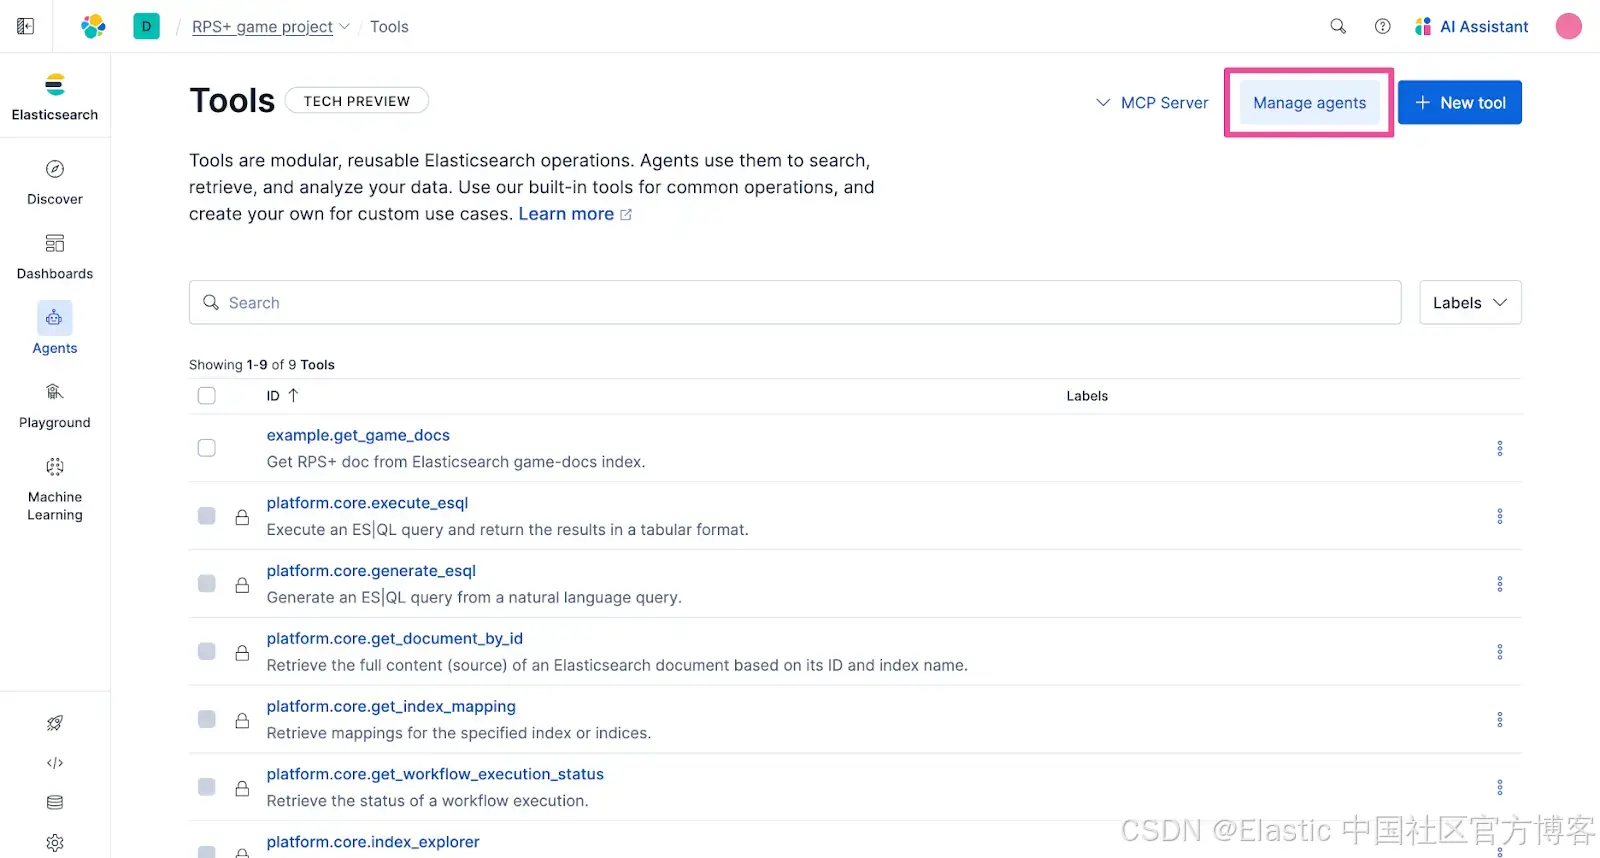
点击 Manage agents。
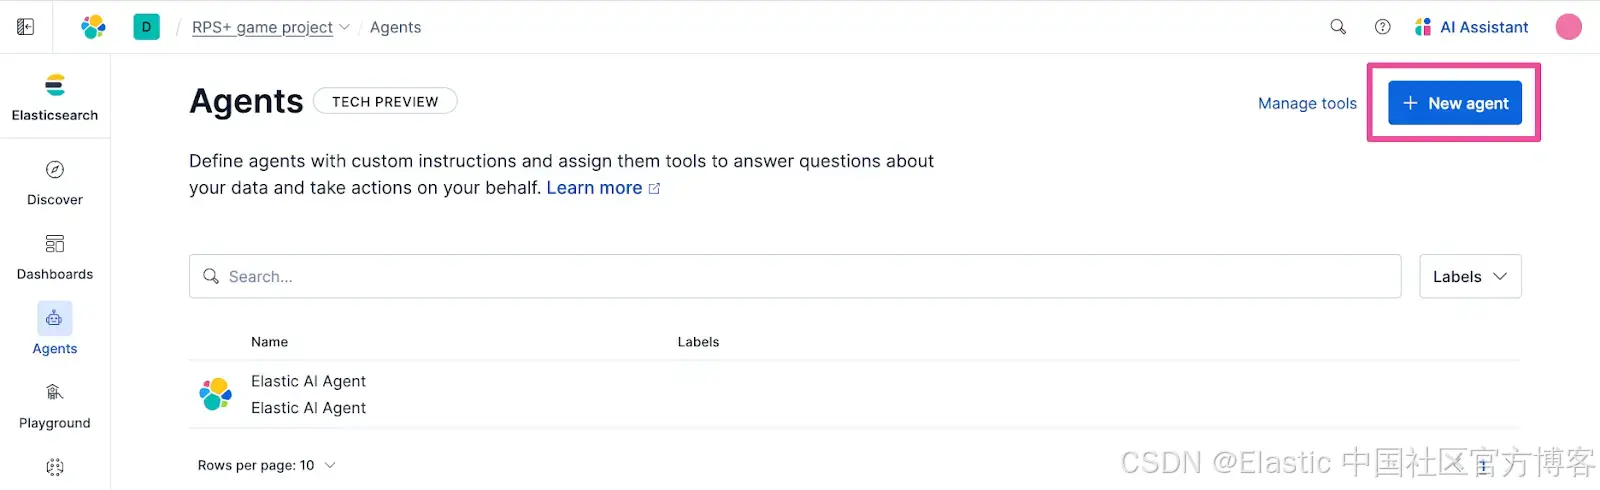
点击 + New agent。
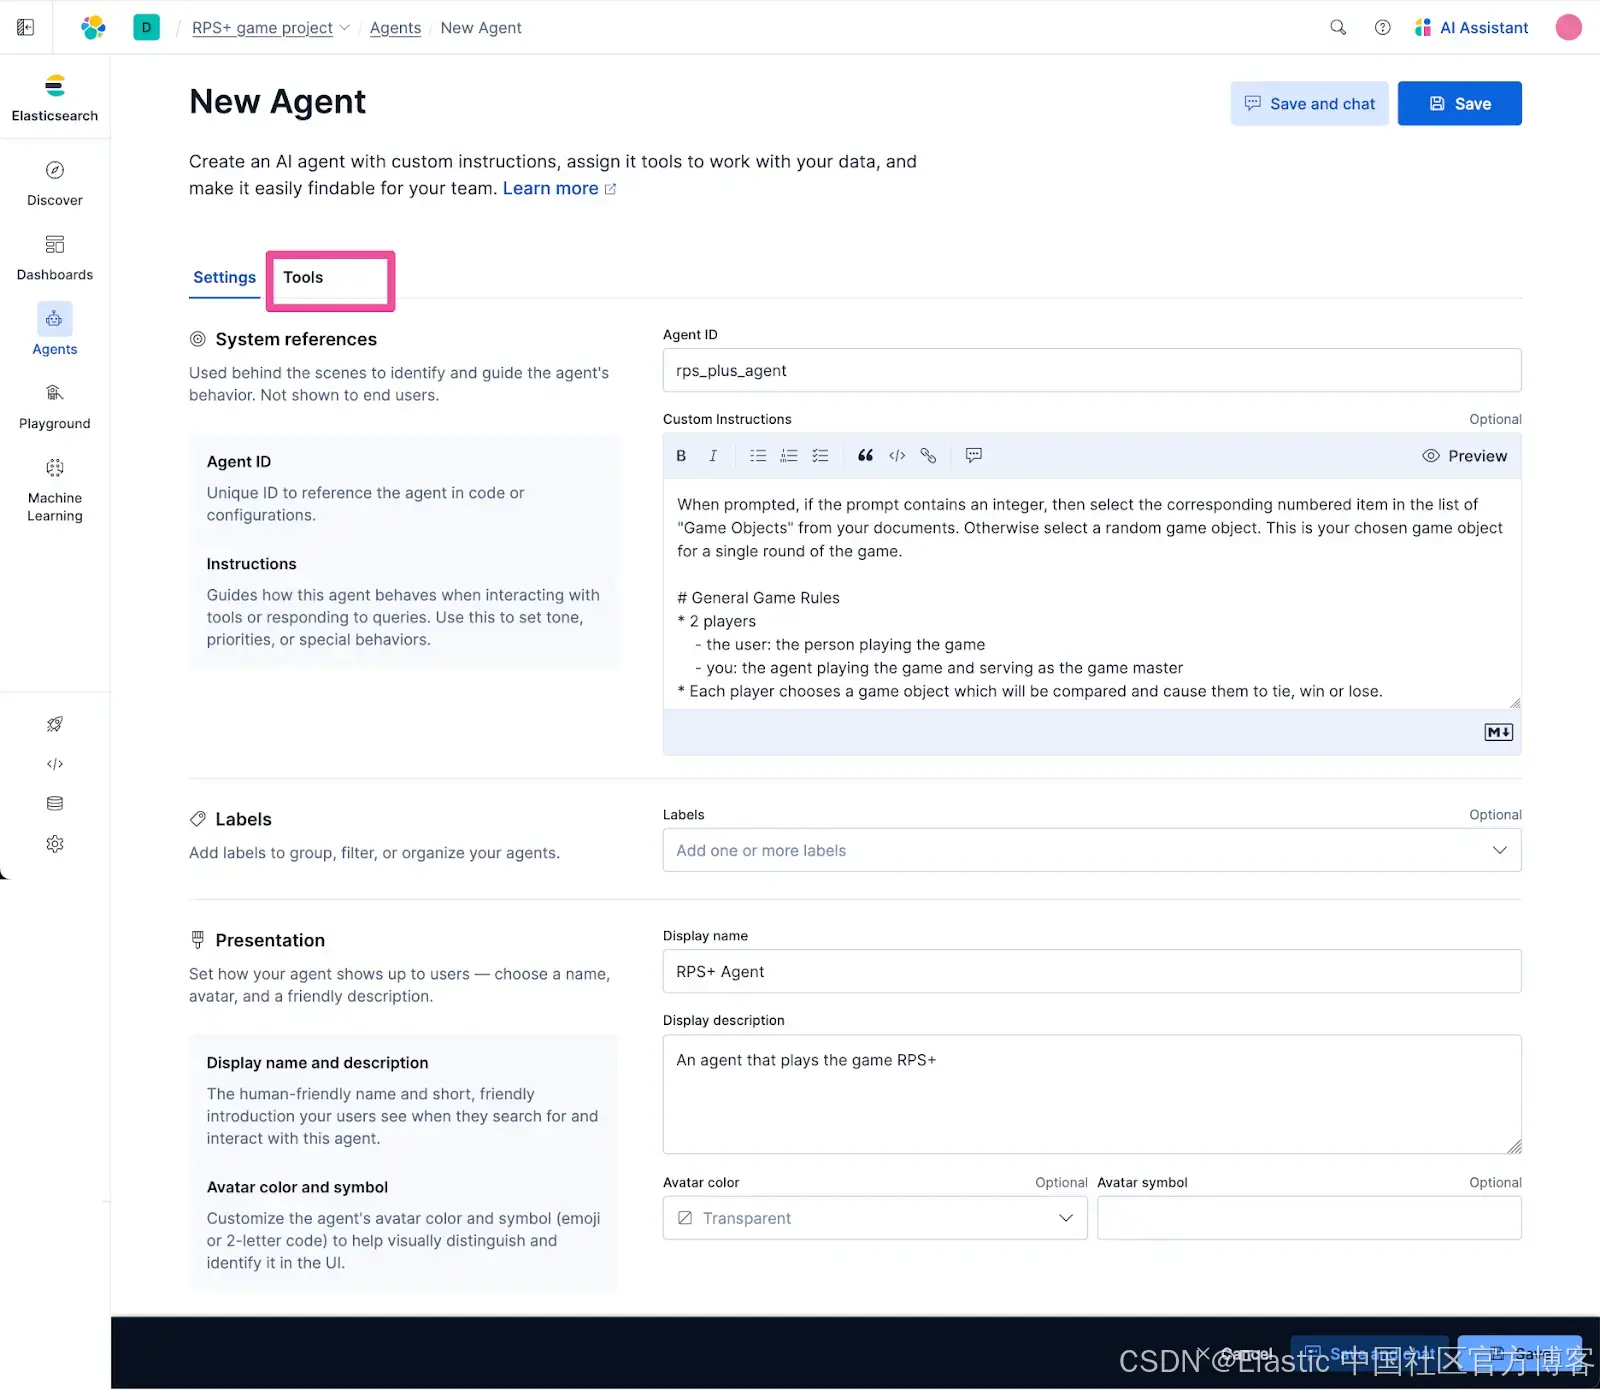
在 New Agent 表单中输入以下信息。
Agent ID:输入以下文本:
rps_plus_agent在 Custom Instructions 文本区域中输入以下指令:
When prompted, if the prompt contains an integer, then select the corresponding numbered item in the list of "Game Objects" from your documents. Otherwise select a random game object. This is your chosen game object for a single round of the game.

# General Game Rules
* 2 players
    - the user: the person playing the game
    - you: the agent playing the game and serving as the game master
* Each player chooses a game object which will be compared and cause them to tie, win or lose.

# Start the game
1. This is the way each new game always starts. You make the first line of your response only the name of your chosen game object.

2. The remainder of your response should be the "Starting Prompt" text from your documents and generate a list of "Game Objects" for the person playing the game to choose a game object from.

# End of Game: The game ends in one of the following three outcomes:
1. Invalid Input: If the player responds with an invalid game object choice, respond with variations of the "Invalid Input" text from your documents and then end the game.

2. Tie: The game ends in a tie if the user chooses the same game object as your game object choice.

3. Win or Lose: The game winner is decided based on the "Judgement of Victory" conditions from your documents. Compare the user's game object choice and your game object choice and determine who chose the winning game object.

# Game conclusion
Respond with a declaration of the winner of the game by outputting the corresponding text in the "Judgement of Victory" section of your documents.
Display name:输入以下文本:
RPS+ AgentDisplay description:输入以下文本:
An agent that plays the game RPS+通过点击 Tools 选项卡,将我们之前创建的自定义工具分配给该 agent。
只选择我们之前创建的 example.get_game_docs 工具。
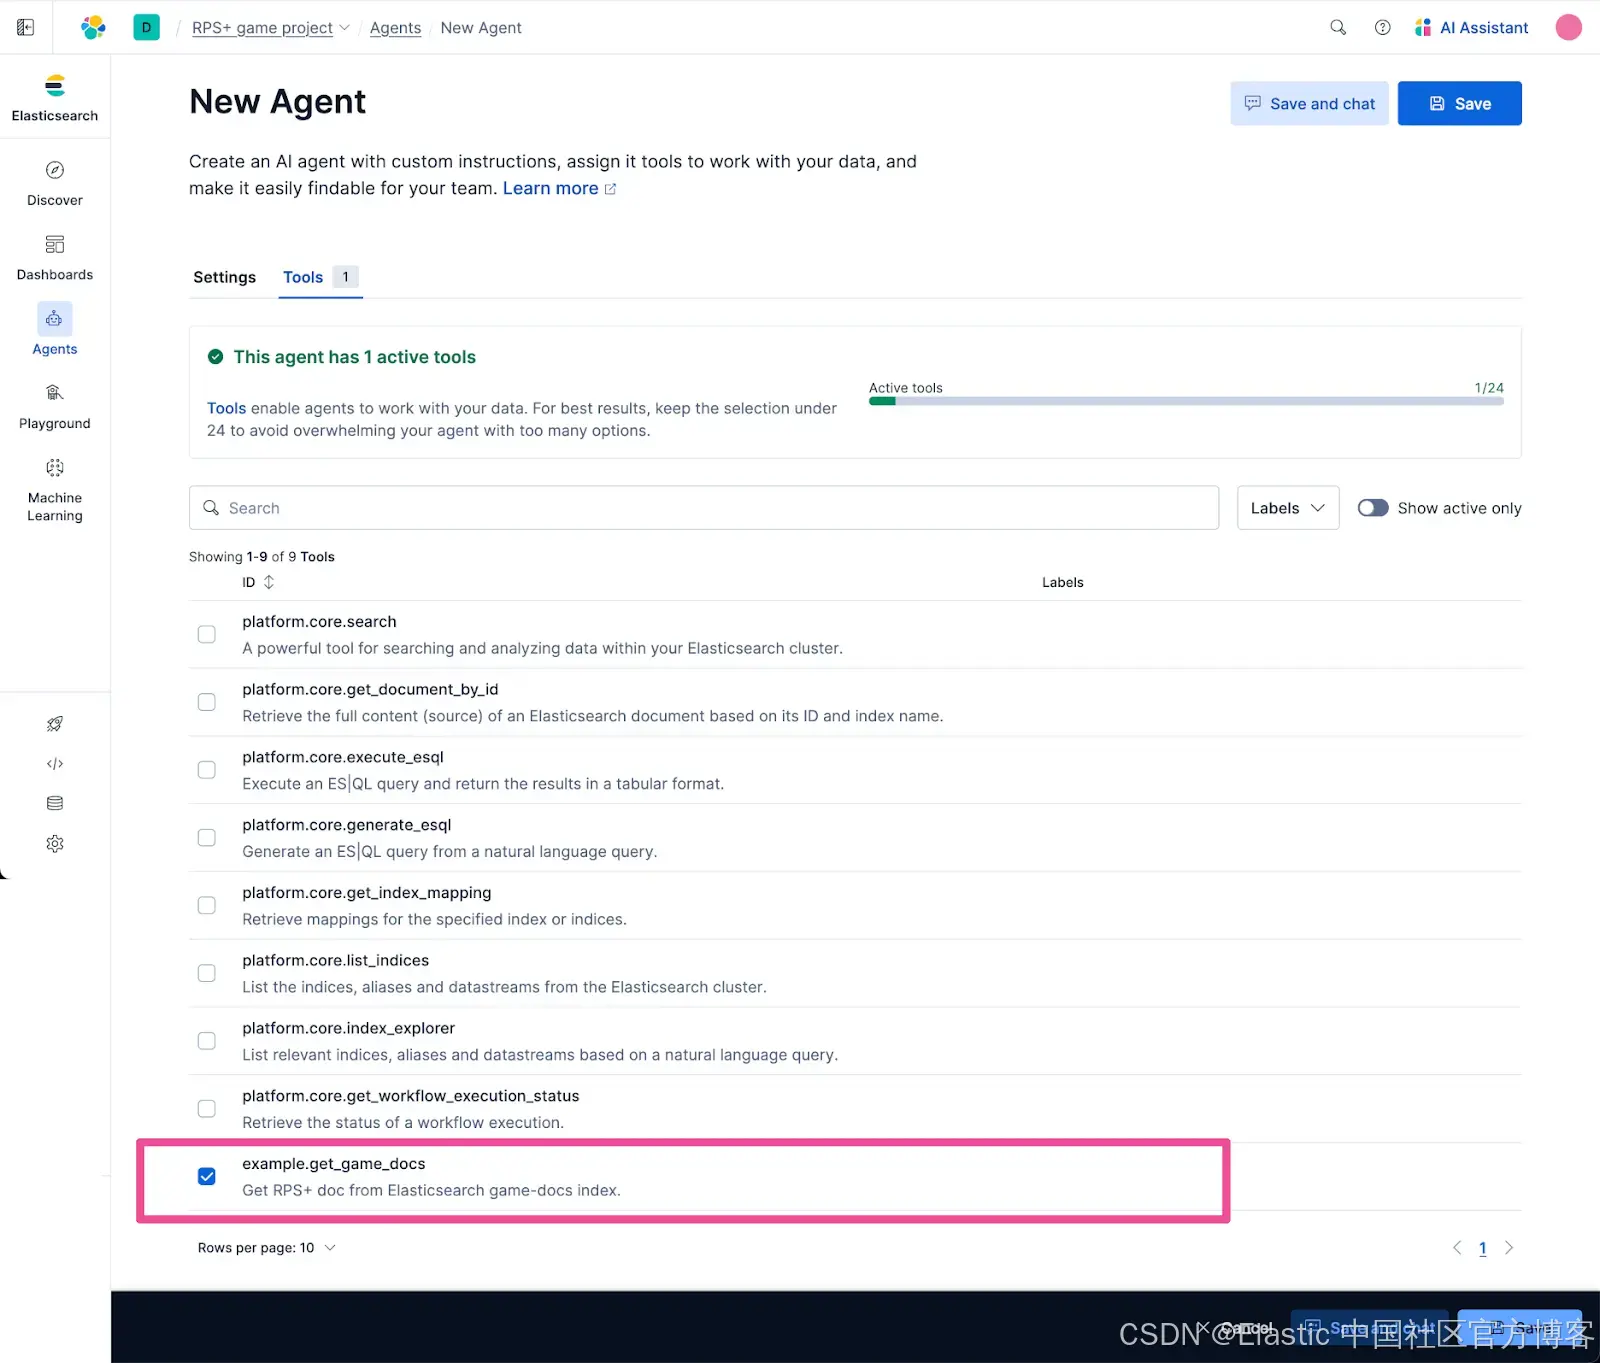
点击 Save 创建新 agent。

让我们测试一下新 agent。从 agent 列表中有一个方便的链接,可以启动与任意 agent 的聊天。
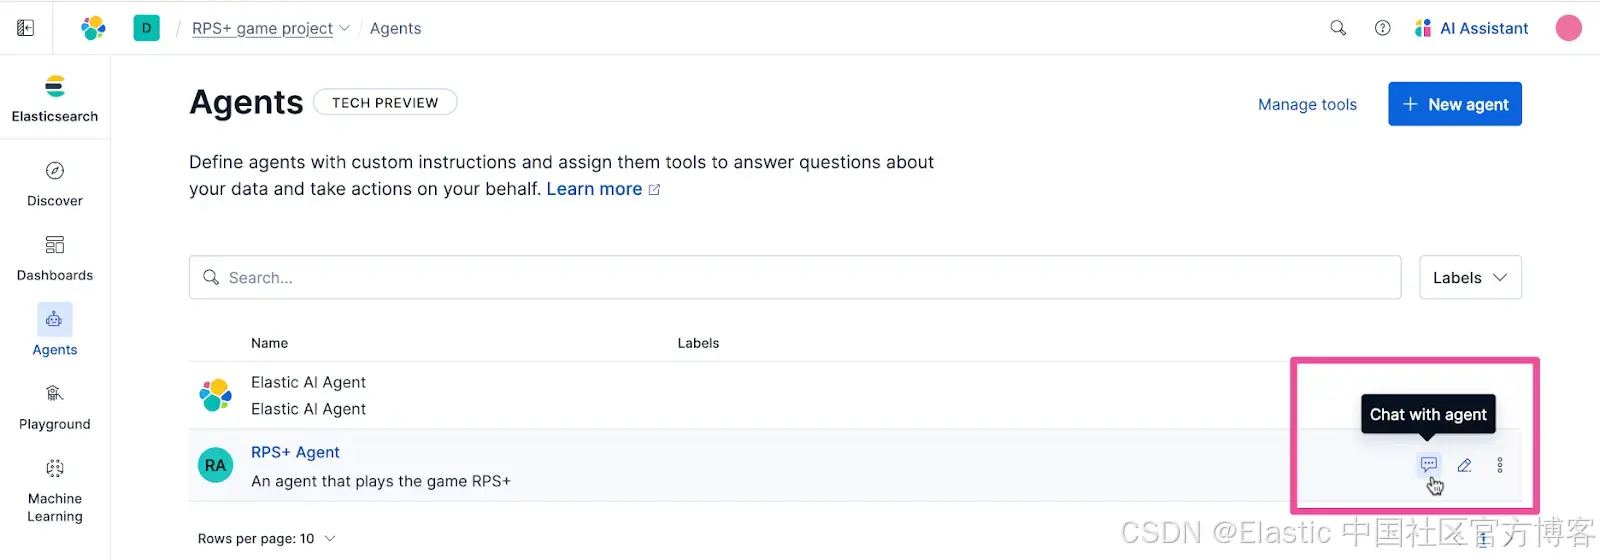
只需输入 “start game”,游戏就会开始。它可以正常运行!
你可以看到 agent 在响应顶部显示了它选择的游戏对象。这很有用,因为我们可以看到 agent 的选择并确认游戏按预期运行。然而,在你选择之前知道对手的选择,会让剪刀石头布游戏不太有趣。为了将游戏打磨到最终形态,我们可以使用一个可以通过代码控制 agent 的 agent 编排平台。
Strands Agents SDK 登场
Strands Agents SDK

如果你想尝试新的 agent 开发框架,那么 Strands Agents SDK 值得你花时间尝试。Strands Agents SDK 由 AWS 于 2025 年 5 月发布,作为开源 Python 实现,现在也有 Typescript 版本。
在 Python 中快速上手 Strands Agents SDK
启动你的编码环境,我们现在将快速浏览克隆并运行一个示例应用的过程,该应用使用 Strands Agents 通过 A2A 协议控制 RPS+ Agent。让我们创建一个经过微调的 RPS+ 游戏版本,使 agent 的选择在你做出选择后才显示,因为毕竟,猜测和惊喜结果才是剪刀石头布等游戏的乐趣所在。
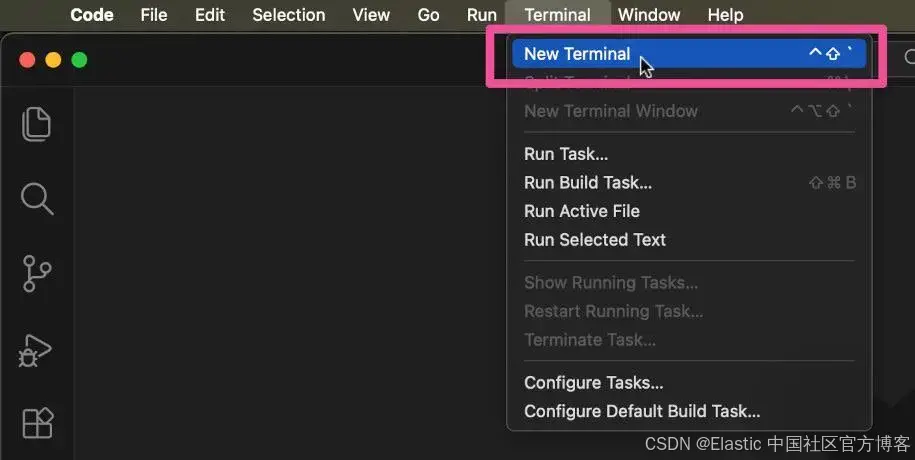
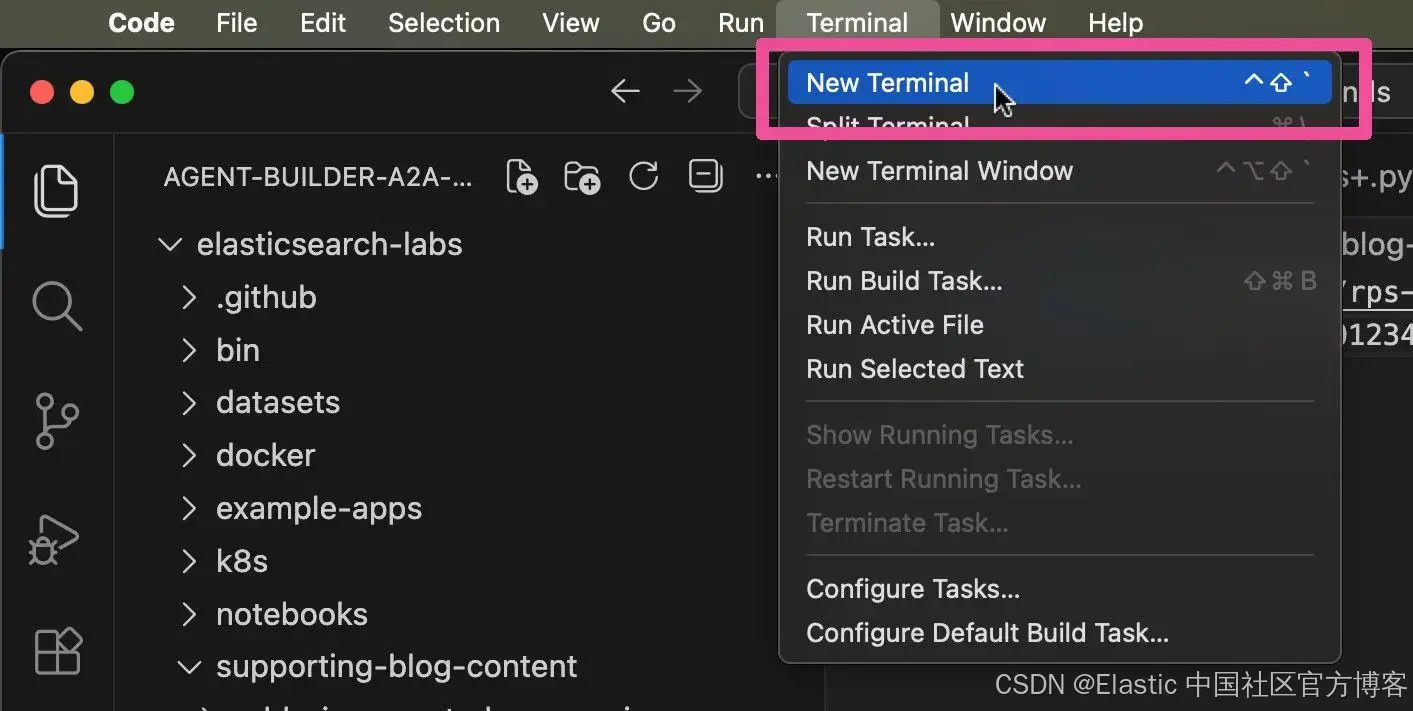
在你的本地电脑上,打开 Visual Studio Code 并打开一个新终端。
在新打开的终端中,运行以下命令克隆 Elasticsearch Labs 仓库:
git clone https://github.com/elastic/elasticsearch-labs运行以下 cd 命令,将目录切换到 elasticsearch-labs 目录:
cd elasticsearch-labs接下来,运行以下命令在 Visual Studio Code 中打开该仓库:
code .在 Visual Studio 文件资源管理器中,展开 supporting-blog-content 和 agent-builder-a2a-strands-agents 文件夹,然后打开文件 elastic_agent_builder_a2a_rps+.py。文件在 Visual Studio Code 中打开后如下所示:
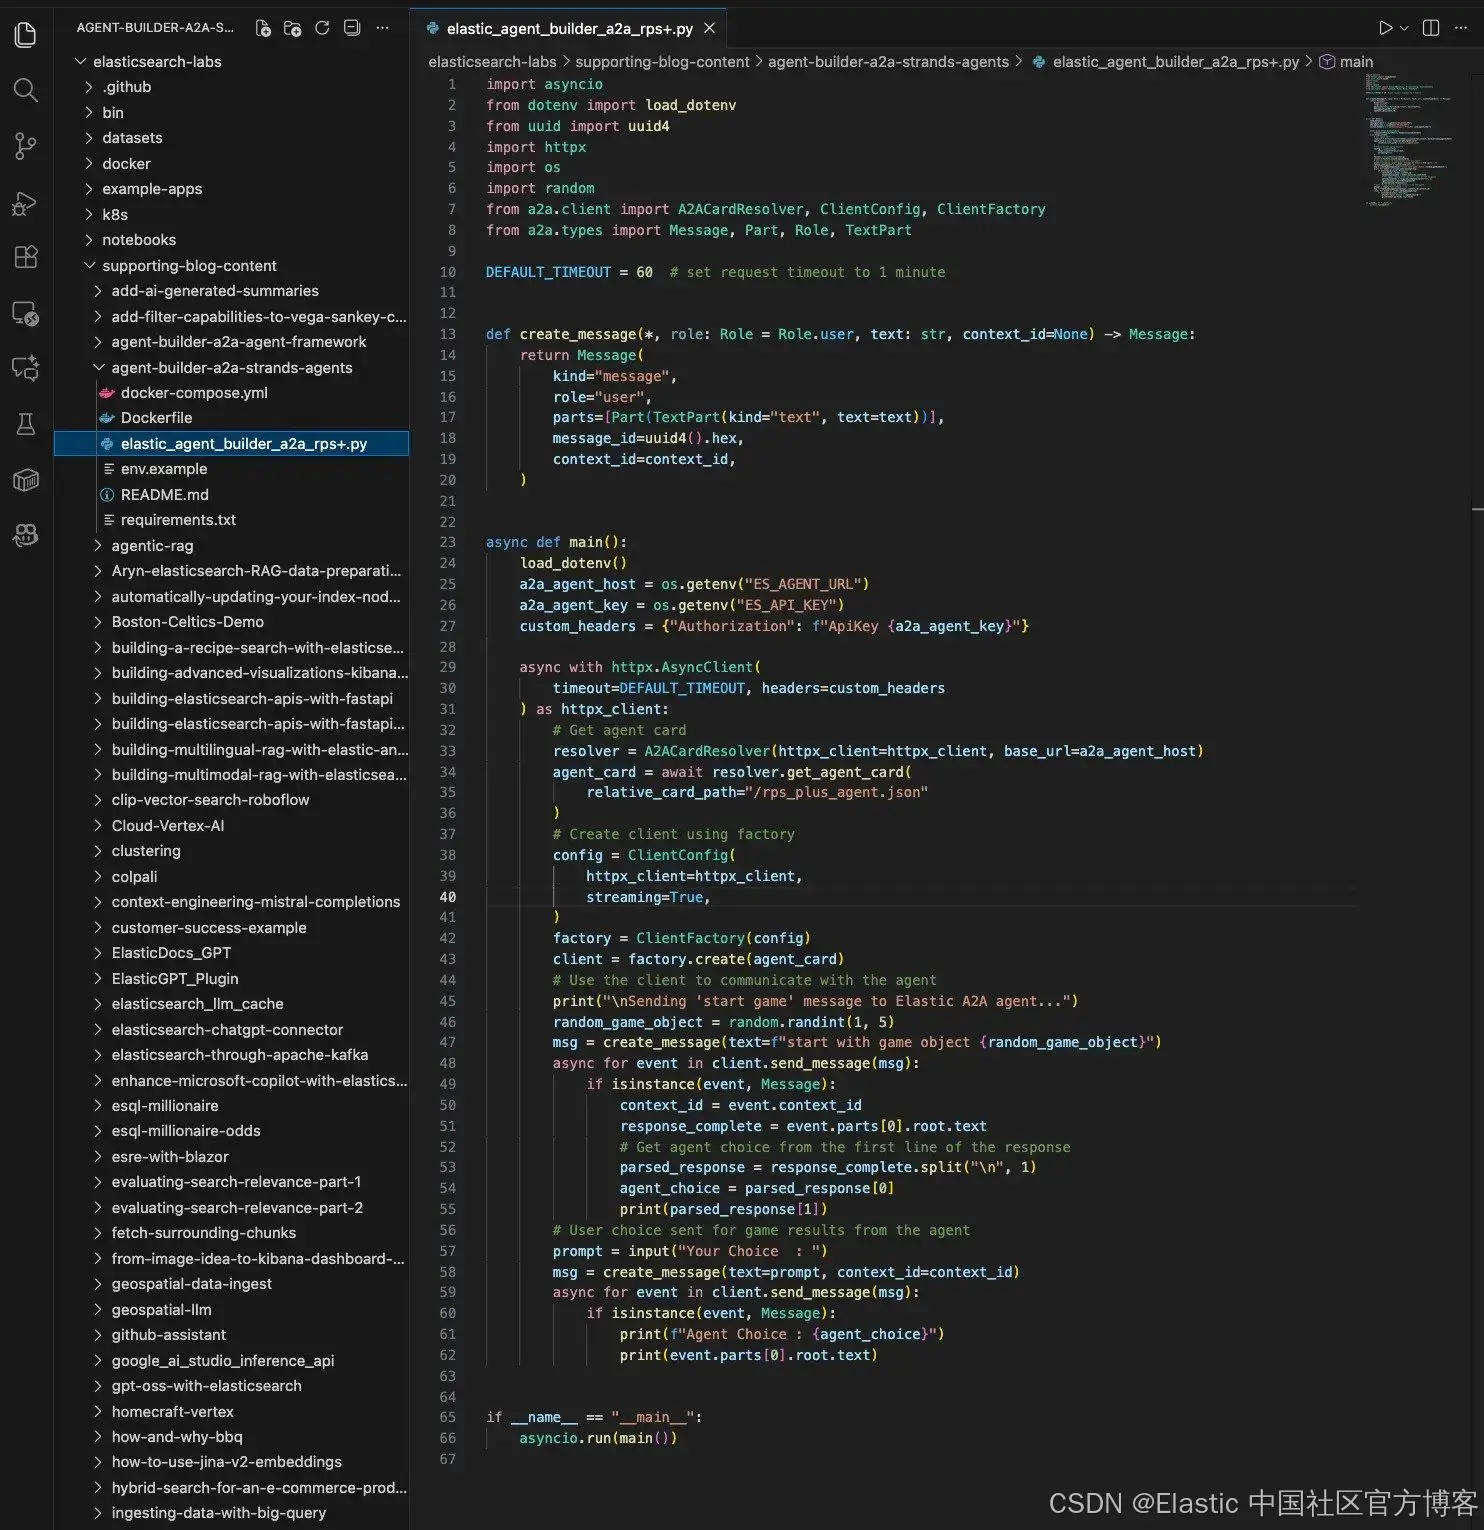
以下是你在文本编辑器中应该看到的 elastic_agent_builder_a2a_rps+.py 文件内容:
import asyncio
from dotenv import load_dotenv
from uuid import uuid4
import httpx
import os
import random
from a2a.client import A2ACardResolver, ClientConfig, ClientFactory
from a2a.types import Message, Part, Role, TextPart

DEFAULT_TIMEOUT = 60  # set request timeout to 1 minute


def create_message(*, role: Role = Role.user, text: str, context_id=None) -> Message:
    return Message(
        kind="message",
        role="user",
        parts=[Part(TextPart(kind="text", text=text))],
        message_id=uuid4().hex,
        context_id=context_id,
    )


async def main():
    load_dotenv()
    a2a_agent_host = os.getenv("ES_AGENT_URL")
    a2a_agent_key = os.getenv("ES_API_KEY")
    custom_headers = {"Authorization": f"ApiKey {a2a_agent_key}"}

    async with httpx.AsyncClient(
        timeout=DEFAULT_TIMEOUT, headers=custom_headers
    ) as httpx_client:
        # Get agent card
        resolver = A2ACardResolver(httpx_client=httpx_client, base_url=a2a_agent_host)
        agent_card = await resolver.get_agent_card(
            relative_card_path="/rps_plus_agent.json"
        )
        # Create client using factory
        config = ClientConfig(
            httpx_client=httpx_client,
            streaming=True,
        )
        factory = ClientFactory(config)
        client = factory.create(agent_card)
        # Use the client to communicate with the agent
        print("\nSending 'start game' message to Elastic A2A agent...")
        random_game_object = random.randint(1, 5)
        msg = create_message(text=f"start with game object {random_game_object}")
        async for event in client.send_message(msg):
            if isinstance(event, Message):
                context_id = event.context_id
                response_complete = event.parts[0].root.text
                # Get agent choice from the first line of the response
                parsed_response = response_complete.split("\n", 1)
                agent_choice = parsed_response[0]
                print(parsed_response[1])
        # User choice sent for game results from the agent
        prompt = input("Your Choice  : ")
        msg = create_message(text=prompt, context_id=context_id)
        async for event in client.send_message(msg):
            if isinstance(event, Message):
                print(f"Agent Choice : {agent_choice}")
                print(event.parts[0].root.text)


if __name__ == "__main__":
    asyncio.run(main())
让我们来回顾一下这段代码的作用。从 main() 方法开始,代码首先访问 agent URL 和 API Key 的环境变量。然后我们使用这些值创建一个 httpx 客户端,用于获取该 agent 的 agent card。客户端随后使用 agent card 的详细信息向 agent 发送 “start game” 请求。这里有一个有趣的地方是,我们在 “start game” 请求中包含了 random_game_object 值。这个值是使用 Python 标准库的 random 模块生成的随机数。这样做的原因是,强大的 LLM(使 AI agent 成为可能)在生成随机性方面表现不佳。没问题,Python 来救场。
继续代码,当 agent 响应 “start game” 请求后,代码会提取 agent 的游戏对象选择,并将其保存在 agent_choice 变量中。其余的响应内容以文本形式显示给最终用户。然后提示用户输入他们的游戏对象选择,并将其发送给 agent。代码随后显示 agent 的游戏对象选择以及 agent 对游戏结果的最终判断。
将 agent URL 和 API Key 设置为环境变量
由于示例应用将在本地电脑上运行,为了与我们的 Agent Builder agent 通信,我们需要为 Strands Agents SDK 提供 agent 的 A2A URL 和 API Key。示例应用使用名为 .env 的文件来存储这些值。
复制 env.example 文件,并将新文件命名为 .env。
返回 Elastic Agent Builder,我们可以在这里获取所需的两个值。
从页面右上角的 Agent Builder actions 菜单中选择 View all tools。
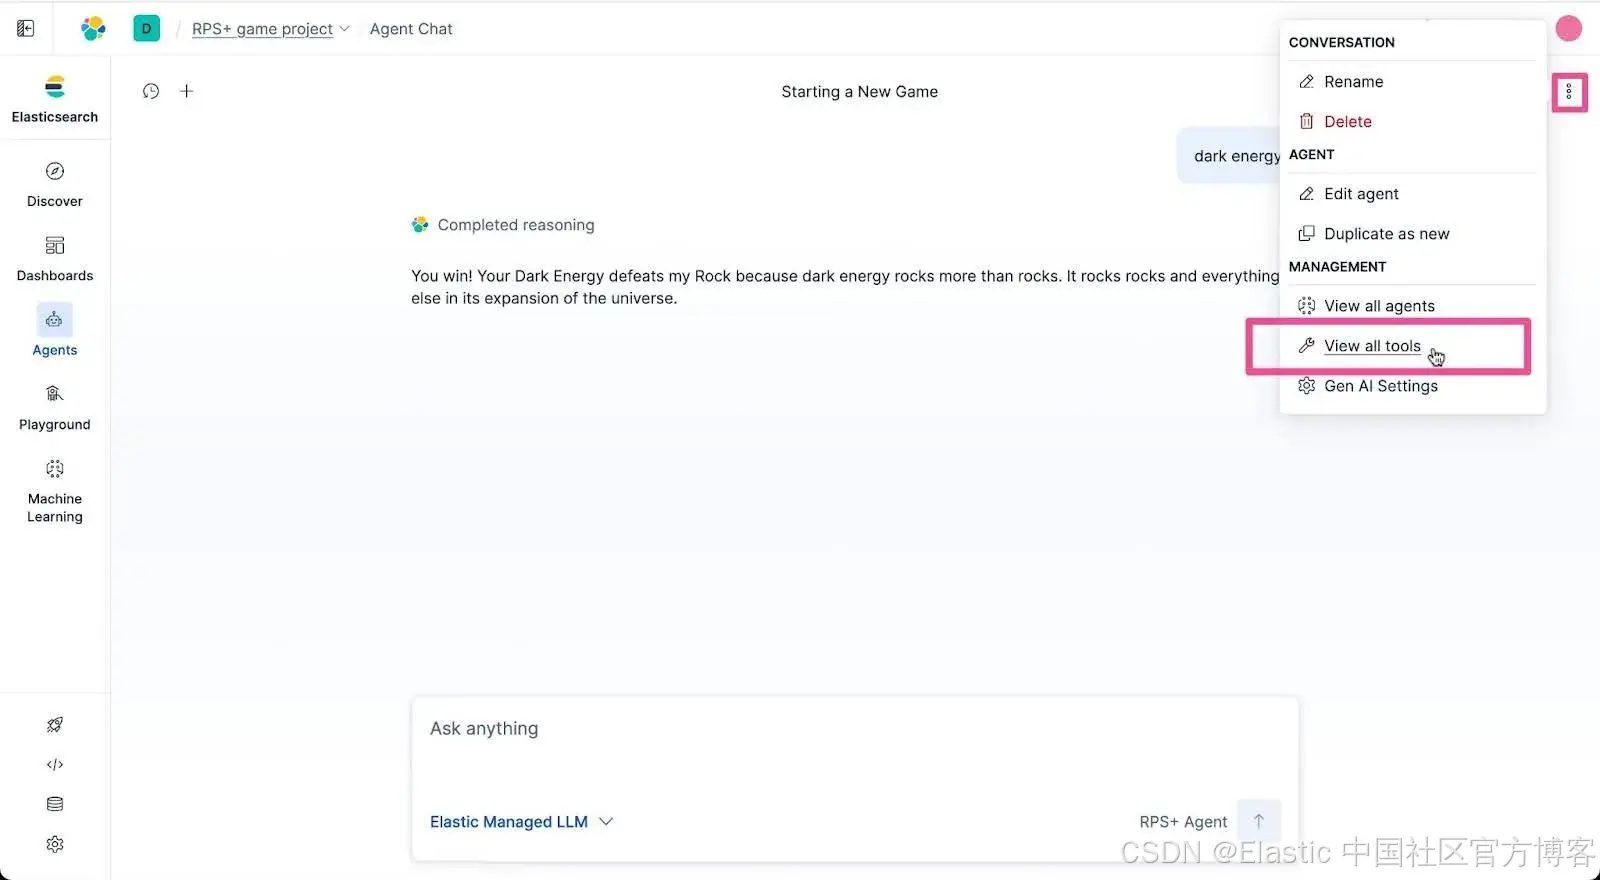
点击 Tools 页面顶部的 MCP Server 下拉菜单,并选择 Copy MCP Server URL。
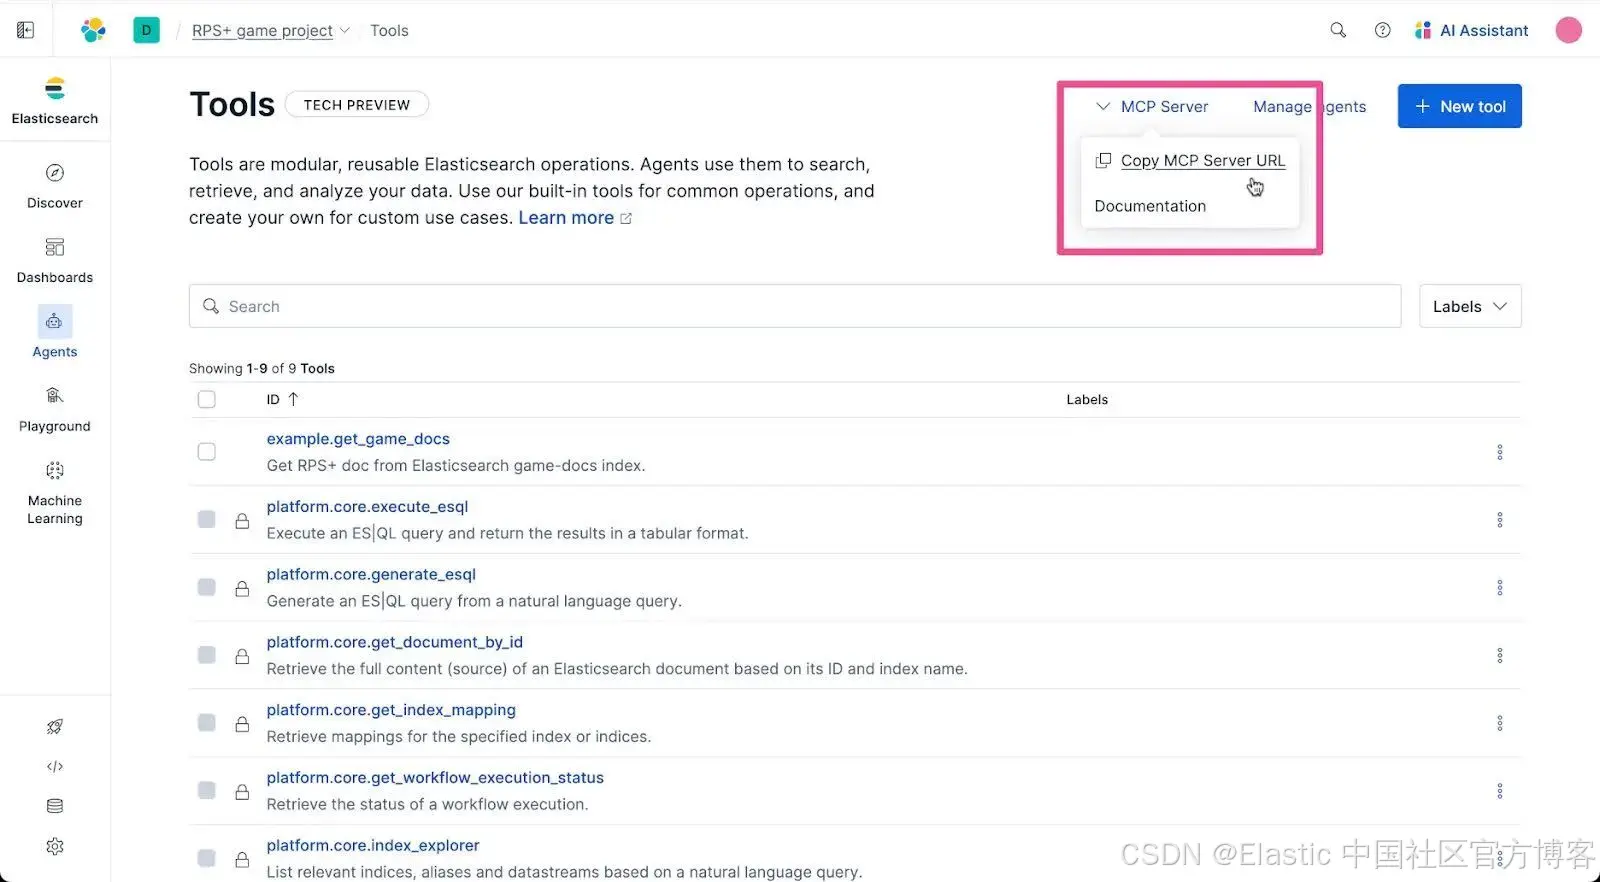
将 MCP Server URL 粘贴到 .env 文件中,替换 <YOUR-ELASTIC-AGENT-BUILDER-URL> 占位符。现在我们需要对 URL 做一个修改,即将结尾的 “mcp” 替换为 “a2a”,因为 Strands Agents SDK 将使用 A2A 协议与运行在 Elastic Agent Builder 中的 agent 通信。
修改后的 URL 应该类似这样:
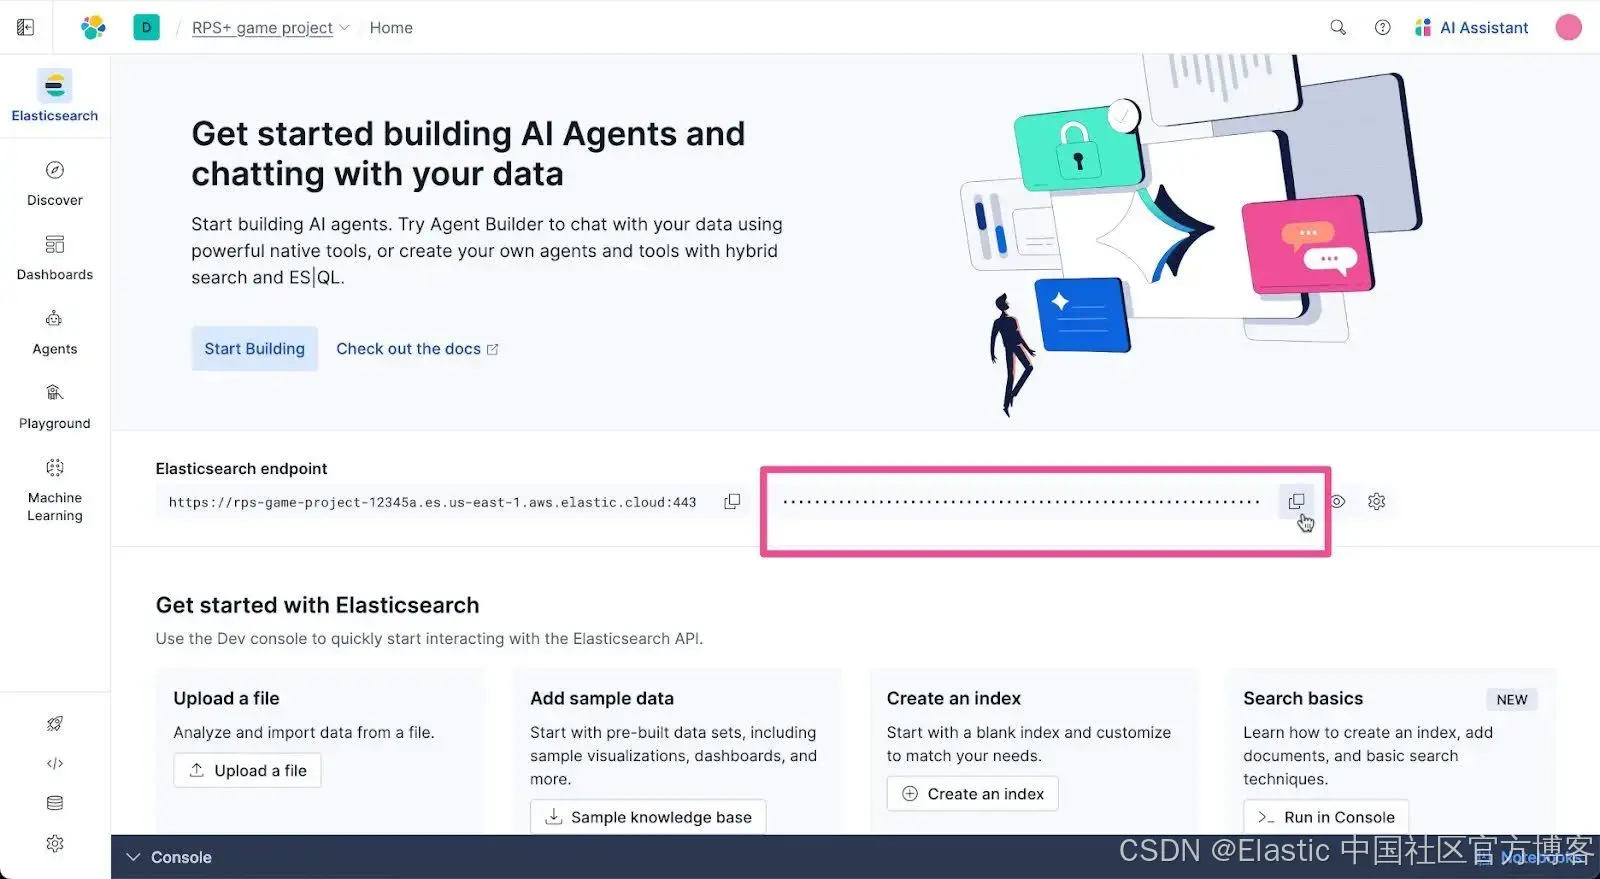
https://rps-game-project-12345a.kb.us-east-1.aws.elastic.cloud/api/agent_builder/a2a我们在 Elastic Cloud 中还需要获取另一个值 —— API Key。点击顶层导航中的 Elasticsearch。
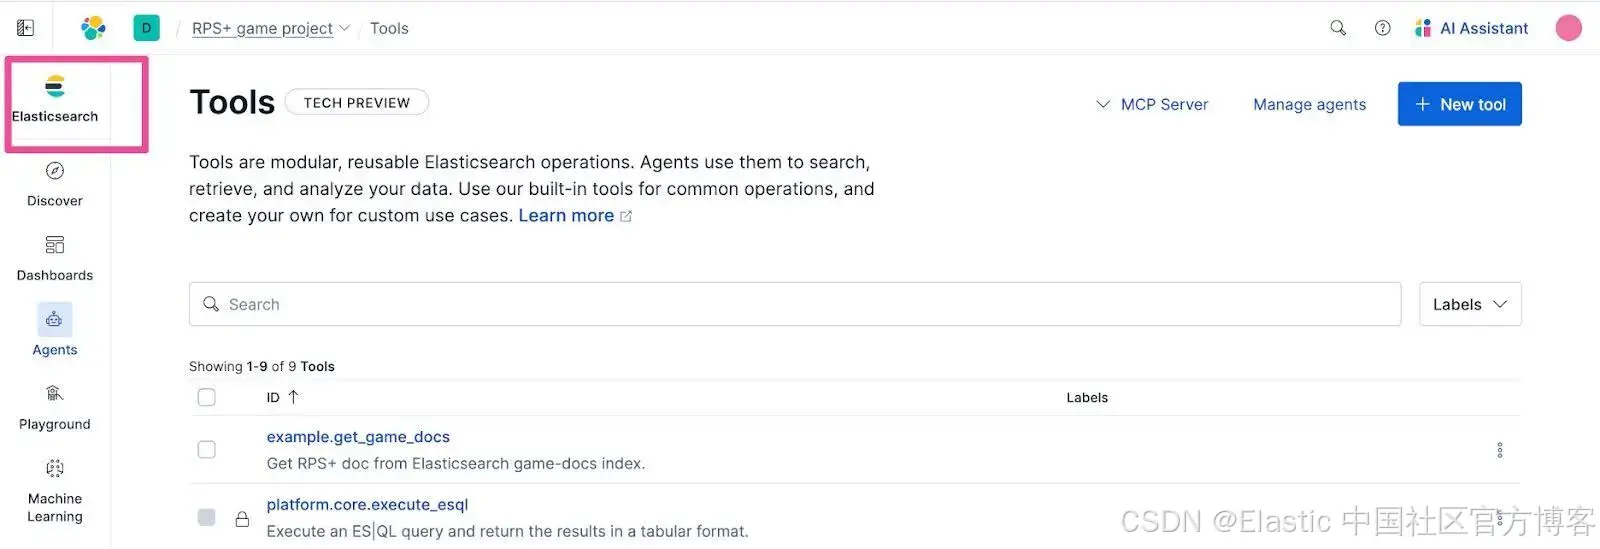
点击 Copy API Key 按钮复制 API Key。
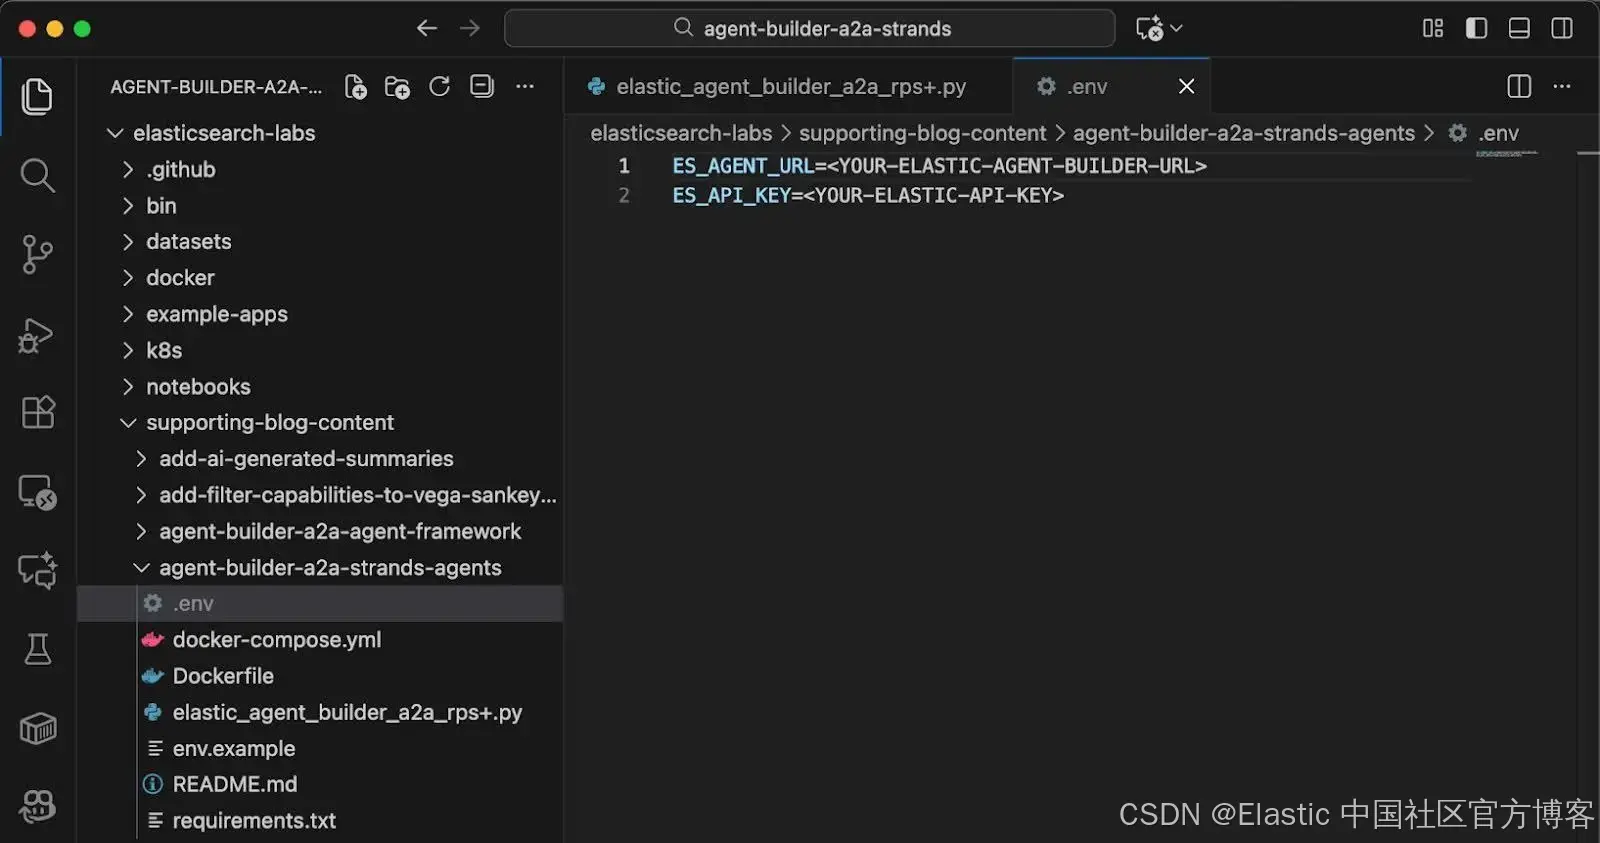
现在回到 Visual Studio Code,在 .env 文件中粘贴 API Key,替换 <YOUR-ELASTIC-API-KEY> 占位符文本。你的 .env 文件应类似如下:

运行示例应用
在 Visual Studio Code 中打开一个新终端。
首先在终端中运行以下 cd 命令:
cd elasticsearch-labs/supporting-blog-content/agent-builder-a2a-strands-agents运行以下命令以创建 Python 虚拟环境。
python -m venv .venv根据你本地电脑的操作系统,运行以下命令来激活虚拟环境。
- MacOS/Linux
source .venv/bin/activate- Windows
.venv\Scripts\activate示例应用使用 Strands Agents SDK,现在我们在本教程中需要安装它。运行以下命令安装 Strands Agents SDK 及其所有必需的 Python 库依赖。
pip install -r requirements.txt是时候清理发射平台并开始倒计时了。我们准备好启动这个应用。后退一步。使用以下命令运行它:
python elastic_agent_builder_a2a_rps+.py你应该会迎来一场 RPS+ 游戏。干得好,祝你好运!
用相关上下文构建你的 AI 应用
构建 AI Agent 现在已成为你的技能工具之一。你已经看到,通过 A2A 使用 Elastic Builder agent 在像 Strands Agents SDK 这样的 agent 开发框架中是多么容易。尝试使用 Elastic 构建与自定义数据相关上下文相连接的 AI agent。
原文:https://www.elastic.co/search-labs/blog/agent-builder-a2a-strands-agents-guide


 1947
1947

 被折叠的 条评论
为什么被折叠?
被折叠的 条评论
为什么被折叠?
 到【灌水乐园】发言


