


React18配置Eslint+Prettier
1. 创建react项目
这里推荐使用create-react-app创建,因为使用了typescript,我在创建项目时选择了ts模板,使用请参考create-react-app。
npx create-react-app 项目名 --template typescript
2.安装Prettier依赖
npm i eslint-config-prettier eslint-plugin-prettier prettier --save-dev
执行npx eslint --init生成eslint配置文件
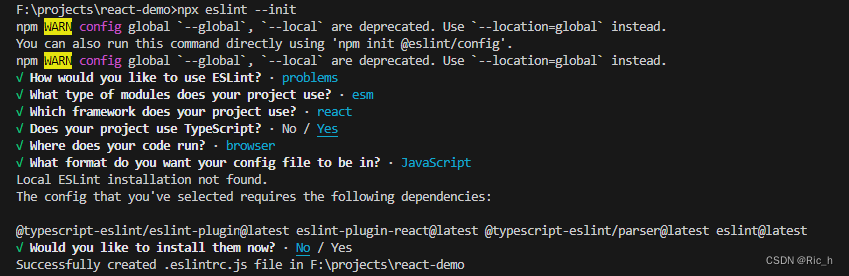
在进行到最后一步,提示是否安装依赖时,我选择了否,因为create-react-app默认创建时就已下载了eslint所有的依赖,重复安装会产生不必要的错误。
执行完上述命令,在src下会生成一个.eslintrc.js,这
3. 添加.eslintignore并修改.eslintrc.js
// .eslintrc.js
module.exports = {
    "env": {
        "browser": true,
        "es2021": true
    },
    "extends": [
        "eslint:recommended",
        "plugin:@typescript-eslint/recommended",
        "plugin:react/recommended"
    ],
    "settings": {
        "react": {
            "version": "999.999.999" //消除npm run lint时的警告信息
        }
    },
    "overrides": [
        {
            "env": {
                "node": true
            },
            "files": [
                ".eslintrc.{js,cjs}"
            ],
            "parserOptions": {
                "sourceType": "script"
            }
        }
    ],
    "parser": "@typescript-eslint/parser",
    "parserOptions": {
        "ecmaVersion": "latest",
        "sourceType": "module"
    },
    "plugins": [
        "@typescript-eslint",
        "react"
    ],
    "rules": {
        "no-unused-vars": "off",
        "@typescript-eslint/no-unused-vars": "off",
        "@typescript-eslint/no-explicit-any": ["off"]
    }
}
添加.eslingtignore文件,代码检查时不会检查这些文件或者文件夹
//.eslintignore

README.md
.DS_Store
node_modules
/dist

/tests/e2e/videos/
/tests/e2e/screenshots/

# local env files
.env.local
.env.*.local

# Log files
npm-debug.log*
yarn-debug.log*
yarn-error.log*

# Editor directories and files
.idea
*.suo
*.ntvs*
*.njsproj
*.sln
*.sw*

# Lock File
package-lock.json
yarn.lock

# autoGen
/autoGen
/public/cdn
/public/cdnimages
4. 创建.prettierignore .prettierrc.js
//.prettierignore
README.md
.DS_Store
node_modules
/dist

/tests/e2e/videos/
/tests/e2e/screenshots/

# local env files
.env.local
.env.*.local

# Log files
npm-debug.log*
yarn-debug.log*
yarn-error.log*

# Editor directories and files
.idea
*.suo
*.ntvs*
*.njsproj
*.sln
*.sw*

# Lock File
package-lock.json
yarn.lock

# autoGen
/autoGen
/public/cdn
/public/cdnimages
//.prettier.js
module.exports = {
  // 箭头函数只有一个参数的时候可以忽略括号
  arrowParens: 'avoid',
  // 括号内部不要出现空格
  bracketSpacing: true,
  // 行结束符使用 Unix 格式
  endOfLine: 'lf',
  // true: Put > on the last line instead of at a new line
  jsxBracketSameLine: false,
  // 行宽
  printWidth: 100,
  // 换行方式
  proseWrap: 'preserve',
  // 分号
  semi: false,
  // 使用单引号
  singleQuote: true,
  // 缩进
  tabWidth: 2,
  // 使用 tab 缩进
  useTabs: false,
  // 后置逗号,多行对象、数组在最后一行增加逗号
  trailingComma: 'es5',
  parser: 'typescript',
}
更多配置项请前往prettier官网
5. vscode配置
在根目录下创建.vscode/settings.json文件,并进行以下配置
{
    "editor.formatOnSave": true, //保存时格式化
    "editor.codeActionsOnSave": {
        "source.fixAll.eslint": "explicit" //保存文件时是否自动修复ESLint问题,手动触发
    }
}
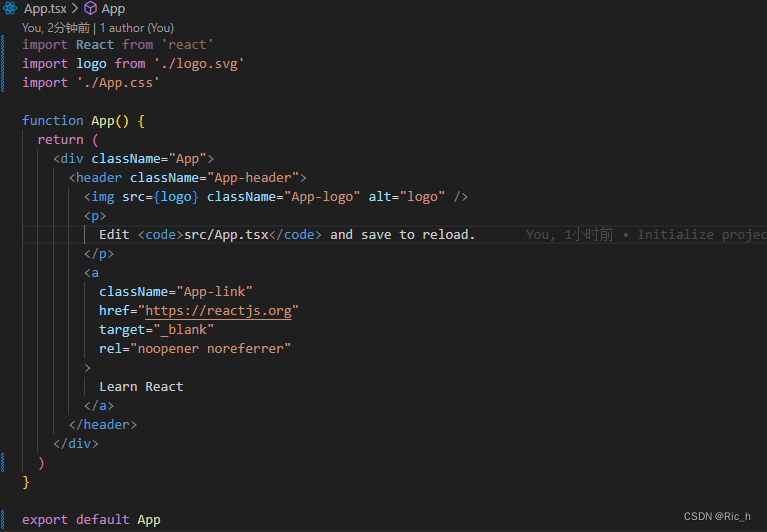
6. 测试格式化效果
为确保配置生效,重新启动一下vscode
ctrl+s 保存 App.tsx 发现在prettier中配置的规则已生效,没有了句尾分号,变量使用单引号


 464
464


 被折叠的 条评论
为什么被折叠?
被折叠的 条评论
为什么被折叠?
 到【灌水乐园】发言


