


文章目录
Obtain Ubuntu Server IP Address
Two ways of obtaining IP Address
- Obtaining an IP address using the ‘ifconfig’ command in server terminal:
ifconfig
Sample output:
enolnp0: flags=4163<UP,BROADCAST,RUNNING,MULTICAST>  mtu 1500
         inet 192.168.1.10  netmask 255.255.255.0  broadcast 192.168.1.255
         inet6 fe80::a00:27ff:fe5c:ebac  prefixlen 64  scopeid 0x20<link>
         ether 08:00:27:5c:eb:ac  txqueuelen 1000  (Ethernet)
         RX packets 26284  bytes 2144348 (2.1 MB)
         RX errors 0  dropped 0  overruns 0  frame 0
         TX packets 24776  bytes 1939930 (1.9 MB)
         TX errors 0  dropped 0 overruns 0  carrier 0  collisions 0
In the example above, the server’s IP address is displayed as 192.168.1.10 under ‘inet’.
- Using the ‘hostname’ command to obtain the IP address:
hostname -I
Sample output:
192.168.1.10
Set Up SSH Configurations
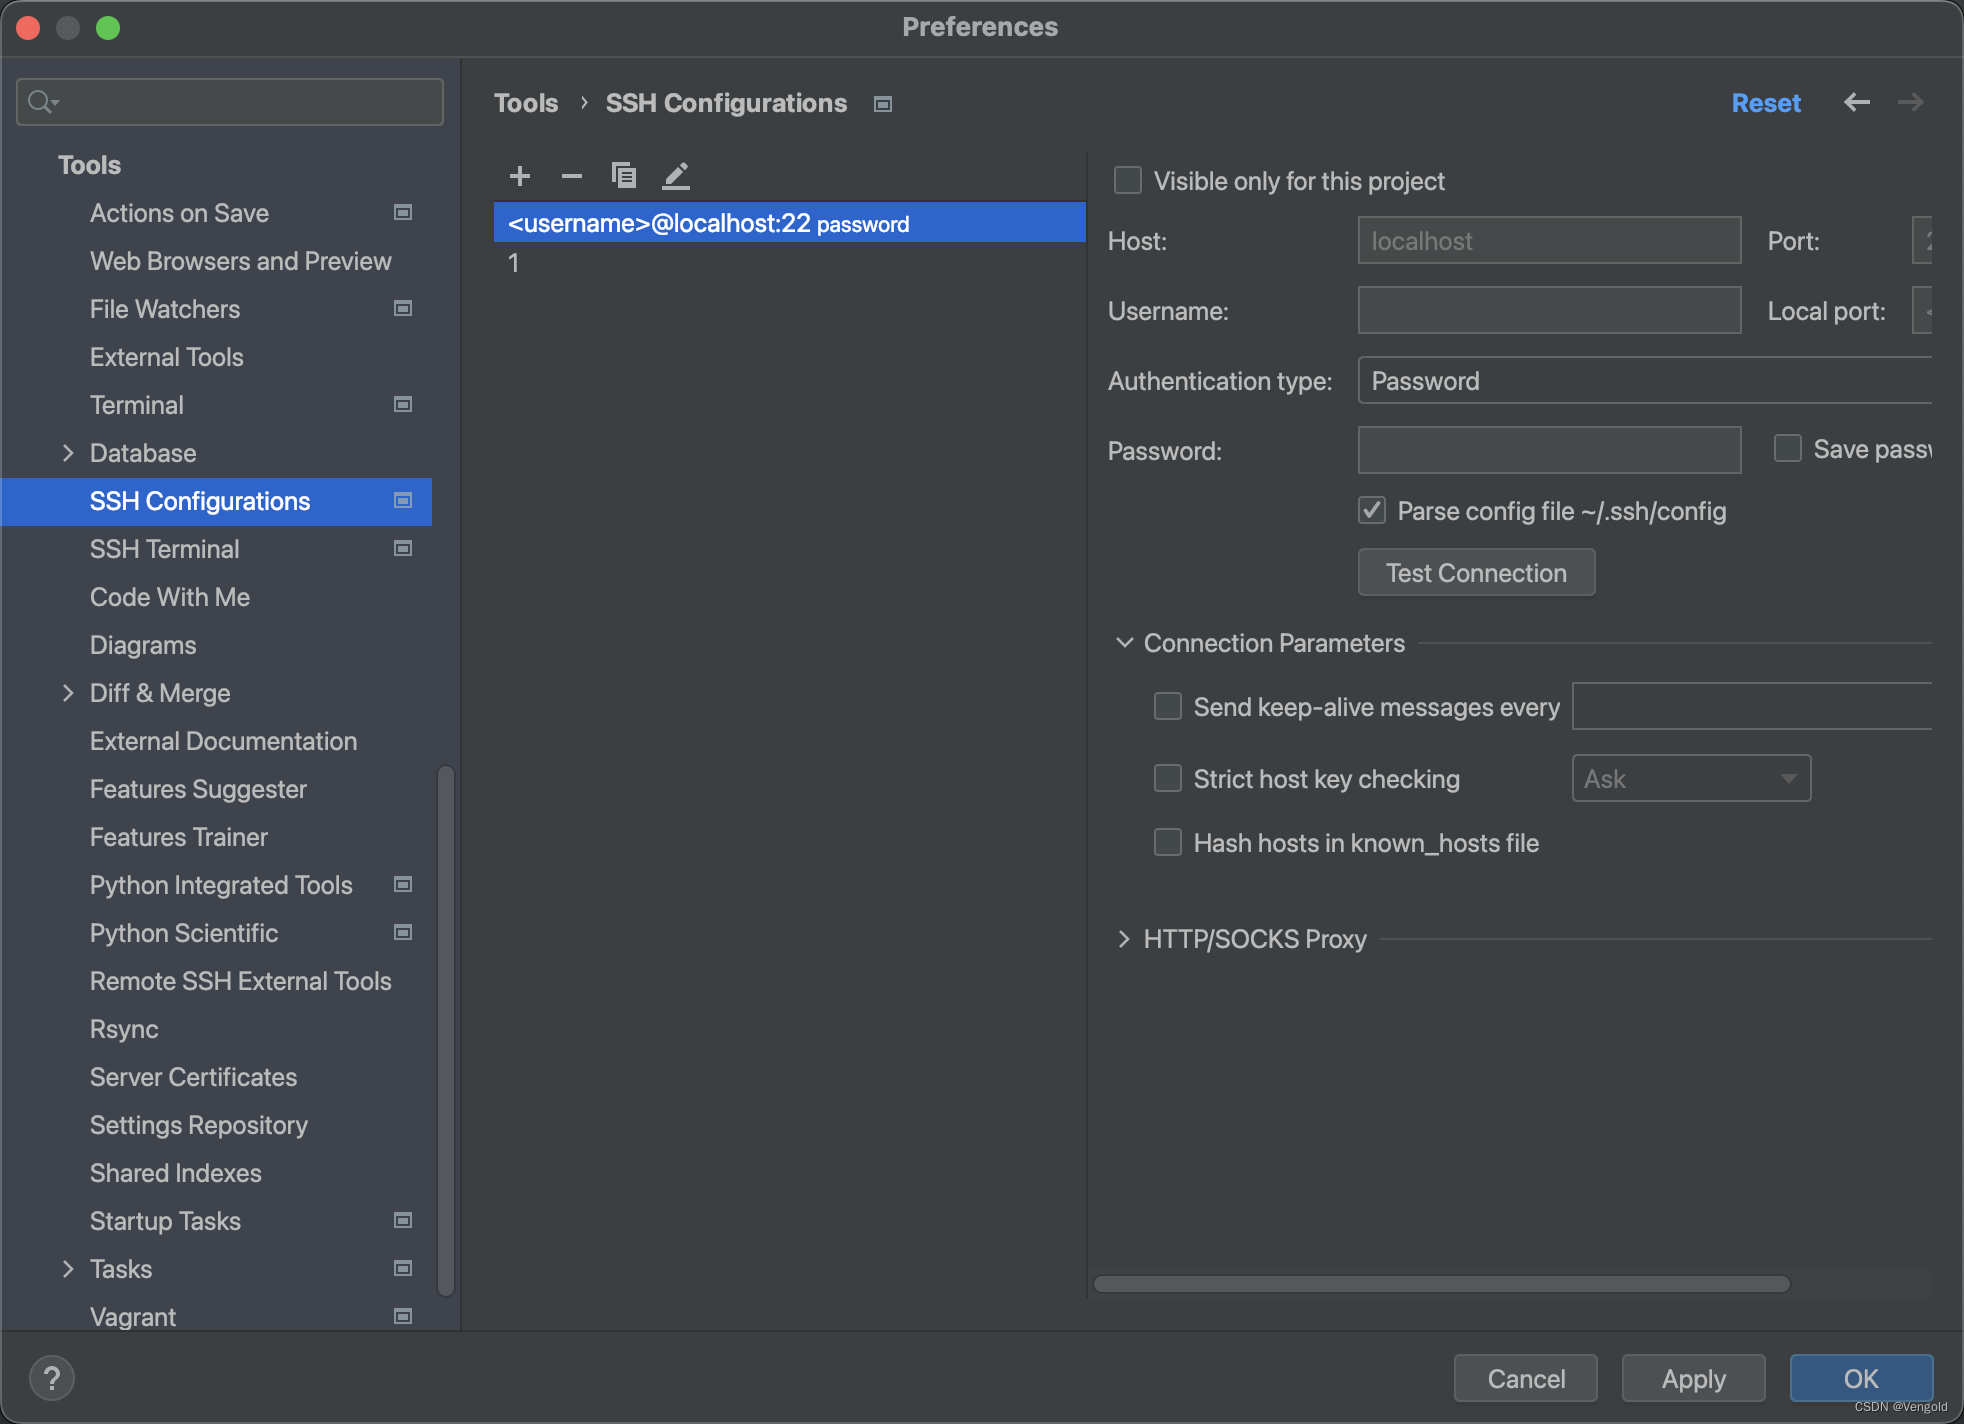
In PyCharm, navigate to ‘Settings…’ -> ‘Tools’ -> ‘SSH Configurations’. To set up a new configuration, click the ‘+’ button. Enter the following details:
Host: Use the IP address obtained earlier.
Port: By default, this will be 22.
Username: Enter the system username of the server.
Password: Input the user login password for the server.
Ensure the ‘Save password’ option is checked.
Additionally, under ‘Connection Parameters’, make sure the option ‘send keep-alive messages every () seconds’ is both filled out and ticked.
Set Up SSH Connection for New Project
Create a new project. In the ‘Location’ tab, specify the directory for your project. Next, under ‘Python Interpreter’, choose ‘Previously configured interpreter’. Then, click on the ‘…’ button.
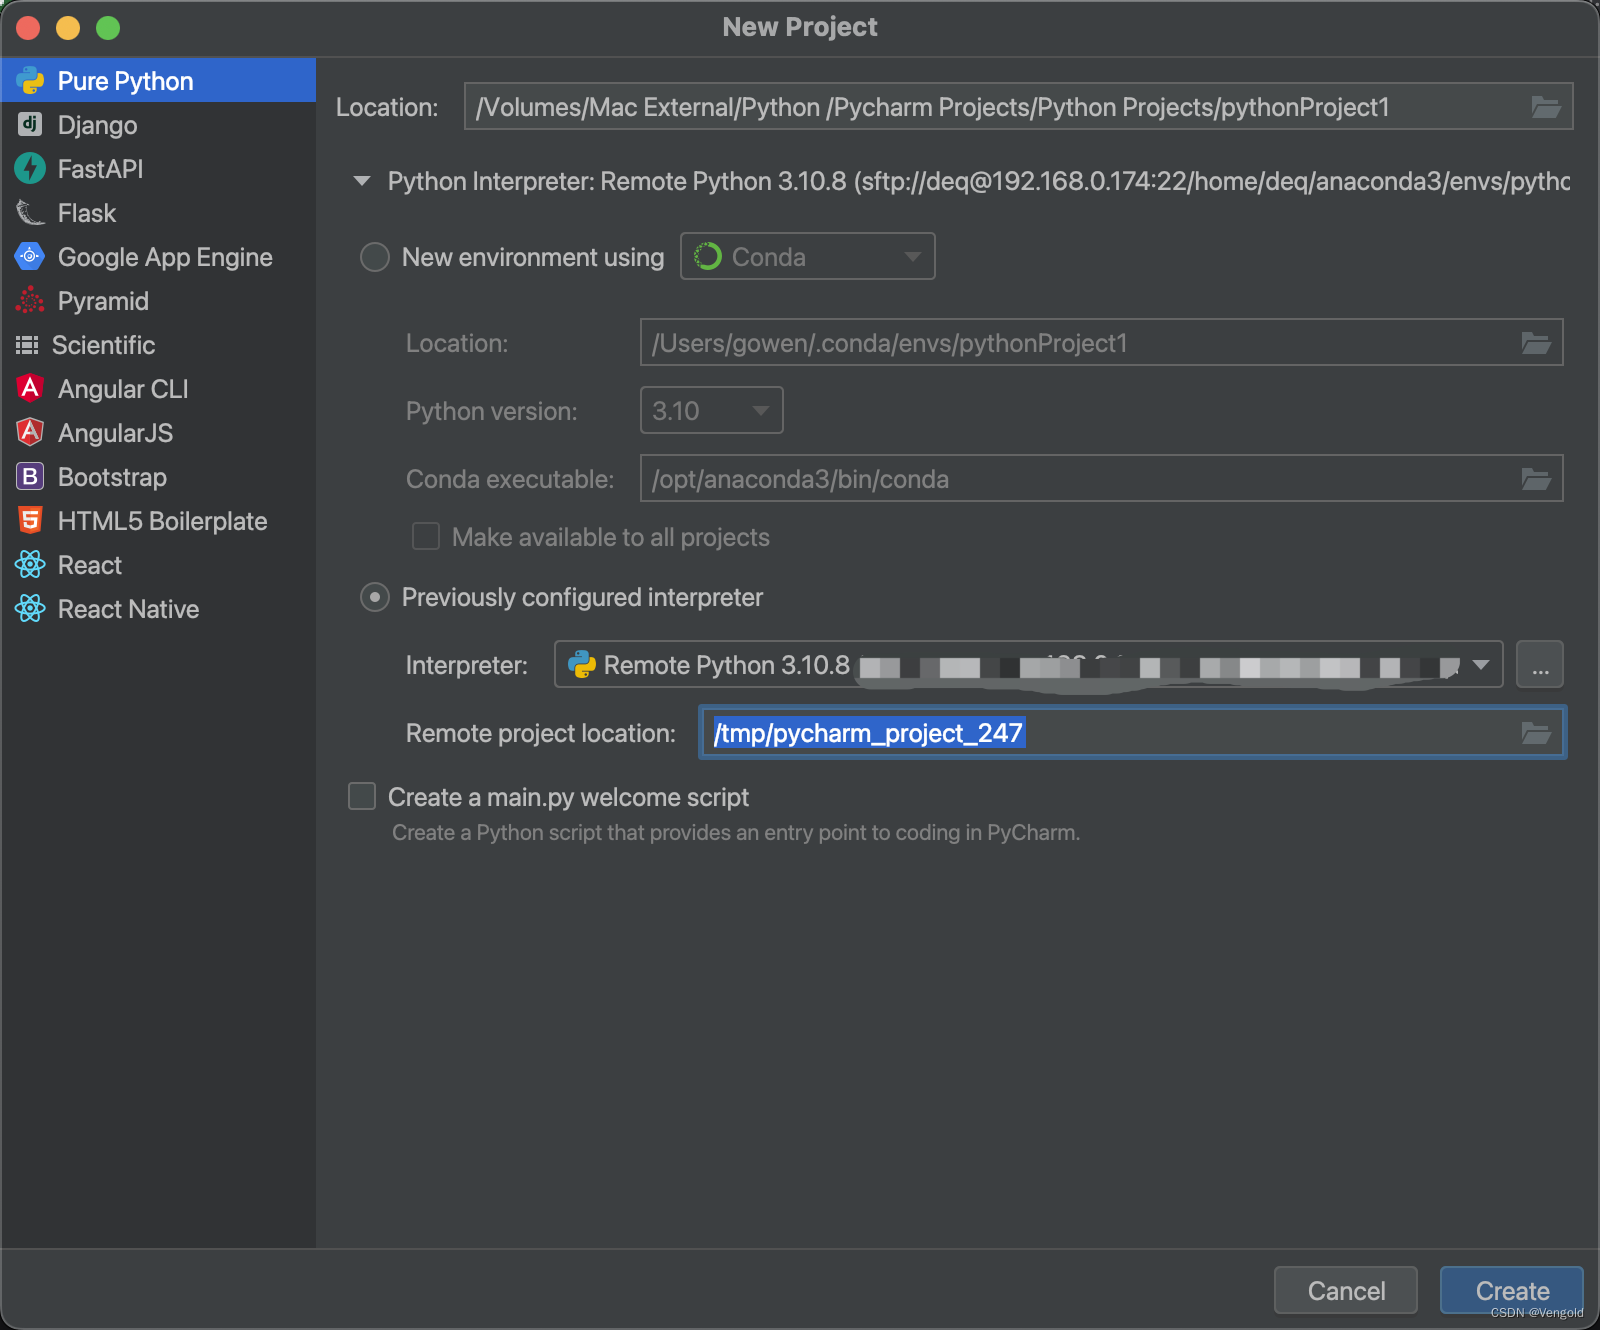
'Remote project location' refers to the directory on the server where you want to store your files.
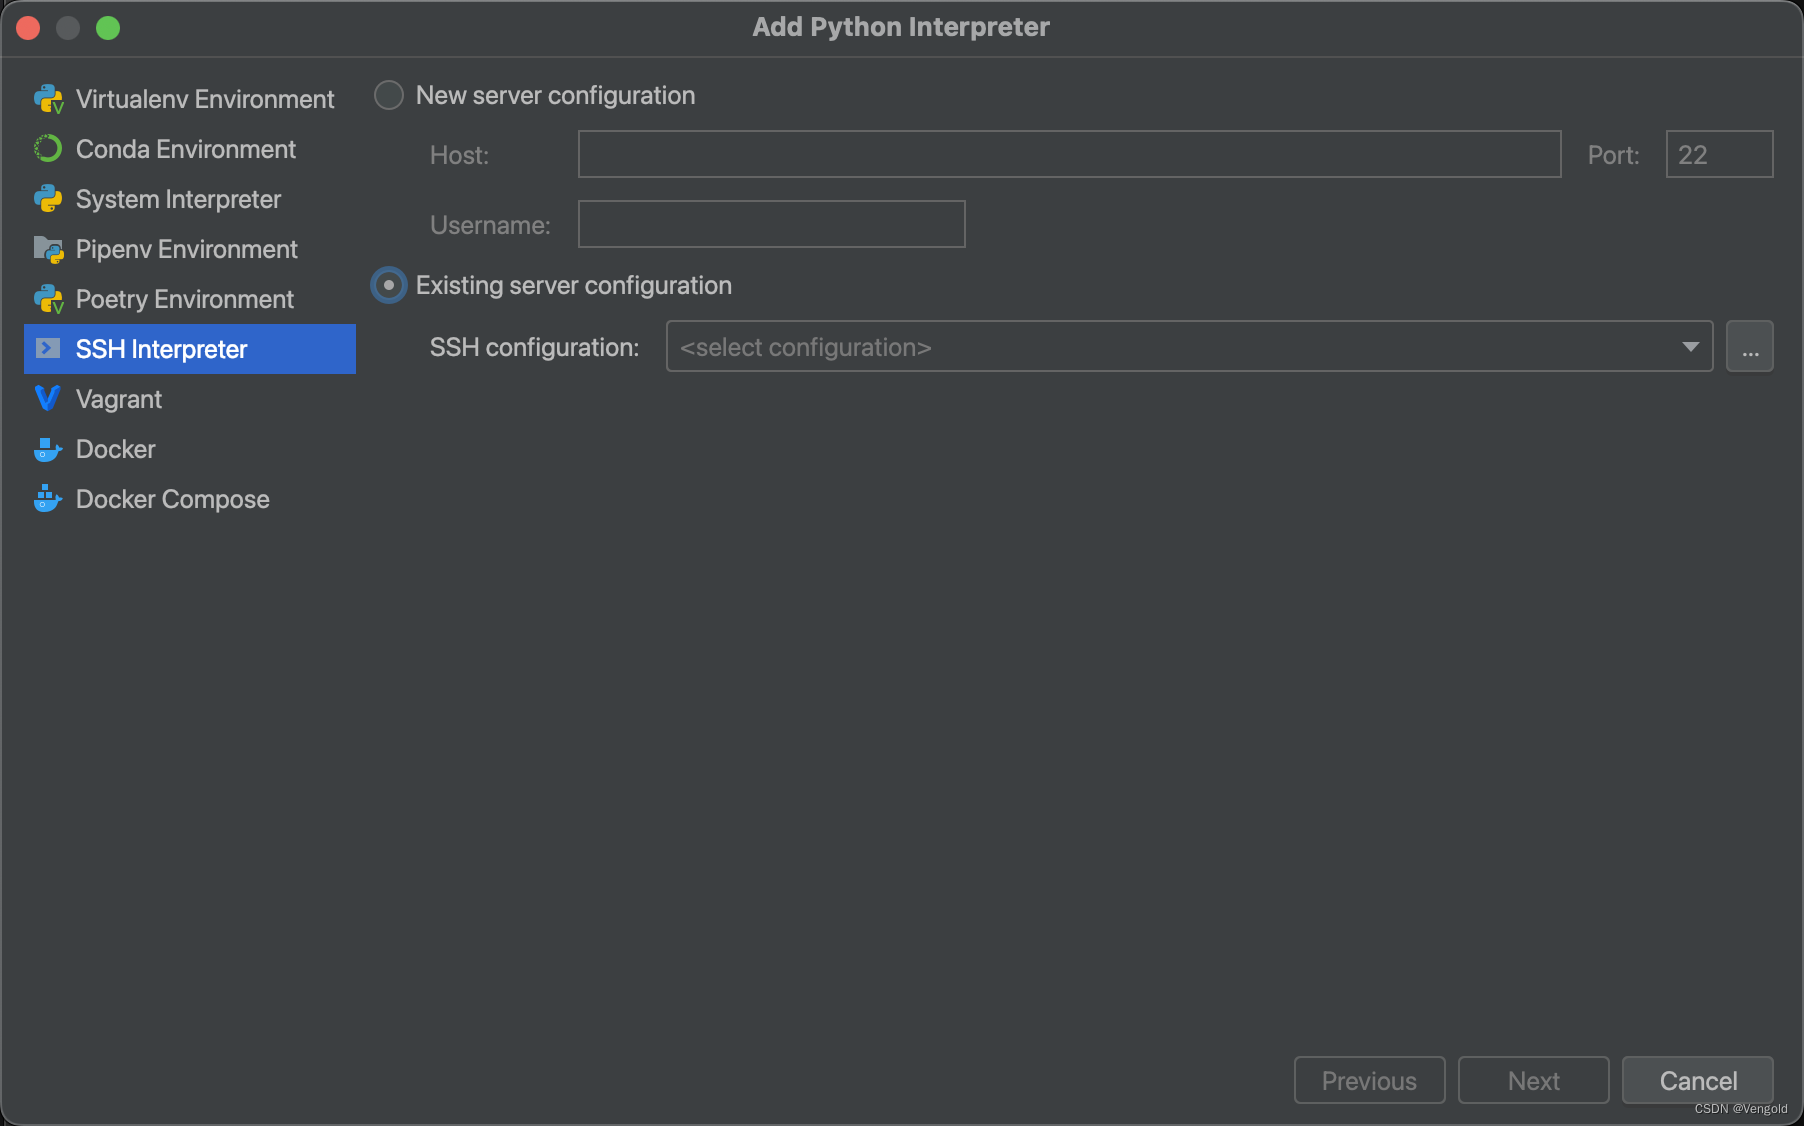
Under ‘SSH Interpreter’, choose ‘Existing server configuration’. Then, from the dropdown list, select the SSH configuration that you created in the ‘Setup SSH Configurations’ section.
Choose the interpreter directory located on the server. Ensure that the option ‘Execute code using this interpreter with root privileges via sudo’ is selected.
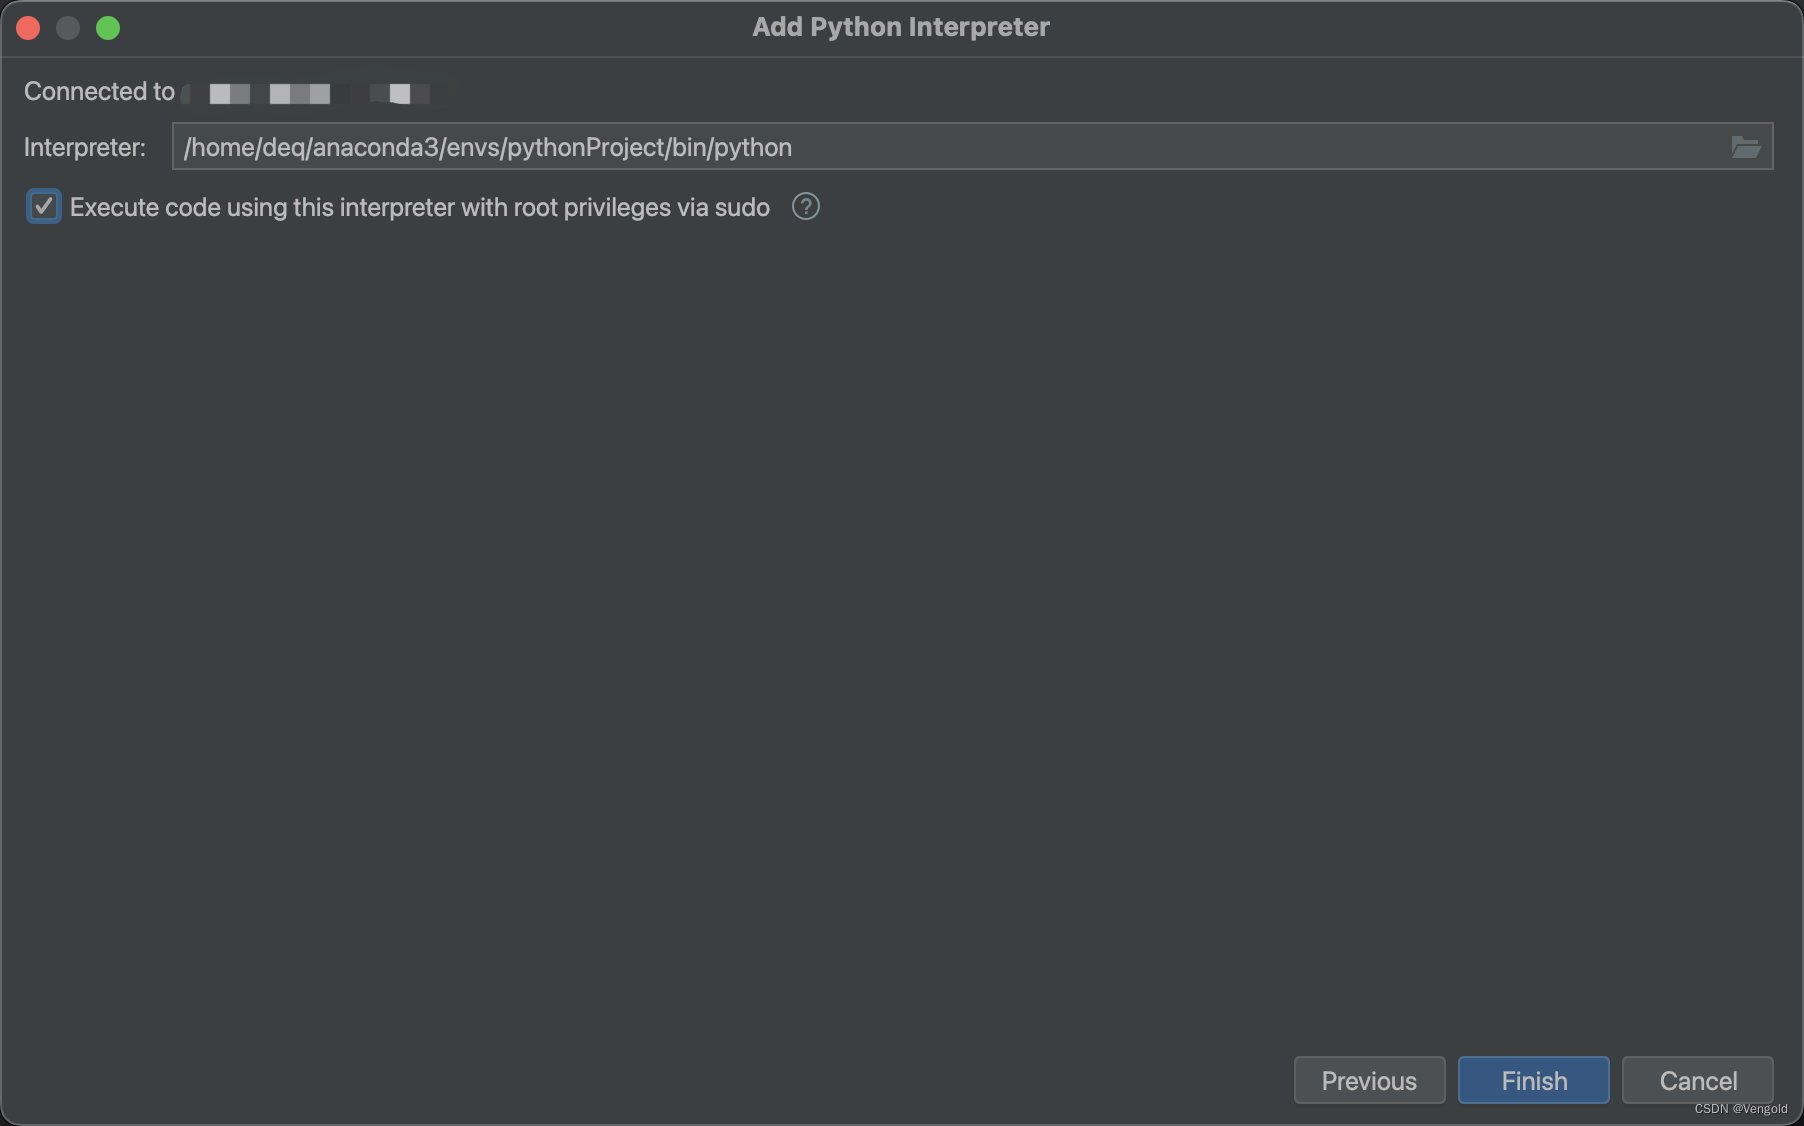
After clicking “Finish”, you’ll return to the “New Project” page. Proceed by clicking “Create”.
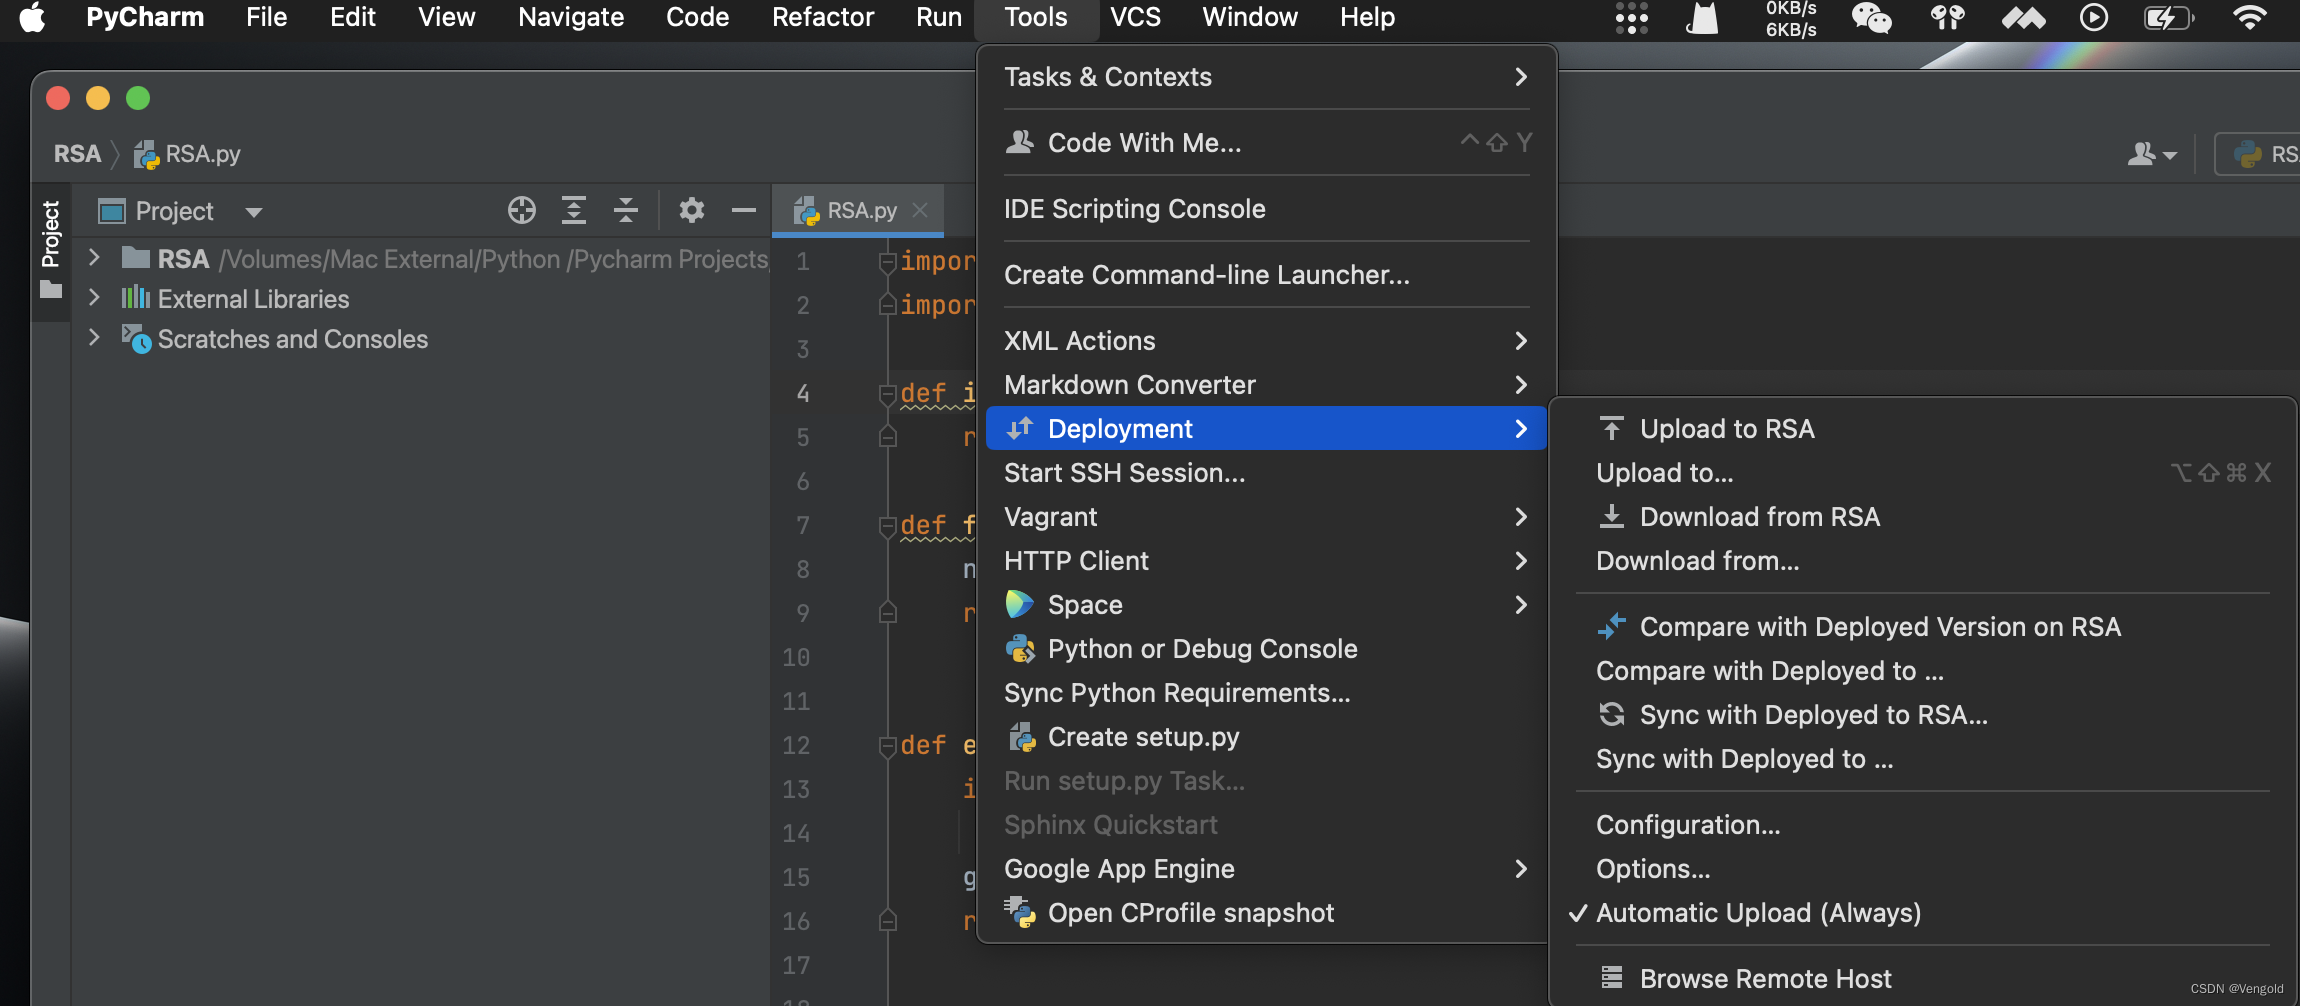
Next, navigate to "Tools" and select “Deployment”. Ensure that the “Automatically Upload” option is checked.
Set Up SSH Connection for Existing Project
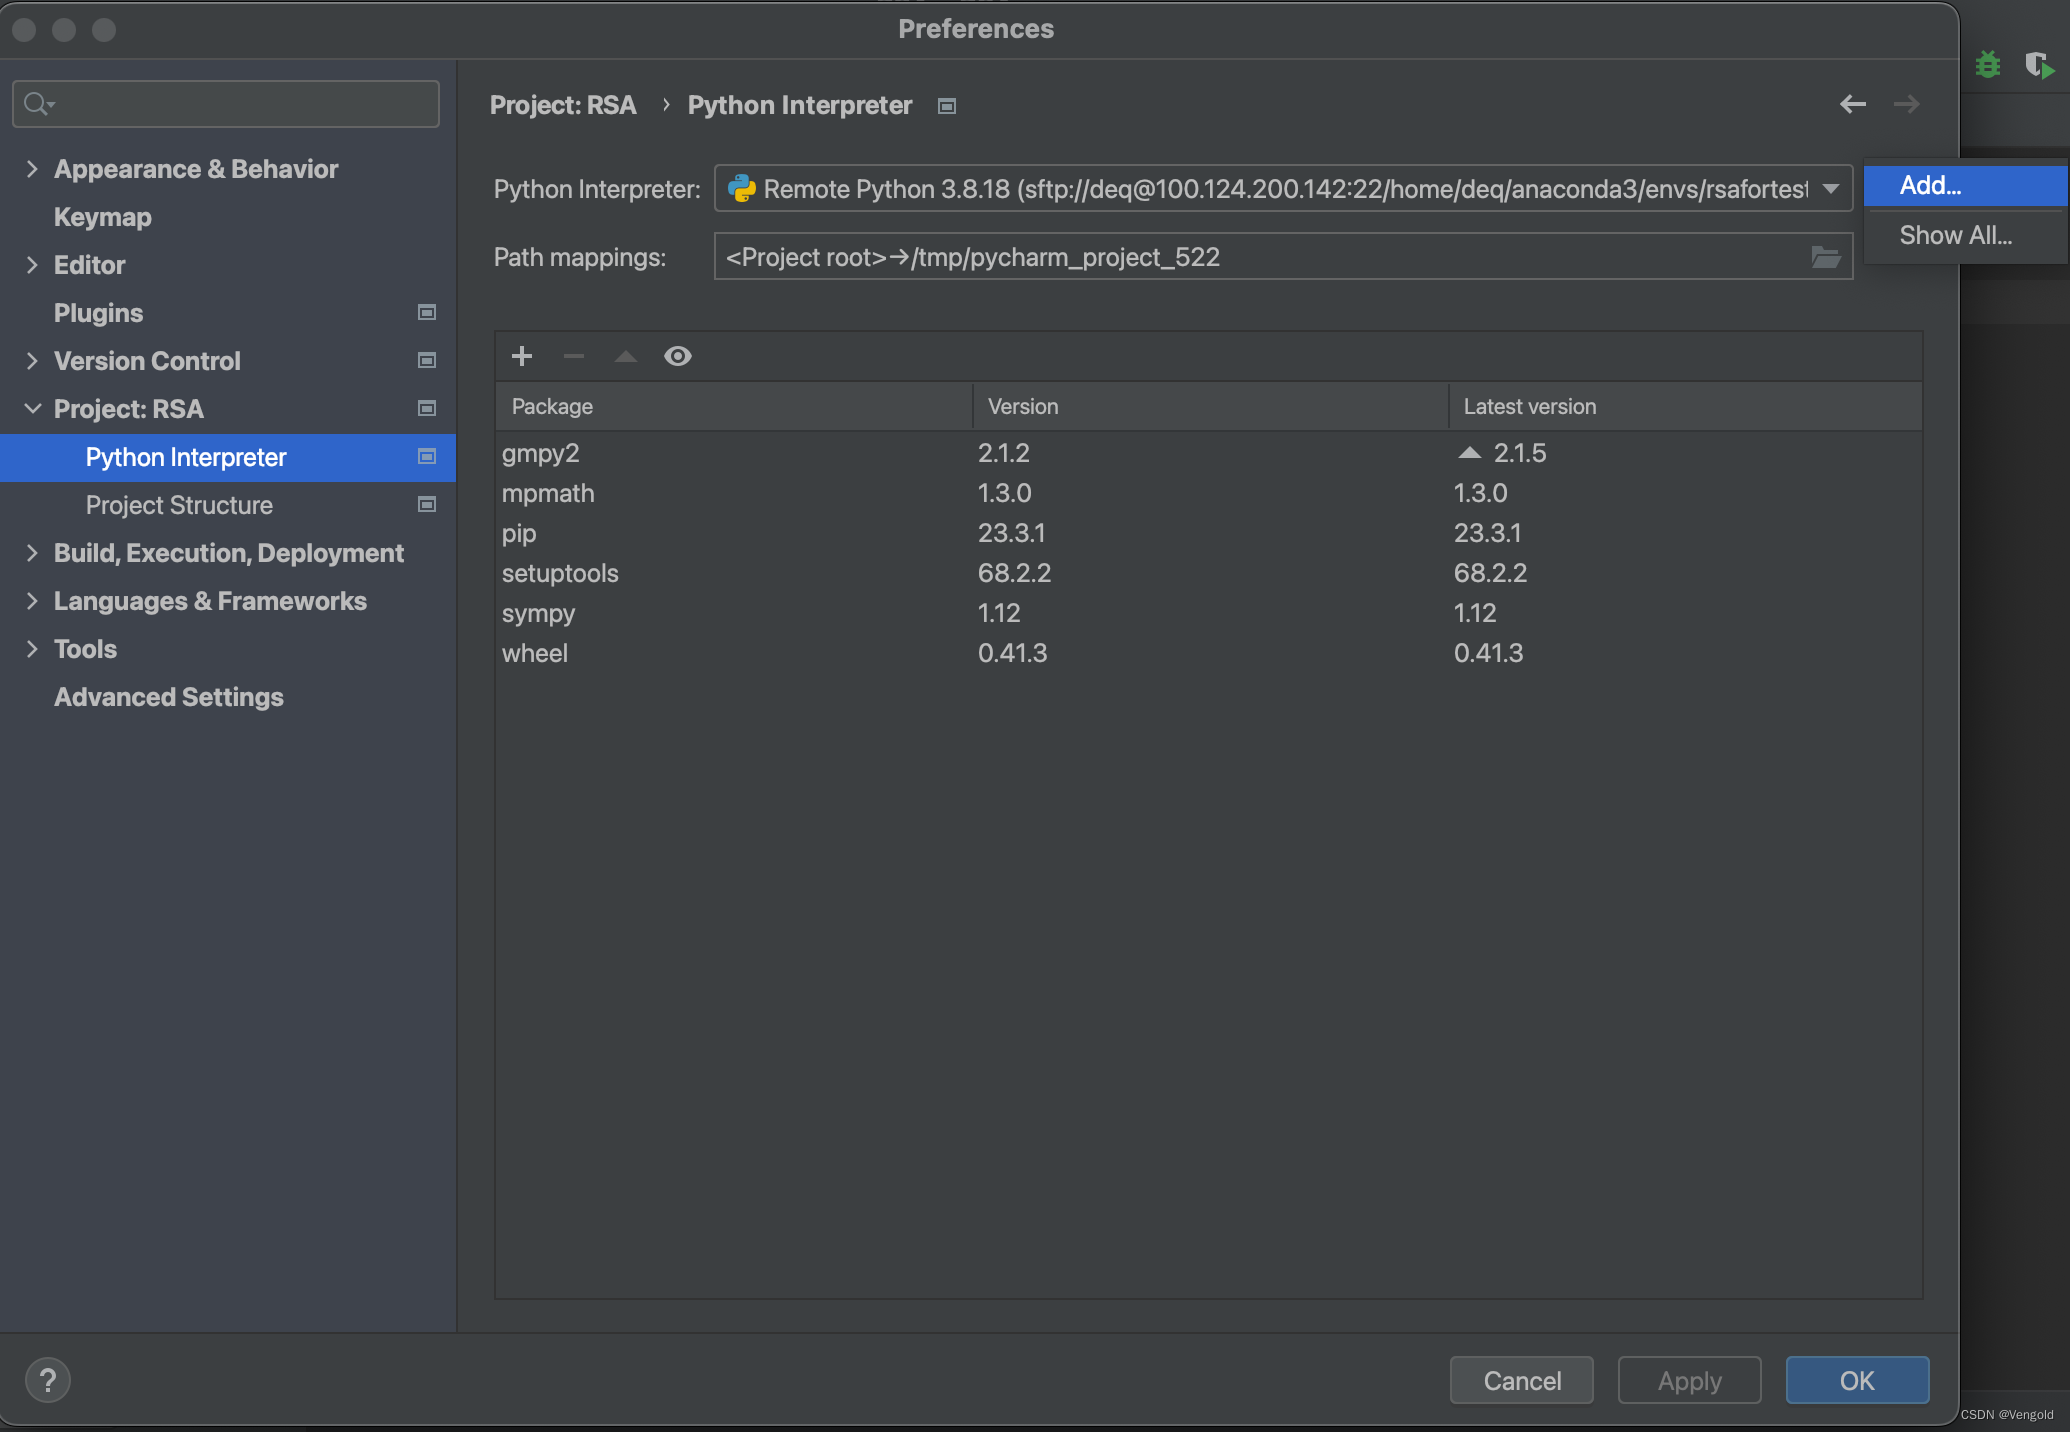
Navigate to ‘Settings’ or ‘Preferences’, then under ‘Project: [Your Project Name]’, choose ‘Python Interpreter’. Next, click on the settings (gear) icon adjacent to the ‘Python Interpreter dropdown’, select ‘Add…’, and follow the instructions as outlined in the ‘Set Up SSH Connection for New Project’ section.


 306
306


 被折叠的 条评论
为什么被折叠?
被折叠的 条评论
为什么被折叠?
 到【灌水乐园】发言


