


目录
一、前言
我们在做简书的项目时用到的很多知识点、语法,在上一篇博客中有详细的讲解,所以我不会再介绍的很详细,如果大家有不会或者是看不懂的地方,可以参考上一篇博客https://blog.csdn.net/We_jia/article/details/89458026
二、项目环境搭建
- 创建react项目
create-react-app jianshu- 整理目录
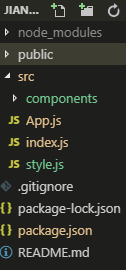
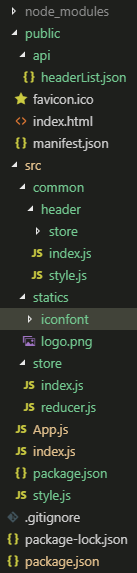
- 项目最终目录
2.1 使用styled-components
styled-components 是一个常用的 css in js 类库。和所有同类型的类库一样,通过 js 赋能解决了原生 css 所不具备的能力,比如变量、循环、函数等。
相对于其他预处理有什么优点?
- 诸如 sass&less 等预处理可以解决部分 css 的局限性,但还是要学习新的语法,而且需要对其编译,其复杂的 webpack 配置也总是让开发者抵触。
- 如果有过sass&less的经验,也能很快的切换到styled-components,因为大部分语法都类似,比如嵌套,& 继承等, styled-componens 很好的解决了学习成本与开发环境问题,很适合 React 技术栈 && React Native 的项目开发。
解决了什么问题?
- className 的写法会让原本写css的写法十分难以接受
- 如果通过导入css的方式 会导致变量泄露成为全局 需要配置webpack让其模块化
- 以及上面提到的解决了原生 css 所不具备的能力,能够加速项目的快速开发
安装styled-components
官方文档 https://www.styled-components.com/docs
cnpm install --save styled-componentsstyle.js 全局样式
import {createGlobalStyle} from 'styled-components';
export const GlobalStyled = createGlobalStyle`
body{
    margin:0;
    padding:0;
    background:red;
}`
App.js
import React,{Component} from 'react';
import {GlobalStyled} from '../style.js';
class App extends Component{
	render(){
	    return(
	        <div className='App'>
          hello world
	            <GlobalStyled />
	        </div>
	    )
	}
}
export default App;
2.2 使用resets.css
去除各种浏览器的差异性影响
style.js
import {createGlobalStyle} from 'styled-components';
// css reset重定义浏览器默认样式
export const GlobalStyled = createGlobalStyle`
html, body, div, span, applet, object, iframe,
h1, h2, h3, h4, h5, h6, p, blockquote, pre,
a, abbr, acronym, address, big, cite, code,
del, dfn, em, img, ins, kbd, q, s, samp,
small, strike, strong, sub, sup, tt, var,
b, u, i, center,
dl, dt, dd, ol, ul, li,
fieldset, form, label, legend,
table, caption, tbody, tfoot, thead, tr, th, td,
article, aside, canvas, details, embed,
figure, figcaption, footer, header, hgroup,
menu, nav, output, ruby, section, summary,
time, mark, audio, video{
  margin: 0;
  padding: 0;
  border: 0;
  font-size: 100%;
  font: inherit;
  font-weight: normal;
  vertical-align: baseline;
}
/* HTML5 display-role reset for older browsers */
article, aside, details, figcaption, figure,
footer, header, hgroup, menu, nav, section{
  display: block;
}
ol, ul, li{
  list-style: none;
}
blockquote, q{
  quotes: none;
}
blockquote:before, blockquote:after,
q:before, q:after{
  content: '';
  content: none;
}
table{
  border-collapse: collapse;
  border-spacing: 0;
}`
三、创建header
使用styled-components第三方模块进行样式布局,实现带样式的组件,这些组件的样式是互不影响的,有效的避免了多个组件可能的样式冲突问题。
在src下创建common文件夹,在这个文件中创建header文件夹,并创建index和style俩个文件来创建header
- 创建header基本样式
index.js
import React,{Component} from "react";
import {
    HeaderWrapper,
    Logo,
    Nav,
    NavItem,
    NavSeach,
    Addition,
    Button
}
from "./style.js";

class Header extends Component {
    render (){
        return (
            <HeaderWrapper>
                <Logo href="/"/>
                <Nav>
                    <NavItem className="left active" >首页</NavItem>
                    <NavItem className="left">下载APP</NavItem>
                    <NavSeach></NavSeach>
                    <NavItem className="right">登录</NavItem>
                    <NavItem className="right">Aa</NavItem>
                </Nav>
                <Addition>
                    <Button className="writing">写文章</Button>
                    <Button className="reg">注册</Button>
                </Addition>
            </HeaderWrapper>

      )
    }
}
export default Header;
style.js
import styled from "styled-components";
//引入图片
import logPic from "../../statics/logo.png";
export const HeaderWrapper=styled.div`
    position:relative;
    width:100%;
    height:56px;
    border-bottom:1px solid #f0f0f0;
`;
export const Logo=styled.a`
    display:block;
    position:absolute;
    top:0;
    left:0;
    width:100px;
    height:56px;
    background:url(${logPic});
    background-size:contain;
`
// contain把图像图像扩展至最大尺寸,以使其宽度和高度完全适应内容区域。
export const Nav=styled.div`
    width:960px;
    height:100%;
    box-sizing:border-box;
    margin-right:70px;
    margin:0 auto
`
export const NavItem=styled.div`
    padding:0 15px;
    line-height:56px;
    font-size:17px;
    &.left{
      float:left;
      color:#333;
    }
    &.right{
        float:right;
        color:#969696;
    }
    &.active{
        color:#ea6f5a;
    }
`
export const NavSeach=styled.input.attrs({
    placeholder:"搜索"
})`
    width:160px;
    height:38px;
    border:none;
    outline:none;
    margin:9px 0 0 20px;
    padding:0 20px;
    box-sizing:border-box;
    border-radius:19px;
    background:red;
    font-size:14px;
    background:#eee;
    &::placeholder{
        color:#999;
    }
`
export const Addition=styled.div`
    position:absolute;
    right:0;
    top:0;
    height:56px
`
export const Button=styled.div`
    float:right;
    line-height:38px;
    border-radius:19px;
    border:1px solid #ec6149;
    margin:9px 20px 0 0;
    padding:0 20px;
    font-size:14px;
    &.reg{
        color:#ec6149;
    }
    &.writing{
        background:#ec6149;
        color:#fff;
    }
`
效果展示:

- 为header添加iconfont图标
添加了放大镜,Aa,羽毛笔三个图标,首先看下效果图

iconfont的使用
- 首先要在iconfont官网注册账号,
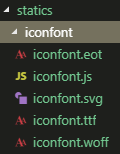
- 操作步骤:图标管理-我的项目-创建项目-添加图标-下载至本地-引入项目
- 如何引入项目:在src目录下创建statics文件夹,将所需文件添加至项目中,将源文件中的iconfont.css重命名为iconfont.js 最终效果如图:
- 全局使用iconfont,设置iconfont.js
// 全局样式
import {createGlobalStyle} from 'styled-components';
export const IconGlobalStyled = createGlobalStyle`
@font-face {font-family: "iconfont";
  src: url('./iconfont.eot?t=1556544954488'); /* IE9 */
  src: url('./iconfont.eot?t=1556544954488#iefix') format('embedded-opentype'), /* IE6-IE8 */
  url('data:application/x-font-woff2;charset=utf-8;base64,d09GMgABAAAAAAPgAAsAAAAACJwAAAOUAAEAAAAAAAAAAAAAAAAAAAAAAAAAAAAAHEIGVgCDHAqEXIQ3ATYCJAMQCwoABCAFhG0HQRuiB8gOJcHDwACAoRRgPPw31v6+mdllME2SRCOHKpZJdLVQCQmal0inVELy+M/P+9Nv6kNmUBdmVhMjnQM5UmJk5Ob+6/5lImQm8scxX5fi+Ww2sd0QqimSIhpHuwGWtQ6s0wtkA63+gv6HsZvIg1xOoMO4XoiNoooGaKsA7QJxoZgEaJuQKhXhoQrNgqEF4h5aqWkGeQ64804ff+KigqSRAXTdPio0Qs5np2cqNf7/eOhHEcAeTg1lFBkLQCFOCrV7qMCxgNJh+dKWgArViaEqkp6p//+LnK2IqvgvjyRkogkgtAssCs7MZydMJvGZRCb4VMUuEl1aV2wBbwD+C9jR21dky7X6s11uLAHW0dGzo8mtgbGwzX3mRjCvQQZhLzsLoCOYQx0zLxATeH6CN31G47b1MH4DO+soQUi63uRy8devN167NgAJGnxG/N11fcTMAHnuPH80x2/2KBbQPhxijx9cjUfj9Wt+noiX9pLfeLTrgxcGtu/s6/y6q9H6tUNy8eVuBZeRx38xXzdnVTeSeaKS5aJ/Zznx8ZRoopEbpXZvUtz7s+U5aU8G8PhssP/vkM4fO0fAnj1jyLXryNGQTgVjBHaEWOOdNYxcvowcJtJFBpGSy0S6sFDg1RiyPzmp47C45OSOnTig/g2MANTCIzipHNIgovSg5JHTTzYagn2/13stZHOH7att9srW8kkj49VxfGa1G9qdNT349ihD14wtPejz9pO7/Pr+vMF7kRvcALT+50MZaJ3OuynWcC2nHuRB/8ffuP324RromfG1LUsDfLyN2OPpWstpaCaGl8xuzP4b2A2Tis0FslJMHmY5vYpd2QAJHVDBP+BhwL0hJMONQwnVcARJmzHIqglkwS5AQ6dFaKqWocO84tGdBmkoUdoBc6ZwEPpshKTHO2R9ziML9i40jHgLTX2RocNO+E7ZaSpOmXwNCRgZOXEEp0iqXUYKzPjhdcg0xCpoca6Ha0KaUzFzsVExaXcxsiNtiB7OoaY4jGVO1lQbV8SthqxWlXNoqhlJOKoFY0dadLRctKMoSbUBY50GEWCIEUc0AkchUdnJND3GZI5fBzEZwkqgVSS0KJsgGielek6sKDENkMUie6OES6ntNJRJHAyTxVYyjcqGU8SrESt0qDiO4kZmiASL0tLB5pAmWkglNxVFTS+x3eE86ACmLEESFEETrSCtCows2E1GwazQuFaDhyhWKwA=') format('woff2'),
  url('./iconfont.woff?t=1556544954488') format('woff'),
  url('./iconfont.ttf?t=1556544954488') format('truetype'), /* chrome, firefox, opera, Safari, Android, iOS 4.2+ */
  url('./iconfont.svg?t=1556544954488#iconfont') format('svg'); /* iOS 4.1- */
}

.iconfont {
  font-family: "iconfont" !important;
  font-size: 16px;
  font-style: normal;
  -webkit-font-smoothing: antialiased;
  -moz-osx-font-smoothing: grayscale;
}`
6 在app.js中引入iconfont
四、header搜索框动画

这个动画效果主要有俩点:
- input框长度的变化和iconfont的背景色
1.input聚焦(onFocus)时 给input框添加focused类名称,给iconfont放大镜框添加focused类名称
2.input框失焦(onBlur)时 类名称为空
- 变化过程中的动画ease-out
使用ReactTransitionGroup插件库,导入CSSTransition,具体使用方法可参考我的另一篇博客React动画
https://blog.csdn.net/We_jia/article/details/89451802
官方文档
https://github.com/reactjs/react-transition-group
header下index.js
import React,{Component} from "react";
import { CSSTransition } from 'react-transition-group'; //引入css动画
import {
HeaderWrapper,
Logo,
Nav,
NavItem,
SearchWrapper,
NavSeach,
Addition,
Button
}
from "./style.js";
class Header extends Component {
constructor(props){
super(props);
this.state={
focused:false
}
}
render (){
return (
<HeaderWrapper>
<Logo href="/"/>
<Nav>
<NavItem className="left active" >首页</NavItem>
<NavItem className="left">下载APP</NavItem>
<SearchWrapper>
{/* 为包含的组件添加css样式 */}
<CSSTransition
in={this.state.focused} //动画的出场入场 true or false
timeout={200}
classNames="slide"
>
<NavSeach
onFocus={this.handleInputFouce}
onBlur={this.handleInputBlur}
className={this.state.focused?'focused':""}>
</NavSeach>
</CSSTransition>
<i className={this.state.focused?'focused iconfont':"iconfont"}></i>
</SearchWrapper>
<NavItem className="right">登录</NavItem>
<NavItem className="right">
<i className="iconfont"></i>
</NavItem>
</Nav>
<Addition>
<Button className="writing">
<i className="iconfont" style={{marginRight: 5 + 'px'}} ></i>
写文章</Button>
<Button className="reg">注册</Button>
</Addition>
</HeaderWrapper>
)
}
handleInputFouce=()=>{
this.setState({
focused:true
}
)
}
handleInputBlur=()=>{
this.setState({
focused:false
}
)
}
}
export default Header;header下style.js
import styled from "styled-components";
//引入图片
import logPic from "../../statics/logo.png";
export const HeaderWrapper=styled.div`
    position:relative;
    width:100%;
    height:56px;
    border-bottom:1px solid #f0f0f0;
`;
export const Logo=styled.a`
    display:block;
    position:absolute;
    top:0;
    left:0;
    width:100px;
    height:56px;
    background:url(${logPic});
    background-size:contain;
`
// contain把图像图像扩展至最大尺寸,以使其宽度和高度完全适应内容区域。
export const Nav=styled.div`
    width:945px;
    height:100%;
    box-sizing:border-box;
    padding-right:70px;
    margin:0 auto
`
export const NavItem=styled.div`
    padding:0 15px;
    line-height:56px;
    font-size:17px;
    &.left{
      float:left;
      color:#333;
    }
    &.right{
        float:right;
        color:#969696;
    }
    &.active{
        color:#ea6f5a;
    }
`
//加入css 动画
export const SearchWrapper=styled.div`
    float:left;
    position:relative;
    .iconfont{
        position:absolute;
        right:5px;
        bottom:5px;
        width:30px;
        line-height:30px;
        border-radius:19px;
        text-align:center;
        &.focused{
            color:#fff;
            background:#777;
        }
    }
`;
export const NavSeach=styled.input.attrs({
    placeholder:"搜索"
})`
    width:160px;
    height:38px;
    border:none;
    outline:none;
    margin:9px 0 0 20px;
    padding:0 30px 0 20px;
    box-sizing:border-box;
    border-radius:19px;
    font-size:14px;
    background:#eee;
    color:#666;
    &.focused{
        width:240px;
    }
    &::placeholder{
        color:#999;
    }

    &.slide-enter{
        transition:all .2s ease-out
    }
    &.slide-enter-active{
        width:240px;
    }
    &.slide-exit{
        transition:all .2s ease-out
    }
    &.slide-exit-active{
        width:160px;
    }
`
export const Addition=styled.div`
    position:absolute;
    right:0;
    top:0;
    height:56px
`
export const Button=styled.div`
    float:right;
    line-height:38px;
    border-radius:19px;
    border:1px solid #ec6149;
    margin:9px 20px 0 0;
    padding:0 20px;
    font-size:14px;
    box-sizing:border-box;
    &.reg{
        color:#ec6149;
    }
    &.writing{
        background:#ec6149;
        color:#fff;
        &.yumao{
            padding-right:10px;
         }
    }

`
五、使用React-Redux进行应用数据的管理
5.1 导入redux与react-redux
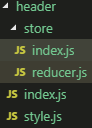
- 创建store文件夹及其文件,如图所示:
- 配置各个文件内容
index.js
import {createStore} from "redux";
import reducer from "./reducer.js"
const store =createStore(reducer);
export default store;
reducer.js
const defaultState={}
export default (state=defaultState,action)=>{
     return state;
}- 引入redux与react-redux
App.js
import React,{Component} from 'react';
import Header from './common/header';
import {GlobalStyled} from './style.js'; //全局样式
import {IconGlobalStyled} from './statics/iconfont/iconfont';  //全局使用iconfont
import { Provider  } from "react-redux";  //引入 react-redux 核心APIProvider
import store from "./store/index"    //引入store

class App extends Component{
	render(){
	    return(
	        <Provider store={store}>
				{/* 组件名字一定要大写 */}
	            <GlobalStyled />
				<IconGlobalStyled />
				<Header></Header>
			</Provider>
	    );
	}
}
export default App;
header文件夹下的index.js
省略 class Header extends Component {} 中的内容,可参考上文
导入connect,使得该组件与store连接,获取数据,而且传入参数mapStateToProps和mapDisptachToProps,具体用法参考另一篇博客https://blog.csdn.net/We_jia/article/details/89458026
import React,{Component} from "react";
import { connect } from "react-redux";     //导入connect,使得该组件与store连接
import { CSSTransition } from 'react-transition-group';  //引入css动画
import {
    HeaderWrapper,
    Logo,
    Nav,
    NavItem,
    SearchWrapper,
    NavSeach,
    Addition,
    Button
}
from "./style.js";

class Header extends Component {

}

const mapStateToProps=(state)=>{
    return {

    }
}
const mapDisptachToProps=(disptach)=>{
    return {

    }
}
export default connect(mapStateToProps,mapDisptachToProps)(Header);
5.2 使用redux与react-redux管理数据
header文件夹下的index.js
import React,{Component} from "react";
import { connect } from "react-redux"; //导入connect,使得该组件与store连接
import { CSSTransition } from 'react-transition-group'; //引入css动画
import {
HeaderWrapper,
Logo,
Nav,
NavItem,
SearchWrapper,
NavSeach,
Addition,
Button
}
from "./style.js";
class Header extends Component {
render (){
return (
<HeaderWrapper>
<Logo href="/"/>
<Nav>
<NavItem className="left active" >首页</NavItem>
<NavItem className="left">下载APP</NavItem>
<SearchWrapper>
{/* 为包含的组件添加css样式 */}
<CSSTransition
in={this.props.focused} //动画的出场入场 true or false
timeout={200}
classNames="slide"
>
<NavSeach
onFocus={this.props.handleInputFouce}
onBlur={this.props.handleInputBlur}
className={this.props.focused?'focused':""}>
</NavSeach>
</CSSTransition>
<i className={this.props.focused?'focused iconfont':"iconfont"}></i>
</SearchWrapper>
<NavItem className="right">登录</NavItem>
<NavItem className="right">
<i className="iconfont"></i>
</NavItem>
</Nav>
<Addition>
<Button className="writing">
<i className="iconfont" style={{marginRight: 5 + 'px'}} ></i>
写文章</Button>
<Button className="reg">注册</Button>
</Addition>
</HeaderWrapper>
)
}
}
const mapStateToProps=(state)=>{
return {
focused:state.focused
}
}
const mapDisptachToProps=(disptach)=>{
return {
handleInputFouce(){
const action ={
type:"search_focus",
}
disptach(action);
},
handleInputBlur(){
const action ={
type:"search_blur",
}
disptach(action);
}
}
}
export default connect(mapStateToProps,mapDisptachToProps)(Header);reducer.js
const defaultState={
     focused:false
}
export default (state=defaultState,action)=>{
    if(action.type ==="search_focus"){
        return {
          focused:true
        }
     }

     if(action.type ==="search_blur"){
          return {
            focused:false
          }
       }

     return state;

}
分析总结:
- 去掉constructor中的内容
- 在mapStateToProps中接收store中的数据(state)
- 在mapDisptachToProps定义方法改变数据(dispatch)
- 在index中使用this.props 接收数据与方法
- 在reducer中,修改数据并返回给store,最终传给index
5.3 无状态组件提升性能
将index.js改为无状态组件,可以提升性能
import React from "react";
import { connect } from "react-redux"; //导入connect,使得该组件与store连接
import { CSSTransition } from 'react-transition-group'; //引入css动画
import {
HeaderWrapper,
Logo,
Nav,
NavItem,
SearchWrapper,
NavSeach,
Addition,
Button
}
from "./style.js";
const Header=(props)=>{
return (
<HeaderWrapper>
<Logo href="/"/>
<Nav>
<NavItem className="left active" >首页</NavItem>
<NavItem className="left">下载APP</NavItem>
<SearchWrapper>
{/* 为包含的组件添加css样式 */}
<CSSTransition
in={props.focused} //动画的出场入场 true or false
timeout={200}
classNames="slide"
>
<NavSeach
onFocus={props.handleInputFouce}
onBlur={props.handleInputBlur}
className={props.focused?'focused':""}>
</NavSeach>
</CSSTransition>
<i className={props.focused?'focused iconfont':"iconfont"}></i>
</SearchWrapper>
<NavItem className="right">登录</NavItem>
<NavItem className="right">
<i className="iconfont"></i>
</NavItem>
</Nav>
<Addition>
<Button className="writing">
<i className="iconfont" style={{marginRight: 5 + 'px'}} ></i>
写文章</Button>
<Button className="reg">注册</Button>
</Addition>
</HeaderWrapper>
)
}
const mapStateToProps=(state)=>{
return {
focused:state.focused
}
}
const mapDisptachToProps=(disptach)=>{
return {
handleInputFouce(){
const action ={
type:"search_focus",
}
disptach(action);
},
handleInputBlur(){
const action ={
type:"search_blur",
}
disptach(action);
}
}
}
export default connect(mapStateToProps,mapDisptachToProps)(Header);六、使用combineReducers对数据进行拆分管理
在之前的项目中我们将所有的数据都存储在store文件夹下的reducer.js中,可想而知随着项目不断的开发,数据也会越来越多,页面会很臃肿,维护也会很困难,所以我们需要将数据进行分离
在header文件夹下创建store文件夹创建reducer.js来分离数据
header-store-reducer
const defaultState={
    focused:false
}
export default (state=defaultState,action)=>{
   if(action.type ==="search_focus"){
       return {
         focused:true
       }
    }

    if(action.type ==="search_blur"){
         return {
           focused:false
         }
      }

    return state;

}
header-store-index
相当于reducer的出口
import reducer from "./reducer";

export  {reducer};    //导入{}  导出也要{}
src-store-reducer
使用combineReducers方法来整合所有分离的reducer
import { combineReducers } from "redux";
// import headerReducer from "../common/header/store/reducer"
import {reducer as headerReducer} from "../common/header/store";  //从index中引入reducer  as 起别名
const reducer =combineReducers({
     header :headerReducer
})
export default reducer;
header-index
我只截取了需要修改的代码,其他内容不变
const mapStateToProps=(state)=>{
    return {
        focused:state.header.focused
    }
}
在这里,我们需要注意的是:之前我们只有一层目录,所以修改的是 state.focused。
但是,因为通过 combineReducers 将 reducer.js 进行了整合,所以需要修改为state.header.focused
至此,我们就完成了 reducer.js 的优化。
七、抽取Action
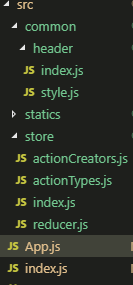
1. 在header文件夹下的store文件夹中创建actionCreators.js
import * as actionTypes from "./actionTypes"
export const searchFocus=()=>({
    type:actionTypes.SEARCH_FOCUS
});

export const searchBlur=()=>{
    return {
        type:actionTypes.SEARCH_BLUR
    }

}
2.我们在 header 中的 index.js 文件引入 actionCreators.js,并在 mapDispathToProps方法体中将其 dispatch 出去
import React from "react";
import { connect } from "react-redux"; //导入connect,使得该组件与store连接
import { CSSTransition } from 'react-transition-group'; //引入css动画
import * as actionCreators from "./store/actionCreators";
import {
HeaderWrapper,
Logo,
Nav,
NavItem,
SearchWrapper,
NavSeach,
Addition,
Button
}
from "./style.js";
const Header=(props)=>{
return (
<HeaderWrapper>
<Logo href="/"/>
<Nav>
<NavItem className="left active" >首页</NavItem>
<NavItem className="left">下载APP</NavItem>
<SearchWrapper>
{/* 为包含的组件添加css样式 */}
<CSSTransition
in={props.focused} //动画的出场入场 true or false
timeout={200}
classNames="slide"
>
<NavSeach
onFocus={props.handleInputFouce}
onBlur={props.handleInputBlur}
className={props.focused?'focused':""}>
</NavSeach>
</CSSTransition>
<i className={props.focused?'focused iconfont':"iconfont"}></i>
</SearchWrapper>
<NavItem className="right">登录</NavItem>
<NavItem className="right">
<i className="iconfont"></i>
</NavItem>
</Nav>
<Addition>
<Button className="writing">
<i className="iconfont" style={{marginRight: 5 + 'px'}} ></i>
写文章</Button>
<Button className="reg">注册</Button>
</Addition>
</HeaderWrapper>
)
}
const mapStateToProps=(state)=>{
return {
focused:state.header.focused
}
}
const mapDisptachToProps=(disptach)=>{
return {
handleInputFouce(){
disptach(actionCreators.searchFocus());
},
handleInputBlur(){
disptach(actionCreators.searchBlur());
}
}
}
export default connect(mapStateToProps,mapDisptachToProps)(Header);3. 我们在 actionCreators.js 中使用的 type 是字符串,所以我们同样在 store 中创建 actionTypes.js,将其变成常量,并且在actionCreators中引入actionTypes
//将变量定义为常量
export const SEARCH_FOCUS='header/searchFocus';
export const SEARCH_BLUR='header/searchBlur';
4.修改header 目录中 store 下的 reducer.js,因为我们的字符串变成了常量,所以这里也需要做相应变更,引入actionTypes.js
import * as actionTypes from "./actionTypes"
const defaultState={
    focused:false
}
export default (state=defaultState,action)=>{
   if(action.type ===actionTypes.SEARCH_FOCUS){
       return {
         focused:true
       }
    }

    if(action.type ===actionTypes.SEARCH_BLUR){
         return {
           focused:false
         }
      }

    return state;

}
5.我们现在 header/store 目录下有:actionCreators.js、actionTypes.js、reducer.js 三个文件,如果我们每次引入都要一个一个找,那是相当麻烦的,所以我们在 header/store 目录下再新建一个 index.js,通过 index.js 来管理这三个文件,这样我们其他页面需要引入它们的时候,我们只需要引入 store 下的 index.js 即可。
import reducer from "./reducer";
//当需要导出一个js文件中的全部模块时,使用 * as xxx 语法
import * as actionCreators from "./actionCreators";
import * as actionTypes from "./actionTypes";
export  {reducer,actionCreators,actionTypes};    //导入{}  导出也要{}
//此文件 相当于reducer,actionCreators,actionTypes的出口6.此时我们需要处理下之前每一个文件对于actionCreators的引入,导出和导入的形式要一样
header/index.js:
import {actionCreators} from "./store";header/store/reducer.js
import {actionTypes} from "./index"header/store/actionCreators.js
import {actionTypes} from "./index"八、immutable.js
我们之前就知道不能直接修改 reducer.js 中的数据,我们采用深拷贝的方法获取一份数据进行修改,并返回。
在本案例中引入immutable.js,它是由 Facebook 团队开发的,用来帮助我们生产 immutable 对象,从而限制 state 不可被改变。
- 安装immutable.js
cnpm install immutable --saveconst { Map } = require('immutable');
const map1 = Map({ a: 1, b: 2, c: 3 });
const map2 = map1.set('b', 50);
map1.get('b') + " vs. " + map2.get('b'); // 2 vs. 50- 在本案例中的使用
header/store/reducer.js
import  {actionTypes} from "./index";
import {fromJS} from "immutable";

const defaultState=fromJS({
     focused:false
})
export default (state=defaultState,action)=>{
  //immutable 的set方法结合之前的immutable对象的值和设置的值,返回一个全新的对象
   if(action.type ===actionTypes.SEARCH_FOCUS){
       return  state.set('focused',true)
    }

    if(action.type ===actionTypes.SEARCH_BLUR){
         return state.set('focused',false)
      }

    return state;

}
header/index.js
import React from "react";
import { connect } from "react-redux"; //导入connect,使得该组件与store连接
import { CSSTransition } from 'react-transition-group'; //引入css动画
import {actionCreators} from "./store";
import {
HeaderWrapper,
Logo,
Nav,
NavItem,
SearchWrapper,
NavSeach,
Addition,
Button
}
from "./style.js";
const Header=(props)=>{
return (
<HeaderWrapper>
<Logo href="/"/>
<Nav>
<NavItem className="left active" >首页</NavItem>
<NavItem className="left">下载APP</NavItem>
<SearchWrapper>
{/* 为包含的组件添加css样式 */}
<CSSTransition
in={props.focused} //动画的出场入场 true or false
timeout={200}
classNames="slide"
>
<NavSeach
onFocus={props.handleInputFouce}
onBlur={props.handleInputBlur}
className={props.focused?'focused':""}>
</NavSeach>
</CSSTransition>
<i className={props.focused?'focused iconfont':"iconfont"}></i>
</SearchWrapper>
<NavItem className="right">登录</NavItem>
<NavItem className="right">
<i className="iconfont"></i>
</NavItem>
</Nav>
<Addition>
<Button className="writing">
<i className="iconfont" style={{marginRight: 5 + 'px'}} ></i>
写文章</Button>
<Button className="reg">注册</Button>
</Addition>
</HeaderWrapper>
)
}
const mapStateToProps=(state)=>{
    return {
        focused:state.header.get('focused')
    }
}
const mapDisptachToProps=(disptach)=>{
return {
handleInputFouce(){
disptach(actionCreators.searchFocus());
},
handleInputBlur(){
disptach(actionCreators.searchBlur());
}
}
}
export default connect(mapStateToProps,mapDisptachToProps)(Header);分析总结:
- 引入immutable中的fromJS
- 对defaultState使用fromJS 来设置数据
- 这时候我们不能直接在header/index.js的mapStateToProps中获取数据,需要通过get()方法获取数据
- 通过immutable的set()方法来修改数据,immutable 的set方法结合之前的immutable对象的值和设置的值,返回一个全新的对象
九、redux-immutable
在第八节中我们通过immutable.js保护数据不被修改,
const mapStateToProps=(state)=>{
return {
focused:state.header.get('focused')
}
}这个 header 也是 state 的值,所以我们也需要对它进行保护,但是它是由redux中的combineReducers生成的,所以我们就需要 redux-immutable
- 安装redux-immutable
src/store/reducer.js
import { combineReducers } from "redux-immutable";
// import headerReducer from "../common/header/store/reducer"
import {reducer as headerReducer} from "../common/header/store";  //从index中引入reducer  as 起别名
const reducer =combineReducers({
     header :headerReducer
})
export default reducer;
header/index.js
其他代码省略
const mapStateToProps=(state)=>{
    return {
        focused:state.get('header').get('focused')
    }
}
十、热门搜索功能的实现
10.1 热门搜索显示与隐藏
src/index.js
import React from "react";
import { connect } from "react-redux"; //导入connect,使得该组件与store连接
import { CSSTransition } from 'react-transition-group'; //引入css动画
import {actionCreators} from "./store";
import {
HeaderWrapper,
Logo,
Nav,
NavItem,
SearchWrapper,
NavSeach,
SearchInfo,
SearchInfoTitle,
SearchInfoSwitch,
SearchInfoList,
SearchInfoItem,
Addition,
Button
}
from "./style.js";
const getListArea=(show)=>{
if(show){
return (
<SearchInfo>
<SearchInfoTitle>
热门搜素
<SearchInfoSwitch>换一批</SearchInfoSwitch>
</SearchInfoTitle>
<SearchInfoList>
<SearchInfoItem>教育</SearchInfoItem>
<SearchInfoItem>教育</SearchInfoItem>
<SearchInfoItem>教育</SearchInfoItem>
<SearchInfoItem>教育</SearchInfoItem>
<SearchInfoItem>教育</SearchInfoItem>
<SearchInfoItem>教育</SearchInfoItem>
</SearchInfoList>
</SearchInfo>
)
}else{
return null
}
}
const Header=(props)=>{
return (
<HeaderWrapper>
<Logo href="/"/>
<Nav>
<NavItem className="left active" >首页</NavItem>
<NavItem className="left">下载APP</NavItem>
<SearchWrapper>
{/* 为包含的组件添加css样式 */}
<CSSTransition
in={props.focused} //动画的出场入场 true or false
timeout={200}
classNames="slide"
>
<NavSeach
onFocus={props.handleInputFouce}
onBlur={props.handleInputBlur}
className={props.focused?'focused':""}>
</NavSeach>
</CSSTransition>
<i className={props.focused?'focused iconfont':"iconfont"}></i>
{getListArea(props.focused)}
</SearchWrapper>
<NavItem className="right">登录</NavItem>
<NavItem className="right">
<i className="iconfont"></i>
</NavItem>
</Nav>
<Addition>
<Button className="writing">
<i className="iconfont" style={{marginRight: 5 + 'px'}} ></i>
写文章</Button>
<Button className="reg">注册</Button>
</Addition>
</HeaderWrapper>
)
}
const mapStateToProps=(state)=>{
return {
focused:state.get('header').get('focused')
}
}
const mapDisptachToProps=(disptach)=>{
return {
handleInputFouce(){
disptach(actionCreators.searchFocus());
},
handleInputBlur(){
disptach(actionCreators.searchBlur());
}
}
}
export default connect(mapStateToProps,mapDisptachToProps)(Header);src/style,js
import styled from "styled-components";
//引入图片
import logPic from "../../statics/logo.png";
export const HeaderWrapper=styled.div`
    position:relative;
    width:100%;
    height:56px;
    border-bottom:1px solid #f0f0f0;
`;
export const Logo=styled.a`
    display:block;
    position:absolute;
    top:0;
    left:0;
    width:100px;
    height:56px;
    background:url(${logPic});
    background-size:contain;
`
// contain把图像图像扩展至最大尺寸,以使其宽度和高度完全适应内容区域。
export const Nav=styled.div`
    width:945px;
    height:100%;
    box-sizing:border-box;
    padding-right:70px;
    margin:0 auto
`
export const NavItem=styled.div`
    padding:0 15px;
    line-height:56px;
    font-size:17px;
    &.left{
      float:left;
      color:#333;
    }
    &.right{
        float:right;
        color:#969696;
    }
    &.active{
        color:#ea6f5a;
    }
`
//加入css 动画
export const SearchWrapper=styled.div`
    float:left;
    position:relative;
    .iconfont{
        position:absolute;
        right:5px;
        bottom:5px;
        width:30px;
        line-height:30px;
        border-radius:19px;
        text-align:center;
        &.focused{
            color:#fff;
            background:#777;
        }
    }
`;
export const NavSeach=styled.input.attrs({
    placeholder:"搜索"
})`
    width:160px;
    height:38px;
    border:none;
    outline:none;
    margin:9px 0 0 20px;
    padding:0 30px 0 20px;
    box-sizing:border-box;
    border-radius:19px;
    font-size:14px;
    background:#eee;
    color:#666;
    &.focused{
        width:240px;
    }
    &::placeholder{
        color:#999;
    }

    &.slide-enter{
        transition:all .2s ease-out
    }
    &.slide-enter-active{
        width:240px;
    }
    &.slide-exit{
        transition:all .2s ease-out
    }
    &.slide-exit-active{
        width:160px;
    }
`;
export const SearchInfo=styled.div`
    position:absolute;
    left:0;
    top:56px;
    width:230px;
    padding:0 20px;
    box-shadow: 0 0 8px rgba(0,0,0,.2);
    background-color: #fff;
    border-radius: 4px;
    margin-top: 9px;
`;

export const SearchInfoTitle=styled.div`
    margin-top:20px;
    line-height:20px;
    font-size:14px;
    color:#787878;
`;

export const SearchInfoSwitch=styled.span`
    float:right;
    font-size:13px;
`;
export const SearchInfoList=styled.div`
    overflow:hidden;
    margin:10px 10px 10px 0;
`;
export const SearchInfoItem=styled.a`
    display:black;
    float:left;
    line-height:20px;
    padding:0 5px;
    margin:5px 10px 5px 0;
    font-size:12px;
    border:1px solid #ddd;
    color:#969696;
    border-radius:3px;
`;

export const Addition=styled.div`
    position:absolute;
    right:0;
    top:0;
    height:56px
`
export const Button=styled.div`
    float:right;
    line-height:38px;
    border-radius:19px;
    border:1px solid #ec6149;
    margin:9px 20px 0 0;
    padding:0 20px;
    font-size:14px;
    box-sizing:border-box;
    &.reg{
        color:#ec6149;
    }
    &.writing{
        background:#ec6149;
        color:#fff;
        &.yumao{
            padding-right:10px;
         }
    }

`注意:由于页面逐渐增大,header 中使用无状态组件已经满足不了要求,我们需要将无状态组件改成正常的组件
import React,{Component} from "react";
import { connect } from "react-redux"; //导入connect,使得该组件与store连接
import { CSSTransition } from 'react-transition-group'; //引入css动画
import {actionCreators} from "./store";
import {
HeaderWrapper,
Logo,
Nav,
NavItem,
SearchWrapper,
NavSeach,
SearchInfo,
SearchInfoTitle,
SearchInfoSwitch,
SearchInfoList,
SearchInfoItem,
Addition,
Button
}
from "./style.js";
class Header extends Component{
getListArea(show){
if(show){
return (
<SearchInfo>
<SearchInfoTitle>
热门搜素
<SearchInfoSwitch>换一批</SearchInfoSwitch>
</SearchInfoTitle>
<SearchInfoList>
<SearchInfoItem>教育</SearchInfoItem>
<SearchInfoItem>教育</SearchInfoItem>
<SearchInfoItem>教育</SearchInfoItem>
<SearchInfoItem>教育</SearchInfoItem>
<SearchInfoItem>教育</SearchInfoItem>
<SearchInfoItem>教育</SearchInfoItem>
</SearchInfoList>
</SearchInfo>
)
}else{
return null
}
}
render(){
return (
<HeaderWrapper>
<Logo href="/"/>
<Nav>
<NavItem className="left active" >首页</NavItem>
<NavItem className="left">下载APP</NavItem>
<SearchWrapper>
{/* 为包含的组件添加css样式 */}
<CSSTransition
in={this.props.focused} //动画的出场入场 true or false
timeout={200}
classNames="slide"
>
<NavSeach
onFocus={this.props.handleInputFouce}
onBlur={this.props.handleInputBlur}
className={this.props.focused?'focused':""}>
</NavSeach>
</CSSTransition>
<i className={this.props.focused?'focused iconfont':"iconfont"}></i>
{this.getListArea(this.props.focused)}
</SearchWrapper>
<NavItem className="right">登录</NavItem>
<NavItem className="right">
<i className="iconfont"></i>
</NavItem>
</Nav>
<Addition>
<Button className="writing">
<i className="iconfont" style={{marginRight: 5 + 'px'}} ></i>
写文章</Button>
<Button className="reg">注册</Button>
</Addition>
</HeaderWrapper>
)
}
}
const mapStateToProps=(state)=>{
return {
focused:state.get('header').get('focused')
}
}
const mapDisptachToProps=(disptach)=>{
return {
handleInputFouce(){
disptach(actionCreators.searchFocus());
},
handleInputBlur(){
disptach(actionCreators.searchBlur());
}
}
}
export default connect(mapStateToProps,mapDisptachToProps)(Header);10.2 Ajax获取推荐数据
由于我们的数据是模拟接口数据,需要对接口代码进行管理,在本案例中我们使用redux-thunk,在这里,我们要知道 create-react-app 的配置是包含 Node.js 的,所以我们可以依靠 Node.js 进行开发所需的 Mock 数据。
- 安装axios
cnpm i axios --save- 安装redux-thunk
cnpm i redux-thunk --save- 在创建store时使用redux-thunk
src/store/index.js
import {createStore, compose,applyMiddleware} from "redux";
import reducer from "./reducer.js";
import thunk from "redux-thunk"
const composeEnhancers= window.__REDUX_DEVTOOLS_EXTENSION_COMPOSE__ ||compose;
const store =createStore(reducer,composeEnhancers(
    applyMiddleware(thunk)
));
export default store;- 引入 redux-thunk
- 引入 redux 的
applyMiddleware,进行多中间件的使用 - 通过
applyMiddleware同时使用 redux-thunk 和 redux-dev-tools
header/index.js
import React,{Component} from "react";
import { connect } from "react-redux"; //导入connect,使得该组件与store连接
import { CSSTransition } from 'react-transition-group'; //引入css动画
import {actionCreators} from "./store";
import {
HeaderWrapper,
Logo,
Nav,
NavItem,
SearchWrapper,
NavSeach,
SearchInfo,
SearchInfoTitle,
SearchInfoSwitch,
SearchInfoList,
SearchInfoItem,
Addition,
Button
}
from "./style.js";
class Header extends Component{
getListArea(){
if(this.props.focused){
return (
<SearchInfo>
<SearchInfoTitle>
热门搜素
<SearchInfoSwitch>换一批</SearchInfoSwitch>
</SearchInfoTitle>
<SearchInfoList>
{
this.props.list.map((item)=>{
return <SearchInfoItem key={item}>{item}</SearchInfoItem>
})
}
</SearchInfoList>
</SearchInfo>
)
}else{
return null
}
}
render(){
return (
<HeaderWrapper>
<Logo href="/"/>
<Nav>
<NavItem className="left active" >首页</NavItem>
<NavItem className="left">下载APP</NavItem>
<SearchWrapper>
{/* 为包含的组件添加css样式 */}
<CSSTransition
in={this.props.focused} //动画的出场入场 true or false
timeout={200}
classNames="slide"
>
<NavSeach
onFocus={this.props.handleInputFouce}
onBlur={this.props.handleInputBlur}
className={this.props.focused?'focused':""}>
</NavSeach>
</CSSTransition>
<i className={this.props.focused?'focused iconfont':"iconfont"}></i>
{/* search部分 */}
{this.getListArea()}
</SearchWrapper>
<NavItem className="right">登录</NavItem>
<NavItem className="right">
<i className="iconfont"></i>
</NavItem>
</Nav>
<Addition>
<Button className="writing">
<i className="iconfont" style={{marginRight: 5 + 'px'}} ></i>
写文章</Button>
<Button className="reg">注册</Button>
</Addition>
</HeaderWrapper>
)
}
}
const mapStateToProps=(state)=>{
return {
focused:state.get('header').get('focused'),
list:state.getIn(['header','list']) //俩种写法
}
}
const mapDisptachToProps=(disptach)=>{
return {
handleInputFouce(){
disptach(actionCreators.getList());
disptach(actionCreators.searchFocus());
},
handleInputBlur(){
disptach(actionCreators.searchBlur());
}
}
}
export default connect(mapStateToProps,mapDisptachToProps)(Header);header/store/actionCreators.js
import  {actionTypes} from "./index";
import {fromJS} from "immutable";
import axios from "axios";
export const searchFocus=()=>({
    type:actionTypes.SEARCH_FOCUS
});

export const searchBlur=()=>{
    return {
    type:actionTypes.SEARCH_BLUR
 }
}

const changeList=(data)=>{
return {
    type:actionTypes.CHANGE_LIST,
    data:fromJS(data)
}
}
export const getList=()=>{
    return (disptach)=>{
        axios.get('/api/headerList.json').then((res)=>{
            const data=res.data.data;
            disptach(changeList(data))
        }).catch(()=>{
            console.log('error')
        })
    }
}
header/store/actionTypes.js
//将变量定义为常量
export const SEARCH_FOCUS='header/searchFocus';
export const SEARCH_BLUR='header/searchBlur';
export const CHANGE_LIST="header/changelist";
header/store/reducer.js
import  {actionTypes} from "./index";
import {fromJS} from "immutable";

const defaultState=fromJS({
     focused:false,
     list:[]
})
export default (state=defaultState,action)=>{
  //immutable 的set方法结合之前的immutable对象的值和设置的值,返回一个全新的对象
   if(action.type ===actionTypes.SEARCH_FOCUS){
       return  state.set('focused',true)
    }

    if(action.type ===actionTypes.SEARCH_BLUR){
         return state.set('focused',false)
      }

    if(action.type ===actionTypes.CHANGE_LIST){
          return  state.set('list',action.data)
     }

    return state;

}
分析总结:
- 成功引入redux-thunk,axios
- index——在mapDisptachToProps方法中派发action到actionCreators的
getList()方法。 - actionCreators——定义
getList()使用axios获取模拟数据,并且要在actionType中定义type。 - reducer——提供存储数据的地方list[],定义
action,接受参数data,并将action.data赋值给list数组,同时因为我们使用了 Immutable,所以需要将获取的数据转换为immutable类型。 - index——在const mapStateToProps中获取到list数据,并循环遍历输出该数据。
10.3 代码优化
header/store/reducer.js 使用 switch...case... 替换掉 if... 语句。
import  {actionTypes} from "./index";
import {fromJS} from "immutable";

const defaultState=fromJS({
     focused:false,
     list:[]
})
export default (state=defaultState,action)=>{
  //immutable 的set方法结合之前的immutable对象的值和设置的值,返回一个全新的对象
  switch(action.type){
       case actionTypes.SEARCH_FOCUS:
          return  state.set('focused',true);
       case actionTypes.SEARCH_BLUR:
          return state.set('focused',false);
       case actionTypes.CHANGE_LIST:
          return  state.set('list',action.data);
          default:
          return state;
  }
}
header/index.js
使用es6解构赋值语法
//代码省略
class Header extends Component{
getListArea(){
//es6解构赋值
const {focused} =this.props;
if(focused){
return (
<SearchInfo>
<SearchInfoTitle>
热门搜素
<SearchInfoSwitch>换一批</SearchInfoSwitch>
</SearchInfoTitle>
<SearchInfoList>
{
this.props.list.map((item)=>{
return <SearchInfoItem key={item}>{item}</SearchInfoItem>
})
}
</SearchInfoList>
</SearchInfo>
)
}else{
return null
}
}
render(){
const {focused,handleInputFouce,handleInputBlur} =this.props;
return (
<HeaderWrapper>
<Logo href="/"/>
<Nav>
<NavItem className="left active" >首页</NavItem>
<NavItem className="left">下载APP</NavItem>
<SearchWrapper>
{/* 为包含的组件添加css样式 */}
<CSSTransition
in={focused} //动画的出场入场 true or false
timeout={200}
classNames="slide"
>
<NavSeach
onFocus={handleInputFouce}
onBlur={handleInputBlur}
className={focused?'focused':""}>
</NavSeach>
</CSSTransition>
<i className={focused?'focused iconfont':"iconfont"}></i>
{/* search部分 */}
{this.getListArea()}
</SearchWrapper>
<NavItem className="right">登录</NavItem>
<NavItem className="right">
<i className="iconfont"></i>
</NavItem>
</Nav>
<Addition>
<Button className="writing">
<i className="iconfont" style={{marginRight: 5 + 'px'}} ></i>
写文章</Button>
<Button className="reg">注册</Button>
</Addition>
</HeaderWrapper>
)
}
}
//代码省略10.4 实现换一换功能
- 首先实现每一页展示10条数据
heade/store/reducer
import  {actionTypes} from "./index";
import {fromJS} from "immutable";

const defaultState=fromJS({
     focused:false,
     list:[],
     page:1,
     totalPage:1
})
export default (state=defaultState,action)=>{
  //immutable 的set方法结合之前的immutable对象的值和设置的值,返回一个全新的对象
  switch(action.type){
       case actionTypes.SEARCH_FOCUS:
          return  state.set('focused',true);
       case actionTypes.SEARCH_BLUR:
          return state.set('focused',false);
       case actionTypes.CHANGE_LIST:
          return  state.set('list',action.data).set('totalPage',action.totalPage);
          default:
          return state;
  }
}
heade/store/actionCreators
import  {actionTypes} from "./index";
import {fromJS} from "immutable";
import axios from "axios";
export const searchFocus=()=>({
    type:actionTypes.SEARCH_FOCUS
});

export const searchBlur=()=>{
    return {
    type:actionTypes.SEARCH_BLUR
 }
}

 const changeList=(data)=>{
return {
    type:actionTypes.CHANGE_LIST,
    data:fromJS(data),
    totalPage:Math.ceil(data.length/10)
}
}
export const getList=()=>{
    return (disptach)=>{
        axios.get('/api/headerList.json').then((res)=>{
            const data=res.data.data;
            disptach(changeList(data))
        }).catch(()=>{
            console.log('error')
        })
    }
}
heade/index
import React,{Component} from "react";
import { connect } from "react-redux"; //导入connect,使得该组件与store连接
import { CSSTransition } from 'react-transition-group'; //引入css动画
import {actionCreators} from "./store";
import {
HeaderWrapper,
Logo,
Nav,
NavItem,
SearchWrapper,
NavSeach,
SearchInfo,
SearchInfoTitle,
SearchInfoSwitch,
SearchInfoList,
SearchInfoItem,
Addition,
Button
}
from "./style.js";
class Header extends Component{
getListArea(){
//es6解构赋值
const {focused,page,list} =this.props;
const newList=list.toJS();
const pageList=[];
for(let i=(page-1)*10;i<page*10;i++){
pageList.push(
<SearchInfoItem key={newList[i]}>{newList[i]}</SearchInfoItem> //immutable 不支持list[i]
)
}
if(focused){
return (
<SearchInfo>
<SearchInfoTitle>
热门搜素
<SearchInfoSwitch>换一批</SearchInfoSwitch>
</SearchInfoTitle>
<SearchInfoList>
{pageList}
</SearchInfoList>
</SearchInfo>
)
}else{
return null
}
}
render(){
const {focused,handleInputFouce,handleInputBlur} =this.props;
return (
<HeaderWrapper>
<Logo href="/"/>
<Nav>
<NavItem className="left active" >首页</NavItem>
<NavItem className="left">下载APP</NavItem>
<SearchWrapper>
{/* 为包含的组件添加css样式 */}
<CSSTransition
in={focused} //动画的出场入场 true or false
timeout={200}
classNames="slide"
>
<NavSeach
onFocus={handleInputFouce}
onBlur={handleInputBlur}
className={focused?'focused':""}>
</NavSeach>
</CSSTransition>
<i className={focused?'focused iconfont':"iconfont"}></i>
{/* search部分 */}
{this.getListArea()}
</SearchWrapper>
<NavItem className="right">登录</NavItem>
<NavItem className="right">
<i className="iconfont"></i>
</NavItem>
</Nav>
<Addition>
<Button className="writing">
<i className="iconfont" style={{marginRight: 5 + 'px'}} ></i>
写文章</Button>
<Button className="reg">注册</Button>
</Addition>
</HeaderWrapper>
)
}
}
const mapStateToProps=(state)=>{
return {
focused:state.get('header').get('focused'),
list:state.getIn(['header','list']), //俩种写法
page:state.getIn(['header','page'])
}
}
const mapDisptachToProps=(disptach)=>{
return {
handleInputFouce(){
disptach(actionCreators.getList());
disptach(actionCreators.searchFocus());
},
handleInputBlur(){
disptach(actionCreators.searchBlur());
}
}
}
export default connect(mapStateToProps,mapDisptachToProps)(Header);分析总结:
- reducer.js ——设置页数
page和总页数totalPage - actionCreators.js ——计算总页数,每页展示10条数据
- reducer.js ——通过action设置总页数
totalPage,可以通过merge方法同时设置多个state值 - index——
mapStateToProps获取数据 - index——进行计算:一开始显示 0-9 共 10 条,换页的时候显示 10-19 ……以此类推
- 解决失焦获焦的问题
在做换页功能之前,我们解决之前遗留问题:在我们失焦于输入框的时候,我们的【热门搜索】模块就会消失,从而看不到我们点击【换一批】按钮的效果,所以我们需要修改代码,当鼠标在【热门模块】中时,这个模块不会消失,当我们鼠标失焦且鼠标不在热门模块中时,热门模块才消失。我们在下面代码中一块讲解
- 实现换页的功能
header/index
import React,{Component} from "react";
import { connect } from "react-redux"; //导入connect,使得该组件与store连接
import { CSSTransition } from 'react-transition-group'; //引入css动画
import {actionCreators} from "./store";
import {
HeaderWrapper,
Logo,
Nav,
NavItem,
SearchWrapper,
NavSeach,
SearchInfo,
SearchInfoTitle,
SearchInfoSwitch,
SearchInfoList,
SearchInfoItem,
Addition,
Button
}
from "./style.js";
class Header extends Component{
getListArea(){
//es6解构赋值
const {focused,page,totalPage,list,mouseIn,handleMouseEnter,handleMouseLeave,handelChangePage} =this.props;
const newList=list.toJS();
const pageList=[];
if(newList.length){
for(let i=(page-1)*10;i<page*10;i++){
pageList.push(
<SearchInfoItem key={newList[i]}>{newList[i]}</SearchInfoItem> //immutable 不支持list[i]
)
}
}
if(focused || mouseIn){
return (
<SearchInfo onMouseEnter={handleMouseEnter} onMouseLeave={handleMouseLeave}>
<SearchInfoTitle>
热门搜素
<SearchInfoSwitch onClick={()=>handelChangePage(page,totalPage)}>换一批</SearchInfoSwitch>
</SearchInfoTitle>
<SearchInfoList>
{pageList}
</SearchInfoList>
</SearchInfo>
)
}else{
return null
}
}
render(){
const {focused,handleInputFouce,handleInputBlur} =this.props;
return (
<HeaderWrapper>
<Logo href="/"/>
<Nav>
<NavItem className="left active" >首页</NavItem>
<NavItem className="left">下载APP</NavItem>
<SearchWrapper>
{/* 为包含的组件添加css样式 */}
<CSSTransition
in={focused} //动画的出场入场 true or false
timeout={200}
classNames="slide"
>
<NavSeach
onFocus={handleInputFouce}
onBlur={handleInputBlur}
className={focused?'focused':""}>
</NavSeach>
</CSSTransition>
<i className={focused?'focused iconfont':"iconfont"}></i>
{/* search部分 */}
{this.getListArea()}
</SearchWrapper>
<NavItem className="right">登录</NavItem>
<NavItem className="right">
<i className="iconfont"></i>
</NavItem>
</Nav>
<Addition>
<Button className="writing">
<i className="iconfont" style={{marginRight: 5 + 'px'}} ></i>
写文章</Button>
<Button className="reg">注册</Button>
</Addition>
</HeaderWrapper>
)
}
}
const mapStateToProps=(state)=>{
return {
focused:state.get('header').get('focused'),
list:state.getIn(['header','list']), //俩种写法
page:state.getIn(['header','page']),
totalPage:state.getIn(['header','totalPage']),
mouseIn:state.getIn(['header','mouseIn'])
}
}
const mapDisptachToProps=(disptach)=>{
return {
handleInputFouce(){
disptach(actionCreators.getList());
disptach(actionCreators.searchFocus());
},
handleInputBlur(){
disptach(actionCreators.searchBlur());
},
handleMouseEnter(){
disptach(actionCreators.mouseEnter());
},
handleMouseLeave(){
disptach(actionCreators.mouseLeave());
},
handelChangePage(page,totalPage){
if(page<totalPage){
disptach(actionCreators.changePageList(page+1));
}else{
disptach(actionCreators.changePageList(1));
}
}
}
}
export default connect(mapStateToProps,mapDisptachToProps)(Header);header/store/actionCreators
import  {actionTypes} from "./index";
import {fromJS} from "immutable";
import axios from "axios";
export const searchFocus=()=>({
    type:actionTypes.SEARCH_FOCUS
});

export const searchBlur=()=>{
    return {
    type:actionTypes.SEARCH_BLUR
 }
}

const changeList=(data)=>{
    return {
        type:actionTypes.CHANGE_LIST,
        data:fromJS(data),
        totalPage:Math.ceil(data.length/10)
    }
}
export const getList=()=>{
    return (disptach)=>{
        axios.get('/api/headerList.json').then((res)=>{
            const data=res.data.data;
            disptach(changeList(data))
        }).catch(()=>{
            console.log('error')
        })
    }
}
export const mouseEnter=()=>{
    return {
        type:actionTypes.MOUSE_ENTER
    }
}
export const mouseLeave=()=>{
    return {
        type:actionTypes.MOUSE_LEAVE
    }
}
export const changePageList=(page)=>{
    return {
        type:actionTypes.CHANGE_PAGELIST,
        page:page
    }
}
header/store/actionTypes
//将变量定义为常量
export const SEARCH_FOCUS='header/searchFocus';
export const SEARCH_BLUR='header/searchBlur';
export const CHANGE_LIST="header/changelist";
export const MOUSE_ENTER="header/mouseEnter";
export const MOUSE_LEAVE="header/mouseLeaver";
export const CHANGE_PAGELIST="header/changePageList";
header/store/reducer
import  {actionTypes} from "./index";
import {fromJS} from "immutable";

const defaultState=fromJS({
     focused:false,
     list:[],
     page:1,
     totalPage:1,
     mouseIn:false,
})
export default (state=defaultState,action)=>{
  //immutable 的set方法结合之前的immutable对象的值和设置的值,返回一个全新的对象
  switch(action.type){
       case actionTypes.SEARCH_FOCUS:
          return  state.set('focused',true);
       case actionTypes.SEARCH_BLUR:
          return state.set('focused',false);
       case actionTypes.CHANGE_LIST:
          return  state.merge({
               list:action.data,
               totalPage:action.totalPage
          })
       case actionTypes.MOUSE_ENTER:
          return  state.set('mouseIn',true);
       case actionTypes.MOUSE_LEAVE:
          return  state.set('mouseIn',false);
       case actionTypes.CHANGE_PAGELIST:
          return  state.set('page',action.page);
       default:
          return state;
  }
}
分析总结:
1. 解决的失焦获焦问题:
- 在 reducer.js 中设置鼠标移动到热门模块为mouseIn:
false - 在 index.js 中设置鼠标进入为 handleMouseEnter,移出为 handleMouseLeave,并且在
mapDispathToProps定义 这俩个方法 - 在 actionCreators.js 中定义这两个方法:mouseEnter 和 mouseLeave
- 在 actionTypes.js 中新增
action类型 - 在 reducer.js 中判断这两个
action执行设置mouseIn的true or false - 在 index.js 中
mapStateToProps获取mouseIn - 在 index.js 中的判断中多加一个
mouseIn,这样只要有一个为true,它就不会消失
2. 实现换一批的功能:
- 在 index.js 中进行换页功能实现,添加点击事件,传递参数
page和totalPage - 在 index.js 调用 handelChangePage 方法,进行判断,并
dispatch方法 - 在 actionCreators.js 中定义 changePageList 方法,并接收当前页数page
- 在 actionTypes.js 中定义
action - 在 reducer.js 中判断
action类型,并进行设置页数
10.5 换一批 的图标动画
header/index.js
//代码省略
if(focused || mouseIn){
return (
<SearchInfo onMouseEnter={handleMouseEnter} onMouseLeave={handleMouseLeave}>
<SearchInfoTitle>
热门搜素
<SearchInfoSwitch onClick={()=>handelChangePage(page,totalPage,this.spinIcon)}>
<i ref={(icon)=>{this.spinIcon=icon}} className="iconfont spin"></i>
换一批
</SearchInfoSwitch>
</SearchInfoTitle>
<SearchInfoList>
{pageList}
</SearchInfoList>
</SearchInfo>
)
}else{
return null
}
//代码省略
handelChangePage(page,totalPage,spinIcon){
if(spinIcon.style.transform === 'rotate(360deg)') {
spinIcon.style.transform = 'rotate(0deg)';
} else {
spinIcon.style.transform = 'rotate(360deg)';
}
if(page<totalPage){
disptach(actionCreators.changePageList(page+1));
}else{
disptach(actionCreators.changePageList(1));
}
}
//代码省略
- 在 style.js中添加动画
- 在 index.js 中给
i标签添加ref,并通过handelChangePage方法传递过去 - 在 index.js 中设置它原生 DOM 的 CSS 属性
十一、避免无意义的ajax请求,提升组件性能
在之前的代码中,我们每次聚焦,都会请求数据,其实我们只需要第一次请求数据就行,所以要根据 list 的值来判断是否需要请求数据
其他代码省略
 <NavSeach
           onFocus={()=>handleInputFouce(list)}
           onBlur={handleInputBlur}
           className={focused?'focused':""}
>
</NavSeach>
handleInputFouce(list){
if(list.size===0){
disptach(actionCreators.getList());
}
disptach(actionCreators.searchFocus());
}- 给
searchFocus传递list - 在
searchFocus中判断list的size是不是等于 0,如果是才请求数据(第一次),不是的话则不请求
十二、路由
关于路由的知识点,我在之前写过一个专门介绍路由的文章,欢迎大家浏览嘻嘻https://blog.csdn.net/We_jia/article/details/89353729
在 src 下新建 pages 文件夹,然后在该文件夹下新建文件夹和文件:
- src/pages/detail/index.js
import React,{Component} from "react";
class Detail extends Component {
    render() {
        return (
            <div>detail</div>
        );
    }
}

export default Detail;- src/pages/home/index.js
import React, { Component } from 'react'
class Home extends Component {
  render() {
    return (
      <div>Home</div>
    )
  }
}
export default Home;- App.js中引入这俩个模块并配置路由
import React,{Component} from 'react';
import Header from './common/header';
import {GlobalStyled} from './style.js'; //全局样式
import {IconGlobalStyled} from './statics/iconfont/iconfont';  //全局使用iconfont
import { Provider  } from "react-redux";  //引入 react-redux
import store from "./store/index"    //引入store
import{BrowserRouter,Route} from "react-router-dom";
import Home from "./pages/home";
import Detail from "./pages/detail";

class App extends Component{
	render(){
	    return(
	        <Provider store={store}>
				<div>
					{/* 组件名字一定要大写 */}
					<GlobalStyled />
					<IconGlobalStyled />
					<Header></Header>
					{/* 在页面中引用组件 */}
					<BrowserRouter>
						<Route path="/" exact component={Home}></Route>
						<Route path="/detail" exact component={Detail}></Route>
					</BrowserRouter>
				</div>
			</Provider>
	    );
	}
}
export default App;
现在,我们切换下路由,就可以看到不用的页面,这些页面我们也可以通过编辑对应的 index.js 来修改。
十三、页面实现
1.通常dangerSetInnerHTML是和__html配套使用的,用来在一个标签中插入许多个标签(安全的插入,避免xss攻击);
var HelloMessge = React.createClass({
    render: <div
                dangerouslySetInnerHTML={{
                    __html: '<h3>hahhah</h3>'
                }}>
            </div>
})
2.使用PureComponent 替换Component 提升性能,Store中的数据改变,与本组件无关是就不会调用render函数,重新渲染界面,底层原理:shouldComponentUpdate
3.innerref
4.Redirect react-router的重定向
5.异步组件
- 实现异步加载组件,只有点击详情页时才会加载组件
- 安装 cnpm install react-loadable --save
- 使用在二级菜单detail 文件加下创建 loadable.js
import React from "react"
import Loadable from 'react-loadable';

const LoadableComponent = Loadable({
  loader: () => import('./'),
  loading(){
    return <div>正在加载</div>
  }
});

export default  ()=> <LoadableComponent/>
在App.js中改变引入detail的方式
import Detail from "./pages/detail/loadable.js";在detail/index.js 引入withRouter
import React,{PureComponent} from "react";
import {DetailWrapper,Header,Content} from "./style";
import {connect} from "react-redux";
import {actionCreators} from "./store";
import {withRouter} from "react-router-dom"
class Detail extends PureComponent {
    render() {
        return (
            <DetailWrapper>
                <Header>{this.props.title}</Header>
                <Content dangerouslySetInnerHTML={{__html:this.props.content}}/>

            </DetailWrapper>
        );
    }
    componentDidMount(){
        this.props.getDetail(this.props.match.params.id)
    }
}

const mapState=(state)=>({
        title:state.getIn(['detail','title']),
        content:state.getIn(['detail','content'])
    }
)
const mapDispatch=(disptach)=>({
    getDetail(id){
        disptach(actionCreators.getDetail(id))
    }

})
export default connect(mapState,mapDispatch)(withRouter(Detail));


 399
399


 被折叠的 条评论
为什么被折叠?
被折叠的 条评论
为什么被折叠?
 到【灌水乐园】发言


