


说到导航栏,根据WYSIWYG(所见即所得)原则,我们来看看到底是什么梗,请看大屏幕:

我想,当你看完上图你就马上恍然大悟的说:原来这玩意就是传说中的导航栏啊,实在是脸熟得很啊。没错确实脸熟的很,QQ,微信和网易云音乐以及ZAKER这几款流行的手机软件上都能见到导航栏的存在,甚至毫不夸张的说,只要你打开任何一款软件,你就能找到导航栏的存在。至此你就知道,这东西是多么的有用。好了,不瞎逼逼了,咋们来看看这功能是怎么实现的。
实现方法一:FragmentManager+Fragment
首先,咋们来看主布局文件main.xml
<?xml version="1.0" encoding="utf-8"?>
<LinearLayout xmlns:android="http://schemas.android.com/apk/res/android"
    xmlns:tools="http://schemas.android.com/tools"
    android:layout_width="match_parent"
    android:layout_height="match_parent"
    android:orientation="vertical"
    tools:context="com.teachmodel.MainActivity">

    <FrameLayout
        android:id="@+id/fragment_container"
        android:layout_width="match_parent"
        android:layout_height="0dip"
        android:layout_weight="1"></FrameLayout>

    <LinearLayout
        android:layout_width="match_parent"
        android:layout_height="40dp"
        android:background="@color/bottom_color"
        android:orientation="horizontal">

        <TextView
            android:id="@+id/tv_first"
            android:layout_width="0dip"
            android:layout_height="match_parent"
            android:layout_weight="1"
            android:gravity="center"
            android:text="@string/first"
            android:textColor="@color/pressed_text_color"
            android:textSize="@dimen/mid_text_size" />

        <TextView
            android:id="@+id/tv_second"
            android:layout_width="0dip"
            android:layout_height="match_parent"
            android:layout_weight="1"
            android:gravity="center"
            android:text="@string/second"
            android:textColor="@color/normal_text_color"
            android:textSize="@dimen/mid_text_size" />

        <TextView
            android:id="@+id/tv_third"
            android:layout_width="0dip"
            android:layout_height="match_parent"
            android:layout_weight="1"
            android:gravity="center"
            android:text="@string/third"
            android:textColor="@color/normal_text_color"
            android:textSize="@dimen/mid_text_size" />

        <TextView
            android:id="@+id/tv_fouth"
            android:layout_width="0dip"
            android:layout_height="match_parent"
            android:layout_weight="1"
            android:gravity="center"
            android:text="@string/fouth"
            android:textColor="@color/normal_text_color"
            android:textSize="@dimen/mid_text_size" />


    </LinearLayout>
</LinearLayout>
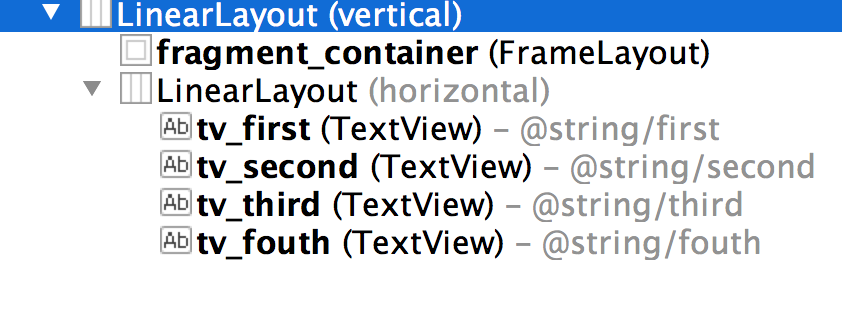
该布局对应的视图结构是这样的:
从上图我们可以知道,导航栏的现实,需要一个容器(FrameLayout)和众多导航标签(我这里是四个TextView),当你点击标签的时候,就相当于告诉容器可以把你以前装的东西倒掉,装上我的东西了。同时标签自己做相应的刷新,例如改变颜色或者图片什么的。
话不多说,我们接着上代码,请看到屏幕。
MainActivity.java
package com.teachmodel;

import android.app.Activity;
import android.app.Fragment;
import android.app.FragmentManager;
import android.os.Bundle;
import android.view.View;
import android.widget.TextView;

import com.teachmodel.fragment.FirstFragment;
import com.teachmodel.fragment.FouthFragment;
import com.teachmodel.fragment.SecondFragment;
import com.teachmodel.fragment.ThirdFragment;

import java.util.ArrayList;
import java.util.List;

public class MainActivity extends Activity implements View.OnClickListener {

    private FragmentManager fm;//碎片管理者,用于管理众多的Fragment
    private List<Fragment> fragmentList;//Fragment队列,用于存放标签对应的fragment
    private int currentTag = 0;//当前显示的标签
    private TextView tv[] = new TextView[4];//标签数组


    @Override
    protected void onCreate(Bundle savedInstanceState) {
        super.onCreate(savedInstanceState);
        setContentView(R.layout.activity_main);
        init();
        setListener();
    }

    private void init() {
        //初始化标签对应的Fragment并加入Fragment队列中
        fragmentList = new ArrayList<>();
        fragmentList.add(new FirstFragment());
        fragmentList.add(new SecondFragment());
        fragmentList.add(new ThirdFragment());
        fragmentList.add(new FouthFragment());

        //初始化碎片管理者,并给容器加入初始界面fragmentList.get(0)
        fm = getFragmentManager();
        fm.beginTransaction().add(R.id.fragment_container, fragmentList.get(0)).commit();

        //初始化标签
        tv[0] = (TextView) findViewById(R.id.tv_first);
        tv[1] = (TextView) findViewById(R.id.tv_second);
        tv[2] = (TextView) findViewById(R.id.tv_third);
        tv[3] = (TextView) findViewById(R.id.tv_fouth);
    }

    //标签绑定监听
    private void setListener() {
        for (int i = 0; i < tv.length; i++) {
            tv[i].setOnClickListener(this);
        }
    }

    //标签切换时更新标签状态
    private void changeTab(int flag) {
        for (int i = 0; i < tv.length; i++) {
            if (i == flag) {
                tv[i].setTextColor(getResources().getColor(R.color.pressed_text_color));
            } else {
                tv[i].setTextColor(getResources().getColor(R.color.normal_text_color));
            }
        }
    }

    //进行切换的相关操作
    @Override
    public void onClick(View v) {
        switch (v.getId()) {
            case R.id.tv_first: {
                currentTag = 0;
                break;
            }
            case R.id.tv_second: {
                currentTag = 1;
                break;
            }
            case R.id.tv_third: {
                currentTag = 2;
                break;
            }
            case R.id.tv_fouth: {
                currentTag = 3;
                break;
            }
        }
        changeTab(currentTag);
        //替换容器内容
        fm.beginTransaction().replace(R.id.fragment_container, fragmentList.get(currentTag)).commit();
    }
}
FirstFragment.java
package com.teachmodel.fragment;

import android.app.Fragment;
import android.os.Bundle;
import android.support.annotation.Nullable;
import android.view.LayoutInflater;
import android.view.View;
import android.view.ViewGroup;

import com.teachmodel.R;

/**
 * Created by windbreaker on 16/3/23.
 */
public class FirstFragment extends Fragment {
    private View v;

    @Nullable
    @Override
    public View onCreateView(LayoutInflater inflater, ViewGroup container, Bundle savedInstanceState) {
        v = inflater.inflate(R.layout.fragment_first, null);
        return v;
    }
}
Note:SecondFragment,ThirdFragment和FouthFragment.java与FirstFragment出了布局文件名不同之外,其他均相同,因此不上代码。fragment_first.xml
<?xml version="1.0" encoding="utf-8"?>
<LinearLayout xmlns:android="http://schemas.android.com/apk/res/android"
    android:layout_width="match_parent"
    android:layout_height="match_parent"
    android:background="@color/yellow"
    android:orientation="vertical">

    <TextView
        android:layout_gravity="center"
        android:layout_width="wrap_content"
        android:layout_height="wrap_content"
        android:text="@string/first"
        android:textSize="@dimen/big_text_size" />
</LinearLayout>
Note:fragment_second,fragment_third和fragment_fouth布局完全相同,因此略去。
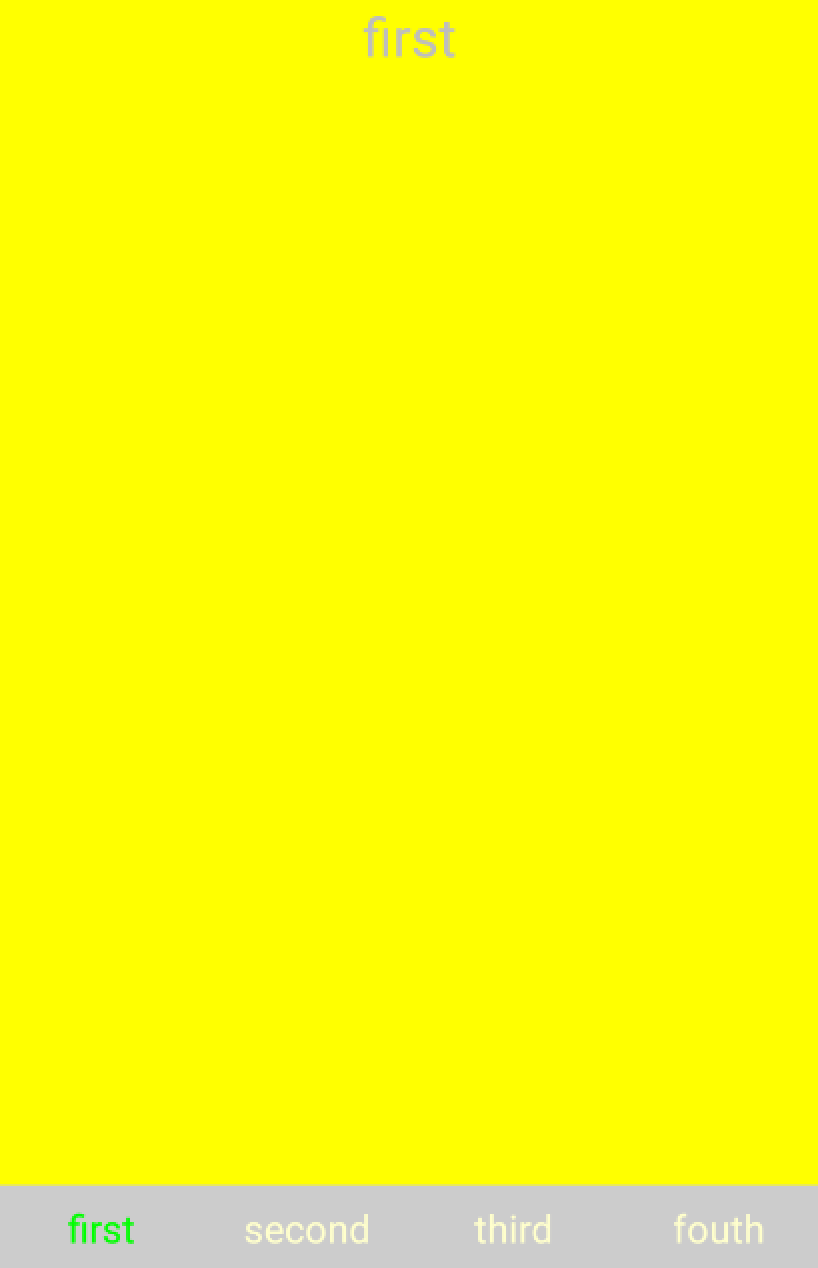
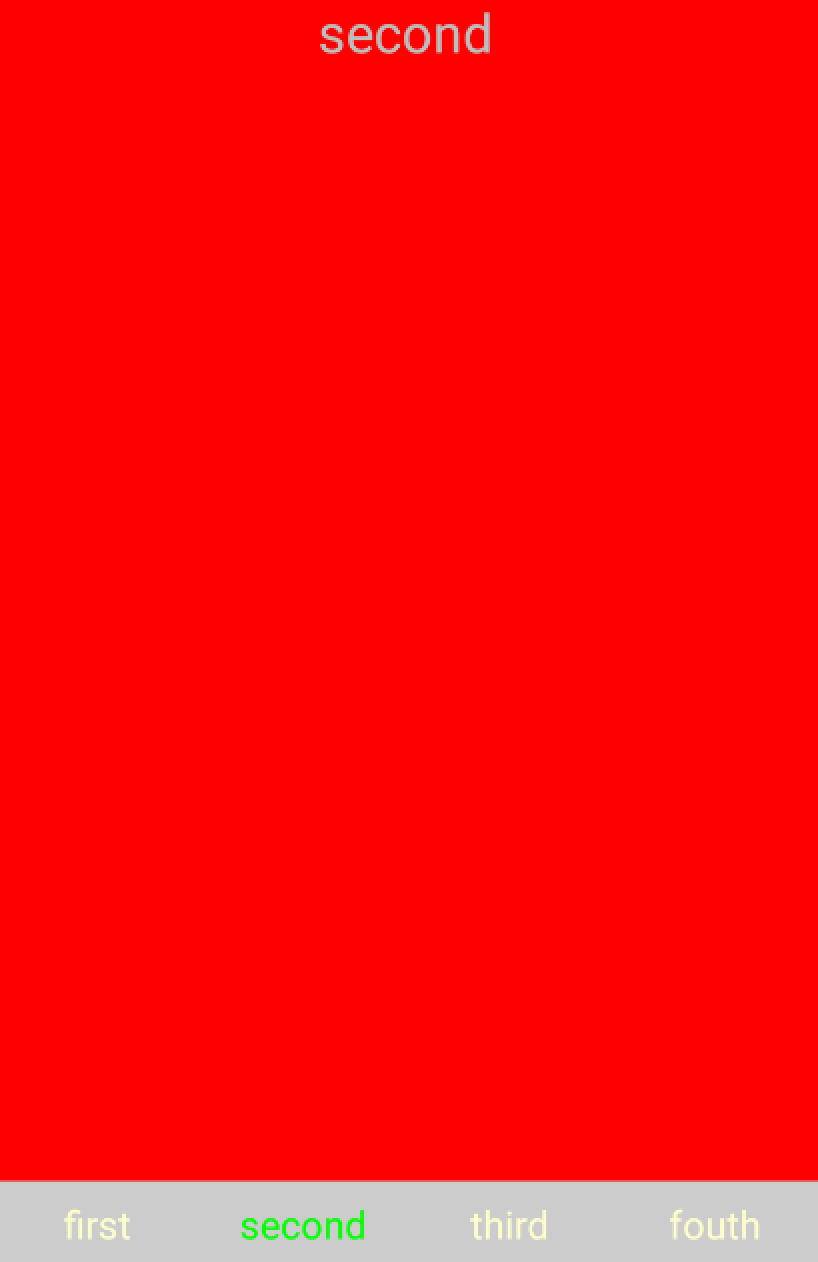
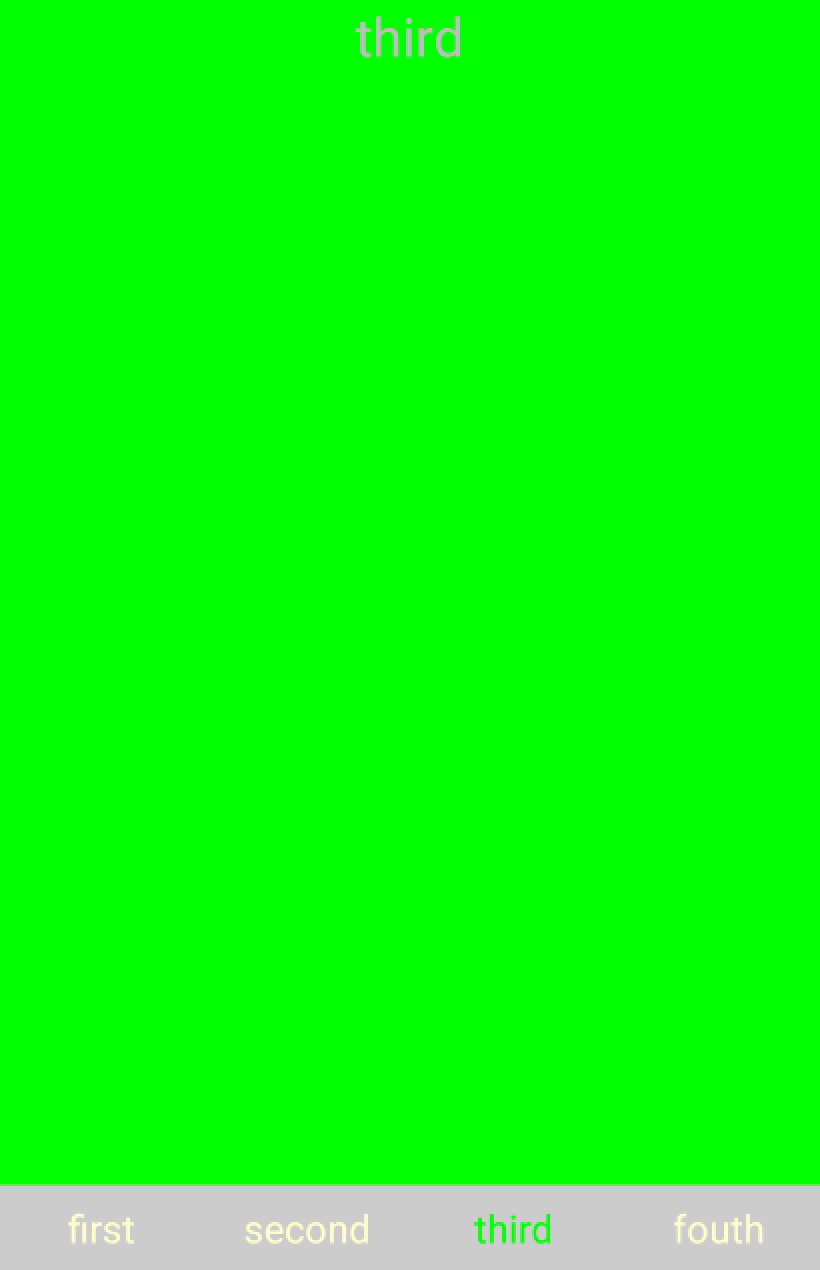
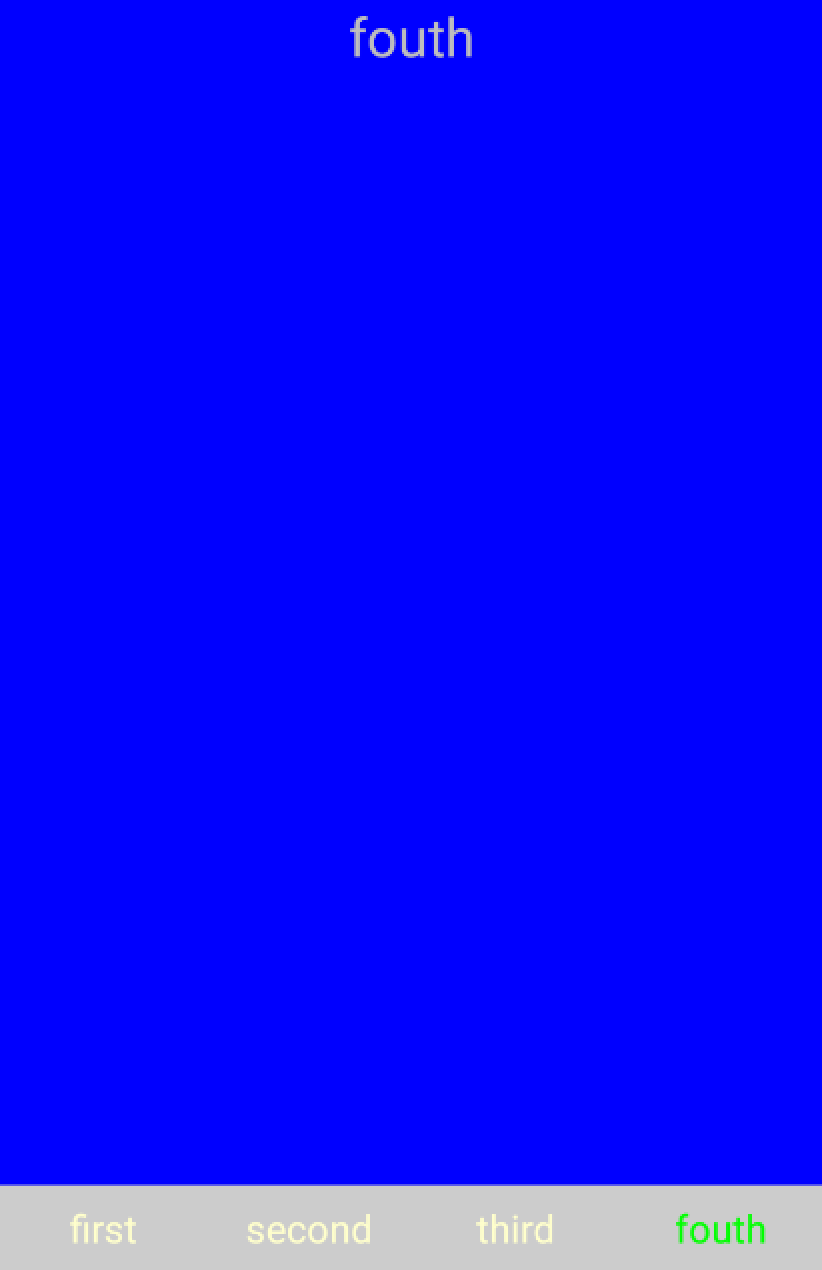
至此,我们运行一下程序,即可实现导航栏效果,请看大屏幕:
各位看客老爷们,相信你们看完功能截图后一定会在心里默默腹诽我:这哥们的审美真是差的可以,这界面粗糙程度堪比野猪皮。对此我只能说:好看的界面设计是需要美工的,尤其是女的。你看我至今单枪匹马战斗在编程前线,你们要是好心就给我介绍个妹子吧。
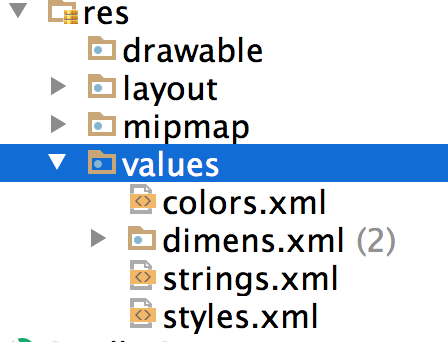
接下来,在讲第二种实现方法是之前,我想先讲讲android资源管理的知识,请先看大屏幕:
在android项目里找到res文件夹,打开后可以看到有layout文件夹,mipmap文件夹,drawable文件夹和values文件夹。其中drawable文件夹是用来存放一些state list drawable文件的,也就是一些状态配置类的XML文件;layout文件夹则是用来存放一些XML布局文件;mipmap文件夹用来存放各种图片文件;以及values文件夹则是用来存放一些资源文件,如colors(颜色资源文件),dimens(尺寸资源文件),strings(字符串资源文件)以及styles(主题资源文件)。
如果你是一个android开发者,相信你经常会遇到给各种控件配置颜色,大小,说明文字等等一些内容,如果直接在每个控件的属性里进行设置,就像这样:
 <TextView
            android:id="@+id/tv_first"
            android:layout_width="0dip"
            android:layout_height="match_parent"
            android:layout_weight="1"
            android:gravity="center"
            android:text="first"
            android:textColor="#00ff00"
            android:textSize="18sp" />
文字,颜色和字体大小都直接暴露在控件属性里,这样的话对于后期管理很不方便。因为假如你有200多个这样的控件,有着相同的属性配置,而且分布在不同的布局文件里,有一天,你的boss让你把所有这个空间的字体,颜色都换一个,这样的话,你是不是要悲催的去不同的布局文件里把这200多个空间都改一遍属性?如果真有那么一天,我想你当时应该会这么想:真TM装逼不成,瞬间懵逼。所以为了不让这样的事情发生,我们最好把所有的颜色,文字和尺寸都当成一种资源来进行管理。例如,我们把颜色资源定义在colors文件里,把尺寸资源定义在dimens文件里,把字符串资源定义在strings文件里,如下所示:colors.xml
<?xml version="1.0" encoding="utf-8"?>
<resources>
    <color name="bottom_color">#cccccc</color>
    <color name="normal_text_color">#ffffcc</color>
    <color name="pressed_text_color">#00ff00</color>
    <color name="white">#ffffff</color>
    <color name="yellow">#ffff00</color>
    <color name="red">#ff0000</color>
    <color name="blue">#0000ff</color>
    <color name="green">#00ff00</color>
</resources>
dimens.xml<resources> <!-- Default screen margins, per the Android Design guidelines. --> <dimen name="activity_horizontal_margin">16dp</dimen> <dimen name="activity_vertical_margin">16dp</dimen> <dimen name="mid_text_size">18sp</dimen> <dimen name="big_text_size">25sp</dimen> </resources>
strings.xml<resources> <string name="app_name">TeachModel</string> <string name="first">first</string> <string name="second">second</string> <string name="third">third</string> <string name="fouth">fouth</string> </resources>
然后在把控件的属性改成这样:<TextView android:id="@+id/tv_first" android:layout_width="0dip" android:layout_height="match_parent" android:layout_weight="1" android:gravity="center" android:text="@string/first" android:textColor="@color/pressed_text_color" android:textSize="@dimen/mid_text_size" />
这样的话,我们就可以通过修改对应资源文件里的值来修改相应控件的属性的目的了。该注意的事项略略的说了一下,接下来让我们来讲导航栏的第二种实现方式:
FragmentTabHost+Fragment
用这种方式实现的话,首先你要把AndroidManifest.xml文件的主题改成android:theme="@style/Theme.AppCompat.Light.NoActionBar"
然后把所有的Fragment导入的包改成V4包的Fragment。再改一下MainActivity.java文件和对应的布局文件activity_main.xml如下:
MainActivity.java
activity_main.xmlpackage com.teachmodel; import android.os.Bundle; import android.support.v4.app.FragmentTabHost; import android.support.v7.app.AppCompatActivity; import android.view.LayoutInflater; import android.view.View; import android.widget.TabHost; import android.widget.TextView; import com.teachmodel.fragment.FirstFragment; import com.teachmodel.fragment.FouthFragment; import com.teachmodel.fragment.SecondFragment; import com.teachmodel.fragment.ThirdFragment; public class MainActivity extends AppCompatActivity { private Class mFragmentArray[] = {FirstFragment.class, SecondFragment.class, ThirdFragment.class, FouthFragment.class}; private int mTextviewArray[] = {R.string.first, R.string.second, R.string.third, R.string.fouth}; private FragmentTabHost mTabHost; @Override protected void onCreate(Bundle savedInstanceState) { super.onCreate(savedInstanceState); setContentView(R.layout.activity_main); init(); initTabContent(); } private void init() { mTabHost = (FragmentTabHost) findViewById(R.id.mytabhost); } private void initTabContent() { mTabHost.setup(this, getSupportFragmentManager(), R.id.fragment_container); for (int i = 0; i < mFragmentArray.length; i++) { String str = getResources().getString(mTextviewArray[i]); TabHost.TabSpec tabSpec = mTabHost.newTabSpec(str).setIndicator(getTabItemView(i)); mTabHost.addTab(tabSpec, mFragmentArray[i], null); /*设置选项之间的竖线*/ mTabHost.getTabWidget().setDividerDrawable(null); } } private View getTabItemView(int index) { View view = LayoutInflater.from(this).inflate(R.layout.activity_main_bottom_tab_item_view, null); TextView textView = (TextView) view.findViewById(R.id.textview); String str = getResources().getString(mTextviewArray[index]); textView.setText(str); return view; } }
<?xml version="1.0" encoding="utf-8"?>
<LinearLayout xmlns:android="http://schemas.android.com/apk/res/android"
    xmlns:tools="http://schemas.android.com/tools"
    android:layout_width="match_parent"
    android:layout_height="match_parent"
    android:orientation="vertical"
    android:clipToPadding="true"
    android:fitsSystemWindows="true">

    <FrameLayout
        android:id="@+id/fragment_container"
        android:layout_width="match_parent"
        android:layout_height="0dip"
        android:layout_weight="1"></FrameLayout>

    <android.support.v4.app.FragmentTabHost
        android:id="@+id/mytabhost"
        android:layout_width="fill_parent"
        android:layout_height="@dimen/activity_main_bottom_height"></android.support.v4.app.FragmentTabHost>
</LinearLayout>
除了修改这两个文件之外,还要在layout文件夹里加入一个activity_main_bottom_tab_item_view.xml文件用于底部标签的显示:
<?xml version="1.0" encoding="utf-8"?>
<LinearLayout xmlns:android="http://schemas.android.com/apk/res/android"
    android:layout_width="wrap_content"
    android:layout_height="wrap_content"
    android:gravity="center"
    android:orientation="vertical">

    <TextView
        android:id="@+id/textview"
        android:layout_width="wrap_content"
        android:layout_height="wrap_content"
        android:layout_gravity="center"
        android:textColor="@drawable/selector_tab_text_background"
        android:textSize="@dimen/mid_text_size"></TextView>
</LinearLayout>
然后在drawable文件夹里加入一个selector_tab_text_background.xml状态文件用于改变标签的状态:
这些新增文件里的资源配置,请到相关的资源文件里添加。<?xml version="1.0" encoding="utf-8"?> <selector xmlns:android="http://schemas.android.com/apk/res/android"> <item android:state_selected="true" android:color="@color/yellow"></item> <item android:state_selected="false" android:color="@color/green"></item> </selector>运行效果如果上图所示,我想到这里你们会觉得第一种方式要简单一些也好理解,但为什么要存在第二种方式呢?貌似挺麻烦的。其实如果你的程序里不需要用到OnAttach()函数即不存在绑定关联的话,你用第一种方式就OK了。但是如果要用到OnAttach()函数的话,你还是用第二种方法吧。不过话说回来你只需要给Fragment传个Activity的context的话,你在Fragment里写个带参数或者Bundle参数的getInstantce()函数也是OK的哦,这样你就能使用第一种方式来实现导航栏效果了。
Note:如果你不知道什么是绑定关系也不知道OnAttach()是干什么用的,请自觉忽略我上面说的话,这东西你以后也许会懂了,并不急于一时。
好了,今天吹牛逼的时间就结束了,写了这么长的一篇文章实属不易啊,希望各位看客们能从中学到点什么,这样也不辜负我花时间写博客了。最后弱弱的提一句:我还是单身,如果你长的不错的话,可以联系我~~~~~~~~~~
第二种实现方式的下载链接:点击打开链接


 1131
1131


 被折叠的 条评论
为什么被折叠?
被折叠的 条评论
为什么被折叠?
 到【灌水乐园】发言


