


 本文介绍了一个自定义的Android视图组件,用于实现在图标右上角显示小红点或包含数字的小红点。该组件支持调整字体大小、颜色、背景大小及颜色,适用于圆点、数字加圆点或数字加椭圆的场景。通过源码实现,可灵活应用于各种UI需求。
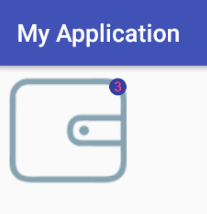
我们经常会遇到需要在图标的右上角显示一个小红点或者包含数字的小红点,在网上搜罗了一番,然后决定自己来写一个~~

效果图如下:
可以是圆点、数字加圆点、数字加椭圆
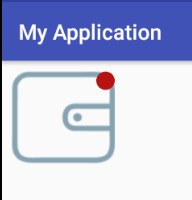
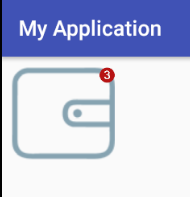
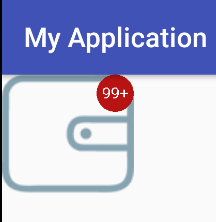
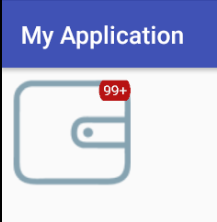
字体大小颜色和背景大小颜色都可以调整。

源码地址:https://github.com/SkUnK-cc/MyWidgetLib
如何使用?
首先引入依赖
implementation 'com.github.wuxiaogui593:MyWidgetLib:v1.1'然后就可以使用了
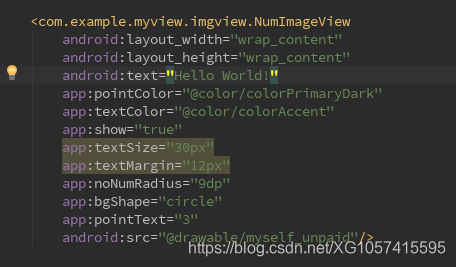
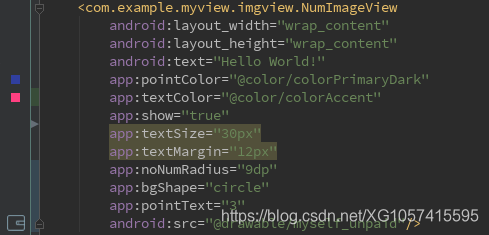
先来看看有哪些属性~
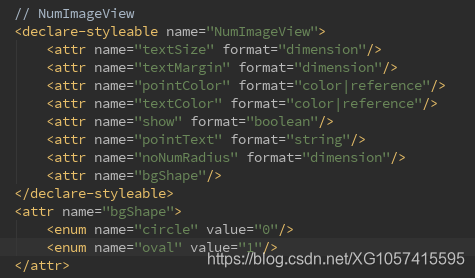
textSize是字体的大小;textMargin是字体距离背景边缘的宽度;pointColor是背景图形的颜色;textColor是字体颜色;
show决定是否展示右上角圆点和字体,当show为false时,和普通图片没区别;pointText是右上角的字;
noNumRadius是只显示圆点不显示数字的时候,圆点的半径;bgShape代表圆形还是椭圆。
也可以在代码中设置这些属性。
比如这样
noNumRadius只在pointText长度为0,也就是没文字的时候,noNumRadius才生效。
代码
继承自AppCompatImageView
public class NumImageView extends AppCompatImageView初始化,这里有一点注意的
getDimension 、 getDimensionPixelSize 、getDimensionPixelOffset的区别
这三个方法返回的值有一个共性:如果xml中设置的值是 X px,则结果为 X ,如果xml中的值是 X dp,则结果为 X 乘屏幕密度
getDimension()是基于当前DisplayMetrics进行转换,获取指定资源id对应的尺寸,如果是px,则返回原数值,如果是dp,则乘以屏幕密度后返回,也就是说返回的是像素值。要注意这个函数的返回值是float。
getDimensionPixelSize()与getDimension()功能类似,不同的是将结果转换为int,并且小数部分四舍五入。
getDimensionPixelOffset()与getDimension()功能类似,不同的是将结果转换为int,并且偏移转换(offset conversion,函数命名中的offset是这个意思)是直接截断小数位,即取整(其实就是把float强制转化为int,注意不是四舍五入哦)。
private void init(Context context, AttributeSet attrs) {
        TypedArray array = context.obtainStyledAttributes(attrs, R.styleable.NumImageView);
        textSize = (int) array.getDimension(R.styleable.NumImageView_textSize,30);
        ovalPadding = (int) array.getDimension(R.styleable.NumImageView_textMargin,6);
        bgColor = array.getColor(R.styleable.NumImageView_pointColor,Color.parseColor("#B71212"));
        textColor = array.getColor(R.styleable.NumImageView_textColor,Color.parseColor("#ffffff"));
        showPoint = array.getBoolean(R.styleable.NumImageView_show,false);
        text = array.getString(R.styleable.NumImageView_pointText);
        if (text ==null){
            text = "";
        }
        noNumRadius = (int) array.getDimension(R.styleable.NumImageView_noNumRadius,0);
        bgShape = array.getInteger(R.styleable.NumImageView_bgShape,-1);
    }
当text的长度为0时,只画圆点 drawCircle() ;否则,根据bgShape指定背景形状,圆形drawCircleWithText()或椭圆drawOvalWithText();如果没有指定bgShape,则当text长度为1时,形状为圆形,大于1时,形状为椭圆。
protected void onDraw(Canvas canvas) {
        super.onDraw(canvas);
        if(!showPoint)return;
        initPaint();
        if(text.length()==0){
            // 当text 长度为0时,只画 圆形背景
            drawCircle(canvas);
            return;
        }
        if (bgShape == 0){
            // 指定背景图形为圆形
            drawCircleWithText(canvas);
        }else if (bgShape == 1){
            // 指定背景图形为椭圆
            drawOvalWithText(canvas);
        }else{
            // 没有指定 bgShape
            if(text.length()==1) {
                // text长度为1 ,画圆
                drawCircleWithText(canvas);
            }else{
                // text长度大于1,画椭圆
                drawOvalWithText(canvas);
            }
        }
    }
核心部分就是drawCircle() 、drawCircleWithText()、drawOvalWithText()三个方法;
drawCircle()
如果没有指定noNumRadius,则默认以图片的五分之一作为半径。
/**
     * 只画圆点
     */
private void drawCircle(Canvas canvas) {
        bgPaint.setColor(bgColor);
        bgPaint.setStyle(Paint.Style.FILL);
        width = getMeasuredWidth();
        // 小圆点半径占控件宽度的比例
        if(noNumRadius!=0){
            radius = noNumRadius;
        }else {
            radius = width / 5;
        }
        // 根据半径选择圆点中心点的位置
        cx = width-radius;
        cy = radius;
        canvas.drawCircle(cx,cy,radius, bgPaint);
    }
drawCircleWithText()
    /**
     * 画带文字的圆
     */
    private void drawCircleWithText(Canvas canvas) {
        bgPaint.setColor(bgColor);
        bgPaint.setStyle(Paint.Style.FILL);
        textPaint.getTextBounds(text,0, text.length(),textRect);
        width = getMeasuredWidth();

        radius = textRect.width()/2 + ovalPadding;

        // 根据半径选择圆点中心点的位置
        cx = width-radius;
        cy = radius;
        canvas.drawCircle(cx,cy,radius, bgPaint);

        textPaint.setTextAlign(Paint.Align.CENTER);
        baseY = (int) ((radius) - ((textPaint.descent() + textPaint.ascent()) / 2));
        canvas.drawText(text, cx, baseY, textPaint);
    }
drawOvalWithText()
/**
     * 画带文字的椭圆
     */
    private void drawOvalWithText(Canvas canvas) {
        textPaint.getTextBounds(text,0, text.length(),textRect);
        width = getMeasuredWidth();
        // Right留出 高度的一半来画弧线
        ovalRight = width - textRect.height()/2;
        ovalLeft = (int) (ovalRight - textRect.width());
        ovalTop = 0;
        ovalBottom = ovalTop + textRect.height() + ovalPadding*2;

        bgPath.addArc(new RectF(ovalLeft-textRect.height()/2,ovalTop,ovalLeft+textRect.height()/2,ovalBottom),90,180);
        bgPath.lineTo(ovalRight,ovalTop);
        bgPath.addArc(new RectF(ovalRight-textRect.height()/2,ovalTop,ovalRight+textRect.height()/2,ovalBottom),270,180);
        bgPath.lineTo(ovalLeft,ovalBottom);

        bgPaint.setColor(bgColor);
        bgPaint.setStyle(Paint.Style.FILL);
        canvas.drawPath(bgPath, bgPaint);

        // Paint.Align.LEFT 代表文本被画在中点的 右边
        textPaint.setTextAlign(Paint.Align.LEFT);
        canvas.drawText(text + "", ovalLeft, textRect.height()+ovalPadding, textPaint);
    }
文章到此结束
喜欢点个赞~~


 2782
2782

 被折叠的 条评论
为什么被折叠?
被折叠的 条评论
为什么被折叠?
 到【灌水乐园】发言


