一. 安装 vue-awesome-swiper
npm install vue-awesome-swiper@3 --save-dev
二. 封装轮播组件
1. HTML
<template>
<div class="swipe">
<div class="title">主讲人</div>
<div class="recommendPage">
<swiper :options="swiperOption" ref="mySwiper">
<swiper-slide v-for="item in teachersArr" :key="item.teacherNo">
<div class="box">
<div class="box_img">
<img :src="item.picture" />
</div>
<div class="box_text">
<div>{{ item.fullName }}</div>
<div>{{ item.title }}</div>
</div>
</div>
</swiper-slide>
<div class="swiper-pagination" slot="pagination"></div>
<div class="swiper-button-prev" slot="button-prev"></div>
<div class="swiper-button-next" slot="button-next"></div>
</swiper>
</div>
</div>
</template>
2. JS
<script>
import { swiper, swiperSlide } from "vue-awesome-swiper";
import "swiper/dist/css/swiper.css";
export default {
props: ["teachersArr"],
data() {
return {
swiperOption: {
loop: true,
autoplay: {
delay: 3000,
stopOnLastSlide: false,
disableOnInteraction: false,
},
pagination: {
el: ".swiper-pagination",
clickable: true,
},
navigation: {
nextEl: ".swiper-button-next",
prevEl: ".swiper-button-prev",
},
},
};
},
components: { swiper, swiperSlide },
computed: {
swiper() {
return this.$refs.mySwiper.swiper;
},
},
mounted() {
},
};
</script>
CSS
<style lang="less" scoped>
.recommendPage .swiper-container {
  position: relative;
  width: 100%;
  height: 0.8rem;
  background: #fff;
}
.recommendPage .swiper-container .swiper-slide {
  width: 100%;
  background: #fafafa;
  color: #000;
  font-size: 0.16rem;
}
.swipe {
  margin: 0.1rem 0;
  padding: 0 0.16rem 0.16rem;
  background-color: #fff;
  .title {
    margin-left: 0.2rem;
    line-height: 0.6rem;
    font-size: 0.18rem;
    font-weight: 600;
  }
}
.box {
  display: flex;
  padding: 0.15rem 0.1rem;
  .box_img {
    img {
      width: 0.5rem;
      height: 0.5rem;
      border-radius: 50%;
      border: 0.01rem solid #ffd200;
    }
  }
  .box_text {
    margin-left: 0.2rem;
    div {
      &:nth-child(1) {
        margin-top: 0.05rem;
        font-size: 0.15rem;
        font-weight: 600;
      }
      &:nth-child(2) {
        margin-top: 0.1rem;
        font-size: 0.1rem;
        color: #ccc;
      }
    }
  }
}
.swiper-pagination-fraction,
.swiper-pagination-custom,
.swiper-container-horizontal > .swiper-pagination-bullets {
  bottom: 0;
}
/deep/.swiper-pagination-bullet-active {
  background: #ffd200;
}
/deep/.swiper-pagination-bullet {
  width: 0.04rem;
  height: 0.04rem;
}
</style>
三. 在页面中引入轮播组件
1. HTML
<TeacherSwipe v-if="form.teachers && form.teachers.length" :teachersArr="form.teachers" />
2. JS
<script>
import TeacherSwipe from "@/components/course/TeacherSwipe.vue";
export default {
	components: { TeacherSwipe },
}
</script>
四. 效果图
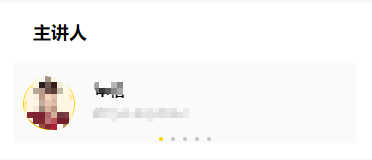


 本文档详细介绍了如何在Vue项目中安装并封装vue-awesome-swiper轮播组件,包括HTML结构、JS配置和CSS样式。通过实例展示了在组件中引入轮播图,并在页面中使用该组件的方法,同时提供了详细的代码实现和效果展示。


 637
637

 被折叠的 条评论
为什么被折叠?
被折叠的 条评论
为什么被折叠?
 到【灌水乐园】发言


