


这里写目录标题
一、@allure.step
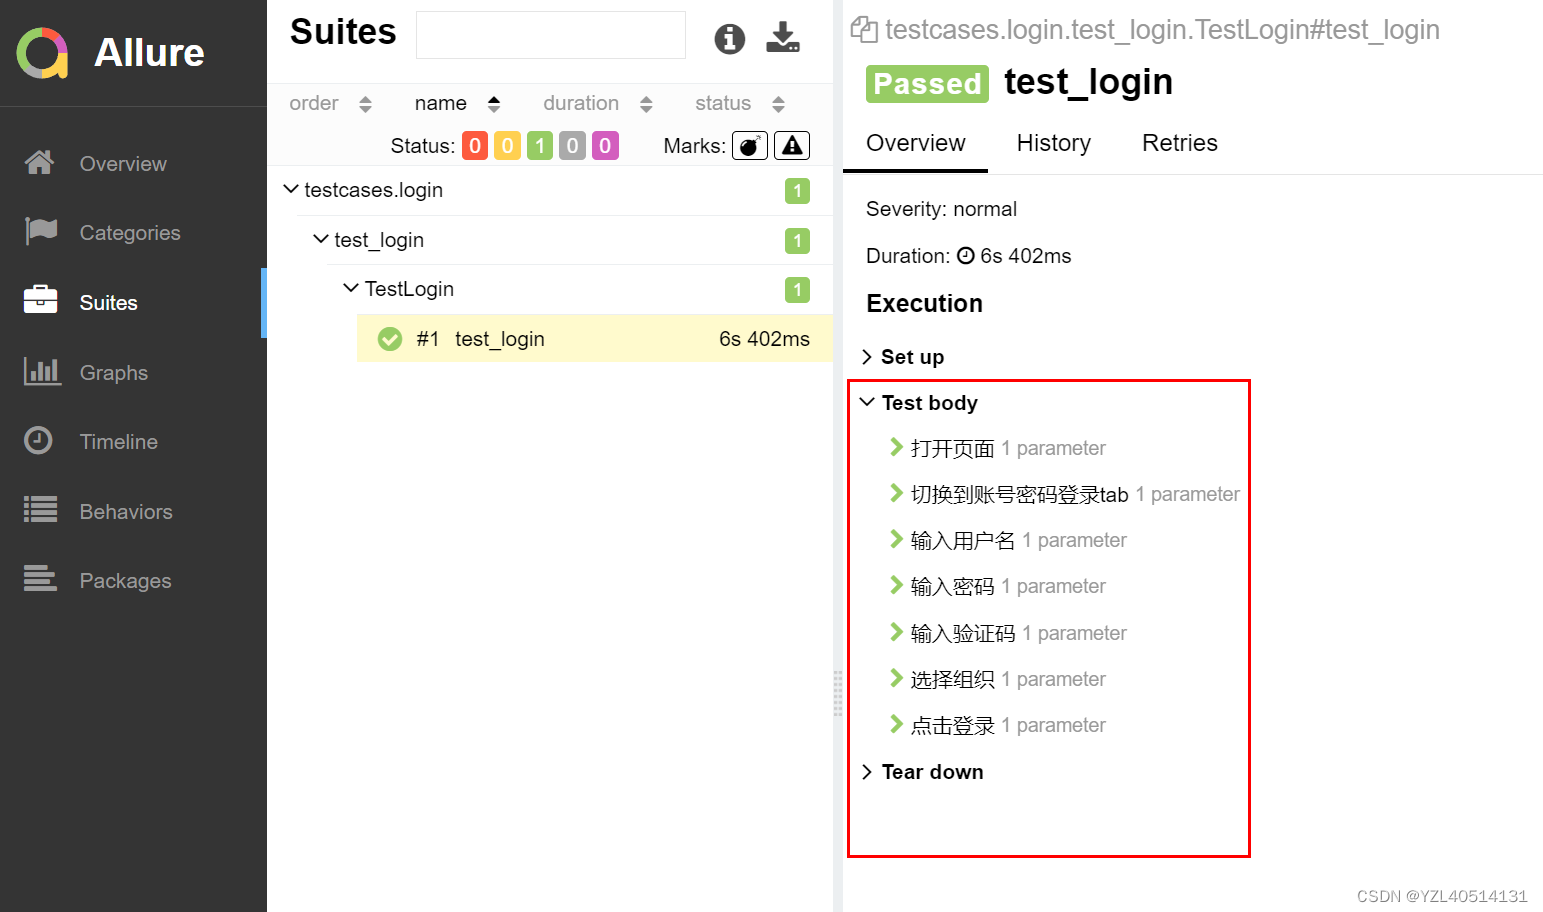
allure报告最重要的一点是,它允许对每个测试用例进行非常详细的步骤说明
通过 @allure.step() 装饰器,可以让测试用例在allure报告中显示更详细的测试过程
step() 只有一个参数,就是title,你传什么,在allure上就显示什么
1、代码实例1
conftest.py
#encoding=utf-8

import allure
import pytest
from selenium import webdriver

@allure.step('打开浏览器')
def fixture_step():
    driver=webdriver.Chrome("C:\Program Files\Google\Chrome\Application\chromedriver.exe")
    driver.implicitly_wait(10)
    return driver


@pytest.fixture(scope='function')
def my_fixture():
    #打开浏览器
    driver=fixture_step()
    yield driver
    driver.close()
test_login.py
#encoding=utf-8
import time

import pytest
import allure
from selenium import webdriver


@allure.step("打开页面")
def passing_step0(driver):
    driver.get('https://test-saas.izuche.com/#/Login')

@allure.step("切换到账号密码登录tab")
def switch_tab_step1(driver):
    el=driver.find_element_by_xpath('//span[text()="账号密码登录"]')
    el.click()

@allure.step("输入用户名")
def input_user_step2(driver):
    el = driver.find_element_by_xpath('//input[@id="userNames"]')
    el.send_keys('yanzhilong')

@allure.step("输入密码")
def input_pwd_step3(driver):
    el = driver.find_element_by_xpath('//input[@type="password"]')
    el.send_keys('12345678')


@allure.step("输入验证码")
def input_code_step4(driver):
    el=driver.find_element_by_xpath('//input[@placeholder="请输入验证码"]')
    el.send_keys('1111')

@allure.step("选择组织")
def select_step5(driver):
    driver.find_element_by_xpath('//input[@placeholder="请选择"]').click()
    time.sleep(1)
    el=driver.find_element_by_xpath('//span[text()="北京分公司"]')
    el.click()
    time.sleep(1)

@allure.step("点击登录")
def click_step6(driver):
    el=driver.find_element_by_xpath('//button[contains(@class,"login_submit")]')
    el.click()


class TestLogin:

    def test_login(self,my_fixture):
        driver=my_fixture
        passing_step0(driver)
        switch_tab_step1(driver)
        input_user_step2(driver)
        input_pwd_step3(driver)
        input_code_step4(driver)
        select_step5(driver)
        click_step6(driver)
        assert 1==1


if __name__ == '__main__':
    pytest.main()
run.py
import pytest
from common.send_email import send_report
import datetime
from time import strftime
now=datetime.datetime.now()
now=now.strftime("%Y-%m-%d_%H_%M_%S")

if __name__ == '__main__':
    #生成简单的测试报告
    # pytest.main(["--html=reports/report.html"])
    #生成allure报告,加上--clean-alluredir解决JSON文件生成冗余问题
    pytest.main(["--alluredir=./reports/allure",
                 "./testcases/login",
                 # "-m smoke",
                 "--clean-alluredir",

                 ])

    # 将JSON文件转换成HTML格式的测试报告(生成JSON文件路径:./report/allure 生成HTML报告路径:./report/html)
    os.system("allure generate ./reports/allure -o ./reports/html --clean")


    # send_report(report_name=f'{now}'+'test.html')
    # send_report(report_name='D:\\project_development\\api_pytest\\reports\\2022-11-01_00_40_49test.html')

    # 打开测试报告
    os.system("allure serve ./reports/allure")
执行结果:
2、使用总结
参数:title,表示step的名称,可以直接展示在测试报告里
特点:可以嵌套使用,也可以外部调用
使用场景:主要用于场景用例的组织,使用多条功能点用例组合成场景用例(允许使用外部的用例)
二、allure.attach
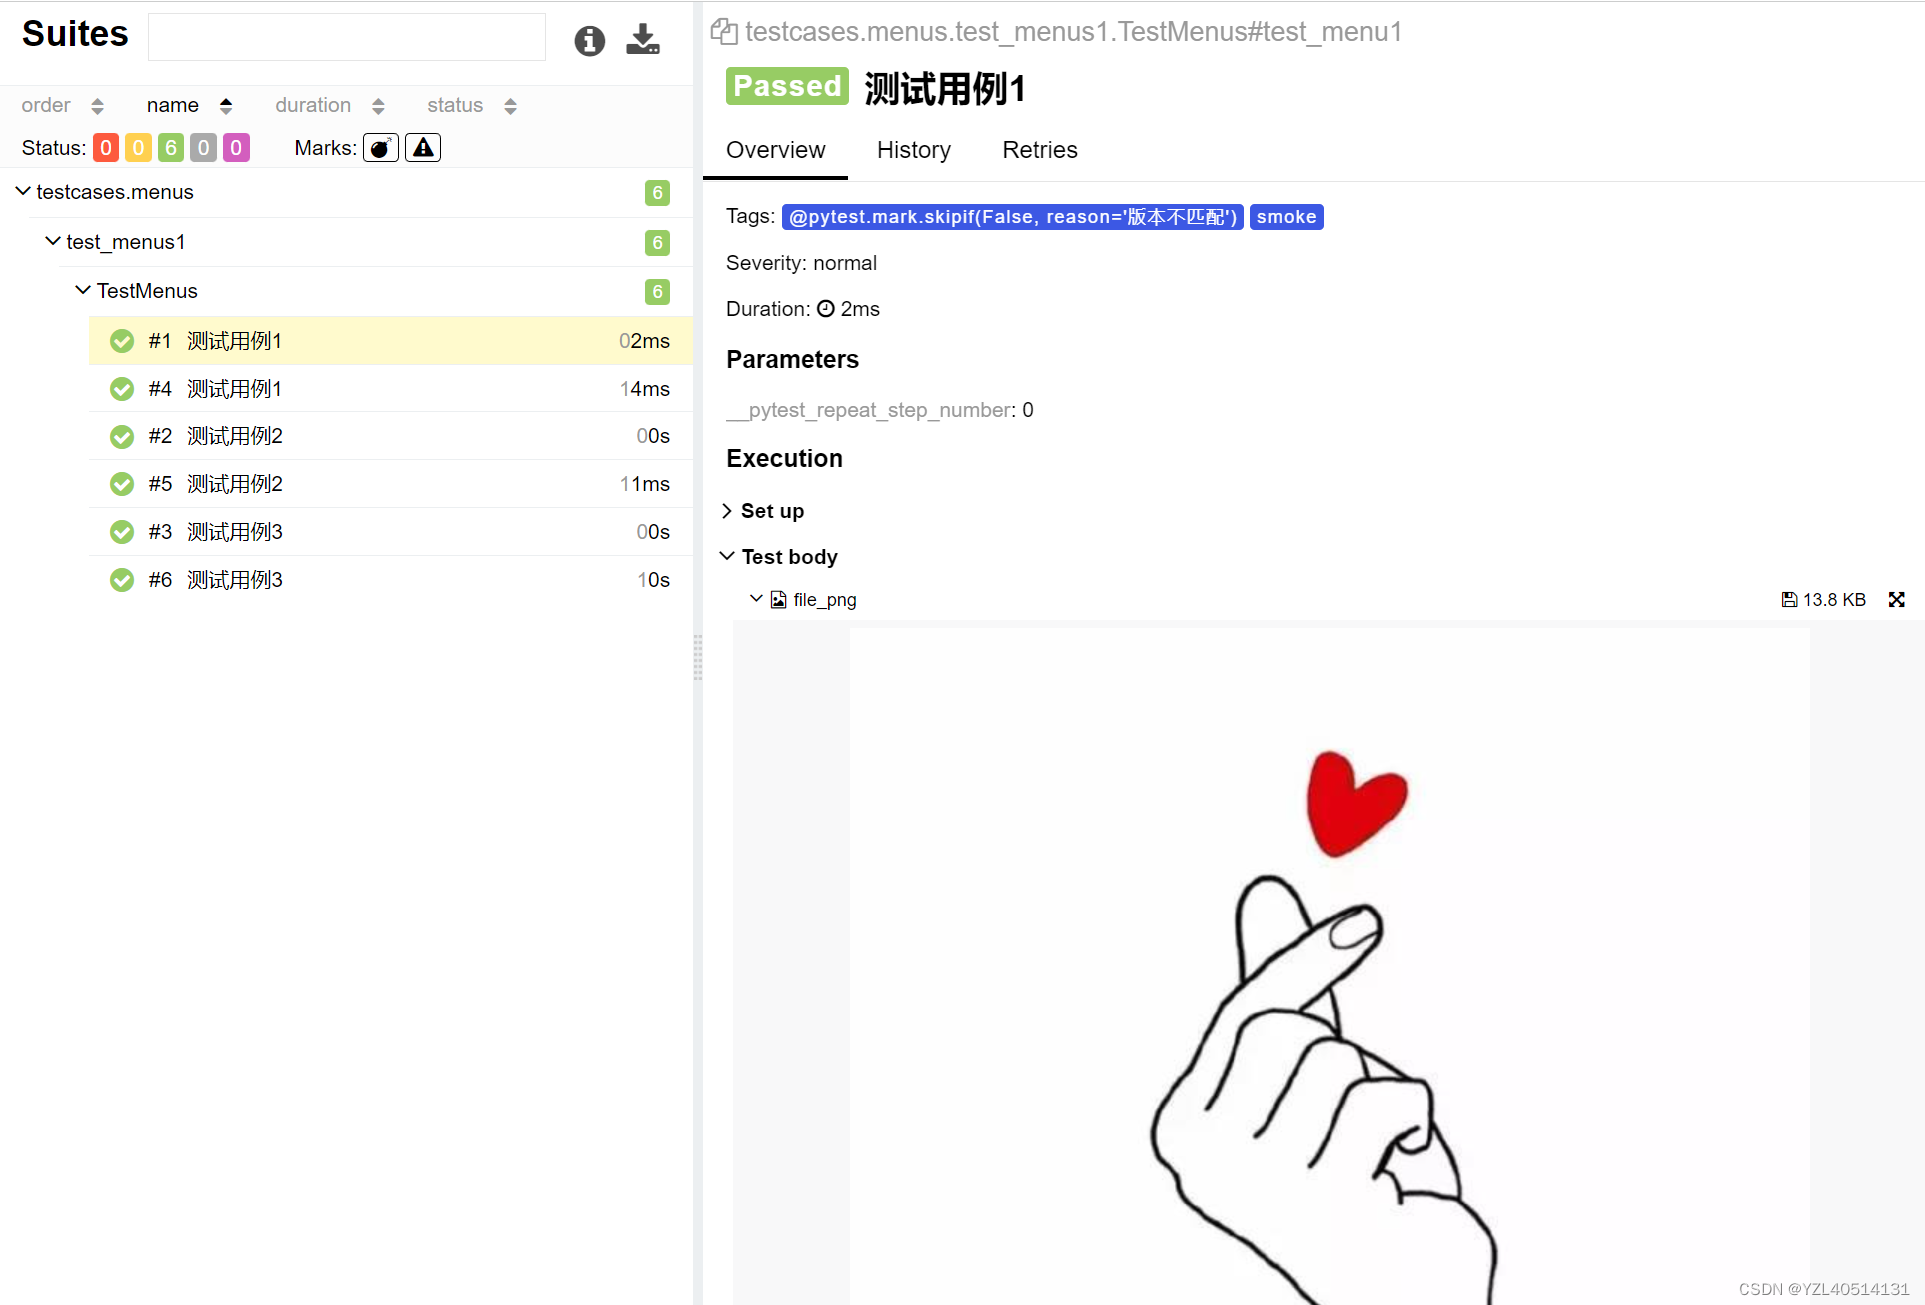
功能:测试报告可以显示许多不同类型的附件,这些附件可以补充测试、步骤或fixture结果
@allure.attach(’arg1’,’arg2’,’arg3’):
参数详解:
arg1:附件
arg2:附件名称
arg3:类型(支持:HTML,JPG,PNG,JSON,OTHER,TEXTXML)
案例2:代码
# encoding=utf-8
import allure
import pytest
import logging
import random
import time

@pytest.mark.smoke
class TestMenus:

    @allure.title('测试用例1')
    @pytest.mark.skipif(24<8,reason='版本不匹配')
    @pytest.mark.smoke
    def test_menu1(self):
        file_png = open('testcases/menus/test.jpg', mode='rb').read()
        allure.attach(file_png, 'file_png', allure.attachment_type.JPG)
        logging.info('执行测试用例1')
        assert 2 == 2

    @allure.title('测试用例2')
    @pytest.mark.smoke
    def test_menu2(self):
        logging.info('执行测试用例2')
        assert 1 == 1

    @allure.description(
    """
    多行测试说明
    使用allure.description装饰器.
    没什么特别的地方,视项目情况而用
    """)
    @allure.title('测试用例3')
    def test_menu3(self):
        logging.info('执行测试用例3')
        assert 2 == 2


if __name__ == '__main__':
    pytest.main()
执行结果:
三、@allure.title()
可以使测试用例标题更具可读性(可以为汉字)
可以和Parameterize参数化及fixture结合使用
用法:@allure.title(“msg”)
案例3不加@allure.title():代码
# encoding=utf-8
import allure
import pytest
import logging
import random
import time

@pytest.mark.smoke
class TestMenus:


    @pytest.mark.skipif(24<8,reason='版本不匹配')
    @pytest.mark.smoke
    def test_menu1(self):
        logging.info('执行测试用例1')
        assert 2 == 2


    @pytest.mark.smoke
    def test_menu2(self):
        logging.info('执行测试用例2')
        assert 1 == 1


    def test_menu3(self):
        logging.info('执行测试用例3')
        assert 2 == 2


if __name__ == '__main__':
    pytest.main()
执行结果
案例4加@allure.title():代码:
# encoding=utf-8
import allure
import pytest
import logging
import random
import time

@pytest.mark.smoke
class TestMenus:

    @allure.title('测试用例1')
    @pytest.mark.skipif(24<8,reason='版本不匹配')
    @pytest.mark.smoke
    def test_menu1(self):
        logging.info('执行测试用例1')
        assert 2 == 2

    @allure.title('测试用例2')
    @pytest.mark.smoke
    def test_menu2(self):
        logging.info('执行测试用例2')
        assert 1 == 1

    @allure.title('测试用例3')
    def test_menu3(self):
        logging.info('执行测试用例3')
        assert 2 == 2


if __name__ == '__main__':
    pytest.main()
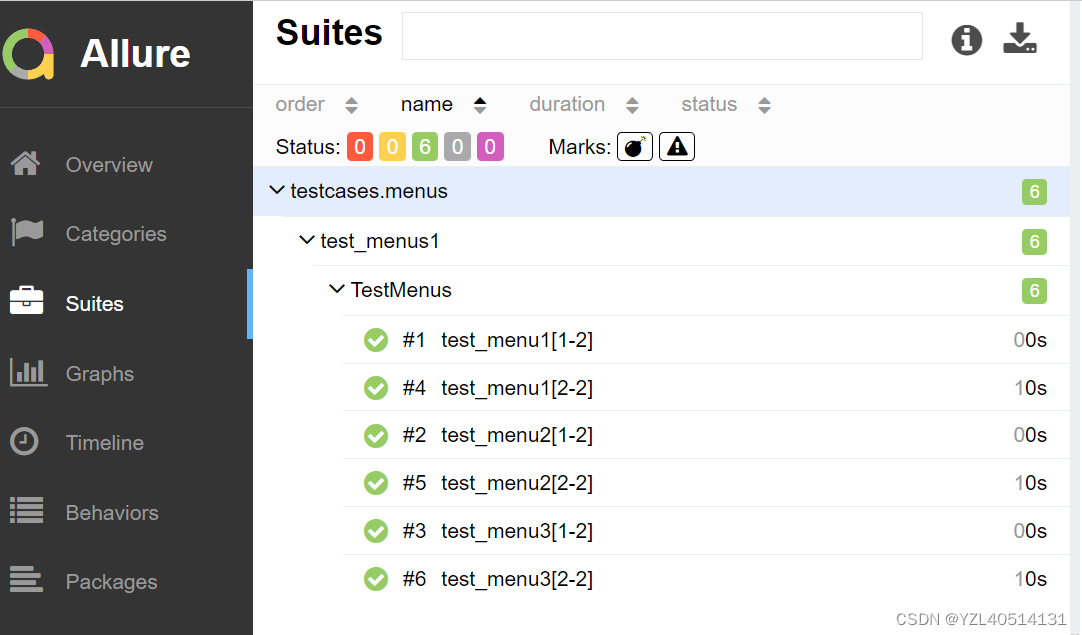
执行结果

不使用allure.title()装饰器,报告默认展示的是用例函数名,可读性较差,
四、allure.description()
1、作用
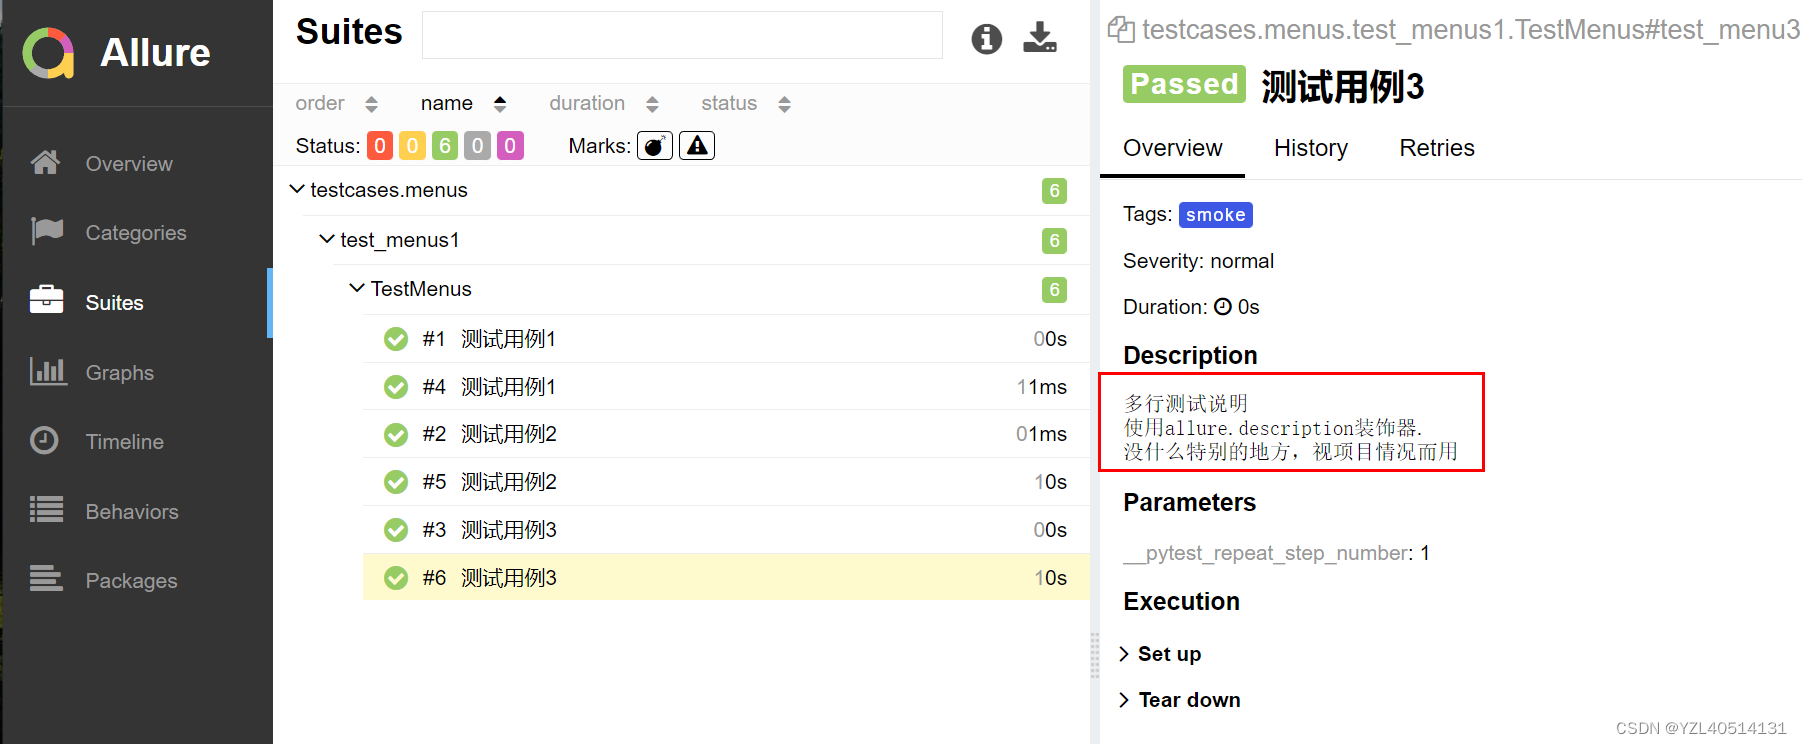
为测试用例添加详细描述,并展示到测试报告内,可以提高测试报告的可读性,使报告更加直观,通俗易懂
2、语法
主要有三种语法,如下:
1、在测试用例下使用"““xxxx””"添加描述
2、使用@allure.description()装饰器
3、使用@allure.description_html()装饰器,添加HTML描述(添加HTML描述和attach装饰器用法一致)
案例5:代码
# encoding=utf-8
import allure
import pytest
import logging
import random
import time

@pytest.mark.smoke
class TestMenus:

    @allure.title('测试用例1')
    @pytest.mark.skipif(24<8,reason='版本不匹配')
    @pytest.mark.smoke
    def test_menu1(self):
        logging.info('执行测试用例1')
        assert 2 == 2

    @allure.title('测试用例2')
    @pytest.mark.smoke
    def test_menu2(self):
        logging.info('执行测试用例2')
        assert 1 == 1

    @allure.description(
    """
    多行测试说明
    使用allure.description装饰器.
    没什么特别的地方,视项目情况而用
    """)
    @allure.title('测试用例3')
    def test_menu3(self):
        logging.info('执行测试用例3')
        assert 2 == 2


if __name__ == '__main__':
    pytest.main()
执行结果:


 1268
1268


 被折叠的 条评论
为什么被折叠?
被折叠的 条评论
为什么被折叠?
 到【灌水乐园】发言


