


本篇文章基于vue2脚手架的基础上编写,如何搭建vue2脚手架请查看【搭建vue3脚手架,并且浅谈nodeJs和vue的关系】
一、Vue Router
Vue Router 是 Vue.js (opens new window)官方的路由管理器,主要用于页面的跳转,VueRouter官方文档传送门
下载
下载vue-router
npm install vue-router
将vueRoute整合到项目中
因为该项目是使用 Vue CLI 的项目,我们可以以项目插件的形式添加 Vue Router。CLI 可以生成路由相关的代码及两个示例路由。它也会覆盖我们的 App.vue,因此请确保在项目中运行以下命令之前备份这个文件:
# 在cmd终端执行
vue add router

# 会在main.js中生成以下代码
import VueRouter from 'vue-router'
import router from './router'
Vue.use(VueRouter)

# 并且会在项目根目录生成route文件夹以及route.js,route.js的内容如下
import Vue from 'vue'
import VueRouter from 'vue-router'
import Home from '../views/Home.vue'

Vue.use(VueRouter)

const routes = [
  {
    path: '/',
    name: 'Home',
    component: Home
  },
  {
    path: '/about',
    name: 'About',
    // route level code-splitting
    // this generates a separate chunk (about.[hash].js) for this route
    // which is lazy-loaded when the route is visited.
    component: () => import(/* webpackChunkName: "about" */ '../views/About.vue')
  }
]

const router = new VueRouter({
  mode: 'history',
  base: process.env.BASE_URL,
  routes
})

export default router
查看效果
然后就可以访问http://localhost:8080/about查看路由Demo

补充,在执行vue add router时,它会询问你是否用history模式的路由。路由有2种模式,hash模式和history模式,https://www.cnblogs.com/JRliu/p/9025290.html
二、Elementui
Elementui是饿了么团队基于vue打造的一套UI框架,Elementui官方文档传送门
下载
npm i element-ui -S
配置
修改main.js,加入如下所示内容
// 引入elementui
import ElementUI from 'element-ui';
import 'element-ui/lib/theme-chalk/index.css';
Vue.use(ElementUI);
然后就可以使用啦
三、Less
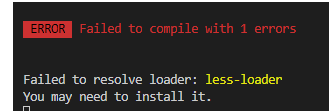
vue使用<style lang="less" scoped></style>之后报错,如下图所示
然后npm i less less-loader -D后继续报错,如下所示
npm ERR! code ERESOLVE
npm ERR! ERESOLVE unable to resolve dependency tree
npm ERR!
npm ERR! Found: webpack@4.46.0
npm ERR! node_modules/webpack
npm ERR!   peer webpack@"^4.0.0" from @intervolga/optimize-cssnano-plugin@1.0.6
npm ERR!   node_modules/@intervolga/optimize-cssnano-plugin
npm ERR!     @intervolga/optimize-cssnano-plugin@"^1.0.5" from @vue/cli-service@4.5.13
npm ERR!     node_modules/@vue/cli-service
npm ERR!       peer @vue/cli-service@"^3.0.0 || ^4.0.0-0" from @vue/cli-plugin-babel@4.5.13
npm ERR!       node_modules/@vue/cli-plugin-babel
npm ERR!         dev @vue/cli-plugin-babel@"~4.5.0" from the root project
npm ERR!       3 more (@vue/cli-plugin-router, @vue/cli-plugin-vuex, the root project)
npm ERR!   peer webpack@"^4.0.0 || ^5.0.0" from @soda/friendly-errors-webpack-plugin@1.8.0
npm ERR!   node_modules/@soda/friendly-errors-webpack-plugin
npm ERR!     @soda/friendly-errors-webpack-plugin@"^1.7.1" from @vue/cli-service@4.5.13
npm ERR!     node_modules/@vue/cli-service
npm ERR!       peer @vue/cli-service@"^3.0.0 || ^4.0.0-0" from @vue/cli-plugin-babel@4.5.13
npm ERR!       node_modules/@vue/cli-plugin-babel
npm ERR!         dev @vue/cli-plugin-babel@"~4.5.0" from the root project
npm ERR!       3 more (@vue/cli-plugin-router, @vue/cli-plugin-vuex, the root project)
npm ERR!   16 more (@vue/cli-plugin-babel, @vue/cli-service, ...)
npm ERR!
npm ERR! Could not resolve dependency:
npm ERR! dev less-loader@"*" from the root project
npm ERR!
npm ERR! Conflicting peer dependency: webpack@5.42.1
npm ERR! node_modules/webpack
npm ERR!   peer webpack@"^5.0.0" from less-loader@10.0.1
npm ERR!   node_modules/less-loader
npm ERR!     dev less-loader@"*" from the root project
npm ERR!
npm ERR! Fix the upstream dependency conflict, or retry
npm ERR! this command with --force, or --legacy-peer-deps
npm ERR! to accept an incorrect (and potentially broken) dependency resolution.
npm ERR!
npm ERR! See /Users/dengzemiao/.npm/eresolve-report.txt for a full report.

npm ERR! A complete log of this run can be found in:
npm ERR!     /Users/dengzemiao/.npm/_logs/2021-07-06T01_37_12_820Z-debug.log
问题原因:https://blog.csdn.net/weixin_45821811/article/details/121394553
解决办法:npm install less@3.9.0 less-loader@4.1.0 --save-dev
参考博客:https://blog.csdn.net/zz00008888/article/details/118515085
最终效果

该篇博客的代码可以到此处进行下载


 643
643


 被折叠的 条评论
为什么被折叠?
被折叠的 条评论
为什么被折叠?
 到【灌水乐园】发言


