


一、JRebel
1.1 Jrebel介绍
JRebel是一个Java开发工具,它是一款用于实时代码重载的插件。它的主要功能是在不重新启动应用程序的情况下,将修改后的Java代码实时应用到正在运行的应用程序中,从而加快开发周期,提高开发效率。
- 实时代码重载:JRebel可以监测开发人员对Java代码的修改,并将这些修改实时应用到正在运行的应用程序中,无需重新启动应用程序。这样,开发人员可以立即看到他们的代码更改的效果,节省了重新编译和部署的时间。
- 支持多种框架和服务器:JRebel支持多种Java框架和服务器,包括Spring、Hibernate、Java EE、Tomcat、Jetty等。无论是开发Web应用程序还是企业级应用程序,JRebel都可以与常用的开发框架和服务器集成,提供实时代码重载的功能。
- 高度兼容性:JRebel与大多数Java开发工具和集成开发环境(IDE)兼容,如Eclipse、IntelliJ IDEA、NetBeans等。开发人员可以在他们喜欢的IDE中使用JRebel插件,无需切换到其他工具。
- 快速部署:JRebel可以加快应用程序的部署速度,因为它只需要将修改后的代码应用到运行中的应用程序,而不需要重新启动整个应用程序。这对于大型应用程序和复杂的部署环境特别有用。
- 支持多种开发场景:JRebel可以应用于各种开发场景,包括本地开发、远程开发、云开发等。无论是单机开发还是分布式开发,JRebel都可以提供实时代码重载的功能。
总的来说,JRebel是一个强大的Java开发工具,它通过实时代码重载的功能,使开发人员能够在不重新启动应用程序的情况下,快速应用他们对Java代码的修改。这大大提高了开发效率,减少了开发周期,使开发人员能够更专注于代码的编写和调试。
1.2 Jrebel插件下载
首先我们要到idea的插件商店中下载jerbel插件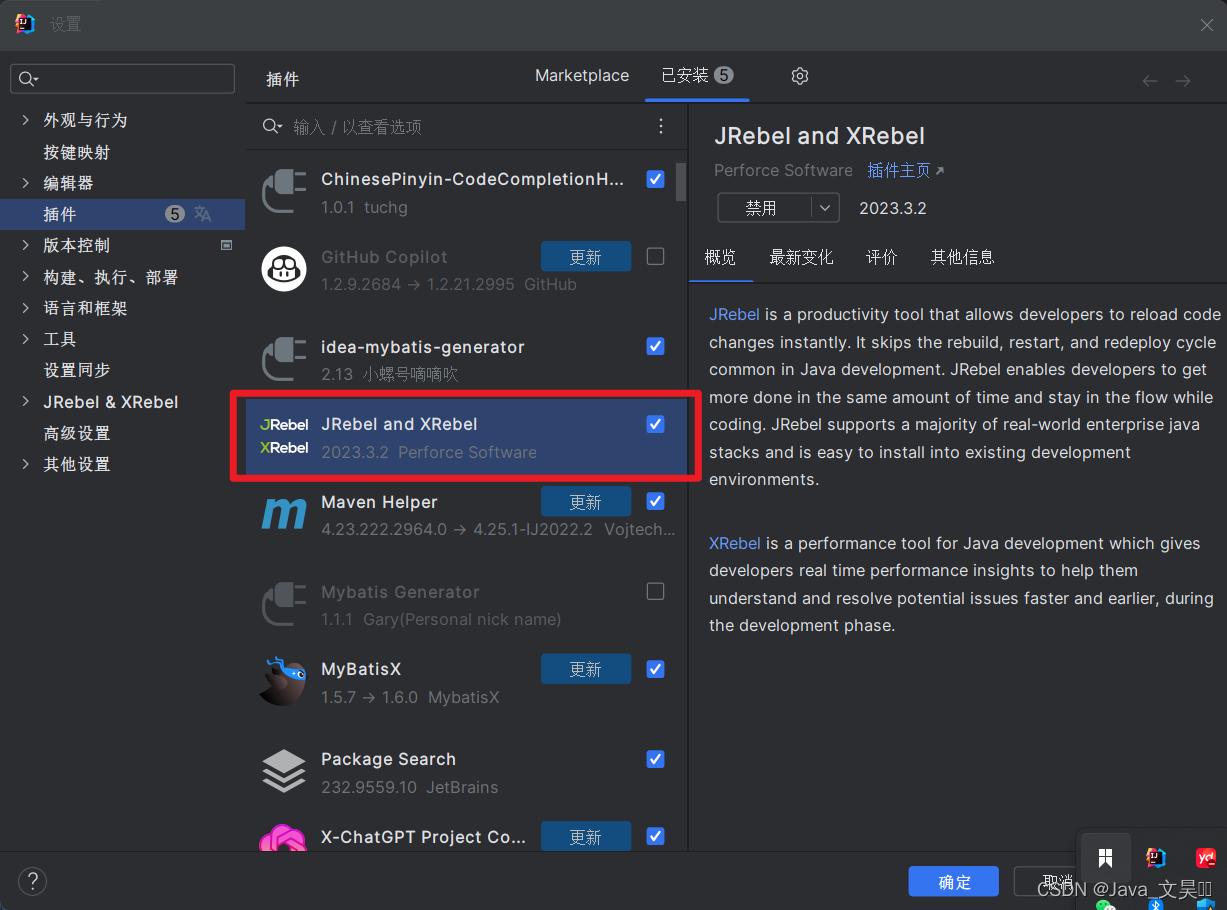
然后进入gitup的开源网站,下载jerbel
Release v1.4 · ilanyu/ReverseProxy · GitHub
我用的是windows的就下载windows and64就行
下载到指定位置以后,双击启动服务
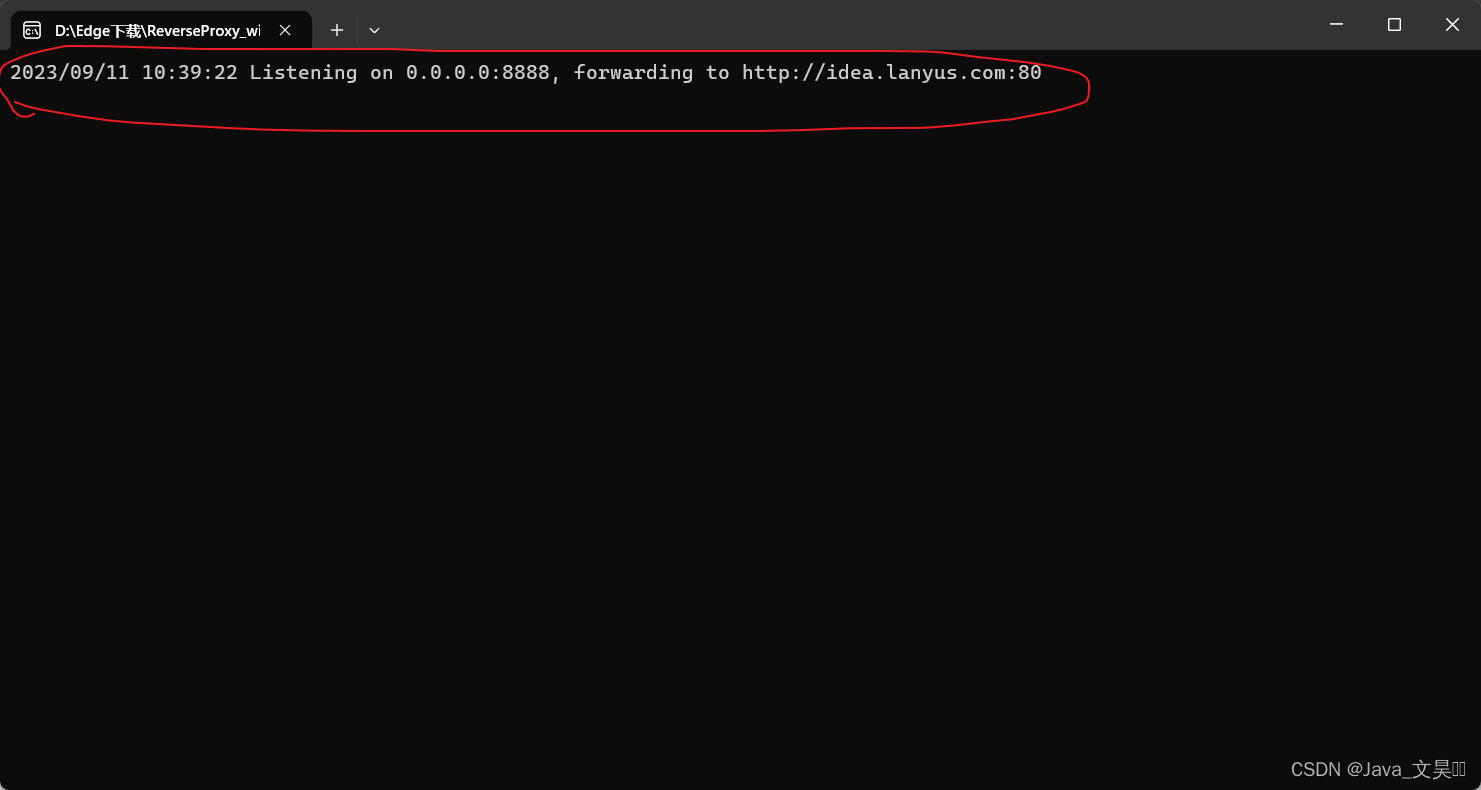
出现这个就是启动成功了
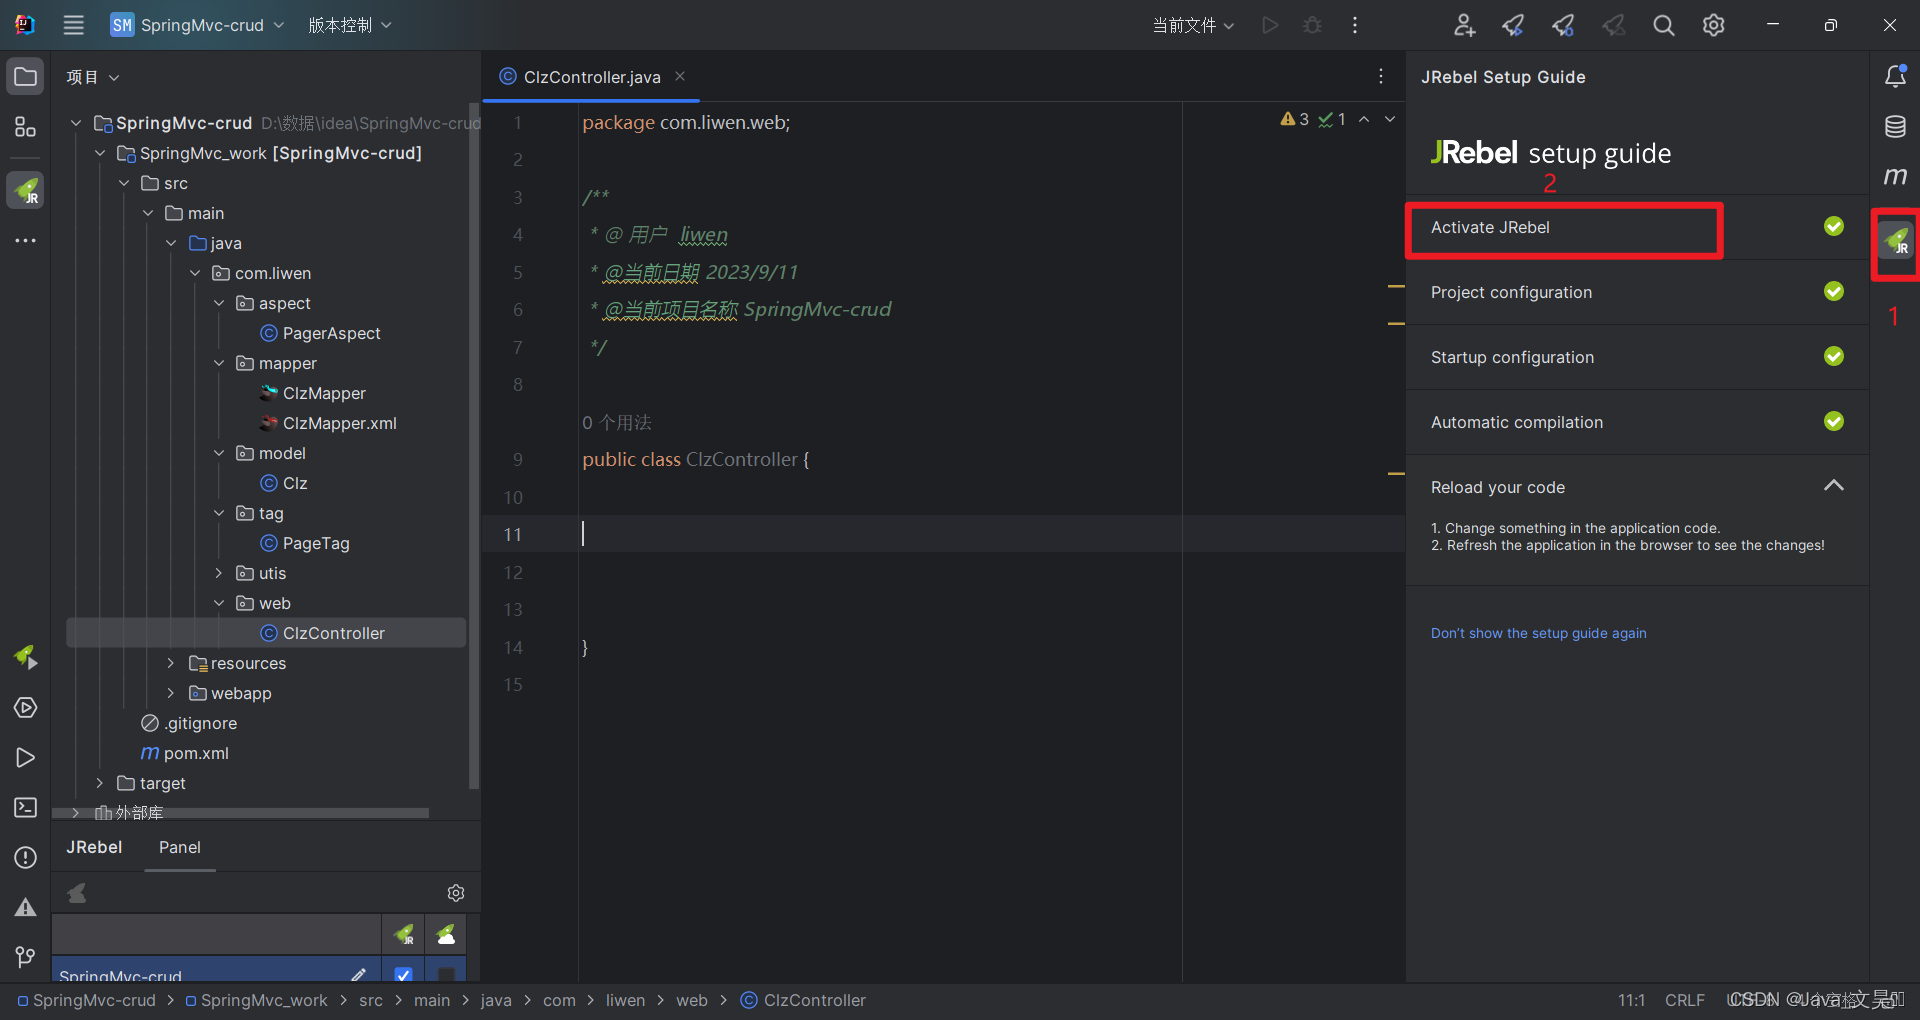
然后我们进入idea,激活jerbel
点击之后,会弹出激活界面

第一栏填入
后面接上GUID码,这里也提供一个给大家,Create GUID online (guidgen.com)
第二栏是自己的电子邮箱
值得注意的是,我在填第一栏的地址的时候,使用127.0.0.1不可以,但是使用localhost就可以了,知道的大佬可以评论区指点指点
激活成功之后,我们就可以jerbel启动了
1.3 jerbel离线设置
因为我们每一次使用erble都需要启动服务太过麻烦,所以此时我们需要设置离线模式
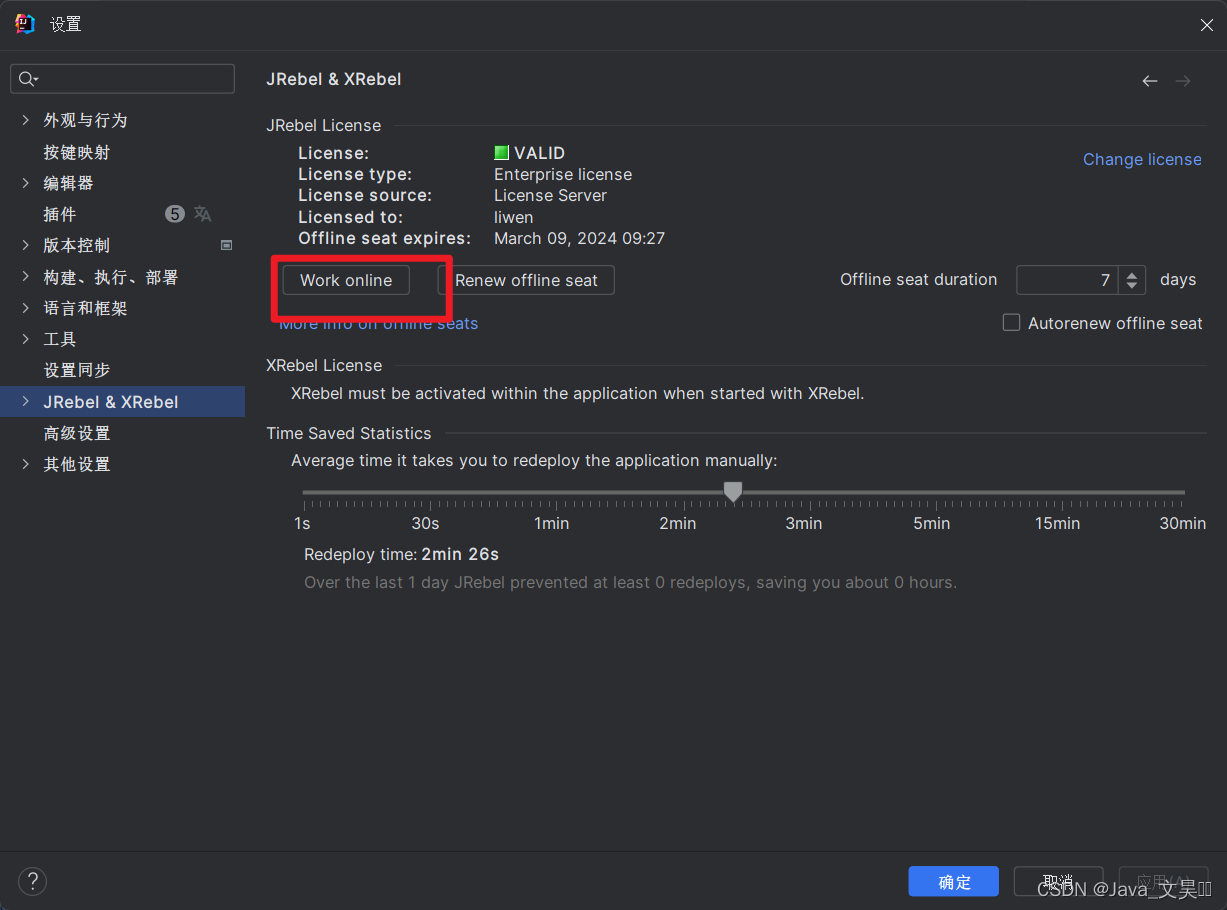
我这里是因为我已经开启了,没开启只有一个按钮,是off开头的,点击开启就好了
开启之后我们再次启动jerble就不需要再次启动服务了
值得注意的是,我们在关闭程序之前,需要先关闭tomcat,再关闭服务,这样离线使用时,我们就不需要再去开启jerbel了
二、文件的上传和下载操作
2.1 导入pom依赖
 <commons-fileupload.version>1.3.3</commons-fileupload.version>

    <dependency>
      <groupId>commons-fileupload</groupId>
      <artifactId>commons-fileupload</artifactId>
      <version>${commons-fileupload.version}</version>
    </dependency>
2.2 配置文件上传解析器
在spring-mvc.xml文件中添加文件上传解析器。
<bean id="multipartResolver" class="org.springframework.web.multipart.commons.CommonsMultipartResolver">
    <!-- 必须和用户JSP 的pageEncoding属性一致,以便正确解析表单的内容 -->
    <property name="defaultEncoding" value="UTF-8"></property>
    <!-- 文件最大大小(字节) 1024*1024*50=50M-->
    <property name="maxUploadSize" value="52428800"></property>
    <!--resolveLazily属性启用是为了推迟文件解析,以便捕获文件大小异常-->
    <property name="resolveLazily" value="true"/>
</bean>
这段代码配置了一个名为"multipartResolver"的Bean,用于处理文件上传。通过设置"defaultEncoding"属性、"maxUploadSize"属性和"resolveLazily"属性,可以指定文件上传时的字符编码、最大上传大小和延迟文件解析的行为。这样,Spring框架在处理文件上传时会根据这些配置进行相应的解析和限制。
2.3、指定文件上传的表单
文件上传的表单指定enctype属性为multipart/form-data
<%@ page contentType="text/html;charset=UTF-8" language="java" %>
<html>
<head>
    <base href="${pageContext.request.contextPath }">
    <title>文件上传</title>
</head>
<body>
<form action="/file/upload" method="post" enctype="multipart/form-data">
    <label>编号:</label><input type="text" name="id" readonly="readonly" value="${param.id}"/><br/>
    <label>图片:</label><input type="file" name="imgFile"/><br/>
    <input type="submit" value="上传图片"/>
</form>
</body>
</html>
2.4、设置项目的映射地址
2.5、编写控制器
package com.liwen.web;

import com.liwen.biz.UploadImgBiz;
import com.liwen.model.UploadImg;
import com.liwen.utils.PageBean;
import com.liwen.utils.PropertiesUtil;
import org.apache.commons.io.FileUtils;
import org.springframework.beans.factory.annotation.Autowired;
import org.springframework.stereotype.Controller;
import org.springframework.web.bind.annotation.PathVariable;
import org.springframework.web.bind.annotation.RequestMapping;
import org.springframework.web.multipart.MultipartFile;

import javax.servlet.http.HttpServletRequest;
import java.io.File;
import java.io.IOException;
import java.util.List;

/**
 * @author 云村小威
 * @site blog.csdn.net/Justw320
 * @create 2023-09-10 16:50
 */
@Controller
@RequestMapping("/file")
public class UploadImgController {
    @Autowired
    private UploadImgBiz uploadImgBiz;

    /*新增方法*/
    @RequestMapping("/add")
    public String save(UploadImg uploadImg, HttpServletRequest request) {
        uploadImgBiz.insertSelective(uploadImg);
        return "redirect:list";
    }

    /*删除方法*/
    @RequestMapping("/del/{id}")
    public String del(@PathVariable("id") Integer id) {
        uploadImgBiz.deleteByPrimaryKey(id);
        return "redirect:/file/list";
    }

    /*修改方法*/
    @RequestMapping("/edit")
    public String edit(UploadImg uploadImg, HttpServletRequest request) {
        uploadImgBiz.updateByPrimaryKeySelective(uploadImg);
        return "redirect:list";
    }

    /*查询方法*/
    @RequestMapping("/list")
    public String list(UploadImg uploadImg, HttpServletRequest request) {
        PageBean pageBean = new PageBean();
        pageBean.setRequest(request);
        List<UploadImg> uploadImgs = uploadImgBiz.listPager(uploadImg, pageBean);
//        ModelAndView modelAndView = new ModelAndView();
//        modelAndView.addObject("UploadImgs", UploadImgs);
//        modelAndView.addObject("pageBean", pageBean);
//        modelAndView.setViewName("UploadImg/list");
        request.setAttribute("uploadImgs", uploadImgs);
        request.setAttribute("pageBean", pageBean);
        return "file/list";
    }

    /*数据回显*/
    @RequestMapping("/preSave")
    public String preSave(UploadImg uploadImg, HttpServletRequest request) {
        if (uploadImg != null && uploadImg.getId() != null && uploadImg.getId() != 0) {
            UploadImg img = uploadImgBiz.selectByPrimaryKey(uploadImg.getId());
            request.setAttribute("img", img);
        }
        return "file/edit";
    }

    /*图片上传*/
    @RequestMapping("upload")
    public String upload(UploadImg img,MultipartFile imgFile) throws IOException {
        //读取配置文夹本地路径和服务器路径
        String dir = PropertiesUtil.getValue("dir");
        String server = PropertiesUtil.getValue("server");

        //利用MultipartFile类接受前端传递到后台的文件
        System.out.println("文件名:"+imgFile.getOriginalFilename());
        System.out.println("文件类型:"+imgFile.getContentType());

        //将文件转成流写入到服务器
        FileUtils.copyInputStreamToFile(imgFile.getInputStream(),new File(dir+imgFile.getOriginalFilename()));

        //通过对象将图片保存到数据库
        img.setImg(server+imgFile.getOriginalFilename());
        uploadImgBiz.updateByPrimaryKeySelective(img);

        return "redirect:list";
    }

       /*文件下载*/

   @RequestMapping("/download")
    public ResponseEntity<byte[]> download(UploadImg uploadImg, HttpServletRequest req){
        try {
            //先根据文件id查询对应图片信息
            UploadImg img = this.uploadImgBiz.selectByPrimaryKey(uploadImg.getId());
            String diskPath = PropertiesUtil.getValue("dir");
            String reqPath = PropertiesUtil.getValue("server");
            //上面获取的数据库地址,需要转换才能下载成本地路径
            String realPath = img.getImg().replace(reqPath,diskPath);
            String fileName = realPath.substring(realPath.lastIndexOf("/")+1);
            //下载关键代码
            File file=new File(realPath);
            HttpHeaders headers = new HttpHeaders();//http头信息
            String downloadFileName = new String(fileName.getBytes("UTF-8"),"iso-8859-1");//设置编码
            headers.setContentDispositionFormData("attachment", downloadFileName);
            headers.setContentType(MediaType.APPLICATION_OCTET_STREAM);
            //MediaType:互联网媒介类型  contentType:具体请求中的媒体类型信息
            return new ResponseEntity<byte[]>(FileUtils.readFileToByteArray(file),headers, HttpStatus.OK);
        }catch (Exception e){
            e.printStackTrace();
        }
        return null;
    }
}
2.6、jsp页面
<%@ page contentType="text/html;charset=UTF-8" language="java" %>
<%@ taglib prefix="c" uri="http://java.sun.com/jsp/jstl/core" %>
<%@ taglib prefix="w" uri="http://jsp.veryedu.cn" %>
<html>
<head>
    <meta http-equiv="Content-Type" content="text/html; charset=UTF-8">
    <link
            href="https://cdn.bootcdn.net/ajax/libs/twitter-bootstrap/4.5.0/css/bootstrap.css"
            rel="stylesheet">
    <script
            src="https://cdn.bootcdn.net/ajax/libs/twitter-bootstrap/4.5.0/js/bootstrap.js"></script>
    <base href="${pageContext.request.contextPath }">
    <title>博客列表</title>
    <style type="text/css">
        .page-item input {
            padding: 0;
            width: 40px;
            height: 100%;
            text-align: center;
            margin: 0 6px;
        }

        .page-item input, .page-item b {
            line-height: 38px;
            float: left;
            font-weight: 400;
        }

        .page-item.go-input {
            margin: 0 10px;
        }
    </style>
</head>
<body>
<form class="form-inline"
      action="/file/list" method="post">
    <div class="form-group mb-2">
        <input type="text" class="form-control-plaintext" name="name"
               placeholder="请输入用户名称">
    </div>
    <button type="submit" class="btn btn-primary mb-2">查询</button>
    <a class="btn btn-primary mb-2" href="/file/preSave">新增</a>
</form>

<table class="table table-striped">
    <thead>
    <tr>
        <th scope="col">ID</th>
        <th scope="col">用户</th>
        <th scope="col">图片</th>
    </tr>
    </thead>
    <tbody>
    <c:forEach var="i" items="${uploadImgs }">
        <tr>
            <td>${i.id }</td>
            <td>${i.name }</td>
            <td>
                <img src="${i.img }" style="width: 200px;height: 100px;">
            </td>
            <td>
                <a href="/file/preSave?id=${i.id}">修改</a>
                <a href="/file/del/${i.id}">删除</a>
                <a href="/page/file/upload?id=${i.id}">图片上传</a>
                <a href="/file/download?id=${i.id}">图片下载</a>
            </td>
        </tr>
    </c:forEach>
    </tbody>
</table>
<!-- 这一行代码就相当于前面分页需求前端的几十行了 -->
<w:page pageBean="${pageBean }"></w:page>

</body>
</html>
三、多文件上传
3.1、控制层
  //多文件上传
     @RequestMapping("/uploads")
     public String uploads(HttpServletRequest req, Student student, MultipartFile[] files){
         try {
             StringBuffer sb = new StringBuffer();
             for (MultipartFile cfile : files) {
                 //思路:
                 //1) 将上传图片保存到服务器中的指定位置
                 String dir = PropertiesUtil.getValue("dir");
                 String server = PropertiesUtil.getValue("server");
                 String filename = cfile.getOriginalFilename();
                 FileUtils.copyInputStreamToFile(cfile.getInputStream(),new File(dir+filename));
                 sb.append(filename).append(",");
             }
             System.out.println(sb.toString());

         } catch (Exception e) {
             e.printStackTrace();
         }
         return "redirect:list";
     }
3.2、jsp
 <a href="${pageContext.request.contextPath }/page/student/uploads">多文件上传</a>


<%@ page contentType="text/html;charset=UTF-8" language="java" %>
<html>
<head>
    <title>Title</title>
</head>
<body>
<form action="${pageContext.request.contextPath }/student/uploads" method="post" enctype="multipart/form-data">
    <input type="file" name="files" multiple>
    <button type="submit">上传</button>
</form>
</body>
</html>


 3400
3400


 被折叠的 条评论
为什么被折叠?
被折叠的 条评论
为什么被折叠?
 到【灌水乐园】发言


