


有时候方便管理配置,可以把相关配置放到数据库,并希望替换掉数据库中配置。这里主要借助
环境后处理器 EnvironmentPostProcessor 的功能。
1、在 META-INF定义 spring.factories ,内容如下:
# Environment Post Processors
 org.springframework.boot.env.EnvironmentPostProcessor=com.test.testEnviromentPostProcessor.conf.DbEnvironmentPostProcessor
2、自定义环境后处理器 EnvironmentPostProcessor。
package com.test.testEnviromentPostProcessor.conf;


import com.alibaba.fastjson.JSONObject;
import com.test.testEnviromentPostProcessor.mapper.DbEnvironmentDao;
import com.test.testEnviromentPostProcessor.pojo.DbConfigDto;
import lombok.SneakyThrows;
import lombok.extern.slf4j.Slf4j;
import org.apache.commons.lang3.StringUtils;
import org.apache.ibatis.io.Resources;
import org.apache.ibatis.session.SqlSessionFactory;
import org.apache.ibatis.session.SqlSessionFactoryBuilder;
import org.springframework.boot.SpringApplication;
import org.springframework.boot.context.properties.source.ConfigurationPropertySource;
import org.springframework.boot.env.EnvironmentPostProcessor;
import org.springframework.boot.origin.OriginTrackedValue;
import org.springframework.core.Ordered;
import org.springframework.core.env.ConfigurableEnvironment;
import org.springframework.core.env.MutablePropertySources;
import org.springframework.core.env.PropertiesPropertySource;
import org.springframework.core.env.PropertySource;

import java.io.InputStream;
import java.lang.reflect.Field;
import java.util.*;

/**
 * @ClassName DbEnvironmentPostProcessor
 * @Description 用于加载数据库中的配置文件,并替换环境对象中的配置,另外数据库多余的配置放到自定义的 PropertySources 中
 * @Author 熊斌
 * @Date 2022/9/24 10:26
 * @Version 1.0
 */
@Slf4j
public class DbEnvironmentPostProcessor implements EnvironmentPostProcessor, Ordered {
    @SneakyThrows
    @Override
    public void postProcessEnvironment(ConfigurableEnvironment environment, SpringApplication application) {
        // 获取数据库中的配置信息
        MutablePropertySources propertySources = environment.getPropertySources();
        InputStream inputStream = Resources.getResourceAsStream("mybatis-conf.xml");
        SqlSessionFactory build = new SqlSessionFactoryBuilder().build(inputStream);
        DbEnvironmentDao mapper = build.openSession().getMapper(DbEnvironmentDao.class);
        List<DbConfigDto> configList = mapper.getConfig();
        // 记录在其它配置中已存在的 key ,剩余的统一放到 customConfig 中
        List<DbConfigDto> removeConfigList = new ArrayList<>();
        // 记录在其它配置中已存在的 key ,新添加到临时区
        List<DbConfigDto> addConfigList = new ArrayList<>();
        // 遍历 应用中的 配置文件
        propertySources.stream().forEach(propertySource -> {
            String name = propertySource.getName();
            if (!"configurationProperties".equals(propertySource.getName())) {
                JSONObject defaultSourceJSONObject = JSONObject.parseObject(JSONObject.toJSONString(propertySource.getSource()));
                Set<Map.Entry<String, Object>> configEntrySet = defaultSourceJSONObject.entrySet();
                // 记录 配置文件 中的 key
                Set<String> set = new HashSet<>();
                for (Map.Entry<String, Object> entry : configEntrySet) {
                    set.add(entry.getKey());
                }
                // 配置文件 中包含数据库的标识
                boolean containFlag = false;
                // 记录 配置文件 中的 key 在数据库出现了
                for (DbConfigDto dbConfigDto : configList) {
                    if (set.contains((String) dbConfigDto.getConfKey())) {
                        addConfigList.add(dbConfigDto);
                        containFlag = true;
                    }
                }
                //  配置文件 中有包含数据库的配置
                if (containFlag) {
                    // 记录数据库中覆盖 配置文件 配置
                    removeConfigList.addAll(addConfigList);
                    Properties properties = new Properties();
                    for (Map.Entry<String, Object> entry : configEntrySet) {
                        if (entry.getValue() != null && properties.get(entry.getKey()) == null) {
                            if (entry.getValue().getClass() != String.class) {
                                String value = JSONObject.parseObject(JSONObject.toJSONString(entry.getValue())).getString("value");
                                properties.put(entry.getKey(), value);
                            } else {
                                properties.put(entry.getKey(), entry.getValue());
                            }
                        }
                    }
                    // 添加数据库中的配置
                    for (DbConfigDto dbConfigDto : addConfigList) {
                        properties.put(dbConfigDto.getConfKey(), dbConfigDto.getConfValue());
                    }
                    // 替换以前的配置
                    PropertiesPropertySource propertiesPropertySource = new PropertiesPropertySource(name, properties);
                    propertySources.replace(name, propertiesPropertySource);
                }
            }
        });
        // 将自定义的配置 记录 到所有配置的最后面
        configList.removeAll(removeConfigList);
        Properties properties = new Properties();
        for (DbConfigDto dbConfigDto : configList) {
            properties.put(dbConfigDto.getConfKey(), dbConfigDto.getConfValue());
            PropertiesPropertySource propertiesPropertySource = new PropertiesPropertySource("customConfig", properties);
            propertySources.addLast(propertiesPropertySource);
        }
    }

    @Override
    public int getOrder() {
        return Integer.MAX_VALUE;
    }
}
3、其中需要借助 mybatis 加载配置,mybatis-conf.xml
<?xml version="1.0" encoding="UTF-8"?>
<!DOCTYPE configuration
        PUBLIC "-//mybatis.org//DTD Config 3.0//EN"
        "http://mybatis.org/dtd/mybatis-3-config.dtd">

<configuration>
    <environments default="mysql">
        <environment id="mysql">
            <transactionManager type="JDBC"></transactionManager>
            <dataSource type="POOLED">
                <property name="driver" value="com.mysql.jdbc.Driver"/>
                <property name="url" value="jdbc:mysql://127.0.0.1:3306/test"/>
                <property name="username" value="root"/>
                <property name="password" value="root"/>
            </dataSource>
        </environment>
    </environments>
    <!--配置映射文件目录,使用package标签表示在该目录下的所有文件都是映射文件-->
    <mappers>
        <mapper class="com.test.testEnviromentPostProcessor.mapper.DbEnvironmentDao"/>
    </mappers>
</configuration>
@Mapper
public interface DbEnvironmentDao {

    @Select("select conf_key as confKey,conf_value as confValue from db_config")
    List<DbConfigDto> getConfig();

}
@Data
public class DbConfigDto {
    private String confKey;//作品ID
    private String confValue;//作品ID

}
@SpringBootApplication
public class App {
public static void main(String[] args) {
ConfigurableApplicationContext run = SpringApplication.run(App.class, args);
ConfigurableEnvironment environment = run.getBean(ConfigurableEnvironment.class);
System.out.println("start...");
}
}4、结果
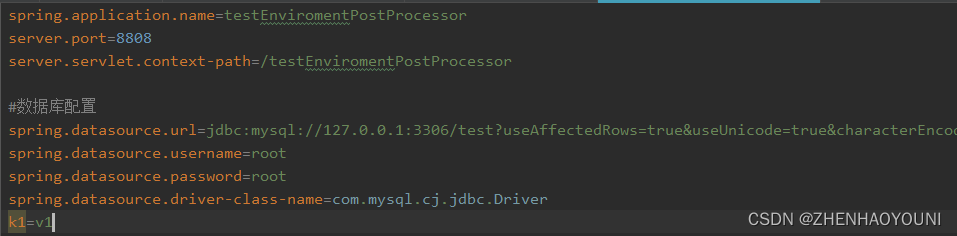
原始的配置
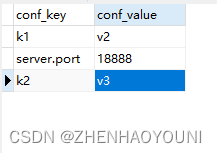
数据库的配置
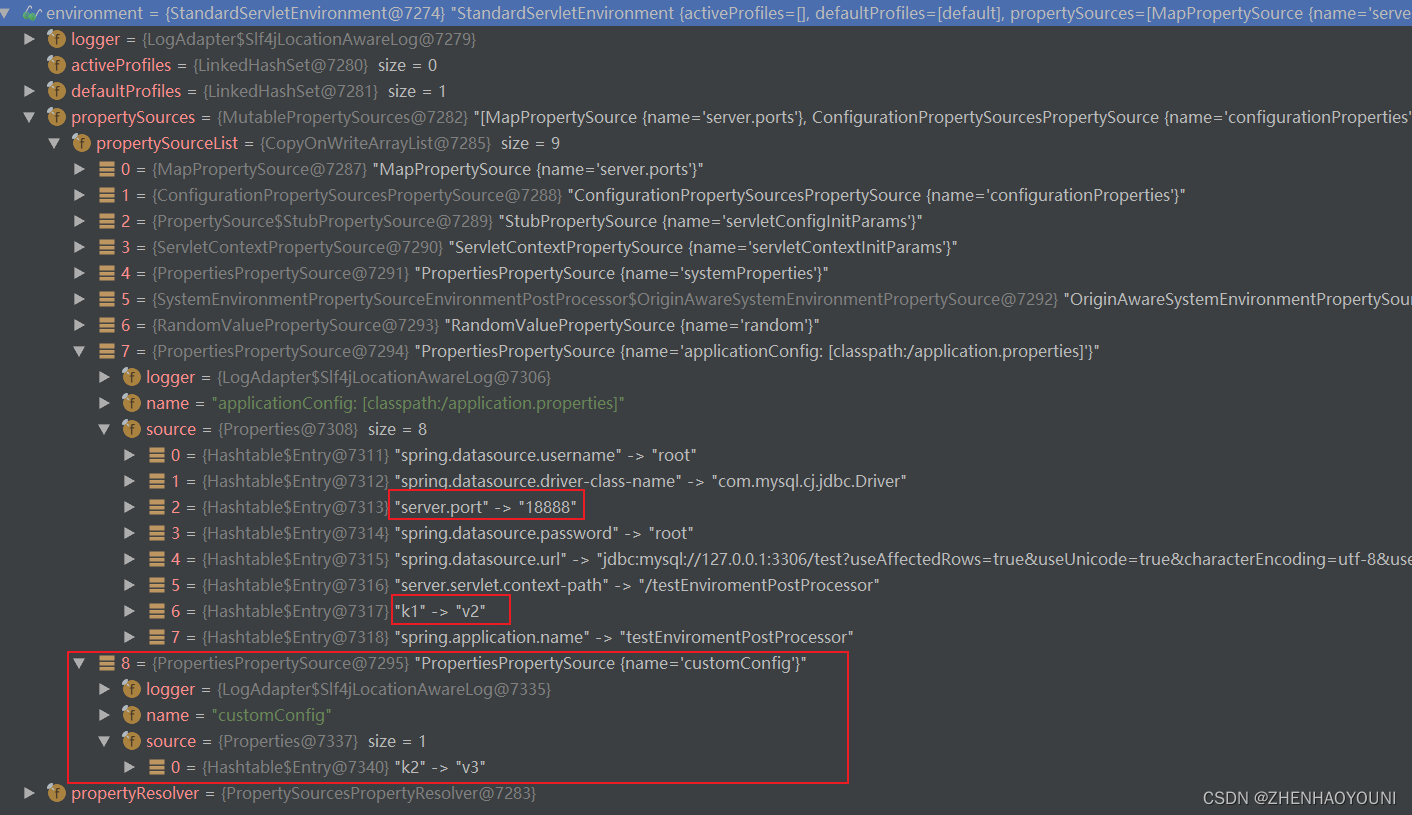
配置替换成功。
另外也可以直接将自定义的配置放到最前面,这样就不是替换应用的配置,而是优先使用前面的配置。
@Slf4j
public class DbEnvironmentPostProcessor implements EnvironmentPostProcessor, Ordered {
    @SneakyThrows
    @Override
    public void postProcessEnvironment(ConfigurableEnvironment environment, SpringApplication application) {
        // 获取数据库中的配置信息
        MutablePropertySources propertySources = environment.getPropertySources();
        InputStream inputStream = Resources.getResourceAsStream("mybatis-conf.xml");
        SqlSessionFactory build = new SqlSessionFactoryBuilder().build(inputStream);
        DbEnvironmentDao mapper = build.openSession().getMapper(DbEnvironmentDao.class);
        List<DbConfigDto> configList = mapper.getConfig();
        Properties properties = new Properties();
        for (DbConfigDto dbConfigDto : configList) {
            properties.put(dbConfigDto.getConfKey(), dbConfigDto.getConfValue());
            PropertiesPropertySource propertiesPropertySource = new PropertiesPropertySource("customConfig", properties);
            // 这里使用 addFirst 方法
            propertySources.addFirst(propertiesPropertySource);
        }
    }

    @Override
    public int getOrder() {
        return Integer.MAX_VALUE;
    }
}
看结果:
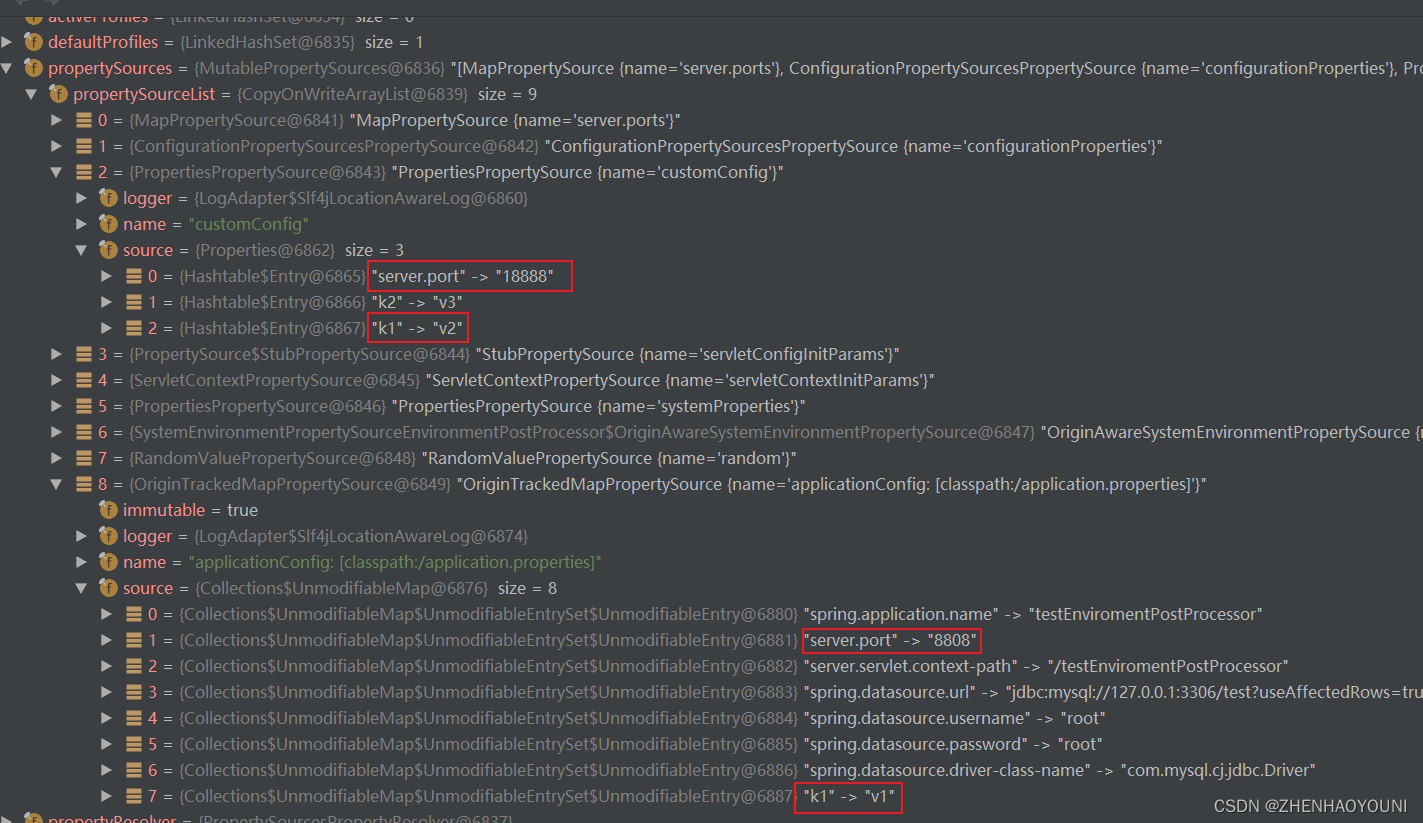
生效的端口是 18888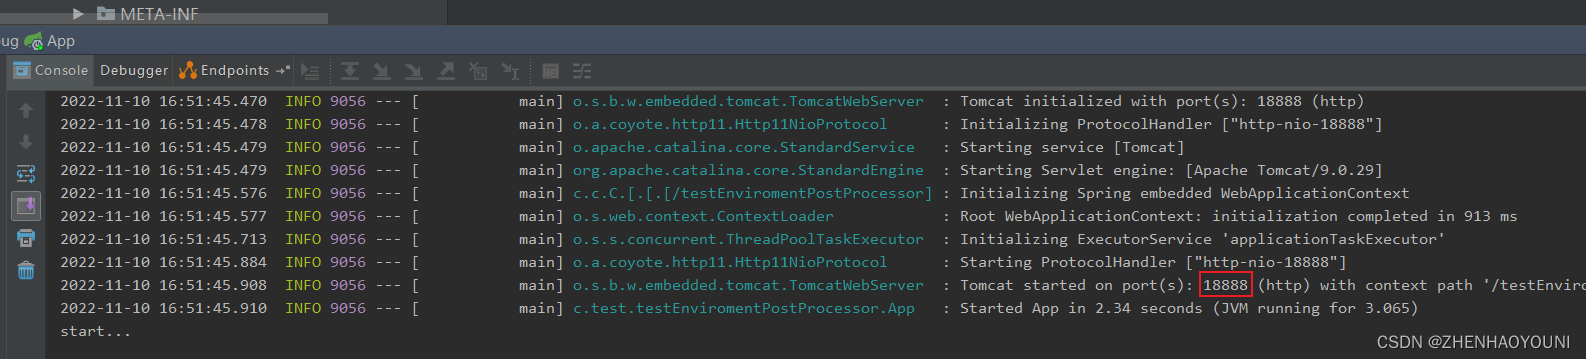


 被折叠的 条评论
为什么被折叠?
被折叠的 条评论
为什么被折叠?
 到【灌水乐园】发言


