


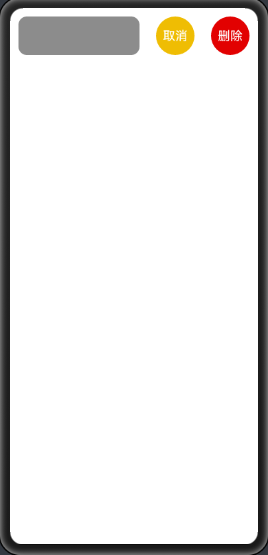
先看下效果

目录
前言
实现滑动菜单我的想法是,菜单隐藏在屏幕之外。当监听到滑动事件时,判断滑动的方向与距离,根据滑动的速度改变前景组件的位置。当滑动结束时,要判断滑动停止的位置,如果停留的位置不在预期的原点或边缘要将前景的组件恢复到指定位置(这里需要运用简单的动画)。
本来想写一个关于动画的文章,发现鸿蒙官方的文档就很简单易懂还有示例。大家可以先看一下官方的动画文档,动画开发指导。
UI布局部分
由于鸿蒙暂时没有圆角的布局,UI中的圆角和圆形都是通过graphic中的shape实现的,利用shape可以快速的实现圆角矩形、圆形和弧的几何图形,当然shape的用法不止这些。
背景资源布局
bg_contacts_component.xml 背景
<?xml version="1.0" encoding="utf-8"?>
<shape
    xmlns:ohos="http://schemas.huawei.com/res/ohos"
    ohos:shape="rectangle">

    <solid ohos:color="#FF8C8C8C"/>

    <corners ohos:radius="12vp"/>
</shape>
bg_contacts_cancel.xml 背景
<?xml version="1.0" encoding="utf-8"?>
<shape
    xmlns:ohos="http://schemas.huawei.com/res/ohos"
    ohos:shape="oval">

    <solid ohos:color="#FFEFBD03"/>
</shape>
bg_contacts_deldete.xml 背景
<?xml version="1.0" encoding="utf-8"?>
<shape
    xmlns:ohos="http://schemas.huawei.com/res/ohos"
    ohos:shape="oval">

    <solid ohos:color="#FFE20101"/>
</shape>
Ability UI
由于是横向滑动,菜单布局在前景布局的后面我们选用DirectionalLayout为主要布局,前景布局和菜单都放在其中。菜单的布局也选用DirectionalLayout布局,选择按钮在其中DirectionalLayout还有一点就是可以利用权重来指定其中组件的占比,特别适合做菜单等单元等分的布局。前景布局现实中可能要复杂很多,我们采用DependentLayout布局。
效果
layout 布局
<?xml version="1.0" encoding="utf-8"?>
<DirectionalLayout
    xmlns:ohos="http://schemas.huawei.com/res/ohos"
    ohos:height="match_parent"
    ohos:id="$+id:dl_contacts_main"
    ohos:orientation="horizontal"
    ohos:width="match_parent">

    <DependentLayout
        ohos:height="80vp"
        ohos:id="$+id:dl_contacts"
        ohos:width="200vp">

        <Component
            ohos:background_element="$graphic:bg_contacts_component"
            ohos:bottom_margin="12vp"
            ohos:end_margin="12vp"
            ohos:height="match_parent"
            ohos:id="$+id:c_contacts"
            ohos:start_margin="12vp"
            ohos:top_margin="12vp"
            ohos:width="match_parent"/>

    </DependentLayout>

    <DirectionalLayout
        ohos:height="80vp"
        ohos:id="$+id:dtrl_contacts"
        ohos:orientation="horizontal"
        ohos:right_of="$id:dl_contacts"
        ohos:total_weight="2"
        ohos:width="160vp">

        <Text
            ohos:background_element="$graphic:bg_contacts_cancel"
            ohos:bottom_margin="12vp"
            ohos:end_margin="12vp"
            ohos:height="match_parent"
            ohos:id="$+id:t_contacts_cancel"
            ohos:start_margin="12vp"
            ohos:text="取消"
            ohos:text_alignment="center"
            ohos:text_color="#FFFFFF"
            ohos:text_size="18fp"
            ohos:top_margin="12vp"
            ohos:weight="1"
            ohos:width="0"/>

        <Text
            ohos:background_element="$graphic:bg_contacts_deldete"
            ohos:bottom_margin="12vp"
            ohos:end_margin="12vp"
            ohos:height="match_parent"
            ohos:id="$+id:t_contacts_delete"
            ohos:start_margin="12vp"
            ohos:text="删除"
            ohos:text_alignment="center"
            ohos:text_color="#FFFFFF"
            ohos:text_size="18fp"
            ohos:top_margin="12vp"
            ohos:weight="1"
            ohos:width="0"/>
    </DirectionalLayout>

</DirectionalLayout>
Java 部分
这里包含三部分布局,最外层包含前景和菜单布局我们要移动的就是它、前景布局对点击拖动事件进行响应和菜单部分。
在 onStart() 中初始化布局
private DirectionalLayout dependentLayoutMain;
private DependentLayout dependentLayout;
private DirectionalLayout directionalLayout;

@Override
protected void onStart(Intent intent) {
    ......
    int widthPx = (int) (getContext().getResourceManager().getDeviceCapability().width * AttrHelper.getDensity(this));

    // 前景布局
    dependentLayout = (DependentLayout) findComponentById(ResourceTable.Id_dl_contacts);
    dependentLayout.setWidth(widthPx);

    // 菜单
    directionalLayout = (DirectionalLayout) findComponentById(ResourceTable.Id_dtrl_contacts);

    // 主容器
    dependentLayoutMain = (DirectionalLayout) findComponentById(ResourceTable.Id_dl_contacts_main);
    dependentLayoutMain.setWidth(widthPx + directionalLayout.getWidth());

    ......
}
当UI具备交互后初始化点击拖动事件的监听,也就是在 onActive() 中。
实现拖动监听接口DraggedListener类需要重写其中的方法:
| 方法 | 功能 | 描述 |
|---|---|---|
| onDragDown () | 下拉事件 | 不在我们本次的处理范围内 |
| onDragStart () | 拖拽开始 | 我们需要在这里计算起始位置等初始信息 |
| onDragUpdate( ) | 拖动更新 | 我们需要根据拖动的距离实时更改组件位置 |
| onDragEnd () | 拖拽结束 | 我们需要在这里计算需要移动到的位置将组件继续移动到指定位置 |
| onDragCancel () | 拖动取消 | 暂时不做处理,也可同结束事件 |
具体代码如下:
    @Override
    protected void onActive() {
        ......

        // 设置水平拖动监听
        dependentLayout.setDraggedListener(Component.DRAG_HORIZONTAL, new Component.DraggedListener() {
            // 拖动动作开始X坐标
            private int startX = 0;
            // 拖动动作开始时的前景坐标,确定移动方向
            private float dependentLayoutStartX = 0;
            // 背景组件长度
            private int directionalLayoutWidth = 0;
            // 背景移动最远位置
            private int distance = 0;

            @Override
            public void onDragDown(Component component, DragInfo dragInfo) {

            }

            @Override
            public void onDragStart(Component component, DragInfo dragInfo) {

                startX = dragInfo.startPoint.getPointXToInt();

                dependentLayoutStartX = dependentLayoutMain.getContentPositionX();

                directionalLayoutWidth = directionalLayout.getWidth();


                distance = -directionalLayoutWidth;

                HiLog.error(LABEL_LOG, "前景X坐标:" + dependentLayoutStartX +
                        ";背景长度:" + directionalLayoutWidth +
                        ";拖动开始位置:" + startX +
                        ";背景移动最远位置:" + distance);
            }

            @Override
            public void onDragUpdate(Component component, DragInfo dragInfo) {
                // 拖动动作当前X坐标
                int upX = dragInfo.updatePoint.getPointXToInt();
                // 拖动距离
                int upDataX = upX - startX;
                HiLog.error(LABEL_LOG, "拖动距离:" + upDataX);
                // 前景子组件当时的位置
                float dependentLayoutX = dependentLayoutMain.getContentPositionX();

                // 预定位置
                float position = dependentLayoutX + upDataX;

                if (position < distance) {
                    position = distance;
                }

                if (position > 0) {
                    position = 0;
                }

                dependentLayoutMain.setContentPositionX(position);
            }

            @Override
            public void onDragEnd(Component component, DragInfo dragInfo) {
                HiLog.error(LABEL_LOG, "拖动结束");
                float nowX = dependentLayoutMain.getContentPositionX();

                // 由于不是拖动,添加动画使移动流畅
                AnimatorProperty animatorProperty = new AnimatorProperty();
                animatorProperty
                        .setTarget(dependentLayoutMain)
                        .setLoopedCount(0)
                        .setDuration(200)
                        .setCurveType(Animator.CurveType.LINEAR);


                // 设定以2/5为分界点
                int divide = directionalLayoutWidth / 3;
                if (dependentLayoutStartX == 0) {
                    // 从原点出发
                    if (nowX < -divide) {
                        animatorProperty.moveFromX(nowX).moveToX(distance);
                    } else {
                        animatorProperty.moveFromX(nowX).moveToX(0);
                    }
                } else if (dependentLayoutStartX == distance) {
                    // 从隐藏点出发
                    if (distance - nowX > -divide) {
                        animatorProperty.moveFromX(nowX).moveToX(distance);
                    } else {
                        animatorProperty.moveFromX(nowX).moveToX(0);
                    }
                }

                animatorProperty.start();
            }

            @Override
            public void onDragCancel(Component component, DragInfo dragInfo) {
                //HiLog.error(LABEL_LOG, "拖动取消");
            }
        });

        ......
    }
到此拖动菜单就结束了,也可以举一反三下拉刷新之类的处理!


 476
476


 被折叠的 条评论
为什么被折叠?
被折叠的 条评论
为什么被折叠?
 到【灌水乐园】发言


