


注册阿里云
开通对象存储OSS
使用支付宝开通阿里云,网站:www.aliyun.com,找到对象存储OSS,然后点击开通。

然后点击控制台,点击创建Bucket:

然后回到对象存储概览页面,创建密钥:
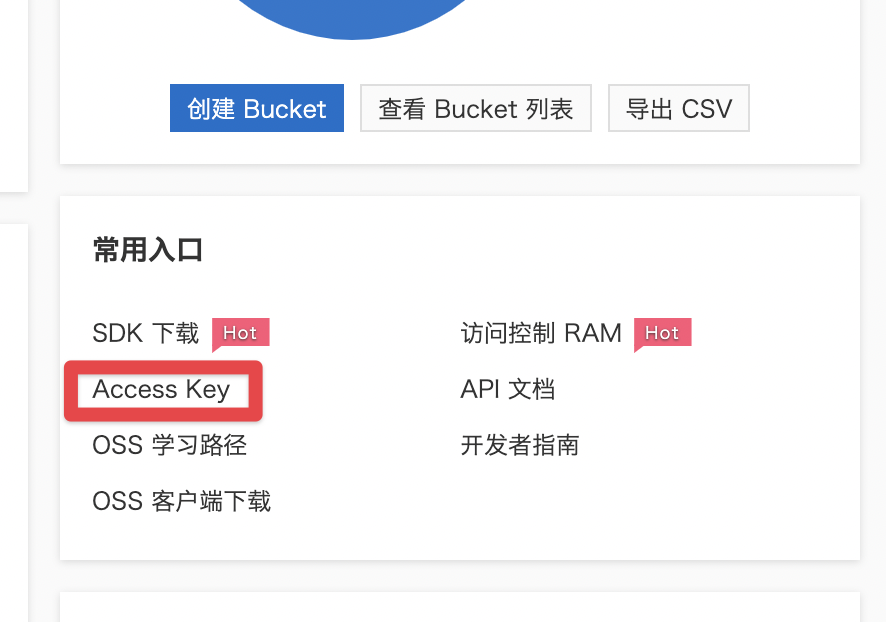
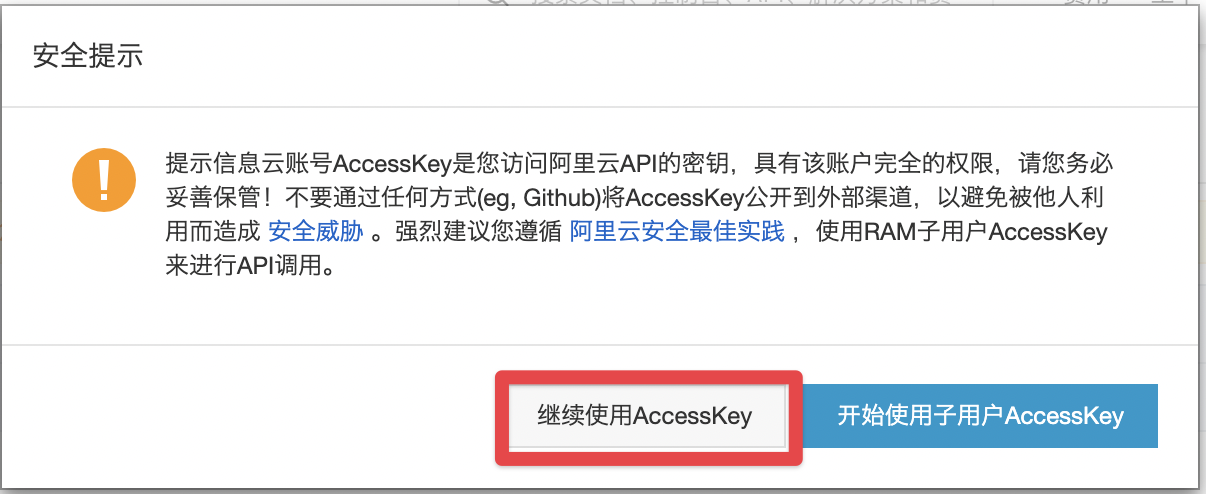

创建好以后保存起来,后面会用到。
官方学习文档
查看JavaAPI文档,里面有详细的使用教程:
链接:https://help.aliyun.com/document_detail/32008.html?spm=a2c4g.11186623.6.939.1fb314a0WOSp6q

一、后端新建云存储微服务
1、创建service_oss模块
2、引入依赖
在service_oss模块的pom.xml文件中引入依赖,父工程里面已经指定了版本号,这里不用写版本号:
<dependencies>
  <!-- 阿里云oss依赖 -->
  <dependency>
    <groupId>com.aliyun.oss</groupId>
    <artifactId>aliyun-sdk-oss</artifactId>
  </dependency>
  <!-- 日期工具栏依赖 -->
  <dependency>
    <groupId>joda-time</groupId>
    <artifactId>joda-time</artifactId>
  </dependency>
</dependencies>
3、创建配置文件
创建 application.properties 文件:
#服务端口
server.port=8002

#服务名
spring.application.name=service-oss

#环境设置:dev、test、prod
spring.profiles.active=dev

#阿里云 OSS
#不同的服务器,地址不同
aliyun.oss.file.endpoint=******
aliyun.oss.file.keyid=******
aliyun.oss.file.keysecret=******

#bucket可以在控制台创建,也可以使用java代码创建
aliyun.oss.file.bucketname=******
4、创建启动类
创建包com.atguigu.oss,创建启动类:OssApplicatoin
@SpringBootApplication
@ComponentScan({"com.atguigu"})
public class OssApplicatoin {
    public static void main(String[] args) {
        SpringApplication.run(OssApplicatoin.class, args);
    }
}
5、遇到问题
启动项目,报错如下:
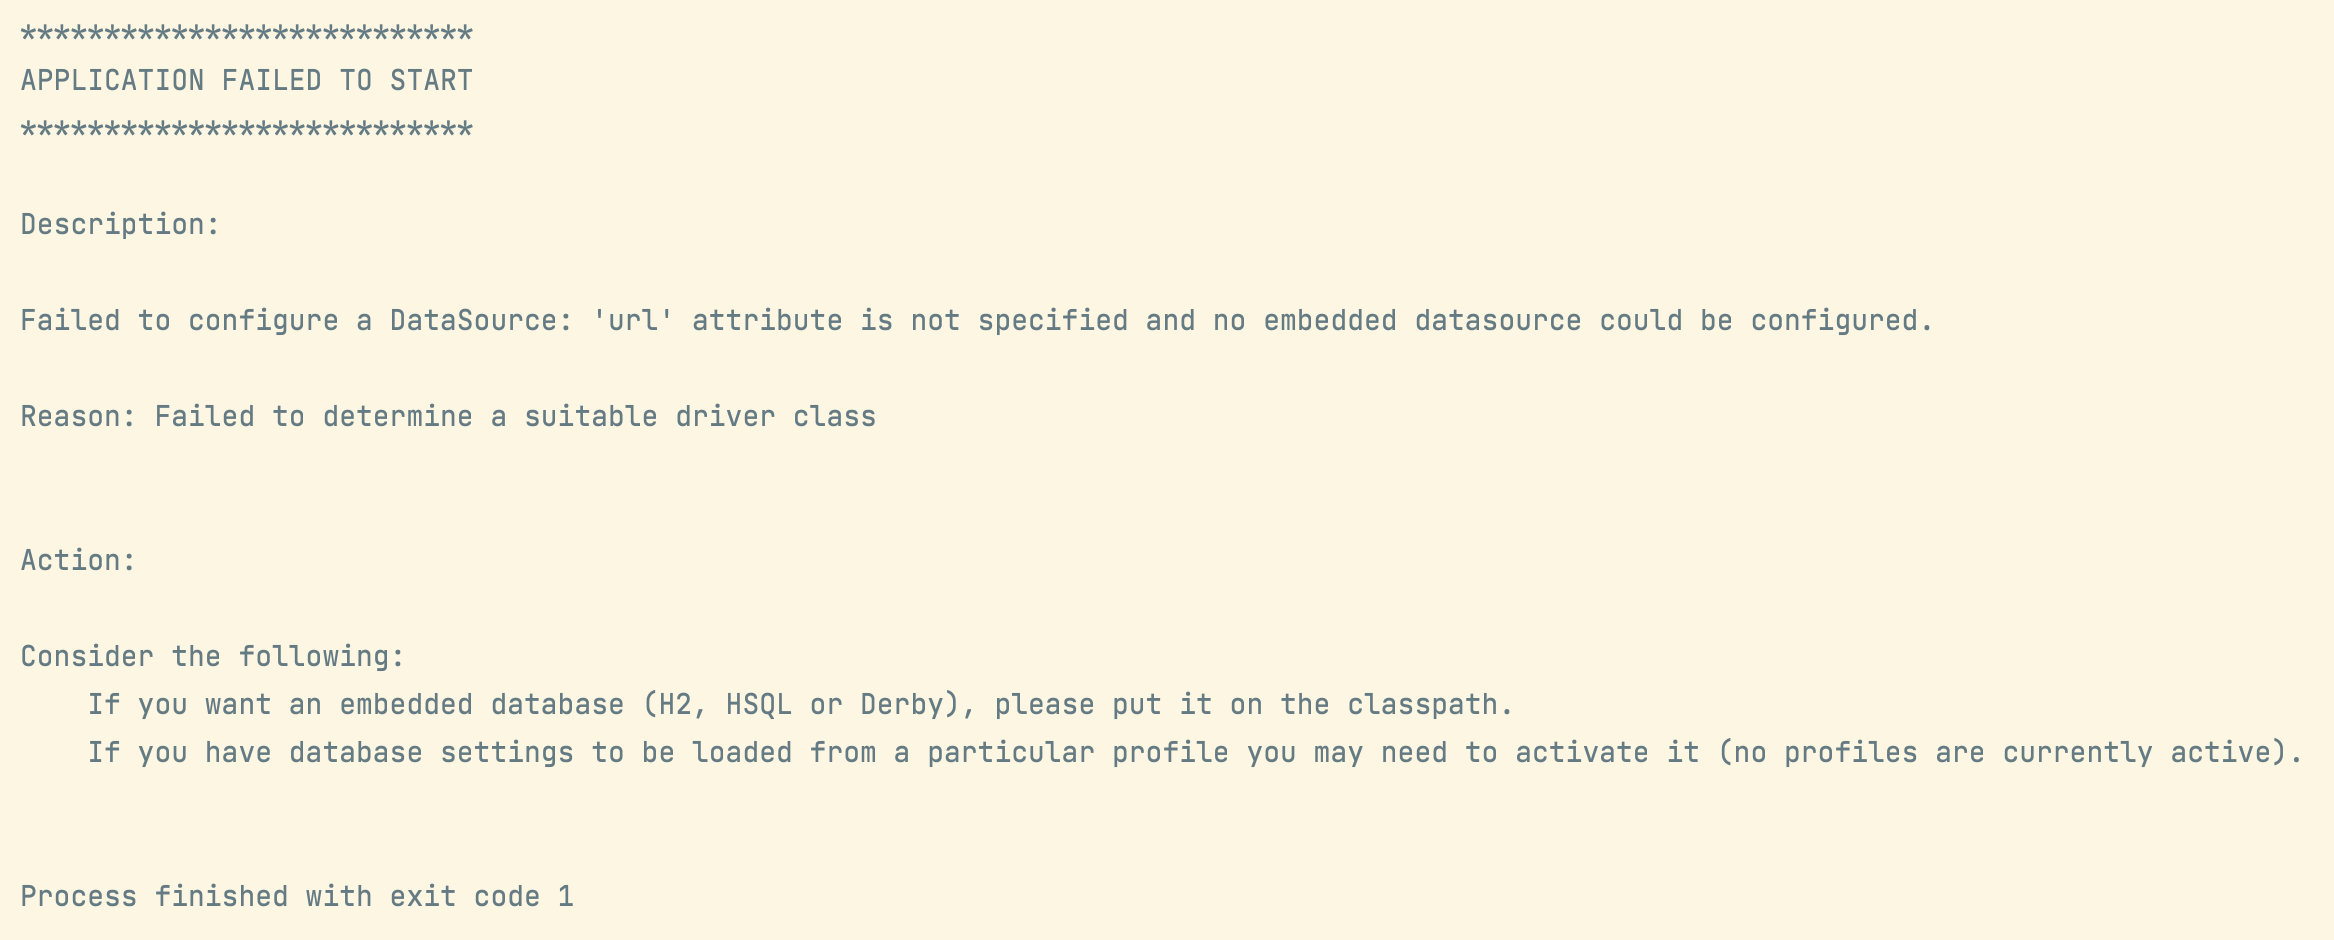
原因:
spring boot 会默认加载org.springframework.boot.autoconfigure.jdbc.DataSourceAutoConfiguration这个类,
而DataSourceAutoConfiguration类使用了@Configuration注解向spring注入了dataSource bean,又因为项目(oss模块)中并没有关于dataSource相关的配置信息,所以当spring创建dataSource bean时因缺 少相关的信息就会报错。
解决办法:
在@SpringBootApplication注解上加上exclude,解除自动加载DataSourceAutoConfiguration
@SpringBootApplication(exclude = DataSourceAutoConfiguration.class)
二、后端实现文件上传
1、创建工具类读取配置文件
创建包:utils,创建常量读取工具类:ConstantPropertiesUtils,使用@Value读取application.properties里的配置内容,
用spring的 InitializingBean 的 afterPropertiesSet 来初始化配置信息,这个方法将在所有的属性被初始化后调用。
/**
 * 常量类,用于读取配置文件内容,实现spring的一个接口,加载后会执行该接口的方法
 */
@Component
public class ConstantPropertiesUtils implements InitializingBean {

    @Value("${aliyun.oss.file.endpoint}")
    private String endpoint;

    @Value("${aliyun.oss.file.keyid}")
    private String keyId;

    @Value("${aliyun.oss.file.keysecret}")
    private String keySecret;

    @Value("${aliyun.oss.file.bucketname}")
    private String bucketName;

    // 定义公开静态常量
    public static String END_POINT;
    public static String ACCESS_KEY_ID;
    public static String ACCESS_KEY_SECRET;
    public static String BUCKET_NAME;

    @Override
    public void afterPropertiesSet() {
        END_POINT = endpoint;
        ACCESS_KEY_ID = keyId;
        ACCESS_KEY_SECRET = keySecret;
        BUCKET_NAME = bucketName;
    }
}
2、service层
创建service包,创建OssService接口:
public interface OssService {
    // 上传头像到oss
    String uploadFileAvatar(MultipartFile file);
}
参考文档:https://help.aliyun.com/document_detail/84781.html?spm=a2c4g.11186623.6.964.7c9046a1cS5fil
@Service
public class OssServiceImpl implements OssService {

    @Override
    public String uploadFileAvatar(MultipartFile file) {

        String endpoint = ConstantPropertiesUtils.END_POINT;
        String accessKeyId = ConstantPropertiesUtils.ACCESS_KEY_ID;
        String accessKeySecret = ConstantPropertiesUtils.ACCESS_KEY_SECRET;
        String bucketName = ConstantPropertiesUtils.BUCKET_NAME;

        // 创建OSSClient实例
        OSS ossClient = new OSSClientBuilder().build(endpoint, accessKeyId, accessKeySecret);

        // 获取上传文件输入流
        InputStream inputStream = null;
        try {
            inputStream = file.getInputStream();
        } catch (IOException e) {
            e.printStackTrace();
        }

        // 获取文件名
        String fileName = file.getOriginalFilename();
        // 1、给文件名添加一个随机唯一值
        String uuid = UUID.randomUUID().toString().replaceAll("-","");
        // 2、把文件按照日期进行分类,用joda-time依赖
        String datePath = new DateTime().toString("yyyy/MM/dd");
        // 拼接文件名
        // 例如https://guli-edu-21.oss-cn-beijing.aliyuncs.com/2021/04/21/5fd5ba65acfb41fc9bcfa5f54074ceb51.JPG
        fileName = datePath + "/" + uuid + fileName;

        // 调用oss方法实现上传
        // 第一个参数是bucket名称
        // 第二个参数是上传到oss文件路径和文件名称
        // 第三个参数是上传文件输入流
        ossClient.putObject(bucketName, fileName, inputStream);

        // 关闭OSSClient。
        ossClient.shutdown();

        // 把上传之后文件路径返回
        // 需要把上传到阿里云oss路径手动拼接出来
        String url = "https://"+bucketName+"."+endpoint+"/"+fileName;
        return url;
    }
}
3、controller层
创建controller包,创建OssController类:
@RestController
@RequestMapping("/eduoss/fileoss")
@CrossOrigin
public class OssController {
    @Autowired
    private OssService ossService;

    @PostMapping
    public R uploadOssFile(MultipartFile file) {
        // 获取上传文件,返回上传到oss的路径
        String url = ossService.uploadFileAvatar(file);
        return R.ok().data("url", url);
    }
}
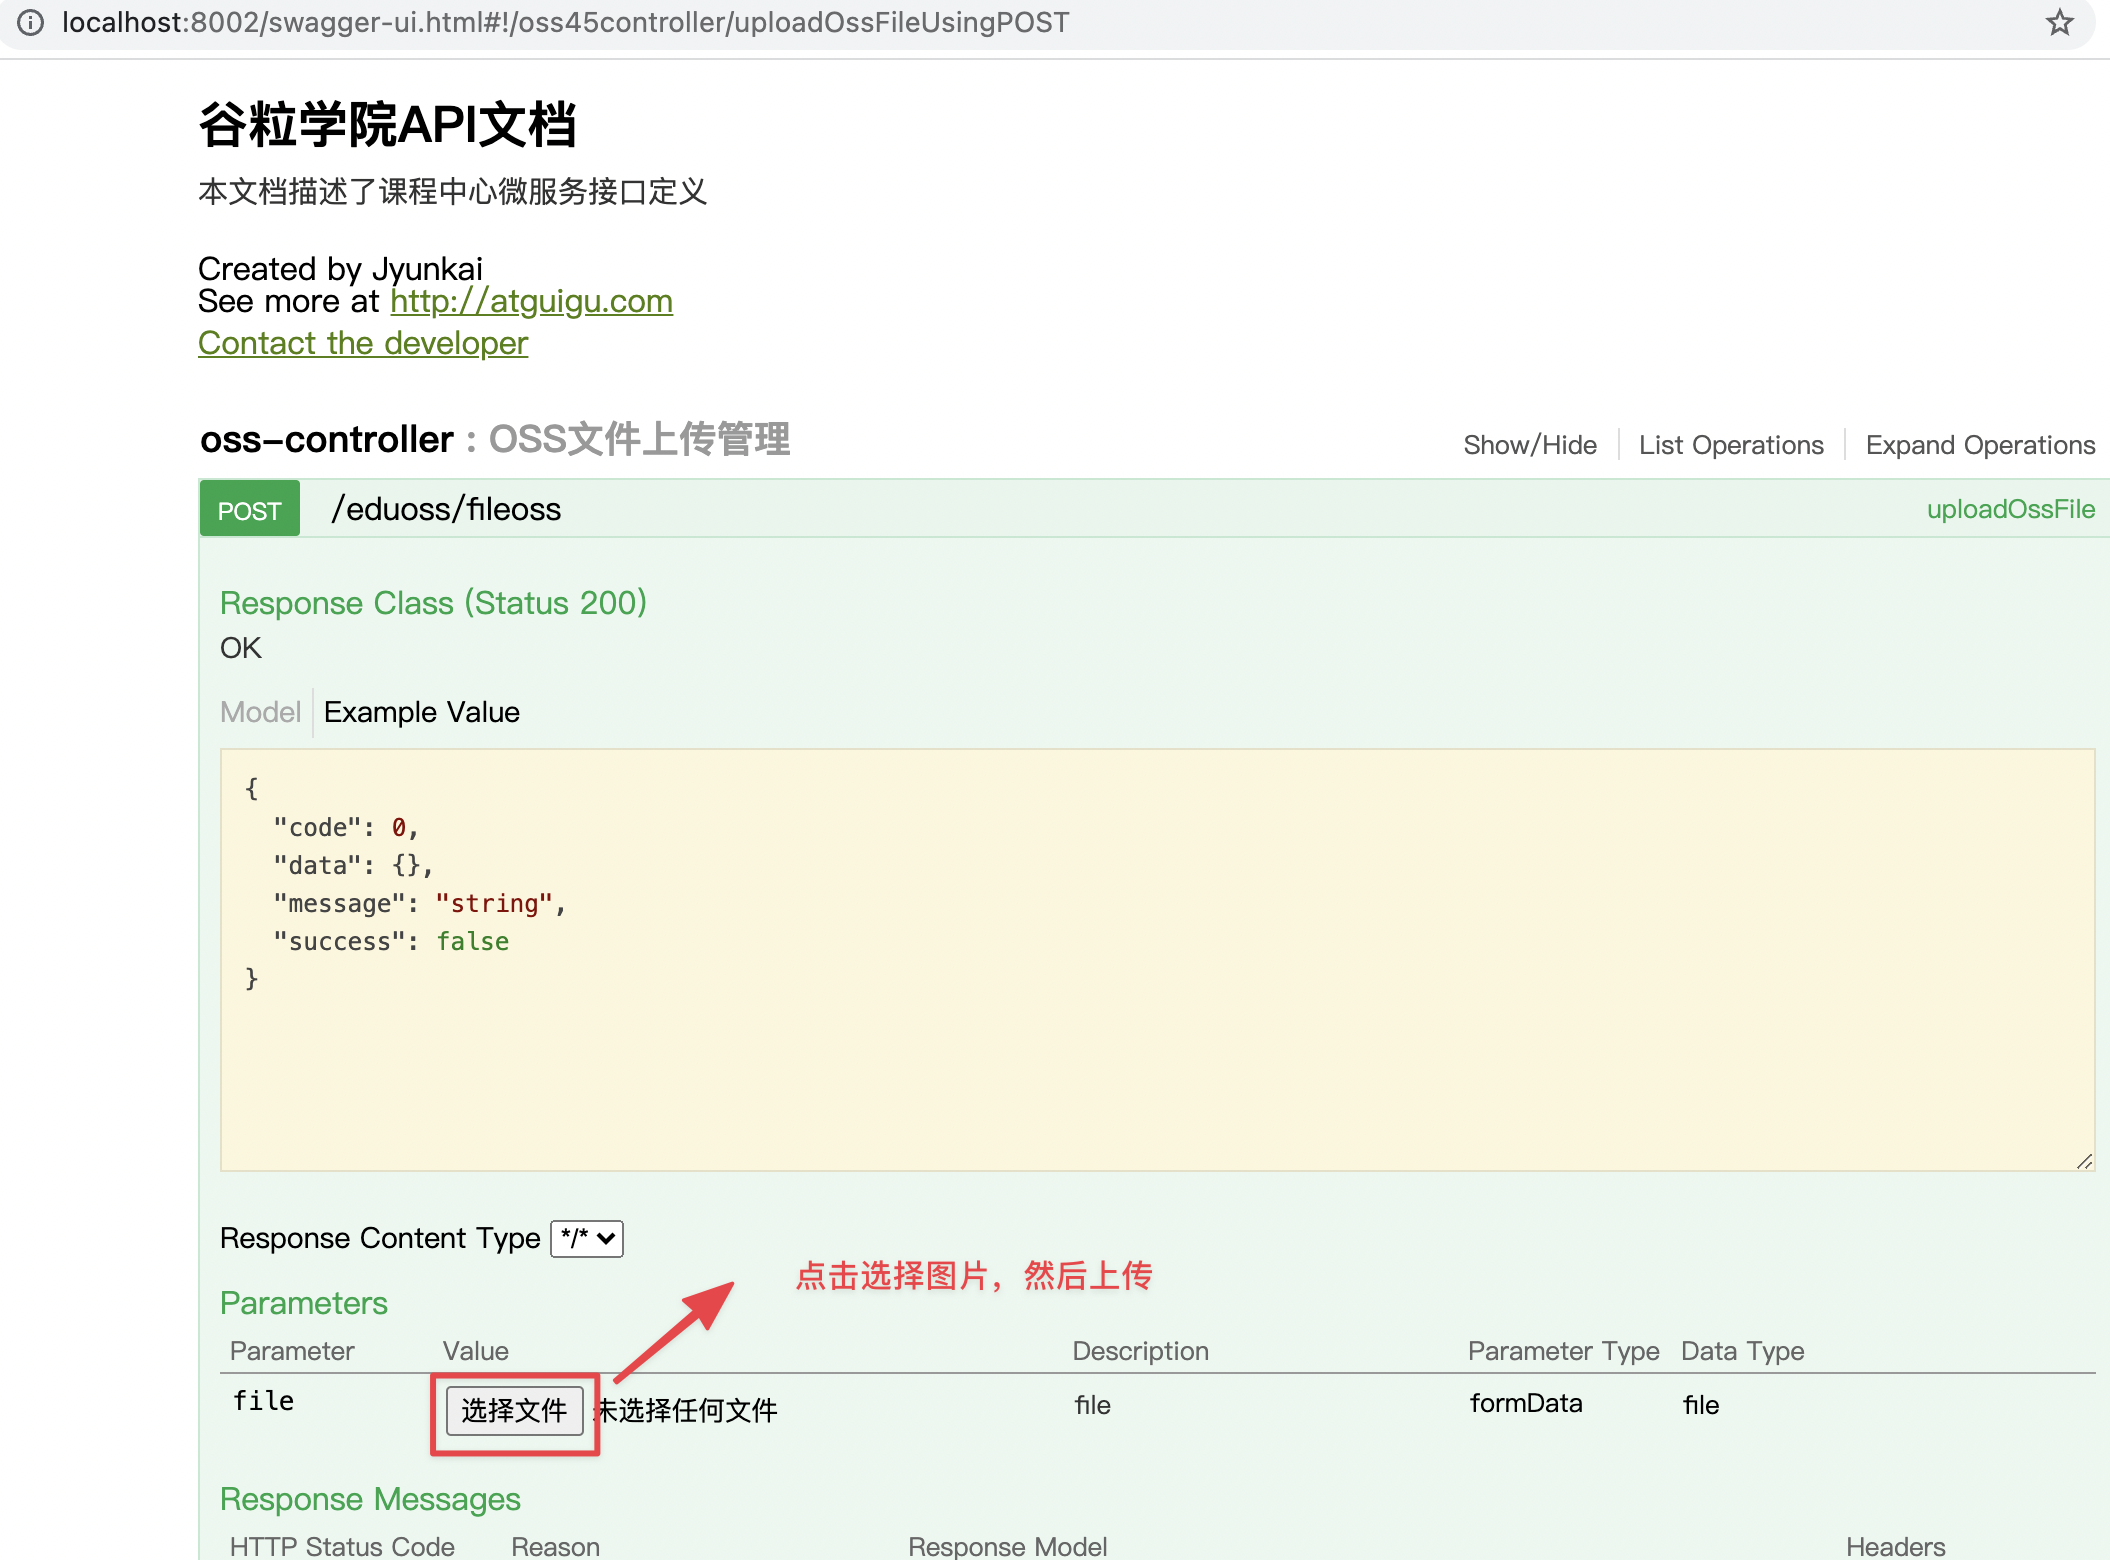
4、Swagger 测试
访问 http://localhost:8002/swagger-ui.html,上传图片,成功:

三、Nginx安装配置
安装Nginx
# 启动nginx服务
nginx

# 关闭nginx服务
nginx -s stop

# 重启nginx服务
nginx -s reload
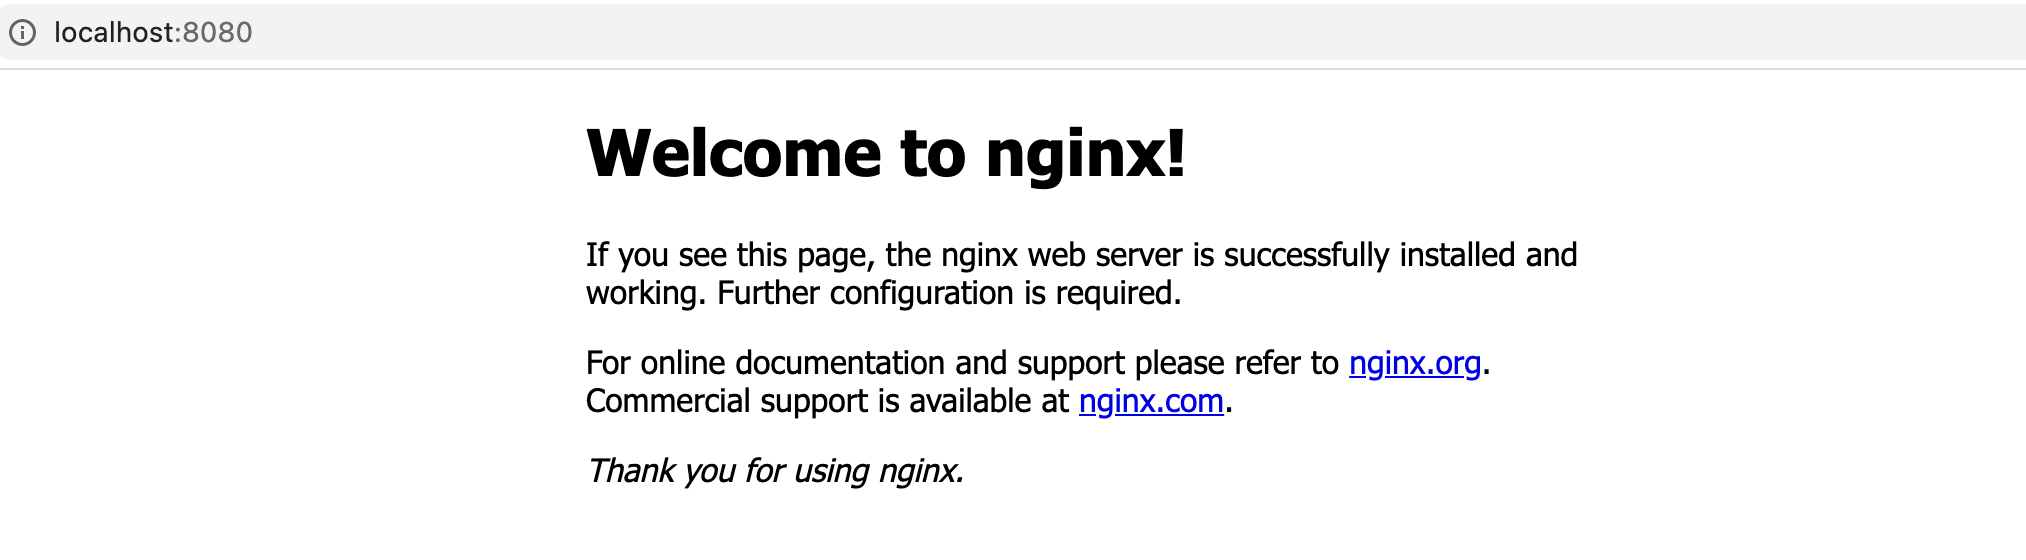
默认端口是8080,浏览器访问:http://localhost:8080,效果如下:
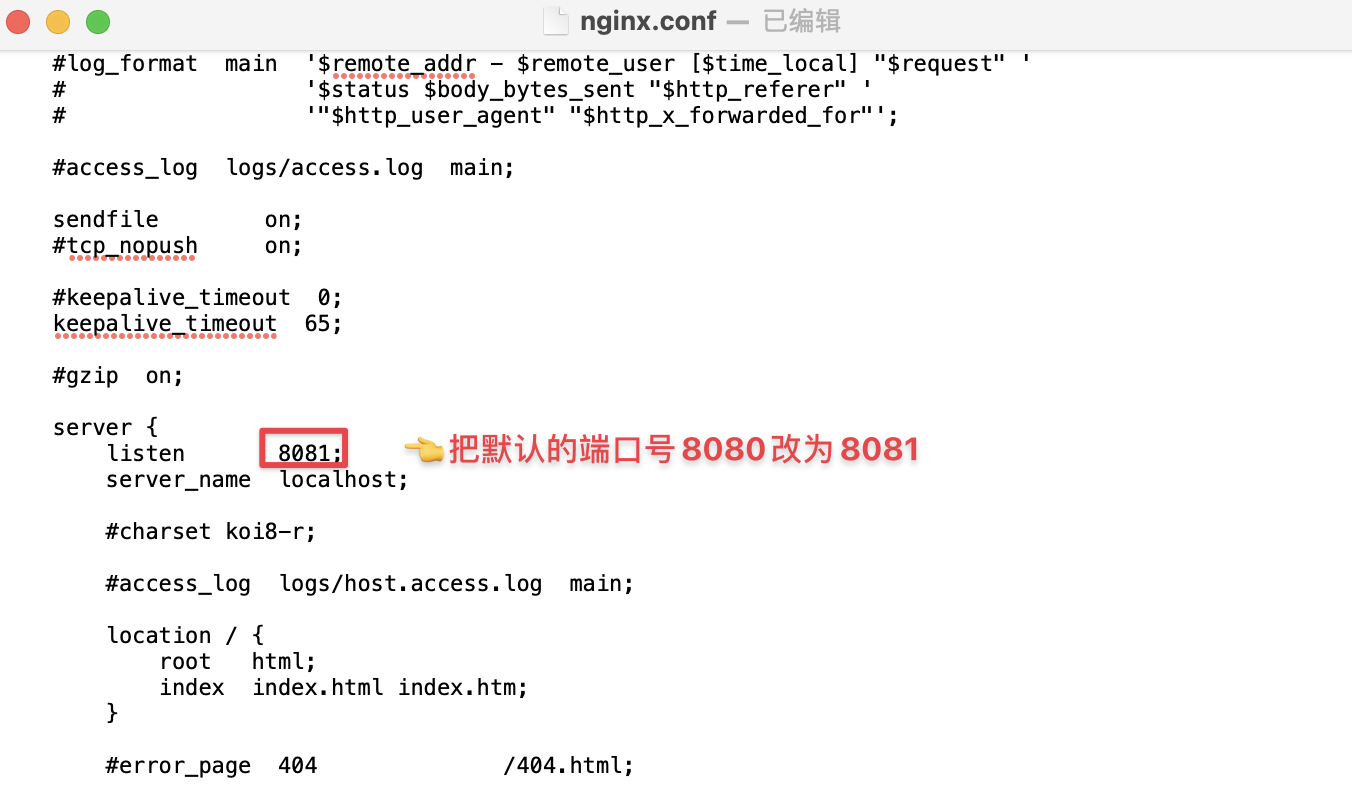
配置Nginx
配置文件地址:nginx/nginx.conf
打开配置文件,修改默认端口号,并添加请求转发的接口地址,其中~代表正则匹配。

修改前端地址端口号
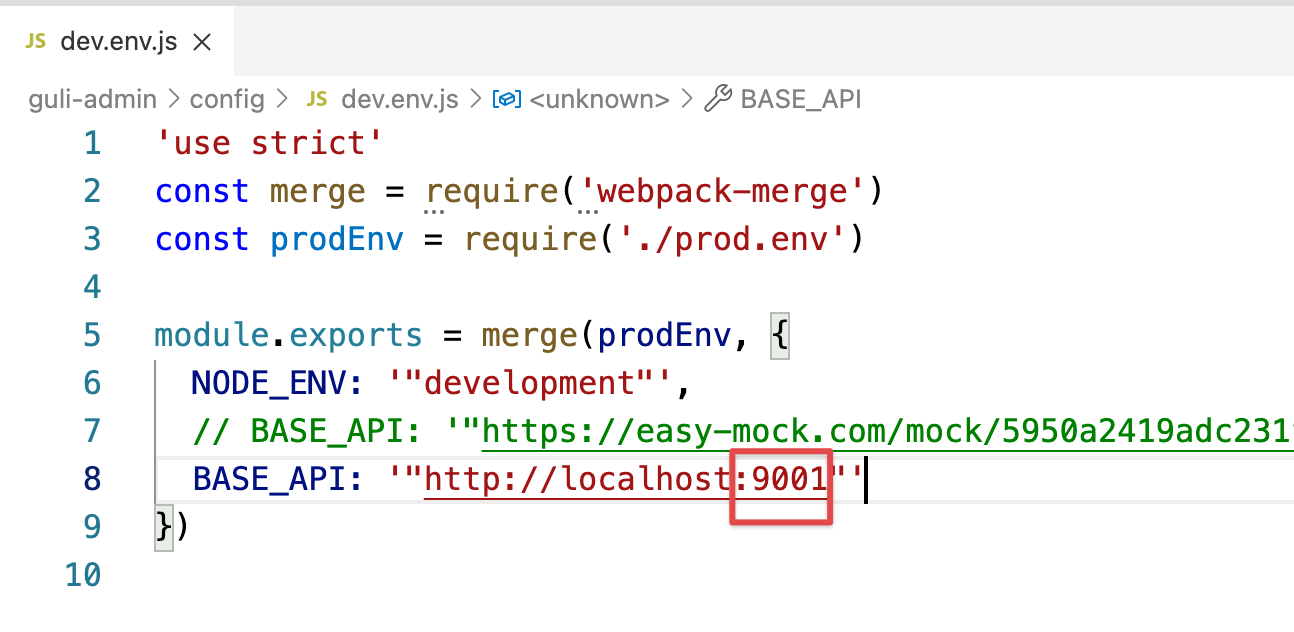
测试
同时启动nginx、后端(EduApplication)、前端,然后访问讲师列表,发现请求地址已经变成9001了:

四、前端整合图片上传组件
1、复制头像上传组件
将下面两个组件复制到src/components
- vue-element-admin/src/components/ImageCropper
- vue-element-admin/src/components/PanThumb

资料:
上传组件.rar
2、文件上传组件
在 src/views/edu/teacher/save.vue文件中的 <!-- 讲师头像:TODO -->注释的下面添加代码:
注意修改上传接口的地址为:/eduoss/fileoss
<!-- 讲师头像 -->
<el-form-item label="讲师头像">
  <!-- 头衔缩略图 -->
  <pan-thumb :image="teacher.avatar"/>
  <!-- 文件上传按钮 -->
  <el-button type="primary" icon="el-icon-upload" @click="imagecropperShow=true">更换头像 </el-button>
  <!--
	v-show:是否显示上传组件 :key:类似于id,如果一个页面多个图片上传控件,可以做区分
	:url:后台上传的url地址@close:关闭上传组件 @crop-upload-success:上传成功后的回调
	-->
  <image-cropper v-show="imagecropperShow"
                 :width="300"
                 :height="300"
                 :key="imagecropperKey"
                 :url="BASE_API+'/eduoss/fileoss'"
                 field="file"
                 @close="close"
                 @crop-upload-success="cropSuccess"/>
</el-form-item>
3、引入和声明组件,定义变量和初始值
<script>
import teacherApi from '@/api/edu/teacher'
import ImageCropper from '@/components/ImageCropper'
import PanThumb from '@/components/PanThumb'

export default {
  components: { ImageCropper, PanThumb },
  data() {
    return {
      teacher: {},
      // 上传弹框组件是否显示
      imagecropperShow: false,
      // 上传组件id值
      imagecropperKey: 0,
      // 接口API地址
      BASE_API: process.env.BASE_API,
      // 保存按钮是否禁用
      saveBtnDisabled: false
    }
  },
}
...
</script>
4、关闭弹框与上传成功的方法
methods: {
		...
    // 关闭上传弹框的方法
    close() {
      this.imagecropperShow = false
      // 上传组件初始化
      this.imagecropperKey = this.imagecropperKey + 1
    },
    // 上传成功方法
    cropSuccess(data) {
      this.imagecropperShow = false
      // 上传之后接口返回图片地址
      this.teacher.avatar = data.url
      this.imagecropperKey = this.imagecropperKey + 1
    }
}
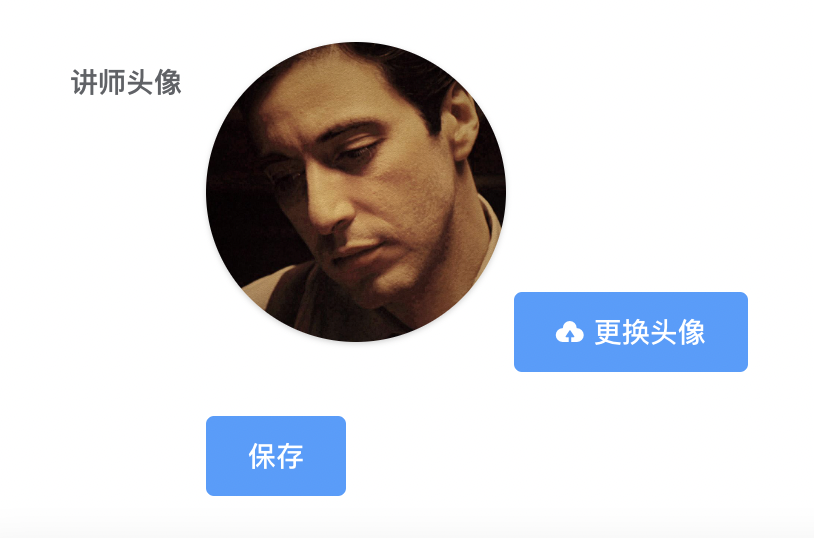
5、测试
启动前端和nginx,启动后端的是OssApplication、EduApplication
点击更换图像,然后选择本地图片上传即可,成功如下所示:
然后查看阿里云oss管理控制台,确实多了一张图片,组件会把图片名字最后都变成 file.png,为了预防出现中文


 568
568


 被折叠的 条评论
为什么被折叠?
被折叠的 条评论
为什么被折叠?
 到【灌水乐园】发言


