


SpringBoot初学(一)-----搭建项目,简单例子启动
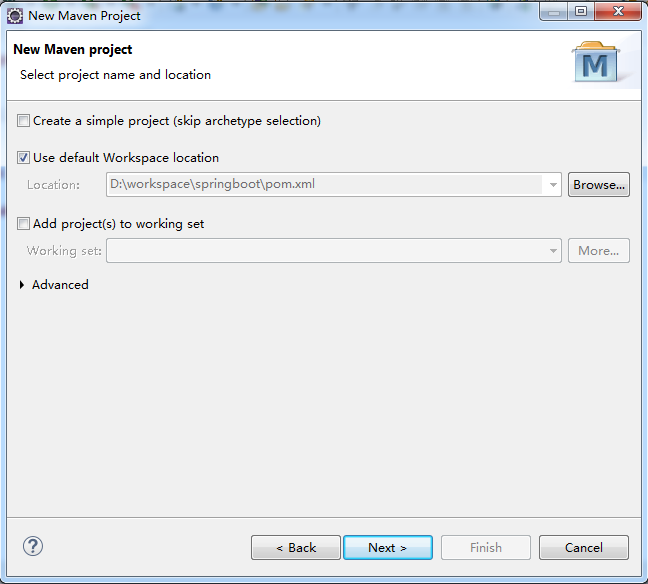
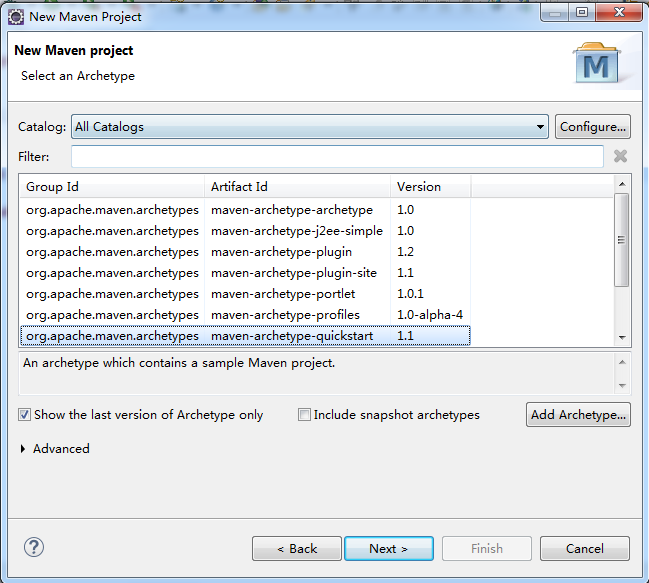
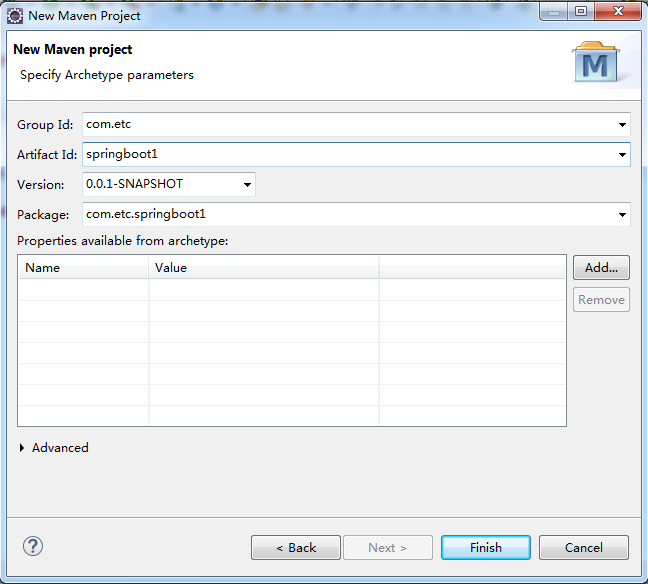
1、使用MyEclipse工具,新建一个Maven项目,进行如下设置:
2、新建的项目格局如下:
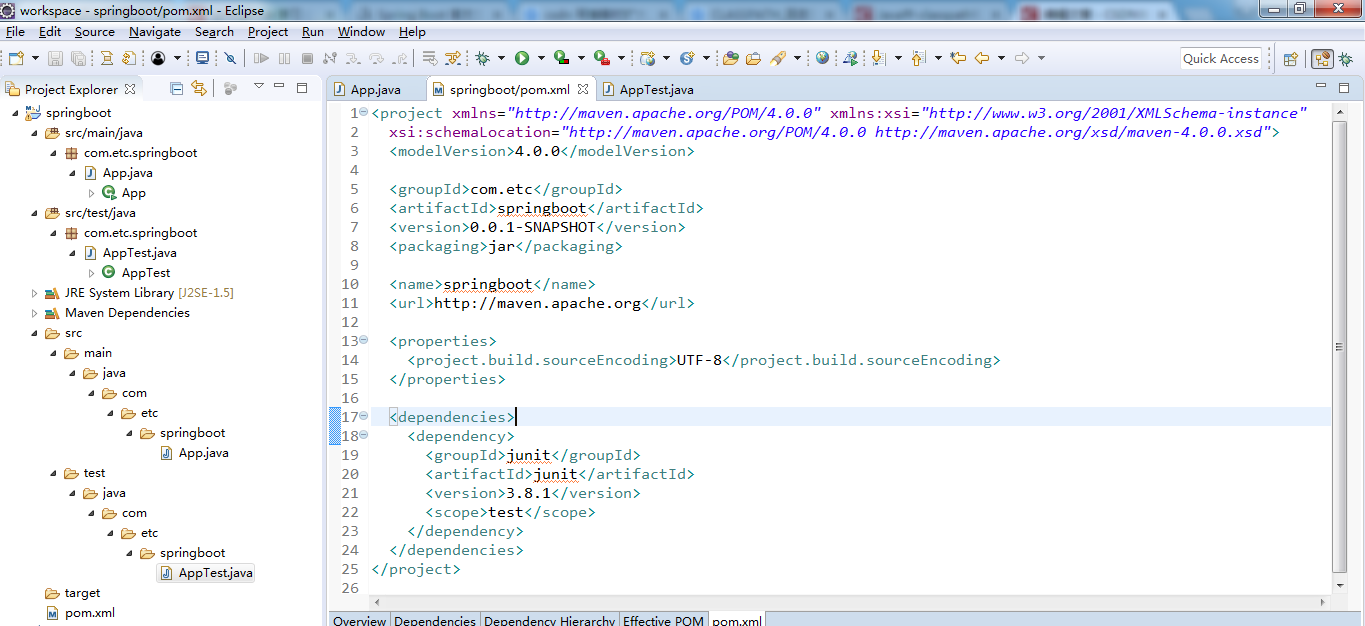
3、配置pom.xml,添加SpringBoot依赖包
<project xmlns="http://maven.apache.org/POM/4.0.0" xmlns:xsi="http://www.w3.org/2001/XMLSchema-instance"
	xsi:schemaLocation="http://maven.apache.org/POM/4.0.0 http://maven.apache.org/xsd/maven-4.0.0.xsd">
	<modelVersion>4.0.0</modelVersion>

	<groupId>com.etc</groupId>
	<artifactId>SpringBoot</artifactId>
	<version>0.0.1-SNAPSHOT</version>
	<packaging>jar</packaging>

	<name>SpringBoot</name>
	<url>http://maven.apache.org</url>

	<parent>
		<groupId>org.springframework.boot</groupId>
		<artifactId>spring-boot-starter-parent</artifactId>
		<version>1.4.7.RELEASE</version>
		<relativePath /> <!-- lookup parent from repository -->
	</parent>
	<properties>
		<project.build.sourceEncoding>UTF-8</project.build.sourceEncoding>
	</properties>

	<dependencies>
		<!-- SpringBoot导入的jar包 -->
		<dependency>
			<groupId>org.springframework.boot</groupId>
			<artifactId>spring-boot-starter-web</artifactId>
		</dependency>
		 <!-- freemarker模版 -->
        <dependency>
            <groupId>org.springframework.boot</groupId>
            <artifactId>spring-boot-starter-freemarker</artifactId>
        </dependency>
		<dependency>
			<groupId>junit</groupId>
			<artifactId>junit</artifactId>
			<version>3.8.1</version>
			<scope>test</scope>
		</dependency>
	</dependencies>
</project>
4、 在com.etc.springBoot下面新建启动类SpringBootTestApplication
package com.etc.SpringBoot;

import org.springframework.boot.SpringApplication;
import org.springframework.boot.autoconfigure.SpringBootApplication;
import org.springframework.context.annotation.ComponentScan;

@SpringBootApplication
@ComponentScan(basePackages = "com.etc.*,com.test.*")
public class SpringBootTestApplication {
	public static void main(String[] args) {
		SpringApplication.run(SpringBootTestApplication.class,args);
	}
}5、在com.etc.springBoot下面新建TestController类:
package com.etc.SpringBoot;

import org.springframework.stereotype.Controller;
import org.springframework.web.bind.annotation.RequestMapping;
@Controller
@RequestMapping(value="/test")
public class TestController {
	@RequestMapping(value="/index")
    public String index() {
    	System.out.println("Index页面");
    	return "index";
    }
}<!DOCTYPE html>
<html lang="zh-CN">
<head>
<meta charset="utf-8">
<title>index</title>
<style>
p{
background-color:red;
}
</style>
</head>
<body>
<p>这是index页面</p>
</body>
</html>
控制台输出:Index页面
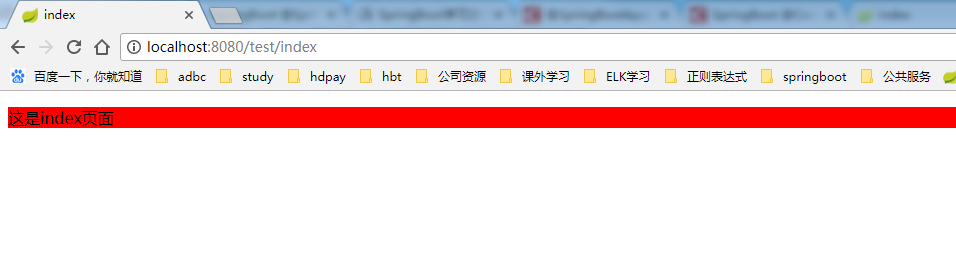
页面进入index.ftl,显示内容如下:
到这里,SpringBoot的简单程序就已经编写完成了。总结步骤如下:
1、新建一个maven项目,加入SpringBoot的指定依赖,和freemarker的依赖(SpringBoot推荐使用freemarker模板来编写页面,对jsp页面不太支持)
2、新建一个启动类,启动SpringBoot
3、新建一个Controller类,编写要访问的方法
4、新建一个ftl页面,显示结果(非必选,方法可以不进入指定的页面,而是返回指定的字符串或者JSON数据等。)
具体的知识点总结如下:
1、注解学习:
(1)
@SpringBootApplication
,它包括三个注解:
(a)@Configuration:表示将该类作为SpringBoot配置文件类
(b)@EnableAutoConfiguration:表示程序启动时,自动加载SpringBoot默认的配置
(c)@ComponentScan:表示程序启动时,自动扫描当前包及子包下的所有类
SpringBoot在写启动类的时候如果不使用@ComponentScan指明对象扫描范围,
默认指扫描当前启动类所在的包里的对象,如果当前启动类没有包,则在启动时会报错
默认指扫描当前启动类所在的包里的对象,如果当前启动类没有包,则在启动时会报错
(2)
@RestController和@Controller的区别:
(a)@RestController注解相当于@Controller+@ResponseBody结合在一起的作用
(b)如果只是使用@RestController注解Controller类,则Controller类中的方法无法返回jsp或者ftl页面,
(a)@RestController注解相当于@Controller+@ResponseBody结合在一起的作用
(b)如果只是使用@RestController注解Controller类,则Controller类中的方法无法返回jsp或者ftl页面,
返回的内容就是return里的内容。
(c)如果需要返回到指定的页面,则需要使用@Controller注解
(d)如果需要返回JSON,XML或者自定义的mediaType内容到页面,则需要在对应的方法上加上 @ResponseBody注解,但是如果在这个类的每个方法都需要加上@ResponseBody,则显得比较麻烦,
(c)如果需要返回到指定的页面,则需要使用@Controller注解
(d)如果需要返回JSON,XML或者自定义的mediaType内容到页面,则需要在对应的方法上加上 @ResponseBody注解,但是如果在这个类的每个方法都需要加上@ResponseBody,则显得比较麻烦,
所以就有了@RestController类,只需要在这个类上面添加注解@RestController,就可以返回JSON,XML等。
2、SpringBoot重启问题:
(a)修改ftl页面,不需要重启,自动更新
(b)修改java代码,需要重启,所以引发一个问题,每次修改一点代码都需要重启,等待一段时间,显得比较麻烦,那么如何解决这个问题呢?
解决方法如下:
在pom.xml中增加热部署如下:
	<!-- 热部署,支持应用快速重启(restart),使得修改代码后不重启就能生效 -->
        <dependency>
        	<groupId>org.springframework.boot</groupId>
        	<artifactId>spring-boot-devtools</artifactId>
        </dependency>
重启了,代码自动更新。


 1987
1987

 被折叠的 条评论
为什么被折叠?
被折叠的 条评论
为什么被折叠?
 到【灌水乐园】发言


