


 本文详细介绍了在Windows系统下如何安装Nginx稳定版,并提供了启动、重启、关闭Nginx的命令。特别指出在Git Bash中执行重启命令可能出现的问题及解决办法。接着,文章展示了Nginx的代理配置示例,包括代理不同目录和图片服务器的设置,以及错误页面的处理。最后,成功启动Nginx并展示了项目代理和图片代理的效果,证明配置完成。
一. nginx安装
1. 下载nginx, 选择下载Stable version版本;
2. 安装到本地文件夹,我这里是安装到的E盘,依据个人喜好,不做过多赘述,
二. 启动nginx
进入到nginx文件夹内,打开终端输入执行命令
1. 启动: start nginx;
2. 重启: ./nginx -s reload;
3. 强制关闭:./nginx -s stop;
4. 丝滑关闭: ./nginx -s quit;
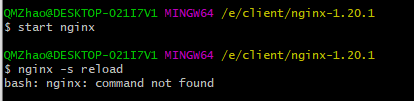
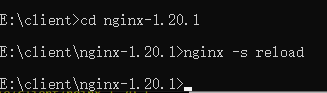
注意:这里如果用 gitbash 的终端执行重启命令就会出现 bash: nginx: command not found 的提示,在网上查了些资料,原因大致是由于 windows 系统执行了 Linux 命令,导致无法通过该命令找到对应的模块,如果用windows自带的终端就可以顺利执行重启命令
gitbash 时:
windows 时:
三. 启动成功及代理
配置代理
server {
		# 监听的端口
        listen       9595;
        # 访问的服务器地址
        server_name  127.0.0.1;

        #charset koi8-r;

        #access_log  logs/host.access.log  main;

        location / {
            root   html;
            index  index.html index.htm;
        }

        # 项目代理
        location /pc {
            alias F:\\xxxx\xxx;
        }

        # 图片服务器打理
        location /file {
            alias C:\\xxx\Pictures;
        }

        #error_page  404              /404.html;

        # redirect server error pages to the static page /50x.html
        #
        error_page   500 502 503 504  /50x.html;
        location = /50x.html {
            root   html;
        }
    }
项目展示:

代理图片展示:

至此 windows 系统配置本地服务器及代理配置成功,同理可在服务器配置nginx相关代理.


 348
348

 被折叠的 条评论
为什么被折叠?
被折叠的 条评论
为什么被折叠?
 到【灌水乐园】发言


