


1.先新建C++项目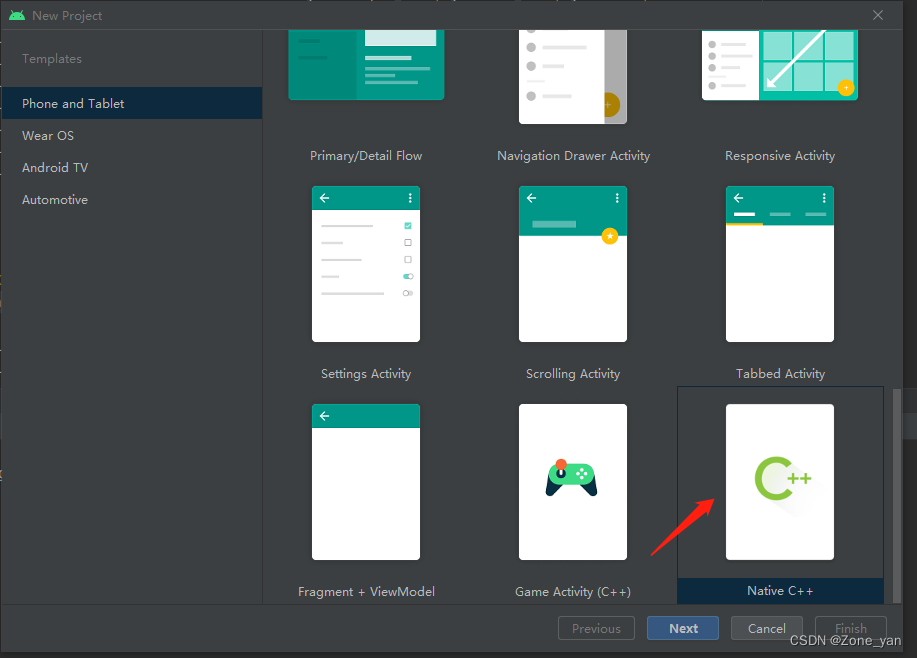
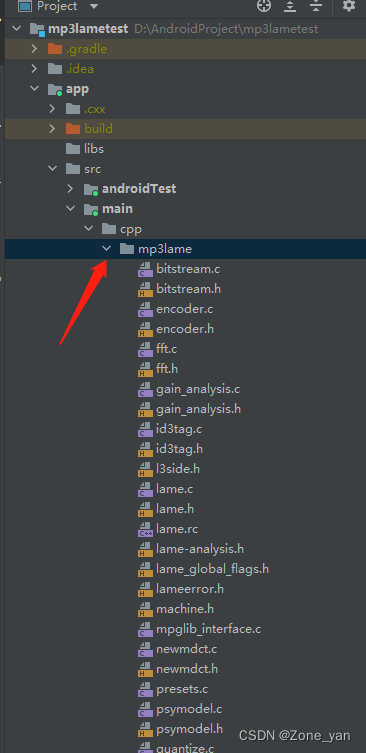
2. 在cpp目录下创建目录map3lame(名字随便起) ,接下来要用到
3.下载lame 地址lame
最新版本是3.100,解压完成后如下图
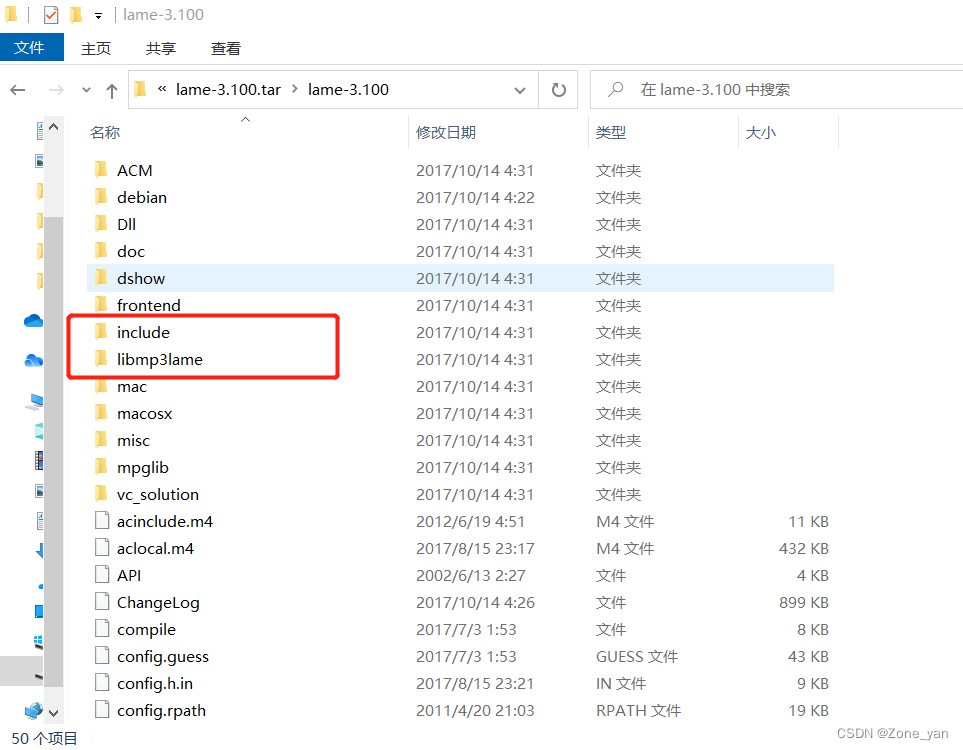
把libmp3lame目录中的所有.c和.h文件(注意其他类型的文件和目录不需要)都复制到项目中新建的map3lame目录中,并且把include目录中的lame.h也复制到项目的map3lame中,一共有43个文件如下图
对其中三个文件进行修改,否则会报错
- fft.c中47行将vector/lame_intrin.h这个头文件注释了或者去掉
- 修改set_get.h文件的24行的#include <lame.h>改为#include “lame.h”
- 将util.h文件的574行的”extern ieee754_float32_t - – fast_log2(ieee754_float32_t x);” 替换为 “extern float fast_log2(float x);”因为android下不支持该类型。
这些文件中会有红线报错,先不用管,因为没有配置CMakeLists.txt文件
4.代码逻辑
- 在mp3lame 目录下新建mp3-lame.cpp文件(名字仍然是随意起),当然也可不用新建,直接用项目中自带的native-lib.cpp也一样,我这里为了区分就新建了一个;
- 配置CMakeLists.txt文件
在add_library中配置生成so库的名字(随便起),以及编译需要引用资源的路径,就是map3lame目录下所有的 .c文件(一共20个),以及我们新建的mp3l-lame.cpp,如下图,其中native-lib.cpp我注释掉了,因为有新建的mp3l-lame.cpp了
cmake_minimum_required(VERSION 3.18.1)
# Declares and names the project.
project("mp3lametest")
# Creates and names a library, sets it as either STATIC
# or SHARED, and provides the relative paths to its source code.
# You can define multiple libraries, and CMake builds them for you.
# Gradle automatically packages shared libraries with your APK.
add_library( # Sets the name of the library.设置生成so库的名字
mp3lame
# Sets the library as a shared library.
SHARED
# Provides a relative path to your source file(s).
# native-lib.cpp
mp3-lame.cpp
mp3lame/bitstream.c
mp3lame/encoder.c
mp3lame/gain_analysis.c
mp3lame/id3tag.c
mp3lame/fft.c
mp3lame/lame.c
mp3lame/mpglib_interface.c
mp3lame/newmdct.c
mp3lame/presets.c
mp3lame/psymodel.c
mp3lame/quantize.c
mp3lame/quantize_pvt.c
mp3lame/reservoir.c
mp3lame/set_get.c
mp3lame/tables.c
mp3lame/takehiro.c
mp3lame/util.c
mp3lame/vbrquantize.c
mp3lame/VbrTag.c
mp3lame/version.c)
# Searches for a specified prebuilt library and stores the path as a
# variable. Because CMake includes system libraries in the search path by
# default, you only need to specify the name of the public NDK library
# you want to add. CMake verifies that the library exists before
# completing its build.
find_library( # Sets the name of the path variable.
log-lib
# Specifies the name of the NDK library that
# you want CMake to locate.
log)
# Specifies libraries CMake should link to your target library. You
# can link multiple libraries, such as libraries you define in this
# build script, prebuilt third-party libraries, or system libraries.
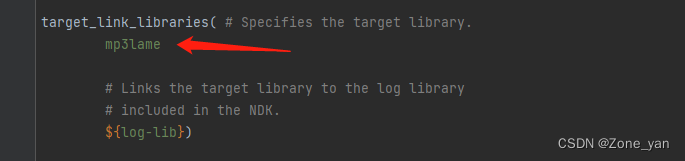
target_link_libraries( # Specifies the target library.
mp3lame
# Links the target library to the log library
# included in the NDK.
${log-lib})
在target_link_libraries中配置的so名字要和上面定义一样
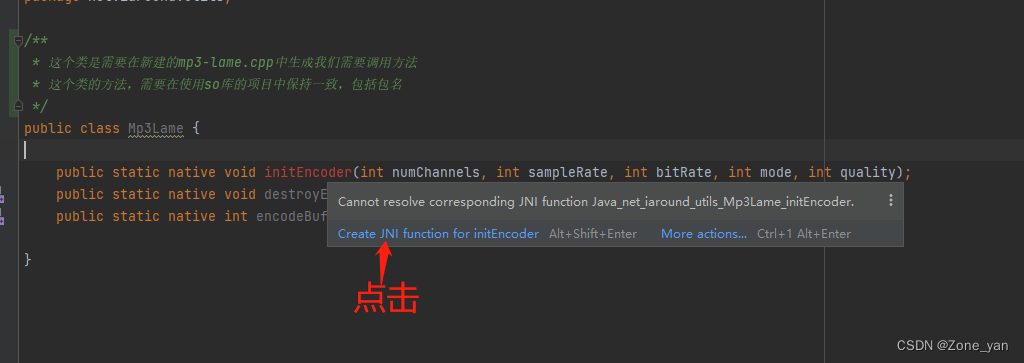
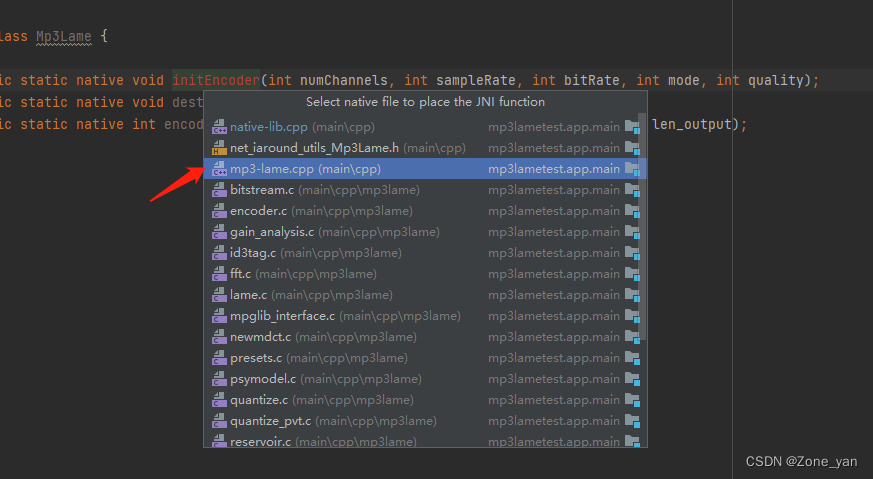
- 新建类定义native方法,根据提示在map3-lame.cpp文件中生成jni方法
在mp3-lame.cpp中编写初始化,解析,回收逻辑
#include <jni.h>

//#include <string>

//#include "android/log.h"

#include "mp3lame/lame.h"

//#include "net_iaround_utils_Mp3Lame.h"可以在这个头文件里定义一些变量和方法,但是感觉没啥必要,因为逻辑比较简单,一个类就行

//#define LOGD(...) __android_log_print(ANDROID_LOG_DEBUG , "mp3-lame", __VA_ARGS__)

extern "C" {
lame_t lame;
JNIEXPORT void JNICALL
Java_net_iaround_utils_Mp3Lame_initEncoder(JNIEnv *env, jclass clazz, jint num_channels,
                                           jint sample_rate, jint bit_rate, jint mode,
                                           jint quality) {
    lame = lame_init();
    lame_set_num_channels(lame, num_channels); //设置声道,跟实例化AudioRecord的参数的channelConfig声道配置保持一致
    lame_set_in_samplerate(lame, sample_rate); //设置采样率
    lame_set_brate(lame, bit_rate); //设置比特率xxx kbps
    lame_set_mode(lame, MPEG_mode_e(mode));//设置模式。立体声或者单声道
    lame_set_quality(lame,quality);//设置质量影响压缩算法,值范围为0-9, 0质量最好速度最慢,9质量最差速度最快。源码建议:3 near-best quality, not too slow; 5 good quality, fast; 7 ok quality, really fast。根据场景选择。
    lame_init_params(lame);//初始化参数

//    LOGD("init");
}

JNIEXPORT void JNICALL
Java_net_iaround_utils_Mp3Lame_destroyEncoder(JNIEnv *env, jclass clazz) {
//    LOGD("destroy");
    lame_close(lame);//回收资源
    lame = NULL;
}

JNIEXPORT jint JNICALL
Java_net_iaround_utils_Mp3Lame_encodeBuffer(JNIEnv *env, jclass clazz, jbyteArray input,
                                            jint len_input, jbyteArray output, jint len_output) {
    short* pcm = (short *)(*env).GetByteArrayElements(input,NULL);
    unsigned char *result = (unsigned char *) (*env).GetByteArrayElements(output, NULL);
    int buffer;
    //num_samples这个参数是每个通道的采样点数量,根据实例化AudioRecord的参数audioFormat以及初始化的声道数量来决定的
    //例如当AudioFormat为16bit的时候,单通道输入, 一个采样点大小为2byte, 则nsamples = input有效数据长度(byte) / 2,即len_input/2
    //AudioFormat为16bit,双通道输入的时候 input有效数据长度(byte) / 2(16bite为2byte) / 2(通道数为2),即即len_input/2/2 = len_input/4
    if (numChannel > 1){
        buffer = lame_encode_buffer_interleaved(lame,pcm,len_input/4,result, len_output);
    } else {
        buffer = lame_encode_buffer(lame,pcm,NULL,len_input/2,result, len_output);
    }
//    LOGD("encode");
    (*env).ReleaseByteArrayElements(input, (jbyte *) pcm, 0);
    (*env).ReleaseByteArrayElements(output, (jbyte *) result, 0);
    return buffer;
}

}
切记,注意代码中的注释,一些参数的设置需要和实例化AudioRecord时的参数保持对应,源码路径:编译libmp3lame.so的代码
使用该库我写了个demo,里面我封装了 音频的录制和播放功能源码路径:音频转MP3格式录制和播放demo


 139
139


 被折叠的 条评论
为什么被折叠?
被折叠的 条评论
为什么被折叠?
 到【灌水乐园】发言


