简介:有时候我们只是想把图片部分拉伸,而不是全部拉伸,那么就要用到下面这个函数,并附上实例验证
   - (UIImage *)stretchableImageWithLeftCapWidth:(NSInteger)leftCapWidth topCapHeight:(NSInteger)topCapHeight;
   //leftCapWidth:左边不拉伸区域
   //topCapHeight:上面不拉伸区域
对距离leftCapWidth的1竖排像素,和具体topCapHeight的1横排像素进行拉伸,其它像素不拉伸
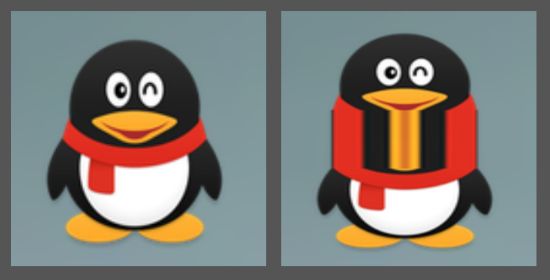
练习一:理解拉伸点,左边和上面分开设置,从效果图来理解。
    self.view.backgroundColor = [UIColor darkGrayColor];

    //不设置拉伸点,直接设置
    UIImage *image1 = [UIImage imageNamed:@"QQ"];
    UIImageView *imageView1 = [[UIImageView alloc] initWithFrame:CGRectMake(10, 100, 170, 170)];
    imageView1.image = image1;
    [self.view addSubview:imageView1];

    //设置拉伸点,对左边和上面分开设置,理解其拉伸效果
    UIImage *image2 = [UIImage imageNamed:@"QQ"];
    image2 = [image2 stretchableImageWithLeftCapWidth:0 topCapHeight:image2.size.height*0.5];
    UIImageView *imageView2 = [[UIImageView alloc] initWithFrame:CGRectMake(190, 100, 170, 170)];
    imageView2.image = image2;
    [self.view addSubview:imageView2];
效果图
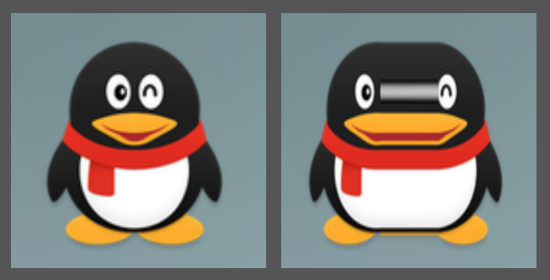
横向拉伸:
image2 = [image2 stretchableImageWithLeftCapWidth:image2.size.width*0.5 topCapHeight:0];
效果图:
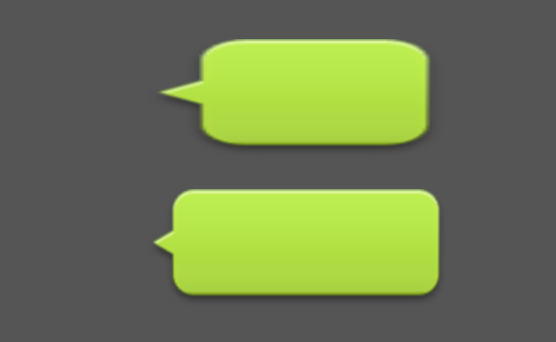
练习二:最近做到一个聊天框的联系,对文字背景图片的拉伸应用,左边的小三角我不希望拉伸,拉伸影响美观,只拉伸右边方框部分,那么调用此函数就可以实现,这个较为常用。
    //不设置拉伸点,直接设置
    UIImage *image1 = [UIImage imageNamed:@"chat"];
    UIImageView *imageView1 = [[UIImageView alloc] initWithFrame:CGRectMake(100, 100, 200, 80)];
    imageView1.image = image1;
    [self.view addSubview:imageView1];

    //设置拉伸点
    UIImage *image2 = [UIImage imageNamed:@"chat"];
    image2 = [image2 stretchableImageWithLeftCapWidth:image2.size.width*0.5 topCapHeight:image2.size.width*0.8];
    UIImageView *imageView2 = [[UIImageView alloc] initWithFrame:CGRectMake(100, 200, 200, 80)];
    imageView2.image = image2;
    [self.view addSubview:imageView2];
效果图:
转载注明出处,然而这只是句废话,并没啥人转载,哈哈哈哈哈~


 1230
1230

 被折叠的 条评论
为什么被折叠?


