


效果查看:

一、搭建好html页面结构
先在html页面中创建出一个盒子用于存放按钮和文字

光一个大盒子还不够,用span标签来说明文字,i标签来表示单选框中间的那坨圆点,这些都用一个小盒子套住,这个小盒子用于勾勒单选框的边框。
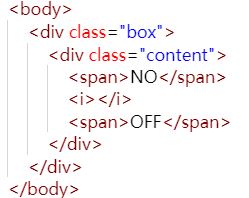
如图。这样html页面结构就完成了
二、规划样式
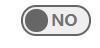
将小盒子的边框勾勒出来,再将各个元素的样式都做出来后初始状态如下,对了,千万别忘了给小盒子一个过渡效果的样式,否则后续的操作会没有动态效果哦~!
三、移入效果
纯css怎么达到一个拟点击效果,我这里选择是hover伪类,虽然有点瑕疵,但是能看出来效果。
该伪类放在小盒子这个样式上,因为小盒子是所有所需子元素的父元素,直接使用这个父元素即可调用子元素。
将鼠标移入小盒子元素中,代表OFF的span标签应该显示,而代表NO的span标签就应该隐藏了,同时,中间的原点应该移至左边。
点击后的效果如图: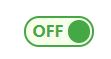
四、效果的关键点
这么一个小玩意,关键点在于初始的样式跟点击后的样式编写,我们只是在两个样式中添加了一个过渡效果而已。
针对html样式其关键点在于小盒子也就是.content这个元素,我们给这个元素一个相对定位,其中子元素span标签,跟i标签就可以根据.content元素来进行位置的调整。
五、JS实现真正的点击事件
如果需要点击事件,可以用js来编写,样式的变化可以通过添加类的方式来简化代码量。
创建一个变量用于记录单选框的选中或取消状态
具体呢,将:hover伪类换成.active当然这个类是自定义的。
当.active类添加在小盒子时就跟:hover伪类一样了,这样我们只需要在js中编写一个点击事件,在点击事件中向小盒子添加.active类,同时将记录状态的变量改为选中状态,这样就完成选中状态。
当需要不勾选单选框时,只需去除.active类,改回记录状态的变量值即可。
六、Js演示:
<!DOCTYPE html>
<html lang="en">
<head>
    <meta charset="UTF-8">
    <meta http-equiv="X-UA-Compatible" content="IE=edge">
    <meta name="viewport" content="width=device-width, initial-scale=1.0">
    <title>css实现单选框按钮</title>
    <style>
        .box{
            z-index: -1;
            position: relative;
            width: 100%;
            height: 100px;
            display: flex;
            justify-content: center;
        }
        .content{
            cursor: pointer;
            margin-top: 100px;
            transition: all .5s;
            height: 20px;
            width: 55px;
            position: relative;
            padding: 2px;
            border-radius: 20px;
            border: 2px solid rgb(102, 102, 102) ;
            background-color: rgb(102, 102, 102, .1);
        }
        .content>span{
            color: rgb(102, 102, 102, .9);
            font-weight: bold;
            position: absolute;
            border-radius: 20px;
            opacity: 1;
            transition: all .5s;
        }
        .content>span:nth-of-type(1){
            left: 10%;
            opacity: 0;
        }
        .content>span:nth-of-type(2){
            right: 18%;
            opacity: 1;
        }
        .content>i{
            width: 20px;
            height: 20px;
            background-color: rgb(102, 102, 102);
            position: absolute;
            border-radius: 1000px;
            transition: all .5s;
            left: 5%;
        }

        /* 移入效果 */
        /*
        .content:hover{
            background-color: rgba(172, 255, 47, 0.1);
            border:2px solid rgb(68, 168, 68);
        }
        .content:hover>span{
            color: rgb(68, 168, 68);
        }
        .content:hover>span:nth-child(1){
            opacity: 1;
        }
        .content:hover>span:nth-child(3){
            opacity: 0;
        }
        .content:hover>i{
            background-color:rgb(68, 168, 68);
            left: 63%;
        }
        */

        /* 点击事件 */
        .content.active{
            background-color: rgba(172, 255, 47, 0.1);
            border:2px solid rgb(68, 168, 68);
        }
        .content.active>span{
            color: rgb(68, 168, 68);
        }
        .content.active>span:nth-child(1){
            opacity: 1;
        }
        .content.active>span:nth-child(3){
            opacity: 0;
        }
        .content.active>i{
            background-color:rgb(68, 168, 68);
            left: 63%;
        }


    </style>
</head>
<body>
    <div class="box">
        <div class="content">
            <span>OFF</span>
            <i></i>
            <span>NO</span>
        </div>
    </div>

    <script>
        window.onload = function (params) {
            var btn = document.querySelector(".content");
            var state = false;

            btn.onclick = function () {
                if (state==true) {
                    btn.setAttribute("class","content")
                    state = false
                    return;
                }
                btn.setAttribute("class","content active")
                state = true
            }

        }

    </script>
</body>
</html>


 1643
1643


 被折叠的 条评论
为什么被折叠?
被折叠的 条评论
为什么被折叠?
 到【灌水乐园】发言


