


我觉得还有有必要写一下这篇文章,因为this.getTabBar().setData({})我找了好多解决方案他们都是采用这同一个解决方式,可这个方法并没有帮我解决我也很无语。
不过好在终于解决了,写出来帮助那些跟我当时一样等待解决的人,下面直接上代码
与(原):微信小程序——自定义底部tabBar_custom-tab-bar-CSDN博客 略有不同
具体视频如下:
解决微信小程序自定义tarbar - 点击两次图标才能选中
一:自定义tarbar
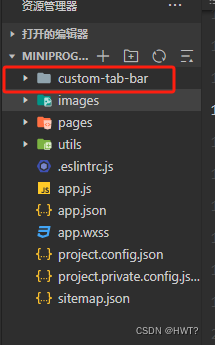
1.在根目录下创建custom-tab-bar [ 名字不要变,必须是这个 ]
2.在全局 app.js 中开启"custom": true,并运用组件
  "tabBar":{
    "custom": true,
    "list": [{
      "pagePath": "pages/index/index",
      "iconPath": "/images/ico_home_tab_juchang_nor 2@2x.png",
      "selectedIconPath": "/images/ico_home_tab_juchang_pre 2@2x.png",
      "text": "首页"
    }, {
      "pagePath": "pages/commdt/index",
      "iconPath": "/images/ico_home_tab_juchang_nor 3@2x.png",
      "selectedIconPath": "/images/ico_home_tab_juchang_pre 3@2x.png",
      "text": "视频"
    },
    {
      "pagePath": "pages/three/three",
      "iconPath": "/images/ico_home_tab_juchang_nor@2x.png",
      "selectedIconPath": "/images/ico_home_tab_juchang_pre@2x.png",
      "text": "充值"
    }]
  },
  "usingComponents": {
    "custom-tab-bar":"/custom-tab-bar/custom-tab-bar"
  },
3. custom-tab-bar.js [ 不同的部分已注释标出 ]
// custom-tab-bar/custom-tab-bar.js
Component({
  // 1.不同部分定义 properties
  properties:{
    selected:{
      type:Number,
      value:null
    }
  },
  data: {
    color: "#7A7E83",
    selectedColor: "#3cc51f",
    list: [{
      pagePath: "/pages/index/index",
      iconPath: "/images/ico_home_tab_juchang_nor 2@2x.png",
      selectedIconPath: "/images/ico_home_tab_juchang_pre 2@2x.png",
      text: "首页"
    }, {
      pagePath: "/pages/commdt/index",
      iconPath: "/images/ico_home_tab_juchang_nor 3@2x.png",
      selectedIconPath: "/images/ico_home_tab_juchang_pre 3@2x.png",
      text: "视频"
    },
    {
      pagePath: "/pages/three/three",
      iconPath: "/images/ico_home_tab_juchang_nor@2x.png",
      selectedIconPath: "/images/ico_home_tab_juchang_pre@2x.png",
      text: "充值"
    }]
  },
  attached() {
  },
  methods: {
    switchTab(e) {
      console.log("执行跳转",e);
      const data = e.currentTarget.dataset
      const url = data.path
      wx.switchTab({url})
      this.setData({
        // 2.不同部分使用 properties 中定义数据
        selected: this.properties.selected
      })
    }
  }
})
4.custom-tab-bar.wxml
<!--custom-tab-bar/custom-tab-bar.wxml-->
<cover-view class="tab-bar">
  <cover-view class="tab-bar-border"></cover-view>
  <cover-view wx:for="{{list}}" wx:key="index" class="tab-bar-item" data-path="{{item.pagePath}}" data-index="{{index}}" bindtap="switchTab">
    <cover-image src="{{selected === index ? item.selectedIconPath : item.iconPath}}"></cover-image>
    <cover-view style="color: {{selected === index ? selectedColor : color}}">{{item.text}}</cover-view>
  </cover-view>
</cover-view>
5.custom-tab-bar.wxss
/* custom-tab-bar/custom-tab-bar.wxss */
.tab-bar {
  position: fixed;
  bottom: 0;
  left: 0;
  right: 0;
  height: 48px;
  background: white;
  display: flex;
  padding-bottom: env(safe-area-inset-bottom);
}

.tab-bar-border {
  background-color: rgba(0, 0, 0, 0.33);
  position: absolute;
  left: 0;
  top: 0;
  width: 100%;
  height: 1px;
  transform: scaleY(0.5);
}

.tab-bar-item {
  flex: 1;
  text-align: center;
  display: flex;
  justify-content: center;
  align-items: center;
  flex-direction: column;
}

.tab-bar-item cover-image {
  width: 27px;
  height: 27px;
}

.tab-bar-item cover-view {
  font-size: 10px;
}
二:其他页面引入使用 - 【这里以index页为例】
【对的,我们这里解决方法就是用组件方式,而非this.getTabBar().setData({})这种获取然后再塞值,我是没有成功解决点击两次才能图片选中,不然也不会有此片文章 😄】
1.index.wxml 引入组件
<custom-tab-bar selected="{{selectedTab}}"></custom-tab-bar>2.index.js 中定义数据
注意:每个 selectedTab 根据自己页当前位置进行填写

 data: {
    selectedTab: 1 // 初始 selected 值
  },


 2744
2744

 被折叠的 条评论
为什么被折叠?
被折叠的 条评论
为什么被折叠?
 到【灌水乐园】发言


