


 本文详细介绍如何在Word 2013中设置标题样式和多级列表,并介绍如何使用MathType录入公式并实现自动编号。包括定义标题格式、设置多级列表、公式编号的具体步骤。
转自http://blog.sina.com.cn/s/blog_599d8faa01019ook.html#cmt_3315642
标题格式定义一般用于文档写作之前。故我们从空白文档开始。本次演示软件为word2013版本。2007及2010版操作步骤相同。
1、新建一个空白文档
启动word软件,点击【新建】按钮,在模版中选择【空白文档】,新建一个空白文档。
2、修改标题格式
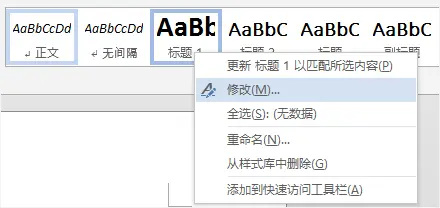
鼠标右键选择【开始】>【样式】中的标题样式,在弹出的菜单项中选择修改。如下图所示。按格式要求修改各级标题的格式要求。如以及标题1用小二号黑体加粗,标题2用三号黑体加粗,标题3用小四黑体加粗等。标题格式根据个人要求不同自由修改。
一般文档都有三级标题,因此我们这里以三级标题为例。
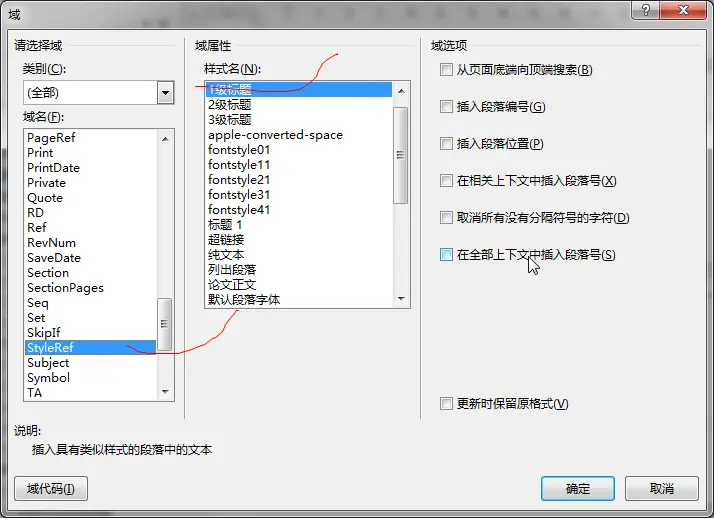
3、定义多级列表
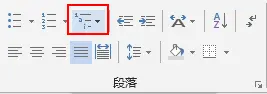
点击【段落】标签中的定义多级列表按钮,如下图所示。
弹出下图所示的定义对话框。
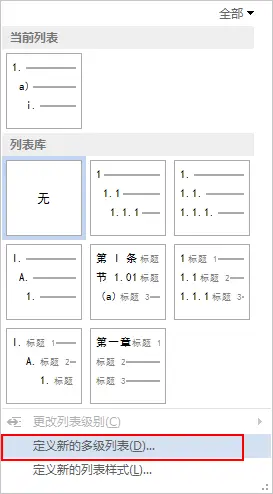
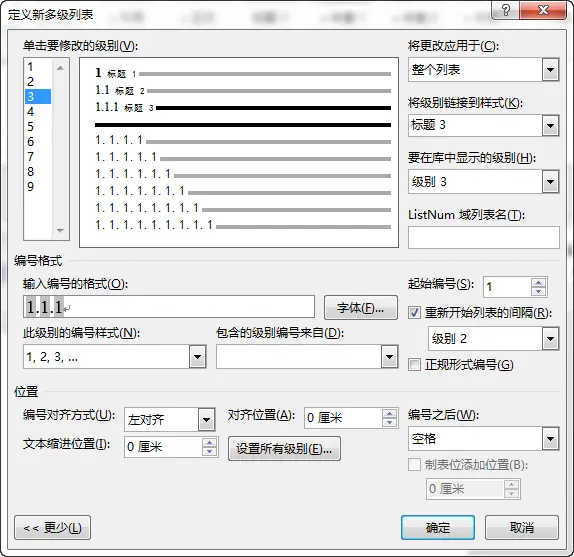
选择按钮【定义新的多级列表】,弹出下图所示对话框。
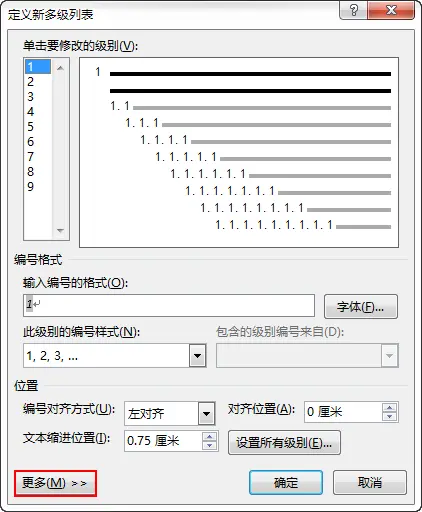
点击【更多】按钮,出现额外的设置选项。如下图所示。
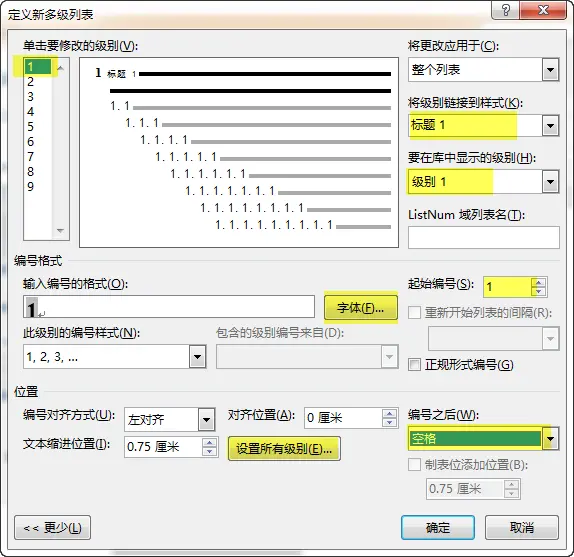
进行图中所示设置。
(1)在【单击要修改的级别】选项下选择1
(2)设置【将级别链接到样式】下拉框中选择标题1
(3)在【要在库中显示的级别】下拉框中选择级别1
(4)在【起始编号】设置框中设置为1
(5)在【编号之后】下拉框中选择空格
另外还有两个地方需要设置,一个是字体,另外一个是文本缩进。
4、设置标题字体
点击上图中的【字体】按钮,进入字体设置对话框,如下图所示。
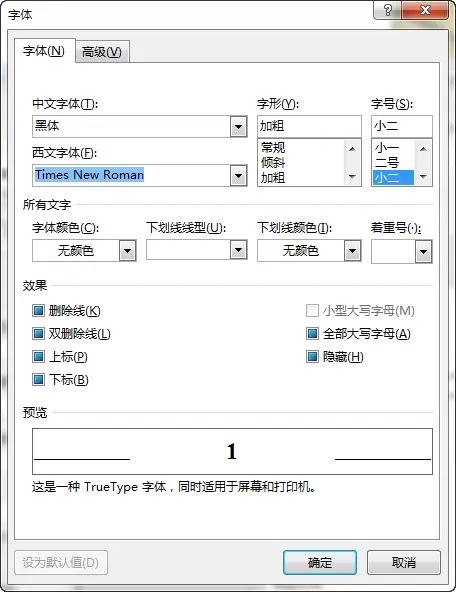
字体设置完毕后,点击【确定】按钮返回。
5、设置文本缩进
点击【定义多级列表】对话框中的【设置所有级别】按钮,弹出下图所示对话框。
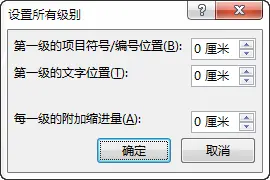
按实际需求设置每一级的缩进量。我们这里设置缩进量为0。点击确定按钮返回至【定义多级列表】对话框。
至此,标题1样式定义完毕。
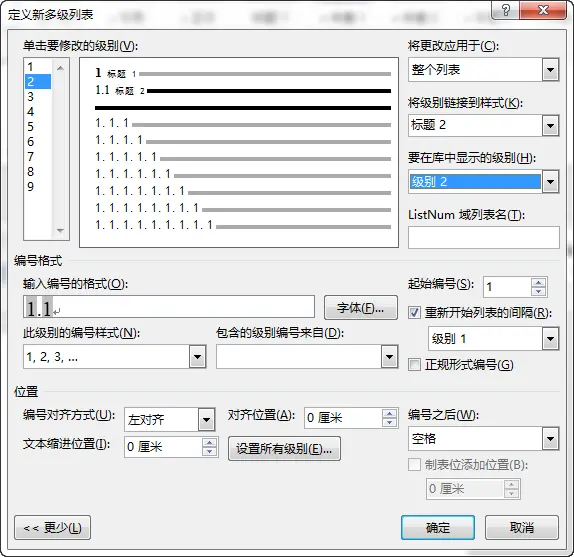
6、设置标题2及标题3
按相同的步骤定义标题2及标题3的样式。
选择正规形式编号【一般标准情况下才选用】
定义完毕后,点击【确定】按钮关闭对话框。
现在可以试一下了。
在写文档的时候,直接点击样式列表中的标题样式,是不是能实现自动编号了呢?而且在文档内部随便插入,都能很好的实现自动编号。省时又省力。
2.公式
2.1公式自动编号
mathtype自己就有(但是不知道怎么交叉引用)
转自http://jingyan.baidu.com/article/948f592421b812d80ef5f971.html
第三步:插入公式与编号
公式用推荐用MathType录入,不用多讲,编号的插入略微复杂。具体操作如下:
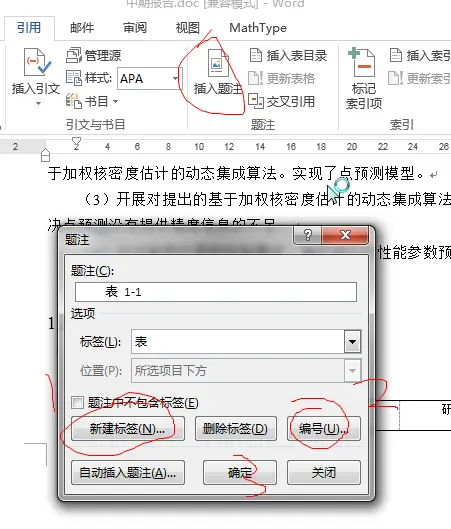
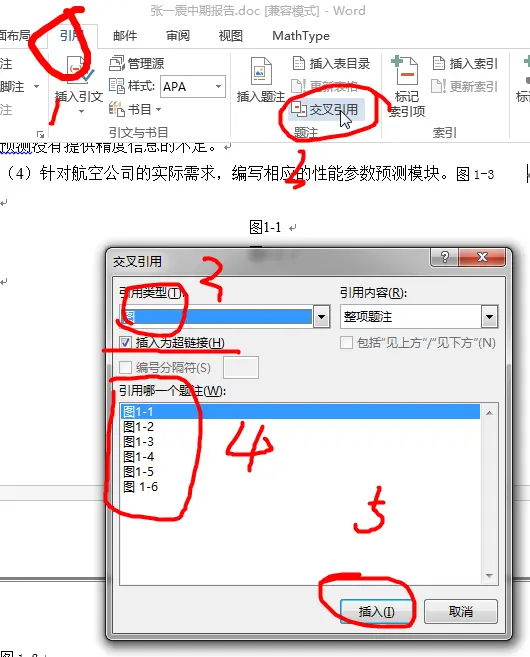
a.在表格外某一空行处点击“引用”->“插入题注”,弹出“题注”对话框;
b.点击“新建标签”按钮,输入英文状态下的左括号“(”,点击“确定”回到“题注”对话框;
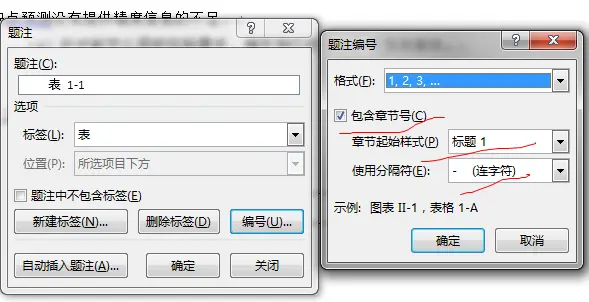
c.点击“编号”按钮,勾选“包含章节号”复选框,“章节起始样式”选择“标题1”,“使用分隔符”选择“连字符”点击“确定”回到“题注”对话框;
d.点击“确定”完成编号的插入,为了对称,在新插入的编号后插入空格和英文状态下的右括号“)”;
e.将编号剪切至表格的右单元格中,并设置右对齐,快捷键Ctrl+R;
插入题注分为两部分1. 当使用“插入题注”时,点击要求题注中有章节号,即“表 [章节号]-[流水号]”,
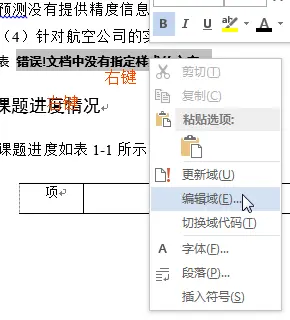
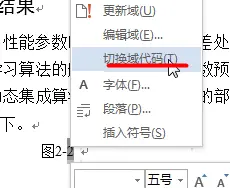
每一次使用,注意右键更新域。c
再加入自动图文集
在引用图(表)的过程中,可以使用交叉引用
使用过程中会出现(流水号不对)
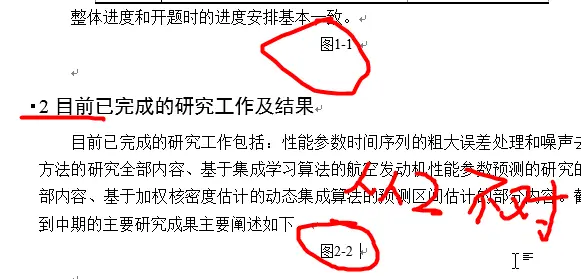
则办法为:【卡在这里了。。。。。】还是谷歌牛逼。。。http://wk1344578.blog.163.com/blog/static/7051861420113894629930/

【每一章的第一个改成这样就行,其余的不用改】Ctrl+A-F9--更新域和目录
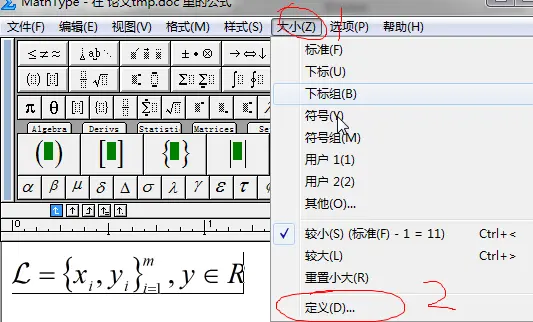
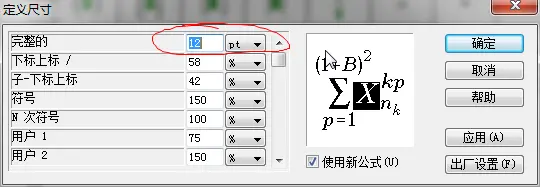
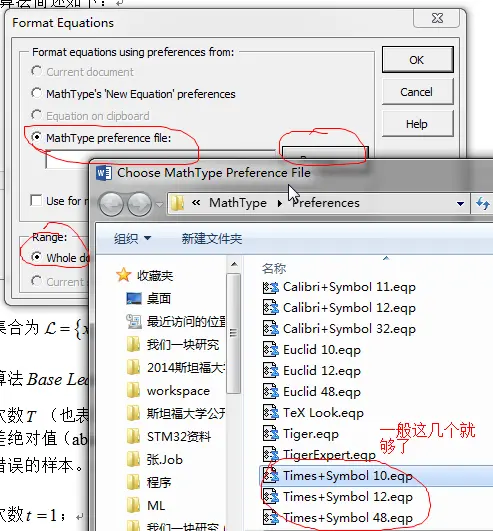
2.2更改公式大小:


 被折叠的 条评论
为什么被折叠?
被折叠的 条评论
为什么被折叠?
 到【灌水乐园】发言


