


在上一篇中完成了一些准备性的工作,在这一篇中来记录一下框架整合的工作。
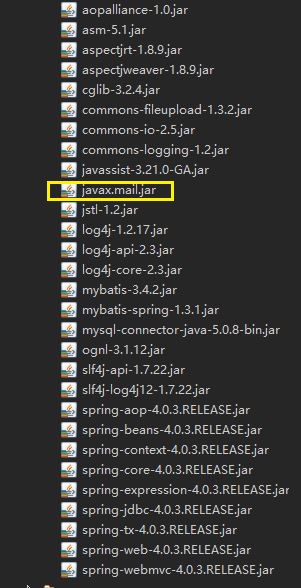
首先是准备所需要的jar包,由于没有使用maven,所以所需要的jar包就提前下载好了,其中黄色的jar包是和邮件发送相关的包,其他的则是框架相关的包。
主要的配置文件如图

web.xml文件的掌管着整个项目的主要配置:
<?xml version="1.0" encoding="UTF-8"?>
<web-app xmlns:xsi="http://www.w3.org/2001/XMLSchema-instance" xmlns="http://java.sun.com/xml/ns/javaee" xsi:schemaLocation="http://java.sun.com/xml/ns/javaee http://java.sun.com/xml/ns/javaee/web-app_3_0.xsd" metadata-complete="true" version="3.0">
  <context-param>
    <param-name>contextConfigLocation</param-name>
    <param-value>classpath:spring/spring-config.xml</param-value>
  </context-param>
  <listener>
    <listener-class>org.springframework.web.context.ContextLoaderListener</listener-class>
  </listener>
  <servlet>
    <servlet-name>dispatcher</servlet-name>
    <servlet-class>org.springframework.web.servlet.DispatcherServlet</servlet-class>
    <init-param>
      <param-name>contextConfigLocation</param-name>
      <param-value>classpath:spring/spring-mvc.xml</param-value>
    </init-param>
    <load-on-startup>1</load-on-startup>
  </servlet>
  <servlet-mapping>
    <servlet-name>dispatcher</servlet-name>
    <url-pattern>*.do</url-pattern>
  </servlet-mapping>
  <filter>
  	<filter-name>CharFilter</filter-name>
  	<filter-class>me.reg.filter.CharFilter</filter-class>
  	<init-param>
  		<param-name>charEncoding</param-name>
  		<param-value>utf-8</param-value>
  	</init-param>
  </filter>
  <filter-mapping>
  	<filter-name>CharFilter</filter-name>
  	<url-pattern>*.do</url-pattern>
  </filter-mapping>

  <session-config>
    <session-timeout>30</session-timeout>
  </session-config>
</web-app>
spring-config.xml中数据源、sqlSessionFactory、事务管理等:
<?xml version="1.0" encoding="UTF-8"?>
<beans xmlns="http://www.springframework.org/schema/beans"
    xmlns:xsi="http://www.w3.org/2001/XMLSchema-instance"
    xmlns:context="http://www.springframework.org/schema/context"
    xmlns:aop="http://www.springframework.org/schema/aop"
    xmlns:tx="http://www.springframework.org/schema/tx"
    xsi:schemaLocation="http://www.springframework.org/schema/beans
        http://www.springframework.org/schema/beans/spring-beans.xsd
        http://www.springframework.org/schema/tx
		http://www.springframework.org/schema/tx/spring-tx.xsd
        http://www.springframework.org/schema/context
        http://www.springframework.org/schema/context/spring-context.xsd
        http://www.springframework.org/schema/aop http://www.springframework.org/schema/aop/spring-aop.xsd">


	<context:component-scan base-package="me.reg"/>

<tx:annotation-driven transaction-manager="txManager"/>
	<bean class="org.springframework.beans.factory.config.PropertyPlaceholderConfigurer">
	    <property name="locations" value="classpath:jdbc.properties"/>
	</bean>

	<bean id="dataSource" class="org.springframework.jdbc.datasource.DriverManagerDataSource">
		<property name="driverClassName" value="${driver}"/>
		<property name="url" value="${url}"/>
		<property name="username" value="${username}"/>
		<property name="password" value="${password}"/>
	</bean>

	<bean id="sqlSessionFactory" class="org.mybatis.spring.SqlSessionFactoryBean">
	  <property name="dataSource" ref="dataSource" />
	  <property name="mapperLocations" value="classpath*:mybatis/mapper/**/*.xml" />
	  <property name="configLocation" value="classpath:mybatis/mybatis-config.xml"/>
	</bean>

	<bean class="org.mybatis.spring.mapper.MapperScannerConfigurer">
	  <property name="basePackage" value="me/reg/mapper" />
	  <property name="sqlSessionFactoryBeanName" value="sqlSessionFactory" />
	</bean>

	<bean id="txManager" class="org.springframework.jdbc.datasource.DataSourceTransactionManager">
		<property name="dataSource" ref="dataSource"/>
	</bean>


</beans><beans xmlns="http://www.springframework.org/schema/beans"
xmlns:mvc="http://www.springframework.org/schema/mvc"
xmlns:xsi="http://www.w3.org/2001/XMLSchema-instance"
xmlns:context="http://www.springframework.org/schema/context"
xsi:schemaLocation="
http://www.springframework.org/schema/beans
http://www.springframework.org/schema/beans/spring-beans.xsd
http://www.springframework.org/schema/context
http://www.springframework.org/schema/context/spring-context.xsd
http://www.springframework.org/schema/mvc
http://www.springframework.org/schema/mvc/spring-mvc.xsd">
<context:component-scan base-package="me.reg.controller"/>
<mvc:annotation-driven/>
</beans>mybatis-config.xml配置了domain的别名:
<!DOCTYPE configuration
PUBLIC "-//mybatis.org//DTD Config 3.0//EN"
"http://mybatis.org/dtd/mybatis-3-config.dtd">
<configuration>

	<typeAliases>
		<typeAlias type="me.reg.domain.User" alias="user"/>
	</typeAliases>

</configuration>
UserMapper.xml保存了对user表操作的语句:
<?xml version="1.0" encoding="UTF-8"?>
<!DOCTYPE mapper
PUBLIC "-//mybatis.org//DTD Mapper 3.0//EN"
"http://mybatis.org/dtd/mybatis-3-mapper.dtd">
<mapper namespace="me.reg.mapper.UserMapper">
	<resultMap id="UserResultMapper" type="User">
		<id property="id" column="id"/>
		<result property="username" column="username"/>
		<result property="password" column="password"/>
		<result property="email" column="email"/>
		<result property="state" column="state"/>
		<result property="code" column="code"/>
	</resultMap>
	<select id="queryUser" parameterType="String" resultMap="UserResultMapper">
		select id,username,password,email,state,code from user where code = #{code};
	</select>
	<select id="queryUserByName" parameterType="String" resultMap="UserResultMapper">
		select id,username,password,email,state,code from user where username = #{username};
	</select>
	<insert id="createUSeer" parameterType="User" useGeneratedKeys="true" keyProperty="id">
		insert into user(username,password,email,state,code) values(#{username},#{password},#{email},#{state},#{code});
	</insert>
	<update id="modifyUser" parameterType="User">
		update user
		<set>
			<if test="username!=null">
				username = #{username},
			</if>
			<if test="password!=null">
				password = #{password},
			</if>
			<if test="email!=null">
				email = #{email},
			</if>
			<if test="state!=null">
				state = #{state},
			</if>
			<if test="code!=null">
				code = #{code}
			</if>
		</set>
		where code=#{code}
	</update>

	</mapper>
jdbc.properties则是保存了连接数据库的信息:
driver=com.mysql.jdbc.Driver
url=jdbc:mysql://127.0.0.1:3306/res?userUnicode=true&characterEncoding=UTF8&useSSL=false
username=root
password=123456


 3466
3466


 被折叠的 条评论
为什么被折叠?
被折叠的 条评论
为什么被折叠?
 到【灌水乐园】发言


